
How to Torque Lower Control Arm Bolts : the Right Way
Learning **how to torque lower control arm** bolts correctly matters because these fasteners hold a major suspension link in place. The lower control arm connects the wheel-side suspension parts to the vehicle structure. If its bolts are too loose, parts may move. If they are too tight, fasteners or mounting points can suffer damage.
The most important detail is often not just the torque number. On many vehicles with bonded rubber control arm bushings, the pivot bolts should receive their final torque with the suspension near its normal driving position. tightening them while the suspension hangs can preload the rubber and shorten bushing life.
There is no universal lower control arm torque specification for every car, SUV, or pickup sold in the United States. A compact car may use very different hardware from a full-size truck. The correct specification should come from the factory service information or another reliable repair-data source for the exact vehicle.
This guide explains **how to torque lower control arm** fasteners step by step. It also covers ride-height tightening, torque-to-yield hardware, ball-joint connections, tools, common mistakes, and checks to make after the work is complete.
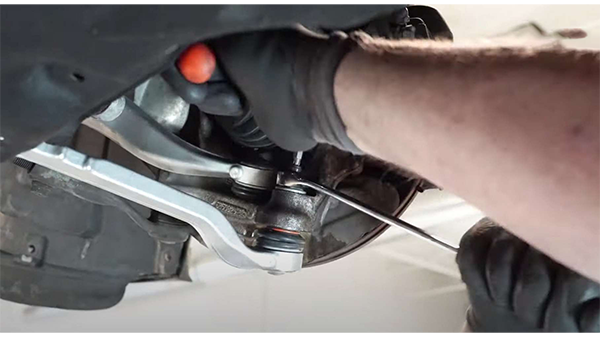
Why Lower Control Arm Torque Matters
A lower control arm must stay firmly attached while still letting the suspension move through its designed range. Proper bolt tension creates the clamping force needed to keep the joint secure. That is why learning **how to torque lower control arm** hardware is more important than simply making the bolts feel tight.
An under-torqued fastener may allow movement between the control arm, bushing sleeve, and mounting bracket. This can lead to noise, changing alignment, or fastener wear. A severely loose suspension bolt can also become a safety concern.
Over-tightening is not better. Too much torque can stretch a bolt, damage threads, distort a bracket, or harm a bushing sleeve. The goal is the exact clamp load intended by the vehicle maker.

- ✦ Correct clamping force
Proper torque keeps the control arm securely clamped to its mounting points.
- ✦ Longer bushing life
Correct ride-height tightening helps bonded rubber bushings rest near their neutral position.
- ✦ Stable alignment
Secure control arm mounts help suspension geometry stay consistent.
- ✦ Fastener protection
Following the correct specification reduces the risk of thread or bolt damage.
Torque Is More Than Making a Bolt Tight
A torque wrench measures the twisting force applied to the fastener. The actual goal is enough bolt tension to clamp the parts together. Thread condition, lubrication, coatings, and fastener design can all affect the relationship between torque and clamp load.
- ✦ Use the specified condition
If the service procedure calls for clean, dry threads, do not add oil or anti-seize unless instructed.
Find the Correct Lower Control Arm Torque Specification First
Before learning the physical steps of **how to torque lower control arm** bolts, identify every fastener you plan to tighten. A lower control arm may have one large pivot bolt, two inner pivots, a separate ball-joint connection, or several fasteners depending on the suspension design.
Do not copy a torque figure from a different model, engine, trim, suspension package, or model year. Even vehicles that look almost identical can use different bolt sizes or torque procedures.
Some service procedures give torque in pound-feet, while smaller fasteners may use pound-inches. Metric service data normally lists Newton-meters. Mixing units can cause major errors, so check the unit before tightening anything.

- ✦ Check the exact vehicle
Match the year, make, model, drivetrain, and suspension configuration.
- ✦ Identify the fastener
Separate pivot-bolt specifications from ball-joint and shock or stabilizer-link specifications.
- ✦ Check the procedure
Look for notes about ride height, bolt replacement, tightening order, or additional angle.
- ✦ Verify the units
Confirm whether the value is lb-ft, lb-in, or N·m before setting the wrench.
Do Not Use a Universal Torque Number
There is no safe universal answer such as 80, 100, or 150 lb-ft for every lower control arm. The correct number depends on bolt size, grade, joint design, vehicle weight, and how the manufacturer engineered the mount.
- ✦ Best practice
Use factory service information or trusted vehicle-specific repair data instead of a generic chart.
Watch for Torque-Plus-Angle Specifications
Some suspension fasteners use an initial torque followed by a specified angle, such as an additional number of degrees. In that case, reaching the first torque value does not finish the job. Follow the entire sequence exactly.
- ✦ Angle tightening
Use an angle gauge or a torque wrench with an angle function when the service procedure requires it.
Tools You Need to Torque a Lower Control Arm
The job is easier and safer when you have the correct tools ready before starting. For most home garages, a quality torque wrench, sockets, breaker bar, and safe vehicle supports cover the basic needs.
Choose a torque wrench whose working range places the target specification comfortably within the wrench’s range. A wrench is generally easier to use accurately when the target is not at the extreme bottom or top of its scale.
You may also need equipment to hold the suspension at ride height. That could mean ramps, a drive-on lift, or a floor jack placed carefully under an approved suspension point while the vehicle remains securely supported.

- ✦ Torque wrench
Use a good-quality wrench with a range suitable for the specified torque.
- ✦ Correct sockets
Use sockets that fully fit the bolt head and nut.
- ✦ Breaker bar
Use it for loosening stubborn fasteners instead of using the torque wrench as a breaker bar.
- ✦ Jack and stands
Use properly rated equipment and support the vehicle at approved lift points.
- ✦ Angle gauge
Keep one available if the procedure includes a torque-plus-angle step.
- ✦ Service information
Have the exact torque specifications and tightening notes available before final assembly.
Use the Torque Wrench Correctly
Apply force smoothly at the wrench handle. Do not jerk the wrench. With a click-type tool, stop pulling when you feel or hear the first clear click unless the tool maker says otherwise.
- ✦ Protect the tool
Do not use a torque wrench to loosen seized hardware unless its manufacturer specifically allows that use.
How to Torque Lower Control Arm Bolts Step by Step
The exact sequence can change by vehicle, but the method below explains the normal process for **how to torque lower control arm** pivot hardware. Your vehicle’s service procedure should always take priority over a general guide.
If you just replaced the arm, install all parts in their correct positions first. Start the control arm bolts and nuts by hand when possible. This lowers the chance of cross-threading expensive suspension hardware or welded mounting nuts.

- ✦ Step 1: Confirm the specifications
Write down the exact torque value and any required angle for each lower control arm fastener.
- ✦ Step 2: Inspect the hardware
Check bolts, nuts, washers, mounting holes, and threads for damage, heavy rust, or stretching.
- ✦ Step 3: Install the arm loosely
Start the pivot fasteners and other connections without fully tightening rubber-bushing pivot bolts yet.
- ✦ Step 4: Assemble connected components
Install the ball joint and any removed suspension parts according to the vehicle-specific procedure.
- ✦ Step 5: Position the suspension
If required for bonded rubber bushings, move the suspension to normal ride height before final pivot-bolt torque.
- ✦ Step 6: Set the torque wrench
Set the exact value using the same unit listed in the service information.
- ✦ Step 7: Hold the opposite side
If the bolt and nut can both rotate, hold the correct side with a wrench as required by the service procedure.
- ✦ Step 8: Apply torque smoothly
Pull steadily until the torque wrench indicates that the target has been reached.
- ✦ Step 9: Complete any angle step
If specified, turn the fastener through the required additional angle after the initial torque.
- ✦ Step 10: Inspect the assembly
Check that the bushing, washers, brackets, ball joint, and nearby parts sit in their intended positions.
Should You Torque the Bolt Head or the Nut?
Follow the factory procedure when it identifies which side should turn. Friction can differ between the nut, bolt head, and mating surfaces. On some joints, tightening the wrong side can also make the job harder or disturb bolt position.
- ✦ When no special direction is given
Keep the opposite side from rotating and tighten the accessible fastener carefully.
Use a Smooth Final Pull
Do not hammer on the wrench or add a pipe to its handle. A smooth pull gives the torque wrench the best chance to indicate the target correctly. If access is poor, reposition the wrench instead of forcing it at a bad angle.
- ✦ Avoid extensions on the handle
Adding leverage to the handle can change how the tool is used and may damage it.
Why Lower Control Arm Bushings Should Often Be Tightened at Ride Height
This is one of the most important parts of **how to torque lower control arm** bolts. Many control arms use bonded rubber bushings. The inner metal sleeve is clamped by the mounting bolt, while the rubber twists as the suspension moves.
If you fully tighten that sleeve while the suspension hangs at full droop, the rubber may already be twisted when the vehicle returns to normal height. Every bump can then twist it even farther. That extra stress can shorten bushing life.
Final tightening near normal ride height lets the bushing sit closer to its intended neutral position during everyday driving. This does not apply to every bushing design, so always check the service procedure.

- ✦ Bonded rubber bushings
These are the main reason ride-height tightening is so important on many vehicles.
- ✦ Full suspension droop
Avoid final pivot-bolt torque in this position unless the manufacturer specifically calls for it.
- ✦ Normal ride position
Use the manufacturer’s specified ride-height method whenever one is provided.
Ways to Reach Normal Ride Height
A drive-on lift or ramps let the vehicle rest on its wheels while leaving room underneath. When those are not available, some service procedures allow the suspension to be raised with a jack until a specified ride-height measurement is reached. The vehicle must remain securely supported during this process.
- ✦ Safety first
Never work beneath a vehicle that depends only on a hydraulic jack for support.
Do Not Assume Every Bushing Works the Same Way
Some aftermarket arms use spherical bearings, polyurethane bushings, or other designs that behave differently from bonded rubber. Follow the instructions supplied with the arm when they differ from the original equipment procedure.
- ✦ Aftermarket parts
Check the part maker’s installation notes in addition to the vehicle service information.
How to Torque a Lower Control Arm Ball Joint Connection
The lower control arm may attach to the steering knuckle through a ball joint. That connection should not automatically use the same specification as the inner control arm pivots.
Some ball joints use a tapered stud and castle nut. Others use pinch bolts, multiple flange bolts, or an integrated joint. Each design needs its own tightening procedure.
When learning **how to torque lower control arm** hardware, treat the ball-joint connection as a separate fastener group. Check its torque value, hardware replacement rules, and locking method before assembly.

- ✦ Castle nut
Follow the specified torque and cotter-pin procedure. Do not loosen the nut simply to align the cotter pin unless the service instructions permit it.
- ✦ Pinch bolt
Make sure the ball-joint stud or pin is seated correctly before tightening the pinch hardware.
- ✦ Bolt-on joint
Use the specified torque for each mounting bolt and follow any stated tightening pattern.
- ✦ New hardware
Use replacement nuts or bolts when the manufacturer identifies them as one-time-use parts.
Never Guess at a Ball Joint Fastener
A ball joint carries steering and suspension loads. An incorrect fastener, damaged taper, missing cotter pin, or loose pinch bolt can create a serious safety problem. Inspect the joint carefully before returning the vehicle to service.
- ✦ Check seating
Make sure the joint is fully seated in the knuckle or control arm before applying final torque.
Should You Lubricate Lower Control Arm Bolt Threads?
Do not add lubricant, anti-seize, or thread locker just because it makes assembly easier. Torque specifications depend partly on friction. Changing that friction can change the tension created in the bolt at the same wrench setting.
If a specification assumes dry threads but you coat them with oil, the bolt may develop more clamp load than intended. That can overstress the hardware even though the torque wrench shows the correct number.
For safe **how to torque lower control arm** work, prepare the threads exactly as the service procedure states. If the manufacturer specifies a thread-locking compound or a particular lubricant, use the recommended type and amount.

- ✦ Dry specification
Use clean, dry threads when that is what the procedure expects.
- ✦ Specified thread locker
Apply it only where the vehicle maker or replacement-part maker requires it.
- ✦ Anti-seize
Do not use it on suspension fasteners unless the instructions specifically call for it.
- ✦ Dirty threads
Clean contamination that could prevent correct seating, but avoid damaging the thread shape.
Inspect Rusty Hardware Before Reuse
Heavy corrosion can reduce fastener strength and make torque readings less meaningful. Replace questionable suspension hardware when required by the service procedure or when damage makes safe reuse doubtful.
- ✦ Look for damage
Check for stretched threads, rounded heads, severe rust, bent shanks, and damaged locking nuts.
Torque-to-Yield and One-Time-Use Lower Control Arm Bolts
Some vehicles use fasteners that the manufacturer identifies as non-reusable. This is common when a bolt uses an angle-tightening procedure designed to produce controlled stretch.
A bolt that looks normal may still need replacement. Do not decide that it is reusable based only on appearance. Check the service instructions before starting the job so new hardware is ready if needed.
This detail is easy to miss when researching **how to torque lower control arm** bolts. Reusing a one-time-use fastener can prevent the joint from achieving the clamp load the manufacturer intended.
- ✦ Check replacement notes
Service information may explicitly say to discard a bolt or nut after removal.
- ✦ Follow the full sequence
Complete the initial torque and every specified angle step.
- ✦ Use the right hardware
Do not replace a suspension bolt with a similar-looking general-purpose bolt.
Why an Angle Step May Be Used
An angle step controls how far a fastener rotates after reaching an initial seated condition. This can give the manufacturer more control over bolt tension than a simple torque figure alone in some joints.
- ✦ Use an angle tool
Estimate by eye only if the official procedure expressly allows it. Otherwise use a proper angle gauge.
Common Lower Control Arm Torque Mistakes
Many control arm problems after replacement come from installation details rather than from a bad new part. Avoiding a few common errors can make the repair more reliable.
A frequent mistake is tightening a rubber-bushing pivot bolt while the suspension hangs. Another is using an impact wrench for final tightening. An impact tool is useful for some removal work, but it is not a substitute for a torque wrench when an exact final torque is required.
Anyone learning **how to torque lower control arm** bolts should also resist the urge to copy numbers from an unrelated vehicle. The correct procedure can change even within the same model line.
- ✦ Guessing the specification
Use exact vehicle data instead of relying on memory or a generic value.
- ✦ Final tightening at full droop
This may preload bonded rubber bushings and reduce their service life.
- ✦ Using an impact for final torque
Use a torque wrench for controlled final tightening unless the official procedure states otherwise.
- ✦ Ignoring one-time-use hardware
Replace fasteners whenever the repair procedure requires new hardware.
- ✦ Adding lubricant without instructions
Lubrication can change the clamp load produced by a given torque.
- ✦ Using the wrong unit
Check carefully for lb-ft, lb-in, and N·m.
- ✦ Forgetting the angle step
A torque-plus-angle fastener is not finished after the initial torque.
Do Not Repeatedly Click the Torque Wrench
Once a click-type wrench reaches the set value, stop applying force. Repeatedly clicking the wrench can add more torque and does not make the result more accurate.
- ✦ One smooth pull
Use slow, steady force until the wrench gives its normal torque indication.
What to Check After Torquing the Lower Control Arm
The repair is not complete the moment the torque wrench clicks. Look over the full suspension assembly before installing the wheel or driving the vehicle.
Make sure washers, nuts, cotter pins, retaining clips, brake-hose brackets, ABS wiring, sway-bar links, and any parts moved during the repair are back in their correct positions. Check that no hose or wire is stretched or trapped.
If the lower control arm was replaced or its mounting position can affect alignment, a wheel alignment may be needed. Alignment is especially important if the vehicle now pulls, the steering wheel is off center, or adjustable suspension points were disturbed.
- ✦ Inspect every fastener
Confirm that all parts removed for access were reinstalled and tightened correctly.
- ✦ Check wire and hose routing
Make sure brake hoses and ABS sensor wires cannot rub against moving suspension parts.
- ✦ Inspect bushing position
Check that bushings and sleeves sit correctly in their mounts.
- ✦ Check ball-joint security
Verify any cotter pin, pinch bolt, retaining device, or lock nut required by the design.
- ✦ Consider alignment
Have the alignment checked when the repair affects suspension geometry or the service procedure calls for it.
Road Test Carefully
Start with a slow test in a safe area. Listen for clunks, pops, or rubbing. Pay attention to steering feel and stop the vehicle if anything feels loose or abnormal.
- ✦ Reinspect if needed
If you hear new suspension noise after the repair, inspect the work before continuing normal driving.
Can You Retorque a Lower Control Arm Bolt?
Whether a lower control arm fastener should be checked again depends on its design and the manufacturer’s instructions. Standard reusable fasteners may sometimes be verified if there is a reason to suspect incorrect tightening.
Do not automatically loosen and retorque torque-to-yield or one-time-use bolts. Loosening such a fastener may mean it must be replaced. Follow the specific service procedure rather than creating a routine retorque schedule.
If you are checking **how to torque lower control arm** bolts because of a clunk or movement after a repair, inspect the whole joint. A loose sound could also come from a ball joint, sway-bar link, strut mount, tie-rod end, or damaged bushing.
- ✦ Reusable fasteners
Verify them only according to the applicable service instructions.
- ✦ One-time-use bolts
Replace them if the procedure requires replacement after loosening or removal.
- ✦ Persistent noise
Do not assume every clunk means the control arm pivot needs more torque.
More Torque Is Not a Repair for a Loose Joint
If a bolt will not hold its specified torque, stop and find the cause. Damaged threads, a cracked bracket, an incorrect bolt, a failed locking nut, or distorted hardware may need repair or replacement.
- ✦ Do not keep tightening
Exceeding the specification can turn a repairable problem into damaged suspension hardware.
Lower Control Arm Torque Safety Tips
Suspension work involves heavy parts and strong spring forces. Safe support matters as much as correct torque. Use a flat work surface, suitable lifting equipment, and approved vehicle support points.
Never place any part of your body under a vehicle supported only by a floor jack. Also be careful when raising a control arm with a jack to simulate ride height. The main vehicle supports must stay secure as the suspension moves.
If the job involves removing a loaded coil spring, torsion component, or another part that stores a large amount of energy, follow the exact service procedure. Some suspension jobs are better handled by a professional shop with the correct equipment.
- ✦ Use rated jack stands
Support the vehicle securely before working underneath it.
- ✦ Know the spring design
Do not remove suspension hardware that restrains a loaded spring unless you know the correct safe procedure.
- ✦ Wear eye protection
Rust, dirt, and debris often fall when suspension hardware is disturbed.
- ✦ Stop when something looks wrong
Bent brackets, cracked mounts, damaged threads, or severely corroded structural parts need proper inspection.
When Professional Help Makes Sense
Consider professional service if you cannot find the correct torque data, cannot safely place the suspension at the required ride height, or find damaged mounting hardware. Suspension fasteners directly affect wheel control, so uncertainty should not be solved by guessing.
- ✦ Get help when needed
A qualified technician can verify damaged hardware, ride-height procedures, and final alignment.






