
How to Replace Lower Control Arms Jeep Tj: Overview and Key Facts
Worn lower control arms can make a Jeep TJ feel loose, noisy, or unpredictable over bumps. You may hear a clunk when braking or accelerating, notice cracked rubber bushings, or see the axle shift slightly while someone moves the Jeep’s steering wheel. Replacing the arms is a manageable suspension repair, but the Jeep must be supported correctly because the control arms help locate a heavy solid axle.
This guide explains how to replace lower control arms Jeep TJ models, using the practical method of changing one arm at a time while the axle remains supported. The same general process applies to the front and rear, although front control arms are more closely related to caster and steering behavior, while rear arms affect axle position and thrust angle.
You will learn how to identify the correct replacement parts, safely unload the old arm, install the new one without forcing the axle into position, and tighten the bushings at normal ride height. The final checks cover wheel alignment, unusual noises, and warning signs that mean the Jeep should be inspected before driving farther.
At a glance
- Support the Jeep by the frame and support the axle separately before removing a control arm.
- Replace one arm at a time unless you have a specific axle-positioning plan.
- Final-torque rubber-bushed arms with the suspension at normal ride height.
How to replace lower control arms Jeep TJ safely and correctly
A Jeep TJ uses four lower control arms: two in front and two in the rear. Each arm connects the axle housing to the frame and controls the axle’s fore-and-aft movement. Some replacement arms are fixed-length steel arms; others are adjustable and may be part of a lifted-suspension setup.
Before beginning, confirm whether you are working on the front or rear axle and whether the replacement arms match the Jeep’s suspension height. Do not mix a stock-length arm with a modified suspension without checking the manufacturer’s instructions. If a bolt is badly seized, the axle bracket is cracked, or the replacement arm does not line up without extreme force, stop rather than hammering the parts into place.
Tools you will need
- Floor jack and four properly rated jack stands for supporting the frame and axle
- Wheel chocks to prevent the Jeep from rolling
- Socket and wrench set that fits the control-arm fasteners
- Breaker bar for loosening tight bolts
- Torque wrench capable of reaching the Jeep’s specified control-arm torque
- Penetrating oil and a wire brush for dirty or lightly corroded threads
- Replacement control arms and any required washers, sleeves, or locking hardware
- Optional: second floor jack for carefully adjusting axle height and bolt alignment
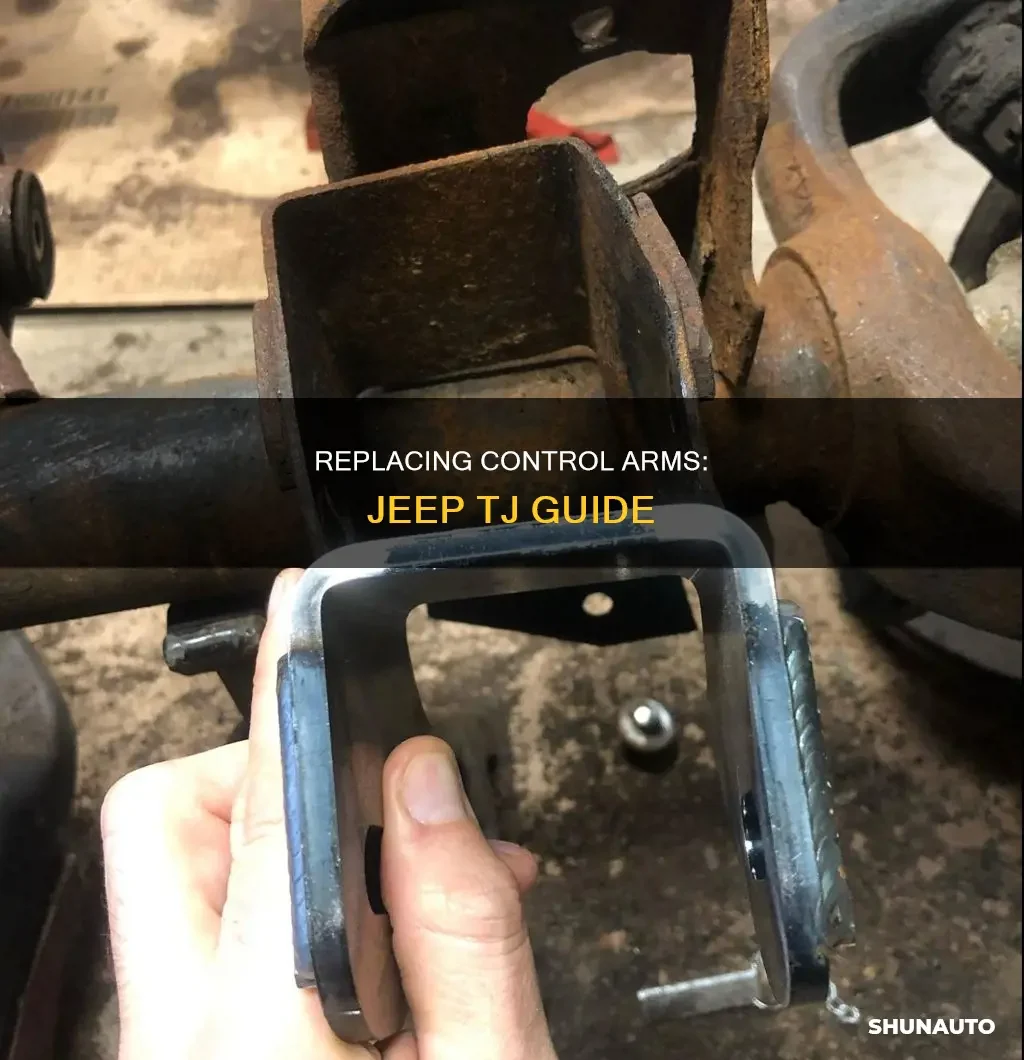
Step 1 Confirm the replacement arms and inspect the suspension
Compare each new arm with the one on the Jeep before lifting anything. Check the length, bend or offset, bushing style, bolt-sleeve diameter, and mounting width. A front lower arm and a rear lower arm may look similar but are not automatically interchangeable, and left and right arms can differ on some aftermarket designs.
Look over the surrounding brackets while the Jeep is still on the ground. Check for torn control-arm bushings, oval-shaped bolt holes, cracked welds, bent brackets, leaking shocks, broken coil springs, and loose track-bar or sway-bar hardware. If the bracket has pulled away from the frame or axle, replacing the arm alone will not correct the problem.
Find the correct torque values in the factory service information for your model year or in the instructions supplied with the control arms. Torque values can differ by fastener size, location, arm design, and whether the hardware is factory or aftermarket. Do not rely on a generic value simply because the bolt appears similar.
Step 2 Park, chock, and raise the Jeep securely
Park on a hard, level surface. Put the transmission in Park or in first gear for a manual transmission, set the parking brake, and place chocks firmly at the wheels that will remain on the ground during the initial lift. Loosen the wheel lug nuts slightly if wheel removal is needed.
Raise the Jeep with a floor jack at a suitable frame or axle lifting point, then place jack stands under strong frame sections. The stands must support the frame, not thin sheet metal, suspension links, or a component that may move when the arm is removed. Lower the Jeep gently onto the stands and shake the body lightly to verify that it is stable before working underneath.
Keep a second support under the axle housing near the control-arm area. This support is not a substitute for the frame stands; it prevents the axle from rotating or dropping suddenly when the control arm is disconnected. The axle should be supported but still adjustable in small amounts with a jack.
Important
Never rely on a hydraulic jack alone while removing a control arm. If the Jeep moves, the axle can shift sharply and trap a hand or damage the brake hose, ABS wiring, driveshaft, or coil spring.
Step 3 Remove the wheel and identify the arm’s original position
Remove the wheel if it blocks access to the control-arm bolts. Before taking the arm out, photograph its routing and mark its position if the arm is adjustable. On a fixed-length factory-style arm, the orientation is usually apparent, but a photo still helps prevent installing a directional replacement backward.
Inspect the brake hose, ABS wire, sway-bar link, shock, and coil spring around the work area. Make sure the axle support is not pressing on a vulnerable component. If the brake hose or wiring is stretched, reposition the jack under the axle before continuing.
Step 4 Relieve tension and loosen both control-arm fasteners
Use the axle-supporting jack to adjust the axle height until the control-arm bolts are not carrying heavy tension. You are looking for a condition in which the bolt can be turned or tapped out without the axle trying to rotate. A small change in jack height can make a large difference.
Brush dirt from the exposed threads and apply penetrating oil if needed. Loosen the frame-side and axle-side nuts, but leave the bolts installed until you are ready to remove the arm. Keeping both bolts in place prevents the arm and axle from moving unexpectedly while you work.
If a bolt will not move, do not continue striking it with the suspension loaded or with a brake line nearby. Confirm that the nut is fully removed, check whether the bolt is binding the axle, and adjust the support slightly. Severely rusted hardware may require heat or cutting, which is a point to seek experienced mechanical help because rubber bushings, fuel lines, wiring, and brake components can be damaged.
Step 5 Remove one lower control arm
Support the arm with one hand or a small jack, then remove the bolts from the control-arm mounts. Usually it is safer to remove one arm and leave the matching arm installed. The remaining arm helps keep the axle located, reducing the chance that the bolt holes move far out of alignment.
Do not remove both lower arms on the same axle unless you have a controlled way to locate and support the axle. With both arms disconnected, the axle can rotate on the springs and shocks, and the driveshaft or brake lines may become the limiting parts. A useful way to approach how to replace lower control arms jeep tj is to check your progress after each stage.
Once the arm is out, compare it directly with the replacement. Measure center-to-center length if the new arm is adjustable, and transfer any required sleeve or washer arrangement. Do not reuse damaged hardware, distorted washers, or locknuts that the manufacturer says to replace.
Step 6 Set the new arm in place without forcing the axle
Install the new arm in the same orientation as the original. Start both bolts by hand, but do not fully tighten either one. If the holes do not line up, use the axle-supporting jack to raise or lower the axle in small movements, or use a suitable alignment tool that is designed for suspension work.
Never put fingers through the bolt holes while moving the axle. Use a drift or tapered alignment tool to guide the holes, then replace it with the actual bolt. Avoid using a long pry bar against a brake line, ABS sensor wire, or thin control-arm bracket.
For adjustable control arms, set the length according to the suspension manufacturer’s instructions before final tightening. A changed arm length can alter front caster or rear axle position, so a visual match to the old arm is not always the correct setup on a lifted TJ.
Step 7 Snug the hardware and repeat on the other arm
With both bolts installed, snug the nuts enough to seat the sleeves and bushings, but leave the final torque for later. Verify that the arm is centered in each bracket and that the bolt heads, washers, and nuts are arranged as specified.
Lower or raise the axle support only as needed to keep the axle stable, then repeat the removal and installation process on the second lower arm on that axle. Changing one arm at a time preserves a useful reference, but the axle can still move enough to affect alignment, so keep the support in place.
If the second arm will not line up, do not assume the new arm is defective. Check whether the axle has shifted forward, backward, or rotated. Adjust the axle support gradually and make sure the first arm’s bolts are snug rather than fully clamped, since a fully tightened first arm can prevent small alignment corrections.
Step 8 Torque the control-arm bolts at normal ride height
Rubber-bushed control arms must generally be tightened with the suspension at normal ride height. Tightening them while the axle hangs can twist the rubber sleeve when the Jeep is lowered, shortening bushing life and making the suspension resist movement.
There are two practical ways to reach this condition. Support the Jeep safely on ramps or other approved supports that let the suspension carry the vehicle’s weight, or use a method specified by the control-arm manufacturer that accurately places the axle and frame in their normal relationship. Do not work beneath an unsupported vehicle merely to reach a bolt.
With the Jeep stable at ride height, torque each control-arm fastener to the correct specification. Hold the bolt head if necessary so the bolt does not spin, and make sure the torque wrench is set correctly. Paint-marking the nut and bolt after torque can make a later visual check easier, but a mark is not a replacement for torque measurement.
Step 9 Reinstall the wheels and lower the Jeep
Inspect the work area before reinstalling the wheels. Confirm that every control-arm bolt is installed, each nut is properly seated, and no jack, tool, wire, brake hose, or loose part remains near the axle or driveshaft.
Install the wheels and tighten the lug nuts in a star pattern enough to hold the wheels in place. Raise the Jeep slightly, remove the stands, and lower it to the ground slowly. Torque the lug nuts to the vehicle or wheel manufacturer’s specification rather than using the control-arm torque value.
Roll the Jeep a short distance on the level surface and apply the brakes gently. This lets the suspension settle. Do not use hard braking, trail obstacles, or high speed as an initial test.
Step 10 Perform the first inspection and road test
With the Jeep on the ground, look at both control arms and verify that the bushings are not visibly pinched, displaced, or twisted in an unusual way. Check that the tires are straight, the steering wheel is approximately centered, and the Jeep does not sit noticeably crooked.
Begin with a slow drive in a quiet area. Listen for clunks during light braking, acceleration, and small bumps. The Jeep should feel controlled rather than loose, but a control-arm replacement may not cure a problem caused by a worn track bar, ball joint, tie-rod end, wheel bearing, shock, or steering component.
Understanding how to replace lower control arms jeep tj also means recognizing the limits of the method.
After the short test, park safely and recheck for loose hardware, shifted bushings, and contact between the arm and nearby parts. Have the alignment checked if front arms were replaced, arm length was changed, the Jeep has a lift, the steering wheel is off center, or the vehicle pulls to one side.
What changes between front and rear lower control arms?
The basic replacement sequence is similar, but the alignment consequences are different. Front lower control arms help establish the axle’s fore-and-aft location and caster, the angle that influences steering return and straight-line behavior. Rear lower arms locate the rear axle and contribute to its thrust angle, which affects whether the Jeep tracks straight.
On a stock-height TJ, fixed-length replacement arms are usually intended to preserve the factory geometry. On a lifted TJ, adjustable arms may be needed to correct caster, driveshaft angle, pinion angle, or axle position. Do not adjust all four arms by eye; changes should follow the suspension manufacturer’s setup guidance and be confirmed by inspection or alignment measurements.
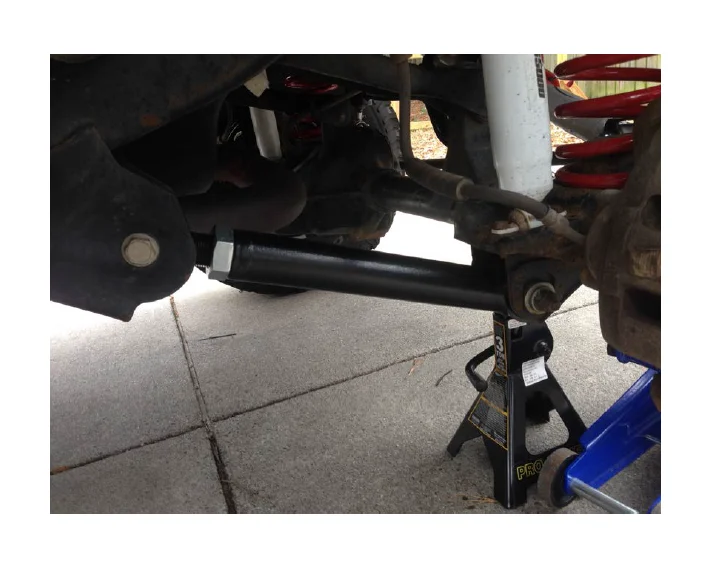
Why one arm at a time is the safer default
Leaving one lower arm installed gives the axle a remaining locating link while you replace the other. This does not make the axle harmless or immovable, which is why an axle support is still required, but it limits unnecessary movement and makes bolt alignment easier for a beginner.
Replacing both arms at once can be appropriate during a complete suspension rebuild, especially when the axle is held by a transmission jack or another controlled fixture. That method requires more attention to driveshaft movement, brake-line slack, spring seating, and axle rotation than a basic one-arm-at-a-time repair.
What hardware and bushing details deserve attention?
Control-arm bushings may be rubber, polyurethane, or a jointed aftermarket design. Rubber bushings normally rely on their inner sleeves being clamped in the correct position at ride height. Polyurethane kits may use separate sleeves and lubricant, while flex joints can have their own preload and adjustment instructions.
Follow the instructions for the exact arm rather than treating every bushing as interchangeable. A sleeve that is too short, a missing washer, or an incorrectly installed joint can allow side-to-side movement even when the nut appears tight.
Helpful tip
If the old bolt is difficult to remove, use the axle jack to change the load rather than pulling harder immediately. The easiest position is usually the one where the bolt slides with only light tapping.
How to check the repair before regular driving
A successful installation is more than a new arm bolted into place. The axle should remain centered and supported, the fasteners should be torqued at the correct suspension position, and no surrounding component should be stretched or contacting the new arm.
Use the following inspection points after the first short drive and again after the first few trips:

- Both ends of each replaced arm remain fully seated in their brackets.
- The control-arm bolts and nuts show no visible movement or missing hardware.
- Brake hoses and ABS wiring have slack through normal steering and suspension movement.
- The coil springs remain seated, and the shocks are not being used as axle stops.
- There is no new clunk during light braking, reversing, or throttle application.
- The steering wheel remains reasonably centered and the Jeep does not pull unexpectedly.
- Tire wear and sidewall contact do not indicate a changed alignment or suspension interference.
Front control-arm work should generally be followed by a professional alignment, particularly if the arms are adjustable or the Jeep has a lift. An alignment can identify incorrect caster, toe, or thrust-angle conditions that are not obvious in the driveway.
Common problems after lower control-arm replacement
Most installation problems come from axle movement, incorrect bushing preload, mismatched parts, or a separate worn suspension component. The symptom can help narrow the inspection, but do not continue driving if the Jeep feels unstable.
| Symptom | Likely area to inspect |
|---|---|
| Control-arm bolt will not align | Axle height or rotation, remaining arm position, or incorrect arm length |
| Clunk when braking or accelerating | Loose hardware, sleeve movement, worn track bar, or another unaddressed bushing |
| Steering wheel is off center | Front geometry, track-bar position, toe, or alignment |
| Jeep pulls or wanders | Alignment, tire pressure, ball joints, wheel bearing, steering linkage, or loose fasteners |
| Ride feels unusually harsh | Rubber bushings torqued at full droop or a binding aftermarket joint |
When should the Jeep not be driven?
Do not drive normally if a control-arm bolt cannot be fully installed, a bracket is cracked, the axle shifts visibly, the steering becomes unpredictable, or a brake hose or ABS wire is stretched. Also stop if the replacement arm contacts the frame, axle, driveshaft, coil spring, or another suspension part through its normal range of movement.
At that point, support the vehicle safely and have the installation inspected by a qualified technician or an experienced Jeep suspension specialist. A new arm cannot compensate for a damaged mounting bracket or a failed component elsewhere in the suspension.
Frequently asked questions
Can I replace only one lower control arm?
Yes, you can replace one damaged arm if the other arm is sound and the replacement matches it. Replacing both arms on the same axle is often sensible when both bushings are worn, but inspect the remaining suspension before deciding.
Do I need an alignment after replacing lower control arms?
Have the alignment checked after front control-arm replacement, any adjustable-arm installation, or any suspension lift. Even fixed-length arms can expose an existing alignment issue, and rear-arm changes can affect the thrust angle.
Can I tighten the control-arm bolts with the Jeep on jack stands?
You can install and snug the bolts while the suspension is unloaded, but final torque for rubber-bushed arms should normally be applied at normal ride height. This prevents twisting the rubber when the Jeep is lowered.
Should I replace the control-arm bolts and nuts?
Inspect the hardware and follow the vehicle or arm manufacturer’s instructions. Replace bolts that are bent, deeply corroded, damaged in the threads, or specified as single-use, and replace distorted locknuts when they no longer provide reliable locking force.
Why will the new control arm not fit between the brackets?
The axle may have shifted or rotated, the arm may be the wrong length or application, or a bushing sleeve may not be centered. Support the axle, adjust its height in small increments, and compare the new arm with the old one before applying force.
Finish the repair with a careful inspection and alignment check
Learning how to replace lower control arms Jeep TJ models is mainly a matter of controlling axle movement, using the correct parts, and tightening the bushings in the position where they will operate. Replace one arm at a time, support both the frame and axle, and never force a misaligned bolt into place.
After the repair, perform a slow test drive and inspect the hardware and surrounding components. Arrange an alignment when front geometry or adjustable arms are involved, and stop driving if the Jeep wanders, clunks severely, or shows any sign of a loose bracket or stretched brake component. A careful final check is what turns a straightforward parts replacement into a safe suspension repair.






