
How to Replace Lower Control Arm Bushings Silverado Explained
A worn lower control arm bushing can make a Silverado wander, clunk over driveway edges, or feel vague when you brake. The bushing is a rubber-and-metal mount that lets the lower control arm move through its normal arc while keeping the wheel located. When the rubber tears or separates, the wheel can shift more than it should.
Learning how to replace lower control arm bushings Silverado models use is realistic for a careful home mechanic, but it is not a simple bolt-on repair. The control arm is part of the loaded front suspension, and the exact removal procedure changes with the truck’s year, drivetrain, torsion-bar design, and whether the bushing is serviceable separately.
This guide explains the safest general method: identify the correct parts, support the truck properly, remove the arm without releasing stored spring or torsion-bar energy carelessly, press out the old bushings, and reinstall everything with the suspension at normal ride height. You will also learn how to check your work and recognize when replacing the complete control arm or using a professional shop is the better choice.
At a glance
- Use the factory service information for your exact Silverado before loosening suspension hardware.
- A hydraulic press and the correct bushing adapters are usually safer than improvised hammering.
- Final bushing fastener torque must be applied at normal suspension ride height, followed by an alignment check.
How to replace lower control arm bushings Silverado models use
The general procedure is to remove the affected lower control arm, press out each old bushing, press in the correctly oriented replacements, and reinstall the arm. This is a method for serviceable bushings in a conventional Silverado front suspension; some replacement arms come with bushings already installed, and some assemblies or model-year configurations require a different procedure.
Before beginning, identify the truck by model year, 2WD or 4WD, engine, suspension package, and front-drive layout. Compare the replacement bushings with the originals, and read the service manual for the exact removal order and torque values. Do not rely on a generic torque chart for a safety-critical suspension joint.
Tools you will need
- Quality floor jack and appropriately rated jack stands for supporting the frame
- Wheel chocks and eye protection
- Complete metric socket and wrench set, including a breaker bar
- Torque wrench that covers the vehicle’s specified fastener range
- Hydraulic press with correctly sized cups, plates, and drivers for the bushings
- Paint marker or scribe for recording original bushing orientation
- Penetrating oil and a wire brush for rusted hardware
- Replacement control-arm bushings and any specified one-time-use nuts or bolts
- Optional: complete replacement lower control arm if the old arm is badly rusted or the bushing bore is damaged
- Optional: digital angle gauge or ride-height measuring tool for recording the original stance
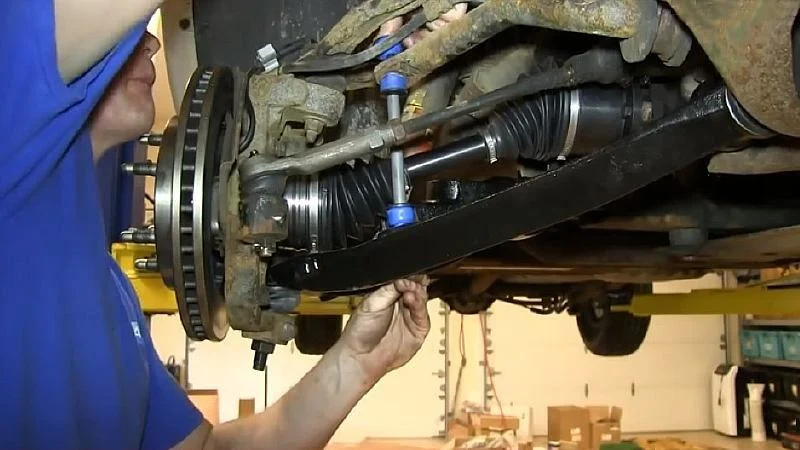
Step 1 Confirm the failed bushing and the correct repair parts
Inspect the lower control arm bushings before ordering parts. Look for rubber that is split, crushed, pulled away from the outer shell, or visibly shifted from the center sleeve. A small amount of molded rubber movement can be normal, so compare both sides and use the service information rather than replacing a bushing solely because it looks different from a new one.
Also inspect the ball joint, upper control arm bushings, stabilizer links, tie-rod ends, wheel bearing, and shock absorber. A clunk or wandering complaint can come from any of these components. If the lower arm itself is bent, cracked, heavily corroded around a bushing pocket, or damaged by a previous collision, install a complete arm instead of pressing bushings into an unsafe housing.
Check whether the replacement bushing has a directional mark, offset sleeve, locating tab, or different front and rear design. Take clear photos and mark the old bushing’s position before pressing it out. Installing an offset bushing backward can alter caster or camber and may prevent the control arm from sitting correctly.
Step 2 Prepare the Silverado on level ground
Park on a hard, level surface, place the transmission in Park or in gear, set the parking brake, and chock the rear wheels. Loosen the front wheel lug nuts slightly while the truck is on the ground. Measure the distance from the wheel center to a consistent fender point on both sides if you want a useful reference for the final ride-height check.
Raise the front of the truck at an approved lifting point and position jack stands under the frame, not under the lower control arms. The suspension must be able to hang freely for removal, while the frame must remain stable if a spring or torsion-bar component is released. Keep the floor jack nearby as a support, but never treat a hydraulic jack as the only support.
Important
Do not loosen the lower control arm, torsion-bar, or spring-retaining hardware until you know where the suspension load is stored and how your exact truck releases it. A coil spring or torsion bar can cause severe injury if it is unloaded with the wrong tool or in the wrong order. Stop and use a qualified suspension shop if the factory procedure requires equipment you do not have.
Step 3 Remove the wheel and document the suspension layout
Remove the wheel and clean the exposed fasteners with a wire brush. Photograph the brake hose routing, ABS sensor wire clips, stabilizer-bar connection, and the positions of any alignment shims or eccentric washers. Do not assume that a picture of the opposite side is enough; the two sides may contain different hardware or routing.
Support the brake knuckle or hub assembly with a separate jack stand or suitable support so its weight does not hang from the brake hose or ABS wire. If the caliper must be moved, support it with wire or a hook rather than allowing it to hang from the flexible hose.
Step 4 Release components that hold the lower arm in place
Follow the exact service-manual sequence for separating the lower ball joint, stabilizer link, and lower control arm pivots. Usually, the ball-joint connection is separated with the knuckle supported and the stud protected from damage. Some Silverado configurations use a ball joint that is serviced separately from the arm; others may make a complete arm replacement more practical.
Remove or secure any brake hose and ABS wire brackets attached to the arm. Keep the knuckle supported while the arm is disconnected. If a tapered stud will not release, use a proper ball-joint separator or apply force to the joint housing as specified by the manufacturer; do not strike the threaded end repeatedly or heat a component containing a sealed bearing or sensor.
On 4WD models, account for the front axle shaft and differential-related clearance. Do not pry against the CV boot or allow the knuckle to pull the axle joint beyond its normal range. If the front torsion bar must be unloaded to remove the arm, use the specified unloading tool and procedure before removing the arm pivot hardware.
Step 5 Remove the lower control arm without disturbing its orientation
Place a jack under the lower control arm only as needed to control its movement, then remove the pivot bolts or nuts in the sequence specified for your truck. Mark the locations of eccentric washers, cams, or shims before disassembly. These marks are not a substitute for an alignment, but they help return the suspension close enough for safe movement to the alignment shop.
Lower the arm slowly and watch for trapped brake wiring, spring pressure, or contact with the frame. Once the arm is free, compare it with the replacement or the opposite side. A bent arm, elongated bolt hole, damaged pivot sleeve, or rust-flaked bushing pocket is a reason to replace the complete arm rather than continue with a bushing-only repair.
Step 6 Record the old bushing position before pressing it out
Clean the outside of each bushing and make reference marks on the control arm and bushing shell. Record whether the sleeve is centered or offset and where any voids in the rubber face. These voids control how the bushing flexes; they are part of the design, not merely missing material.
Measure the exposed sleeve position if the bushing is not centered in the arm. A photo from several angles is worthwhile because the old rubber may be distorted. Never use the position of a visibly torn bushing as the only reference if the sleeve has already shifted.
Step 7 Press out the old bushings with controlled support
Set the control arm squarely in a hydraulic press. Support the arm close to the bushing pocket with a cup that allows the old bushing to pass through, then use a driver that contacts the bushing shell rather than the rubber sleeve. Keep your hands away from the press line and stand out of the path of a component that could slip.
Apply pressure gradually and confirm that the driver, arm, and receiving cup remain aligned. If the bushing will not move, stop and reassess the adapter size and the arm’s support. Excessive pressure on a crooked setup can bend the arm or launch a cup.
Do not burn the rubber out unless the manufacturer specifically permits that method and you have accounted for fumes, fire risk, and damage to nearby coatings.
After removal, clean the bore with a wire brush or approved cleaning method. Do not enlarge the bore, grind away sound metal, or remove a locating shoulder. The new bushing needs a clean, round, undamaged seat to stay aligned under braking and cornering loads.
Step 8 Press in each new bushing in its original orientation
Lubricate the bushing only if the bushing manufacturer or vehicle service information calls for a specific lubricant. Many rubber suspension bushings are designed to be installed dry on their outer shell, while polyurethane products may require a supplied grease. The wrong lubricant can allow a rubber bushing to rotate or damage the material.
A useful way to approach how to replace lower control arm bushings silverado is to check your progress after each stage.
Align the new bushing’s marks, voids, offset, and sleeve with the reference marks on the arm. Use a press driver that contacts the outer shell when pressing the bushing into the arm. Press slowly until the bushing reaches the specified depth or the locating shoulder seats against the arm.
Do not press on the inner sleeve to force the outer shell into the arm, and do not twist the bushing to “make the marks line up” after it is installed. If the bushing begins to enter crooked, release pressure, realign the setup, and start again. The finished sleeve should be centered at the intended angle, with no torn rubber or distorted shell.
Step 9 Reinstall the control arm and reconnect the suspension
Position the arm in the frame and install the pivot hardware in the same locations and direction as before. Start all fasteners by hand to avoid cross-threading. Reconnect the ball joint, stabilizer link, brake brackets, ABS wire clips, and any other parts removed during disassembly.
Leave rubber-bushing pivot fasteners only snug until the arm is at normal ride height unless the service manual specifically gives another procedure. Tightening them with the suspension hanging can preload the rubber. That preload may restrict suspension travel, shorten bushing life, and change the truck’s settled ride height.
Reconnect the ball-joint fastener using the specified new nut or retainer when required. If a castellated nut does not align with a cotter-pin hole at the correct torque, tighten it farther only as the service information allows; never loosen it to create alignment.
Step 10 Set the suspension at ride height and apply final torque
Reinstall the wheel temporarily, snug the lug nuts, and lower the truck onto the ground, or support the lower arm so the hub reaches the manufacturer’s normal ride-height position if the wheel cannot be installed yet. A loaded suspension is important because the bushing sleeve must be clamped at its neutral position.
Torque the pivot fasteners, ball-joint hardware, stabilizer hardware, and wheel lug nuts to the exact specifications for your Silverado. Use a calibrated torque wrench and hold the bolt head or eccentric in the required position while tightening the nut. If the service information specifies a torque-plus-angle procedure or identifies a one-time-use fastener, follow that instruction.
After tightening, check that the brake hose and ABS wire have full steering and suspension clearance. Turn the steering from lock to lock while watching for stretched wiring, contact with the tire, or a brake hose twisted around the spring or control arm.
Step 11 Perform a careful initial inspection and road check
Before driving, verify that every removed fastener is installed, all tools are clear, the wheel is torqued, and the truck is sitting evenly. Look for a bushing sleeve that is visibly off-center, a ball-joint stud that is not fully seated, or a pivot bolt that has migrated from its marked position.
Begin with a slow drive in a safe area. Listen for clunks during gentle braking and low-speed turns, and note whether the steering wheel is off center or the truck pulls. Stop immediately if you hear a sharp metal-to-metal impact, feel severe looseness, or notice that the steering response is worse.
Have the front end professionally aligned after the repair. Control-arm removal can change caster and camber even when the original marks are restored, and toe can be affected by related movement. An alignment printout gives you a more useful result than judging the steering wheel by eye.
Choosing between bushings and a complete lower control arm
Pressing bushings saves the original arm when its metal is sound and the replacement bushing is available. It also lets you preserve a properly shaped factory arm. The tradeoff is that pressing requires a stable setup, correct adapters, and careful attention to orientation.
A complete lower control arm is often the more practical choice when it includes new bushings and a ball joint, especially if the original arm is rusty or the ball joint is worn. Confirm that the replacement arm matches the truck’s drivetrain and suspension package. A similar-looking arm can have a different bushing offset, ball-joint position, or mounting width.
For how to replace lower control arm bushings Silverado applications use, the most important compatibility question is not only “will it fit?” but also “is the bushing designed for this arm and load path?” Compare dimensions, sleeve length, outer diameter, locating features, and orientation before installation.
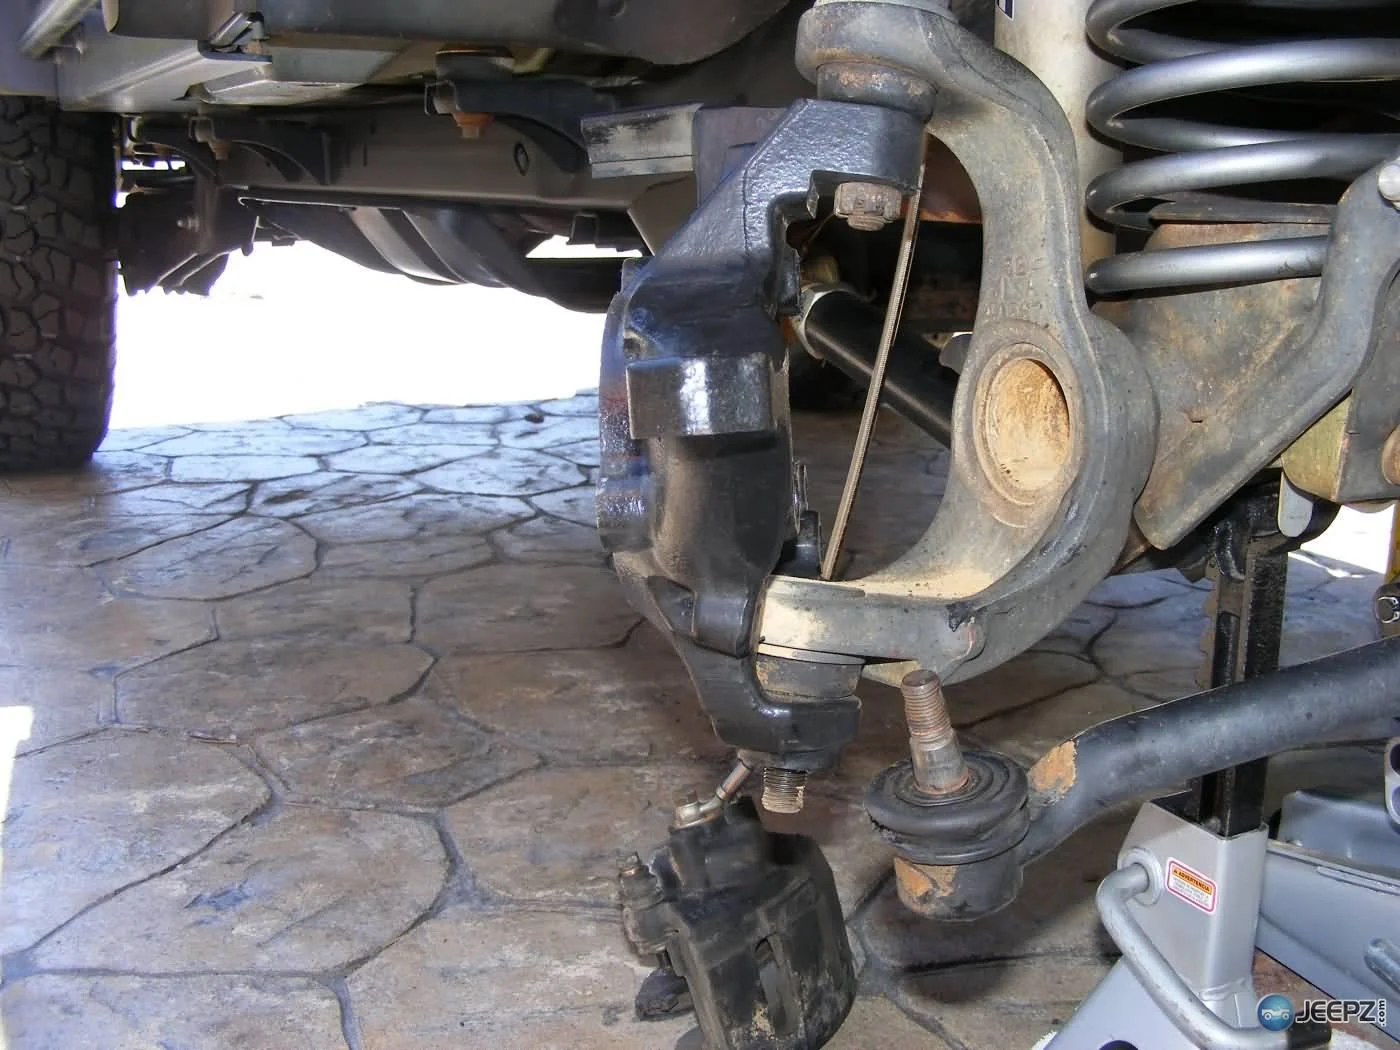
How to verify the repair before regular driving
A successful repair should leave the control arm firmly mounted, the suspension moving without binding, and the steering geometry close enough to reach an alignment shop safely. The first inspection happens with the truck parked; the second happens during a controlled low-speed drive.
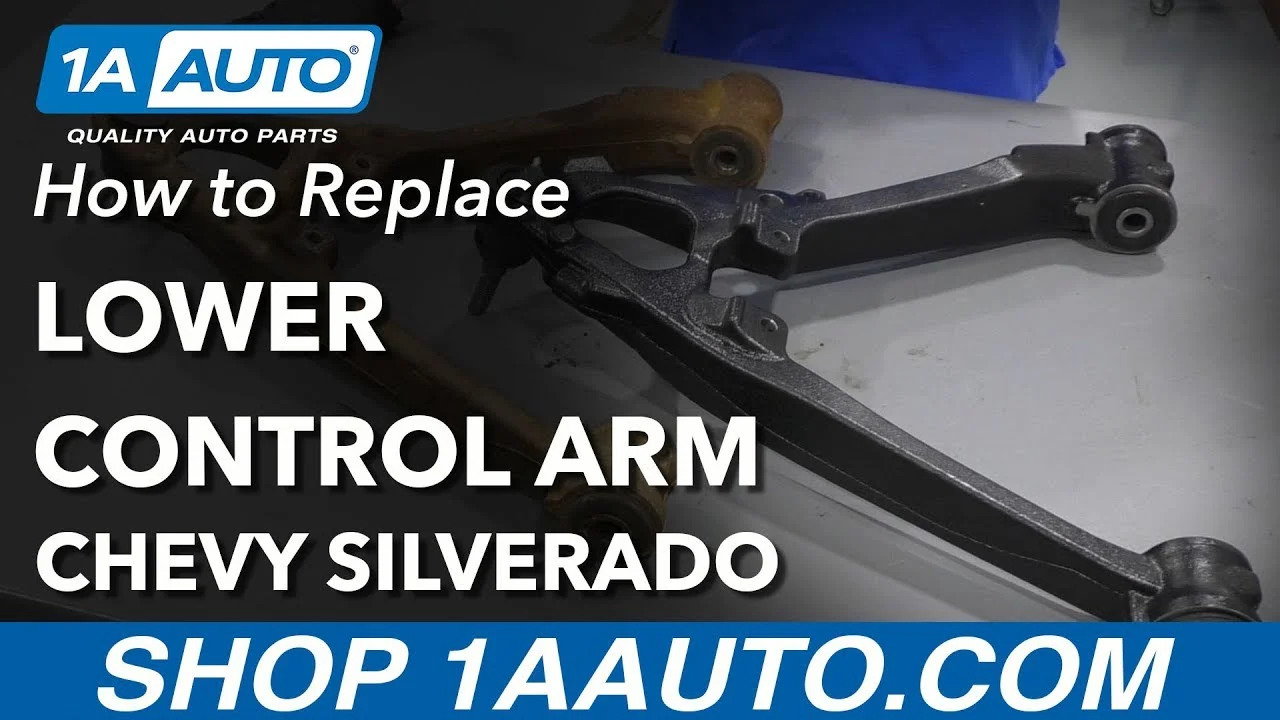
Parked inspection checklist
- Both pivot fasteners are tightened at normal ride height to the exact specification.
- Ball-joint and stabilizer fasteners have the correct retainers, nuts, and cotter pins where required.
- Brake hoses and ABS wires are clipped in place and do not stretch at full steering lock.
- The bushing shell is fully seated, correctly oriented, and not torn or folded.
- The wheel lug nuts are tightened in the specified pattern and torque.
- The truck does not sit noticeably lower on the repaired side.
What the road test should tell you
A mild change in steering feel may occur until alignment is completed, but the truck should not dart, pull sharply, or produce a repeated metallic knock. Brake gently on a quiet, level road, then make slow turns over a smooth surface before checking the repair again.
Check your result
After the short test drive, recheck for loose hardware, fresh contact marks, leaking or stretched brake hoses, and any shift in the bushing sleeve. Do not place any part of your body under the truck while it is supported only by a jack.
Common problems after bushing replacement
Most post-repair issues come from incorrect bushing orientation, a fastener tightened at full droop, a damaged control arm, or a separate worn suspension component. The table below helps narrow the symptom without treating it as a substitute for inspection.
| Symptom | Likely area to inspect | Next action |
|---|---|---|
| Clunk over bumps | Loose pivot, ball-joint, stabilizer, or brake bracket hardware | Recheck fastener torque and inspect for movement with the suspension safely supported. |
| Steering wheel is off center | Changed toe or caster after arm removal | Schedule a four-wheel alignment and request the measurement printout. |
| Truck pulls or wanders | Incorrect bushing orientation, unequal ride height, tire issue, or another worn joint | Stop extended driving and compare both sides before alignment. |
| Squeak during suspension movement | Incorrect lubricant, rubber preloaded at the wrong height, or bushing damage | Inspect installation instructions and confirm pivot torque was applied at ride height. |
| Bushing shifts in the arm | Wrong part, damaged bore, or improper press fit | Do not drive normally; remove and correct the installation or replace the arm. |
When the repair should stop
Stop the job if a spring or torsion bar cannot be safely unloaded, a pivot bolt is seized inside the bushing sleeve, the control arm is badly corroded, or the press setup begins to deform the arm. A seized fastener may require professional extraction, and forcing it can damage the frame or release suspension energy unexpectedly.
Also stop if you cannot identify the correct bushing orientation or torque procedure. A qualified shop can verify the application, use a proper press, and complete the alignment. This is preferable to assembling a safety-critical suspension joint based on guesswork.
Frequently asked questions
Can I replace Silverado lower control arm bushings without removing the control arm?
Usually not in a reliable way. The bushing normally must be pressed out and pressed in squarely, which requires removing the arm or using a manufacturer-approved on-vehicle press tool. Removing the arm also makes it possible to inspect the bore and check for bending or corrosion.
Should I replace both lower control arm bushings at the same time?
Replace both bushings on the same arm if both are worn or if the parts and labor involved make a paired repair sensible. Consider the opposite side based on its condition, mileage, and symmetry, but do not replace a sound bushing solely because it is on the other side.
Do I need an alignment after replacing a lower control arm bushing?
Yes, an alignment check is strongly recommended. The control arm affects wheel location and suspension angles, and restoring alignment marks does not guarantee that caster, camber, and toe returned to specification.
Can I use a hammer instead of a hydraulic press?
A hammer may damage the arm, distort the bushing, or create an unsafe setup, particularly when the old bushing is seized. A hydraulic press with properly sized supports is the controlled method; a shop can press the bushings if you do not have that equipment.
Why must the control-arm bolts be tightened at ride height?
The rubber bushing is intended to twist around its bonded sleeve as the suspension moves. Tightening it while the arm hangs forces the rubber to start from a twisted position, which can limit travel and shorten its service life.
Finish the repair with an alignment check
Knowing how to replace lower control arm bushings Silverado trucks use is only part of the job; safe support, correct bushing orientation, controlled pressing, and ride-height torque matter just as much. If the arm or bushing bore is damaged, a complete control arm can be the safer solution.
Before regular driving, confirm every fastener and retainer, inspect brake and ABS routing, perform a cautious low-speed check, and arrange a professional alignment. If the suspension uses a torsion bar or spring-release procedure you cannot perform safely, stop at disassembly and let a qualified technician complete the repair.






