
How to Replace an Upper Control Arm: Complete DIY Guide for Safe Suspension Repair
If you are searching for how to replace an upper control arm, you are likely dealing with suspension noise, uneven tire wear, loose steering, or a failed ball joint. The upper control arm is a key suspension component that helps keep the wheel moving correctly while maintaining alignment and stability.
Over the years, I have replaced upper control arms on trucks, SUVs, and passenger cars. The job is very manageable for experienced DIY mechanics with the right tools. The biggest lessons I have learned are to work safely, support the suspension properly, and always schedule a wheel alignment after the repair.

What Does an Upper Control Arm Do?
Before learning how to replace an upper control arm, it helps to understand its purpose. The upper control arm connects the suspension system to the steering knuckle. It controls wheel movement while allowing the suspension to travel up and down.
Many upper control arms include bushings and a ball joint. These parts absorb road shock and maintain proper wheel alignment. When they wear out, steering can feel loose and tire wear often increases.

- ✦ Steering Stability
Helps keep the wheel aligned during turns and suspension movement.
- ✦ Ride Control
Supports smooth suspension travel over bumps and uneven roads.
- ✦ Tire Protection
Maintains proper tire contact with the road surface.
Common Signs of a Bad Upper Control Arm
Clunking noises, uneven tire wear, vibration, wandering steering, and poor handling often point to a worn upper control arm. Damaged bushings and ball joints are usually the cause.
- ✦ Clunking Sounds
Often heard when driving over bumps or turning.
- ✦ Uneven Tire Wear
A sign that suspension geometry is no longer correct.
Tools and Parts Needed
Gathering the right tools before starting makes the job much easier. Vehicle designs vary, but most upper control arm replacements require common hand tools and safety equipment.
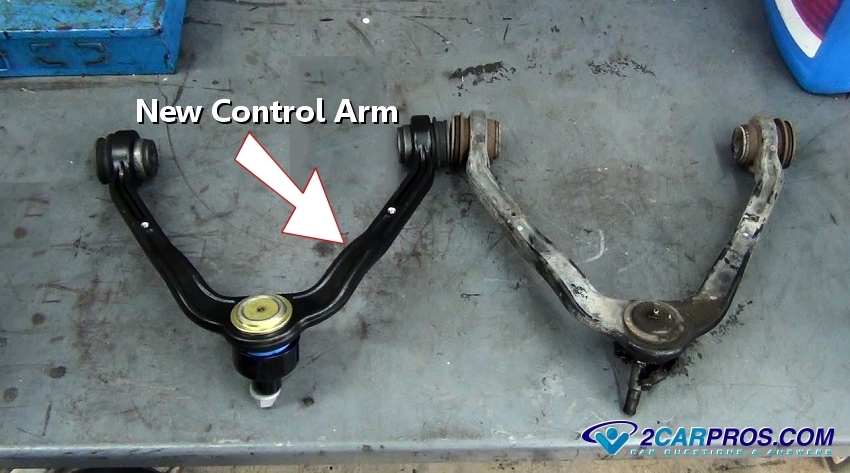
Always purchase a quality replacement part that matches your vehicle. Many aftermarket control arms come with new bushings and ball joints already installed.
- ✦ Floor Jack
Used to lift the vehicle safely.
- ✦ Jack Stands
Support the vehicle while you work underneath.
- ✦ Socket Set
Needed to remove mounting bolts and nuts.
- ✦ Torque Wrench
Ensures fasteners are tightened to specification.
Recommended Replacement Parts
Choose reputable suspension components from trusted manufacturers. Quality parts typically last longer and provide better ride quality.
- ✦ Control Arm Assembly
Includes bushings and often a pre-installed ball joint.
How to Replace an Upper Control Arm Step by Step
This section covers the core process of how to replace an upper control arm. Always consult your vehicle’s service information because mounting points and torque values can vary.
Take photos during disassembly if it is your first suspension repair. This makes reassembly much easier.
- ✦ Work on a Level Surface
Prevents the vehicle from shifting while lifted.
- ✦ Wear Safety Gear
Use gloves and eye protection throughout the repair.
Step 1: Lift and Secure the Vehicle
Loosen the wheel lug nuts slightly before lifting the vehicle. Raise the vehicle using a floor jack and support it securely with jack stands. Remove the wheel for access to the suspension.
- ✦ Safety Check
Shake the vehicle gently to confirm it is stable.
Step 2: Disconnect the Ball Joint
Remove the cotter pin and ball joint nut if equipped. Use a ball joint separator or suitable tool to separate the upper control arm from the steering knuckle.
- ✦ Avoid Damage
Do not strike delicate steering components directly.
Step 3: Remove the Upper Control Arm
Locate the control arm mounting bolts and remove them carefully. Some vehicles require moving nearby components to access the bolts. Slide the old control arm out of position.
- ✦ Keep Hardware Organized
Store bolts and washers in labeled containers.
Step 4: Install the New Control Arm
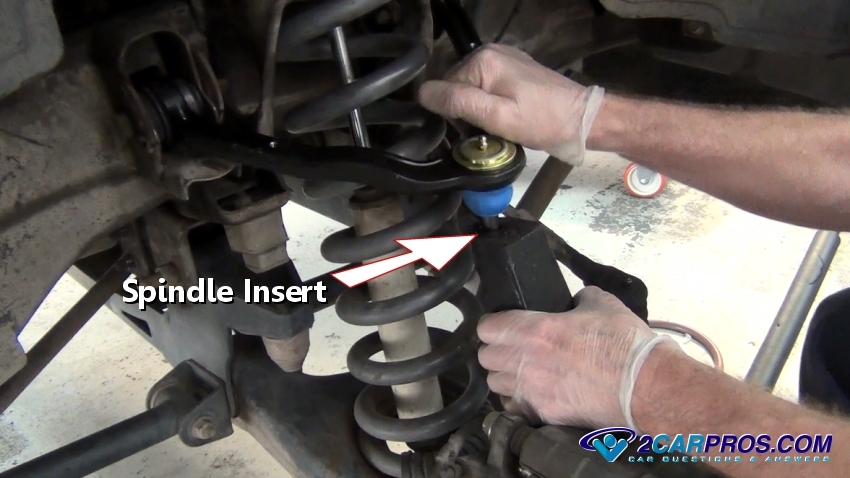
Position the new control arm and install the mounting bolts loosely. Reconnect the ball joint to the steering knuckle and install the retaining hardware.
- ✦ Compare Parts
Match the new part to the old one before installation.
Step 5: Torque and Reassemble
Tighten all fasteners to the manufacturer’s specifications. Reinstall the wheel, lower the vehicle, and torque the lug nuts properly.
- ✦ Final Inspection
Check that all hardware is secure before driving.
Important Safety Tips During Replacement
Safety should always come first when learning how to replace an upper control arm. Suspension components can be under load and may move unexpectedly if not supported correctly.
Never rely on a hydraulic jack alone. Always use quality jack stands and follow proper lifting procedures.

- ✦ Use Wheel Chocks
Prevent vehicle movement while working.
- ✦ Inspect Nearby Parts
Look for damaged tie rods, shocks, and brake components.
When to Seek Professional Help
If severe corrosion, seized fasteners, or specialized suspension designs are present, professional assistance may save time and prevent damage.
- ✦ Heavy Rust
Can make bolt removal difficult and unsafe.
Common Mistakes to Avoid
Many DIY mechanics rush through suspension repairs. Taking your time improves safety and helps ensure long-term reliability.
One of the most common mistakes when learning how to replace an upper control arm is tightening suspension bushings while the suspension hangs freely.

- ✦ Incorrect Torque
Can lead to premature wear or component failure.
- ✦ Skipping Alignment
May cause rapid tire wear and poor handling.
- ✦ Reusing Damaged Hardware
Always replace hardware if required by the manufacturer.
Why Suspension Position Matters
Many bushings are designed to sit at a neutral angle when the vehicle rests at normal ride height. Tightening them incorrectly can shorten their lifespan.
- ✦ Longer Bushing Life
Proper installation reduces unnecessary stress.
Do You Need a Wheel Alignment After Replacing an Upper Control Arm?
In most cases, yes. Replacing suspension components can change wheel alignment angles. Even small changes can affect steering feel and tire wear.
Whenever I replace an upper control arm, I recommend scheduling an alignment as soon as possible. This protects the tires and ensures the suspension performs correctly.

- ✦ Improved Tire Life
Correct alignment reduces uneven tread wear.
- ✦ Better Handling
The vehicle tracks straighter and feels more stable.
Alignment Warning Signs
A steering wheel that sits off-center or a vehicle that pulls to one side often indicates alignment issues after suspension work.
- ✦ Pulling Left or Right
A common indicator of alignment changes.
How Much Does Upper Control Arm Replacement Cost?
The total cost depends on the vehicle, labor rates, and parts quality. Many passenger vehicles require one to three hours of labor for the job.
DIY replacement can save money if you already own the necessary tools. However, professional installation may be worth considering if the suspension design is complex.

- ✦ DIY Cost
Typically includes parts, alignment, and any specialty tools.
- ✦ Professional Cost
Includes labor, parts, shop supplies, and alignment services.
Factors That Affect Price
Luxury vehicles, trucks, and performance models often have higher parts costs and more labor-intensive suspension designs.
- ✦ Vehicle Type
Complex suspension systems usually cost more to service.






