
How to Replace Control Arm Bushings Toyota Camry: Safe DIY Method
Worn control arm bushings can make a Toyota Camry feel loose, noisy, or unsettled even when the tires and struts look fine. The symptoms may include a clunk over bumps, steering that wanders during braking, or visible cracking around the rubber where the control arm attaches to the subframe. Because several suspension parts can produce similar symptoms, diagnosis matters before anything is taken apart.
This guide explains how to replace control arm bushings Toyota Camry models with a cautious, general method. Camry suspension designs vary by generation and trim, and some versions use a bushing that can be pressed out while others are more practical to repair by replacing the complete lower control arm. Use the factory repair information for your exact year to confirm the part, torque values, and bushing orientation.
You will learn how to support the car safely, remove the front lower control arm, separate and install a press-fit bushing, and tighten the suspension at its normal ride height. If the bushing is bonded tightly, the arm is badly corroded, or you cannot safely use a press, replacing the complete arm or using a qualified repair shop is the better choice.
At a glance
- Confirm the failed bushing before ordering parts; a complete control arm may be the correct repair for your Camry.
- Support the vehicle with jack stands and never rely on a floor jack while working underneath it.
- Final control-arm fastener torque should be applied with the suspension at normal ride height.
How to replace control arm bushings toyota camry safely
The procedure below describes the common front lower control arm arrangement on many Camry generations. It is not a substitute for the exact service manual: fastener sizes, bushing orientation, ball-joint construction, and whether the bushing is serviceable can differ. Compare the replacement part with the original before disassembly, and stop if the design does not match.
Tools you will need
- Floor jack and appropriately rated jack stands for lifting and supporting the vehicle
- Wheel chocks to prevent movement
- Socket set, breaker bar, and combination wrenches for suspension fasteners
- Torque wrench that covers the vehicle’s specified torque range
- Ball-joint separator or suitable removal tool, if the control arm must be separated from the steering knuckle
- Hydraulic shop press with correctly sized press cups or adapters for removing and installing the bushing
- Penetrating oil, paint marker, wire brush, and a measuring tool for marking orientation
- Replacement bushing or complete control arm matched to the Camry’s year, trim, and side
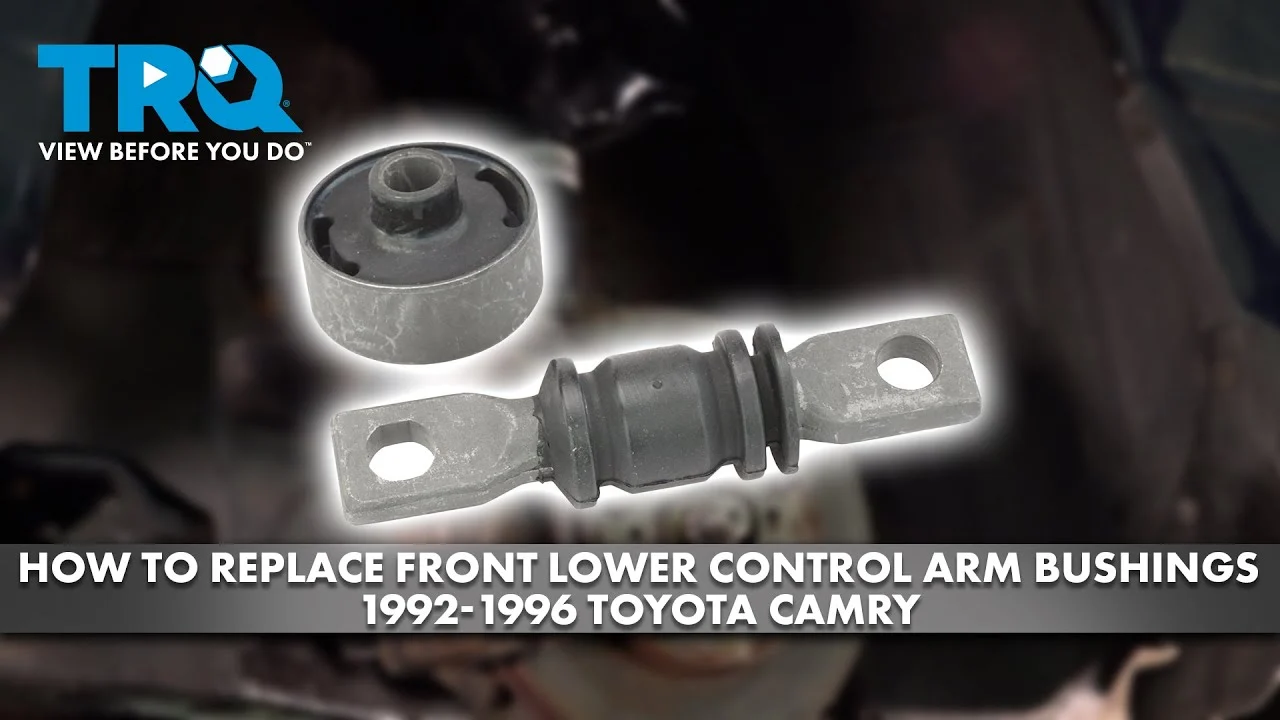
Step 1 Confirm the failed bushing and the correct replacement
Park on a level surface and inspect the suspected front corner before lifting the Camry. Look for rubber that is split, separated from its outer sleeve, crushed, or shifted out of the control-arm housing. Use a pry bar gently to load the arm while watching the bushing; excessive movement or a sharp knock is more meaningful than ordinary rubber flex.
Also inspect the ball joint, sway bar link, tie-rod end, strut, wheel bearing, and tire. A torn ball-joint boot or play at the wheel can create symptoms that resemble a control-arm problem. If the vehicle has separate front and rear control-arm bushings, identify which one is damaged rather than assuming both need replacement.
Check the parts catalog or factory information for your exact model year and drivetrain. Some Camrys have a separately replaceable bushing, while others use a control arm whose bushing is not intended to be serviced separately. A complete arm usually includes the bushing already installed and may also include a ball joint, but verify what is actually supplied.
Step 2 Record the original bushing position and prepare the vehicle
Before loosening anything, photograph the installed bushing from several angles. Mark the control arm and the bushing’s outer sleeve with a paint marker, and note any arrow, void, offset, or molded index mark. These features control how the rubber flexes, so a bushing installed in the wrong orientation can change suspension behavior or fail prematurely.
Loosen the wheel lug nuts slightly while the tire is still on the ground. Set the parking brake, place chocks behind the rear wheels, and follow the lifting points listed for your Camry. Raise the front of the vehicle, place jack stands under approved structural support points, and lower the car gently onto them.
Important
Shake the supported vehicle firmly before working underneath it. If it moves on the stands, lower it and correct the support immediately. Never place any part of your body under a vehicle supported only by a jack.
Remove the wheel and keep the lug nuts together. If you are working on only one side, compare the opposite side before disassembly; it can help you understand the position of brackets, washers, and spacers without relying on memory.
Step 3 Apply penetrating oil and disconnect attached components
Brush dirt from the exposed fasteners and apply penetrating oil where appropriate. Give it time to work, especially if the Camry has lived where road salt causes corrosion. Do not heat a fastener near a rubber brake hose, fuel component, sensor wire, or other heat-sensitive part.
Depending on the model, the lower control arm may connect to the steering knuckle through a ball joint and to the stabilizer bar through a sway bar link. Support the knuckle so it does not hang heavily from the brake hose, then disconnect only the components required to free the arm.
Hold the stud with the correct counterhold while loosening a ball-joint or sway-bar nut. If the ball joint uses a tapered stud, do not hammer directly on the exposed threads. Use a proper separator or strike the side of the steering-knuckle boss only where the service procedure allows it.
Keep ABS wiring and brake hoses routed naturally. A stretched wire, twisted hose, or damaged dust boot is a problem even if the control arm itself comes out successfully.
Step 4 Remove the control arm without losing alignment references
Support the control arm with the jack before removing its main pivot bolts. The arm may not be heavy, but it can drop or swing when the final fastener is removed. Remove the fasteners in a controlled order, keeping track of any washers, eccentric hardware, spacers, or brackets.
On some Camry versions, the control-arm bolts pass through a subframe or a separate bracket. Do not assume every bolt is interchangeable. Arrange the hardware by location and photograph each mounting point before taking it apart.
Once the arm is free, compare it with the replacement bushing. Measure or mark the old bushing’s position relative to the arm, including how far it sits from either edge. If the old rubber has collapsed, use the remaining outer sleeve and the factory orientation mark as references rather than measuring only the damaged rubber.
Helpful tip
If a fastener will not move with reasonable force, stop and reassess. Repeatedly forcing a seized bolt can round the head or damage the subframe. More penetrating oil, a better counterhold, or professional removal may be safer than escalating blindly.
Step 5 Press the old bushing out of the control arm
Clean the control arm around the bushing and place it squarely in the hydraulic press. Use a receiving cup large enough for the bushing to pass into, and position a pressing adapter against the bushing’s outer sleeve rather than the flexible rubber or the inner sleeve.
Check the arm’s support points before applying pressure. It must be supported close to the bushing housing so it does not bend. Keep your hands clear, stand out of the line of force, and increase pressure gradually.
A bushing that suddenly releases can move the arm or adapter unexpectedly.
If the bushing will not move, confirm that you are pressing in the correct direction and that a retaining lip, snap ring, or other feature is not present. Do not cut into the control arm. If cutting is permitted by the repair instructions for the old sleeve, it should be done only with suitable protection and careful control; damaging the arm makes the assembly unsafe.
After removal, inspect the bushing bore. Remove rust and residue with a wire brush, but do not enlarge or gouge the housing. The new bushing should fit firmly and evenly; a loose or visibly damaged bore is a reason to replace the arm.
Step 6 Align and press in the new bushing
Compare the new bushing with the old one before pressing. Transfer the orientation mark if necessary, and identify any voids in the rubber, offset center sleeve, arrow, or flat. These features must face the same direction specified by the manufacturer, not simply match the direction that seems visually convenient.
Support the control arm close to the bushing housing and press on the new bushing’s outer sleeve. Never press on the inner sleeve to force the bushing into the arm; doing so can tear the rubber or displace the sleeve. Keep the bushing and arm square throughout the operation.
Press until the specified seating depth or shoulder position is reached. If the service information gives a measurement, use it. Otherwise, compare all sides carefully with the original reference and make sure the bushing is evenly seated, not cocked, pinched, or protruding farther on one side.
A useful way to approach how to replace control arm bushings toyota camry is to check your progress after each stage.
Do not grease a rubber bushing unless the manufacturer specifically calls for a compatible lubricant. Petroleum products can damage some rubber compounds, and lubricant can allow a bushing to shift in its housing. A clean, dry press fit is commonly correct.
Step 7 Reinstall the control arm and reconnect the suspension
Guide the arm into position without forcing it against the subframe. Install the original hardware in its recorded locations and start every fastener by hand. If a bolt does not align, use a jack under the arm to adjust its height rather than prying against a brake hose, sensor, or ball-joint boot.
Reconnect the ball joint, sway bar link, and any brackets that were removed. Inspect the ball-joint taper and mounting surfaces for dirt or damage before tightening. A tapered stud should seat in its taper; the nut should not be used to pull a misaligned joint into place.
At this stage, snug the control-arm pivot bolts but do not apply their final torque with the suspension hanging at full droop. Tightening a bonded rubber bushing in that position twists it at normal ride height, which can shorten its life and affect ride height or handling.
Step 8 Torque the fasteners at normal ride height
Use the method specified for your Camry to simulate normal ride height. Depending on access, this may mean placing the wheel back on and lowering the vehicle onto ramps, using a drive-on lift, or raising the control arm with a jack until the suspension reaches the manufacturer’s reference position. Never place a jack under a location that could slip or damage the arm.
With the suspension supported at its normal position, tighten the control-arm pivot fasteners to the exact factory specifications. Torque ball-joint, sway-bar, and wheel fasteners as specified as well. Some suspension fasteners are torque-to-yield or specified for replacement; do not reuse them if the repair information says they are one-time-use.
Reinstall the wheel and tighten the lug nuts in a star pattern to the vehicle’s specified torque. Lower the car fully, remove the chocks, and confirm that no tools, stands, or loose hardware remain under or around the vehicle.
Step 9 Inspect the repair before driving
Turn the steering from lock to lock while the vehicle is stationary and listen for contact. Look behind the wheel for a brake hose or ABS wire that is stretched, rubbing, or routed incorrectly. Confirm that the bushing remains centered and that all fastener heads and nuts are seated.
Push down on the front corner several times and listen for a new knock. A small amount of normal rubber movement is expected, but a sharp click, metal-to-metal contact, or visible shift indicates that the repair needs inspection before driving.
Take a slow test drive on a quiet road. Begin with gentle braking and low-speed turns, then listen for clunks and note whether the steering remains centered. Avoid assuming that a quiet test drive proves the alignment is correct; suspension work can alter toe or steering-wheel position.
What makes a Camry control-arm bushing fail?
A control-arm bushing is a rubber-and-metal pivot that allows the suspension arm to move while limiting unwanted movement. It absorbs vibration between the control arm and the subframe, but rubber eventually hardens, cracks, tears, or separates from its sleeve.
Age, heat, road salt, potholes, curb impacts, and oil contamination can all contribute to failure. A bushing can look acceptable from outside while allowing excessive movement under braking, so symptoms and a loaded inspection are more useful than appearance alone.
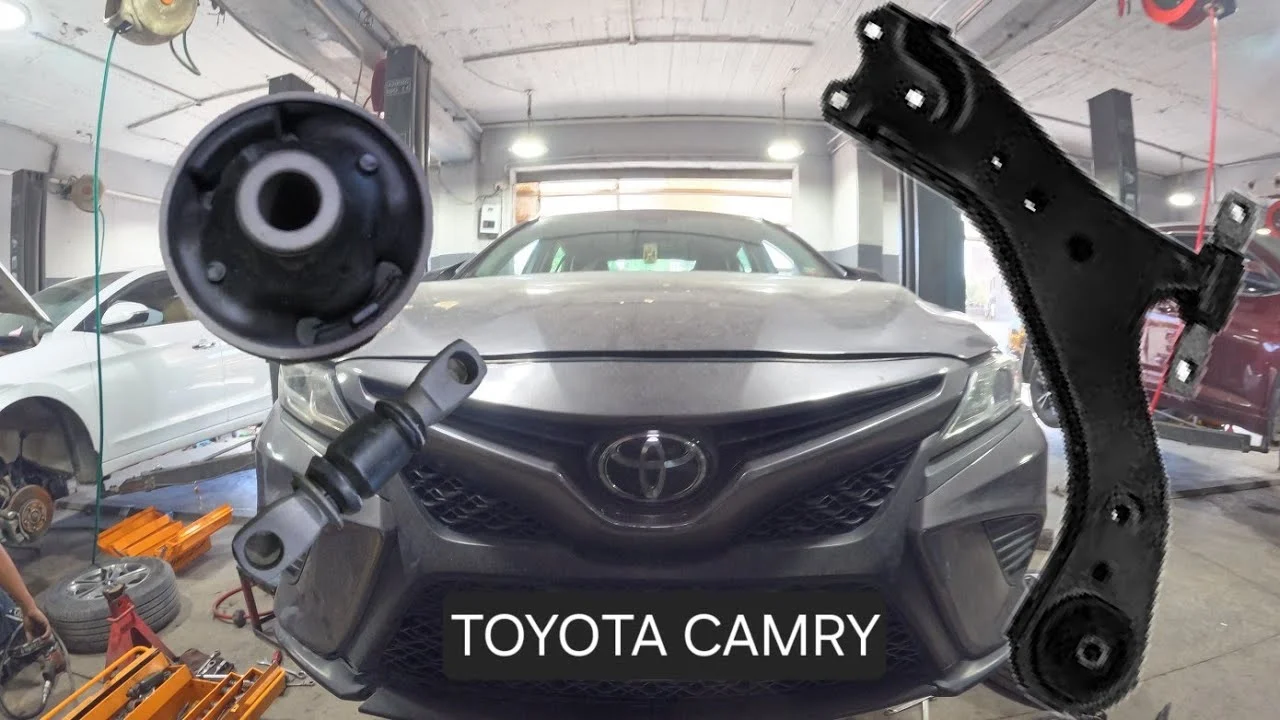
Replace the bushing or the complete control arm?
Pressing in a bushing can preserve a good original control arm, but it requires a suitable press, accurate orientation, and an arm with an undamaged bore. Replacing the complete arm is often simpler when the ball joint is worn, the arm is bent or heavily rusted, or the bushing is not sold as a service part.
For many beginners, the complete arm is the safer practical method if it is a correct, quality part and the installation still follows the required torque procedure. A low-quality arm with an incorrectly positioned bushing is not an improvement over a properly repaired original arm.
Why the alignment still matters
The control arm helps locate the wheel in relation to the body. Even if the arm returns to the same general position, a new bushing can change the wheel’s caster or toe enough to affect tire wear and steering feel.
After replacing a front control-arm bushing, have the alignment checked, especially if the steering wheel is off-center, the car pulls, or the old bushing was severely displaced. An alignment check is also important when both sides have different suspension conditions.
How to check the finished repair
Verification should combine a visual inspection, a stationary movement check, and a controlled road test. If you are learning how to replace control arm bushings Toyota Camry vehicles, the final checks are as important as pressing the new part because a correctly installed bushing can still be paired with a loose fastener or misrouted wire.
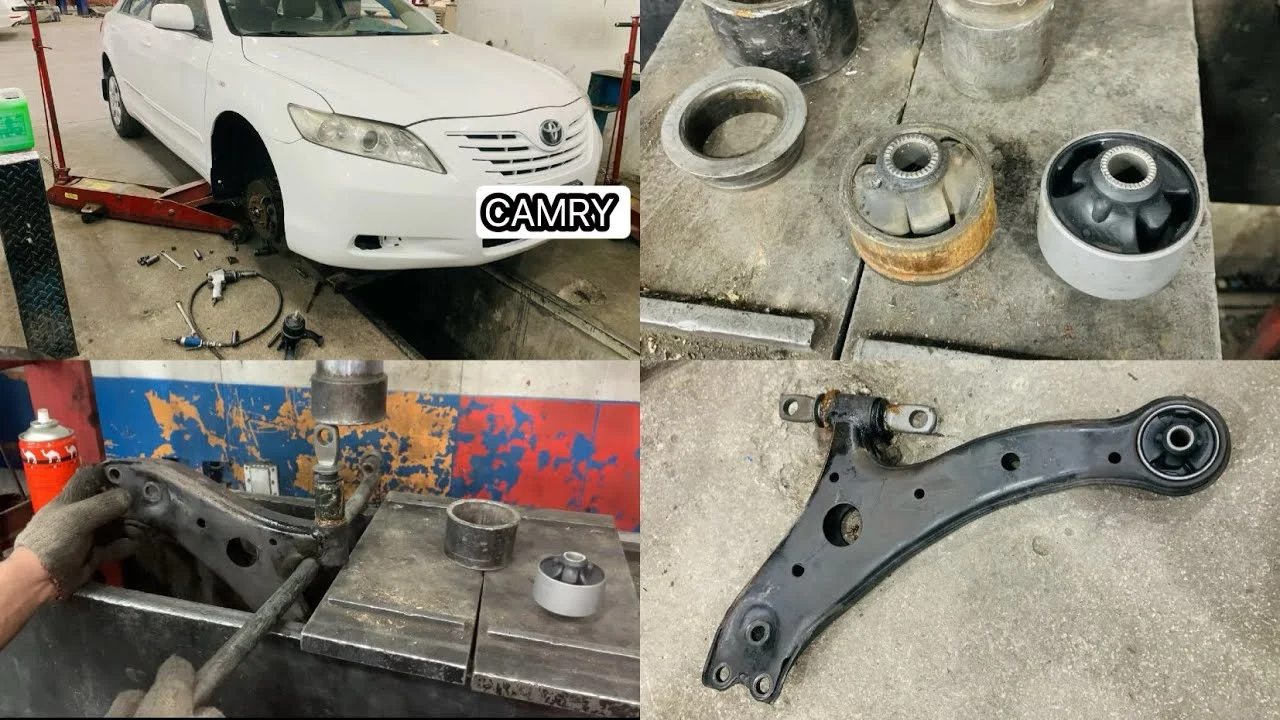
- Confirm the bushing’s orientation and seating depth against the original mark or factory instructions.
- Check that every removed fastener is present and tightened to the correct specification.
- Make sure the ball-joint boot, brake hose, and ABS wiring are undamaged and free from contact.
- Verify that the wheel lug nuts are torqued and the tire is fully seated.
- Listen for clunks during slow turns, light braking, and small bumps.
- Check for pulling, an off-center steering wheel, or abnormal tire scrub during the test drive.
Check your result
A successful repair leaves the bushing evenly seated, the suspension quiet over ordinary bumps, and the vehicle stable under gentle braking. Any new metal-on-metal noise or sudden steering change requires another inspection before normal driving.
Common problems and safer alternatives
Many failed attempts come from treating a suspension bushing like a simple bolt-on part. The press force, installation angle, and final tightening position all matter, and corrosion can make an otherwise straightforward job unsafe.
| Symptom | Likely checks |
|---|---|
| Clunk over bumps | Loose pivot or sway-bar hardware, a poorly seated bushing, ball-joint play, or contact from a misrouted component |
| Pulling or an off-center wheel | Alignment, incorrect bushing orientation, bent arm, or unequal condition between the two sides |
| Bushing shifts in its housing | Damaged control-arm bore, wrong part, incorrect press direction, or inadequate seating |
| Brake hose or ABS wire is tight | Incorrect routing or a knuckle left unsupported during removal |
If the old bushing is seized and you do not have a stable hydraulic press, do not substitute a hammer and improvised sockets under a raised vehicle. A parts store press service, machine shop, or suspension repair shop may be able to remove and install the bushing while the arm is off the car.
Stop and seek qualified help if the subframe is badly corroded, a fastener spins inside damaged sheet metal, the ball joint will not separate without excessive force, or you are unsure whether the car is securely supported. Suspension failure can cause loss of control, so uncertainty is a valid reason to hand off the repair.
Frequently asked questions
Can I replace only one control-arm bushing?
Yes, if the other bushing and the control arm are in good condition and the replacement part is serviceable. However, compare both sides and consider the age of the rubber; replacing a complete arm may be more appropriate if several components are worn.
Do I need a wheel alignment after replacing a bushing?
An alignment check is strongly recommended after front suspension work. It is especially important if the steering wheel is no longer centered, the vehicle pulls, or the old bushing had significant movement.
Can I tighten the control-arm bolts with the car on jack stands?
You can install the bolts while the suspension hangs, but final torque for bonded rubber bushings should normally be applied at normal ride height or at the manufacturer’s specified suspension position. This prevents preloading and twisting the rubber.
What if my Camry has a bushing that will not press out?
Confirm the pressing direction, support the arm correctly, and check for a retaining feature or corrosion. If it still requires excessive force, replace the complete arm or have a shop handle the press work rather than risking a bent arm.
Should both front control-arm bushings be replaced together?
Not automatically. Replace the failed part, but inspect the opposite side and the other bushing closely. Matching repairs on both sides can improve consistency when both components have similar age and wear, but the exact parts and condition should guide the decision.
Finish with a safe inspection and alignment check
Learning how to replace control arm bushings Toyota Camry models requires more than removing and pressing a rubber part. The correct bushing, accurate orientation, safe support, careful press setup, and ride-height torque procedure all affect the result.
After the repair, verify the hardware, wiring, ball joint, and bushing position, then arrange an alignment check if needed. If corrosion, damaged mounting points, or a stubborn press fit makes the job uncertain, using a complete control arm or a qualified technician is the responsible next action.






