
How to Replace Lower Control Arm Toyota Camry Essential Guide
A worn lower control arm can make a Toyota Camry feel loose, noisy, or unsettling over bumps. You may hear a dull clunk when braking or turning, notice uneven tire wear, or see the car pull slightly even though the tires are properly inflated. Because the control arm connects the front wheel assembly to the body, its condition affects both ride control and alignment.
Replacing the arm is achievable for a careful home mechanic, but it is not a job to rush. The vehicle must be supported securely, the correct replacement part must match the Camry’s year and trim, and fasteners that locate the suspension need to be tightened correctly. Some versions also require removing or loosening the sway bar link or separating a ball joint.
This guide explains how to replace lower control arm Toyota Camry components on common front-wheel-drive models, while allowing for year-to-year differences. You will learn how to identify the right part, remove the old arm, install the new one without preloading its rubber bushing, and check the result before arranging a wheel alignment. Always use the repair manual for your exact year when torque values or component details differ.
At a glance
- Support the Camry by its approved lifting points and never rely on a jack alone.
- Tighten pivot-bolt hardware with the suspension at normal ride height when the service instructions require it.
- A professional four-wheel alignment is the final check after control-arm replacement.
How to Replace Lower Control Arm Toyota Camry Safely
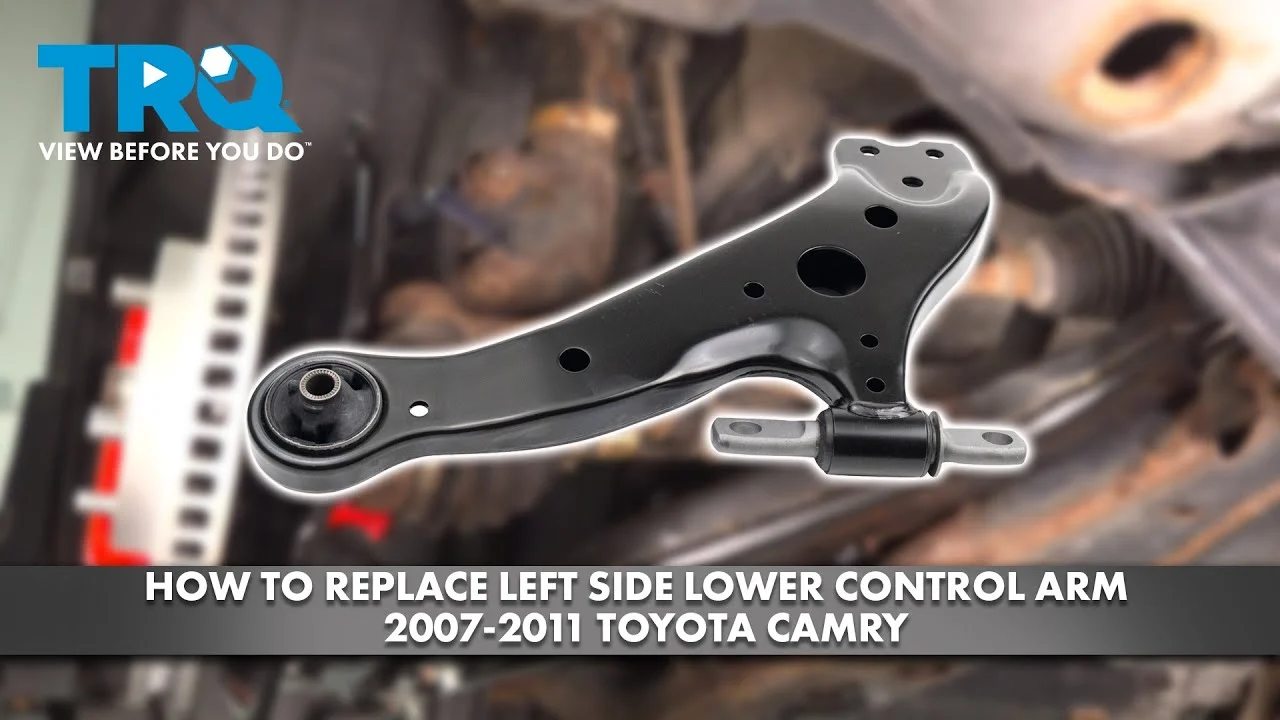
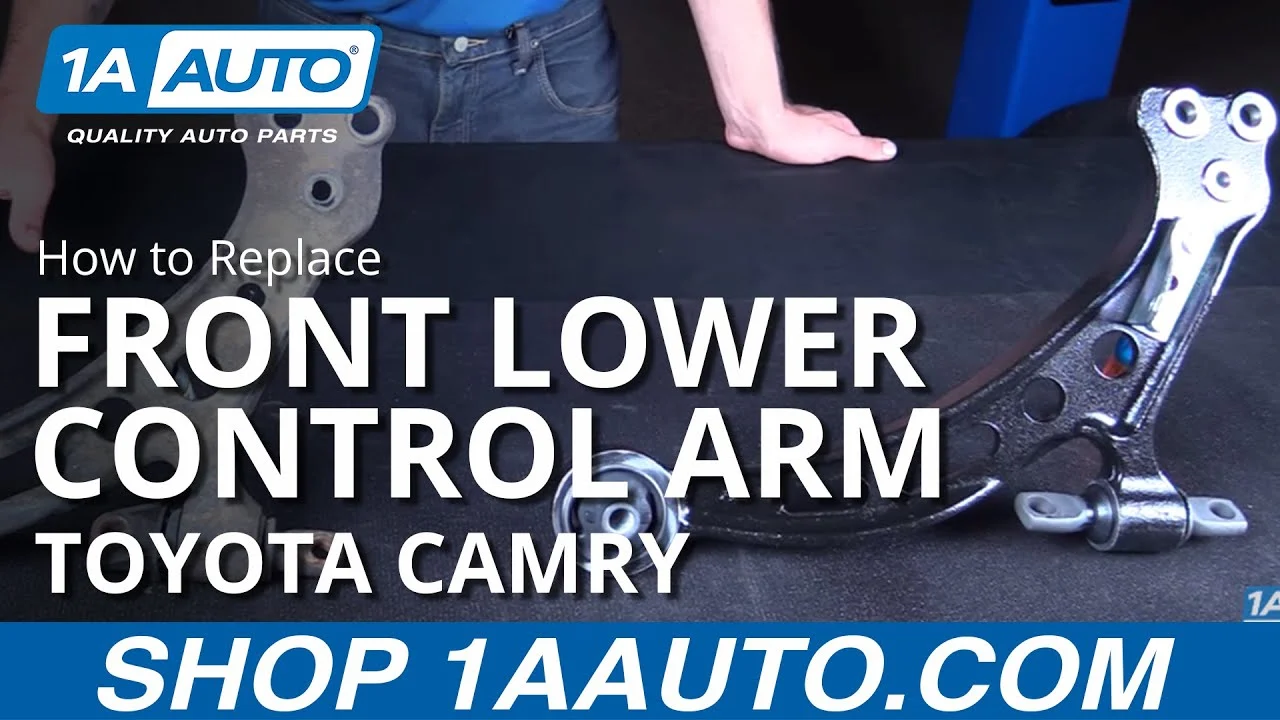
The lower control arm is the metal link between the Camry’s front subframe and steering knuckle. Its inner end usually uses one or more pivot bushings, while its outer end connects to the steering knuckle through a ball joint or a separate joint, depending on the model year and replacement design.
The procedure below describes a typical front lower control arm replacement. Toyota changed suspension layouts, fastener arrangements, and ball-joint designs across Camry generations, so compare the new arm with the old one before removing anything. If the replacement arm does not match the original mounting points, stop and verify the part number rather than forcing it into place.
Tools you will need
- Floor jack and two properly rated jack stands for lifting and supporting the front of the Camry
- Wheel chocks to prevent the rear wheels from moving
- Socket and wrench set, including the sizes specified for your model
- Breaker bar for loosening stubborn suspension fasteners
- Torque wrench for final tightening
- Ball-joint separator or suitable puller, if the joint must be separated
- Penetrating oil for corroded fasteners
- Replacement lower control arm and any single-use nuts or bolts listed by the service manual
- Wire brush, pry bar, and a small hammer for cleaning and freeing parts
- Optional: paint marker or phone camera for recording the original hardware position

Step 1 Confirm the diagnosis and buy the matching control arm
Before lifting the car, verify that the lower control arm is actually the source of the problem. Look for torn or separated control-arm bushings, a bent arm, a loose ball joint, or movement that is clearly visible when the wheel is rocked. A clunk can also come from a sway bar end link, strut mount, tie-rod end, or loose brake hardware, so do not replace the arm based on noise alone.
Check the vehicle identification number, model year, engine, and whether the part is for the left or right side. Some replacement arms include a new ball joint and bushings; others reuse a separate ball joint or require transferring hardware. Lay the new arm beside the old one and compare its shape, bushing locations, mounting holes, and ball-joint connection.
If the ball joint has looseness, a torn dust boot, or corrosion around its stud, replacing the complete arm may be preferable when the new arm includes a ball joint. If the new arm does not include one, follow the exact instructions for removing and installing the separate joint. Do not reuse a damaged joint simply because the arm itself looks sound.
Step 2 Prepare a level work area and loosen the wheel fasteners
Park on a firm, level surface. Set the parking brake, place chocks behind the rear wheels, and keep the transmission in Park for an automatic transmission or in first gear for a manual transmission. Loosen the front wheel lug nuts slightly while the car is still on the ground, but do not remove them yet.
Read the jack-stand instructions and your Camry owner’s manual before lifting. The stands must support approved structural points, not thin floor pan metal or suspension pieces that can move. Keep your hands, tools, and loose clothing away from areas that may shift as the vehicle rises.
Important
Never work under a Camry supported only by a floor jack. Lift one side or the front of the vehicle as appropriate for your setup, place rated jack stands securely, and give the body a firm push before going underneath.
Step 3 Lift the Camry and remove the wheel
Use the floor jack at the lifting point specified for your Camry, then position the jack stands at the approved support points. Lower the vehicle slowly until its weight rests on the stands, and leave the jack lightly positioned as a backup only if it does not interfere with your work.
Remove the loosened lug nuts and the wheel. Slide the wheel under a solid part of the vehicle as an additional backup, but do not treat it as a substitute for jack stands. Turn the steering wheel only if needed for access, and remember to return it to a neutral position before final checks.
With the wheel removed, inspect the brake hose, ABS sensor wire, tie-rod end, strut, sway bar link, and the control-arm mounting points. Take a photo of the original arrangement. This makes it easier to recognize where spacers, washers, clips, or brackets belong during reassembly.
Step 4 Support the steering knuckle and identify every connection
Place a second jack under the steering knuckle or another approved point that supports the suspension without crushing a brake component. Apply only enough pressure to prevent the knuckle from dropping when the control arm is disconnected. The brake hose and ABS wire should never be used to hold the knuckle’s weight.
Trace the control arm from its outer connection at the steering knuckle to its inner pivot points at the subframe or body. Identify the pivot bolt or bolts, the outer ball-joint nut, and any sway bar link or bracket attached to the arm. The exact arrangement differs by Camry generation, so compare what you see with a factory repair diagram for your year.
Spray penetrating oil on exposed threads and allow it to work while you inspect the fasteners. Do not spray it onto brake friction surfaces. If a fastener is heavily rusted, rounded, or twisting the surrounding metal, stop before applying extreme force; replacing a damaged subframe or knuckle is far more difficult than arranging professional help.
Step 5 Disconnect attached links, brackets, and the ball joint
Remove any brake-hose or ABS-wire brackets attached to the control arm, using care not to bend the line or pull the wire. If the sway bar end link attaches to the arm, remove its nut while holding the stud with the specified tool. Some studs spin when the nut is loosened; forcing the nut without controlling the stud can damage the link.
Next, remove the ball-joint retaining nut or the bolts that secure the joint, depending on the design. Leave the nut threaded on a few turns if you are separating a tapered stud with a puller; this prevents the knuckle from dropping suddenly when the taper releases. A useful way to approach how to replace lower control arm toyota camry is to check your progress after each stage.
Use a ball-joint separator or puller when possible. Striking the side of the steering knuckle near the tapered hole can release a stuck taper, but do not strike the threaded stud, the ball-joint housing, or the ABS sensor. Avoid wedging a pry bar against the brake rotor or sensor wiring.
Once the joint is free, keep the knuckle supported. If the brake hose or ABS wire becomes taut, stop and reposition the support before continuing. A successful separation leaves the steering knuckle hanging safely with no strain on either line.
Step 6 Remove the control-arm pivot hardware
With the outer connection free, remove the inner pivot bolt or bolts. Use a breaker bar for removal if necessary, but support the arm as the last fastener comes out. The arm can shift or drop when its weight is released, especially if the bushing is torn and no longer holding it in its original position.
On some Camry models, an inner bolt passes through a captive nut or a nut that is difficult to reach. Keep a wrench on the nut if the design requires it, and note the order of washers and spacers. Do not use an impact tool to spin a captive nut that is starting to turn inside the subframe.
Lower the old arm and compare it with the replacement one. Look for differences in bushing orientation, ball-joint angle, mounting-hole spacing, and any attached brackets. If the new arm is a different style, confirm that it is specifically listed for the exact vehicle before proceeding.
Step 7 Install the new arm without damaging its bushings
Position the new lower control arm in the same direction as the old one. Start every pivot bolt and nut by hand, then connect the ball joint and any sway bar link. Hand-starting the threads helps prevent cross-threading and leaves enough movement to align the holes.
Do not fully tighten the pivot-bushing bolts while the suspension hangs at full droop unless the service manual explicitly instructs you to do so. A rubber bushing is bonded to its inner sleeve; tightening it with the arm hanging can twist the rubber when the car returns to the ground. That preload can shorten bushing life and alter ride height.
For the usual bonded-rubber design, snug the hardware while the components remain aligned, then use the jack under the knuckle to raise the suspension to approximately normal ride height before final torque. Use the manufacturer’s specified torque values and tightening sequence for your year. Do not substitute a generic torque value from a different Camry generation.
Helpful tip
When the arm will not line up, adjust the support under the steering knuckle a small amount rather than pulling the joint into place with the fastener. A bolt should pass through aligned holes without being used as a forcing tool.
Step 8 Torque the connections and reinstall the wheel
Once the control arm is aligned, tighten the pivot hardware, ball-joint connection, sway bar link, and any brackets to the exact specifications in the repair manual. Some suspension nuts and bolts are designated as one-time-use parts, particularly prevailing-torque nuts or specific flange bolts. Replace them when the manual calls for replacement.
Hold the bolt head or stud as specified while tightening the nut. Confirm that the ball-joint stud is fully seated and that the taper is not spinning. Check that the control-arm bushings are seated squarely, the brake hose is not twisted, and the ABS wire follows its original routing.
Reinstall the wheel and thread the lug nuts by hand. Tighten them in a star pattern only enough to seat the wheel, then lower the Camry until the tire contacts the ground and torque the lug nuts to the vehicle’s specified wheel torque. Do not rely on an impact gun’s setting for final tightening.
Step 9 Lower the vehicle and perform a stationary inspection
Remove the wheel from beneath the vehicle, raise the Camry slightly, remove the jack stands, and lower it fully. Roll the car a short distance forward and backward, then bounce the front suspension gently by pressing on the body above the repaired side. This allows the suspension to settle.
Look behind the wheel for anything touching the tire, rotor, strut, axle, or control arm. Confirm that the wheel sits normally, the steering wheel is not bound, and no brake or ABS wire is stretched. Listen for a sharp metallic click when the vehicle settles; that can indicate loose hardware or a component that is not seated correctly.
Recheck accessible fasteners after the suspension has settled if the service instructions call for a ride-height torque check. Do not crawl underneath unless the vehicle is again supported safely. A quick visual check from outside is appropriate only for connections that are visible without placing any part of your body under an unsupported vehicle.
Step 10 Road-test cautiously and arrange an alignment
Start with a slow test in a driveway or empty parking area. Apply the brakes gently, turn the steering wheel through a modest range, and listen for clunks, scraping, or repeated popping. The vehicle should track predictably, and the steering should return toward center after a turn.
Understanding how to replace lower control arm toyota camry also means recognizing the limits of the method.
If everything feels normal, drive at low speed on a quiet road. Avoid hard braking, potholes, and highway speeds until the repair has passed this first check. Stop immediately if the Camry pulls strongly, the steering wheel is suddenly crooked, a wheel shifts, or a loud knock appears.
A control arm can change camber or toe, which are wheel-alignment angles. Arrange a professional alignment as soon as practical, especially if the old arm was bent, the tire showed uneven wear, or the steering wheel is no longer centered. Ask the shop to inspect the opposite side and the related ball joint, tie rod, and sway bar link while the car is on the rack.
What changes between Toyota Camry model years?
The broad process is similar, but the details are not universal. Camry generations may use different control-arm shapes, ball-joint mounting methods, bushing arrangements, and fastener sizes. A front control arm for one year can look nearly identical to another while using a different ball-joint connection or pivot-bolt length.
Some replacement arms are sold as a complete assembly with bushings and a ball joint already installed. Others are bare arms that require a separate ball joint or reuse an existing joint. Read the parts description carefully and compare all mounting points before opening the packaging or removing the old component.
Should you replace one side or both?
Replace the damaged side if the opposite control arm is in good condition and passes inspection. Replacing both sides can make sense when both bushings are cracked, the vehicle has high mileage, or corrosion has affected the suspension, but a good arm does not need replacement solely because the other side failed.
Inspect both sides for torn bushings, bent metal, loose ball joints, and uneven tire wear. If one arm failed after an impact, also inspect the wheel, tire, steering knuckle, strut, subframe, and tie rod for impact damage.
When is a home repair not a good choice?
Seek professional help if you cannot support the Camry securely, cannot identify the correct lifting points, or find severe rust around the subframe and suspension mounts. Stop if a fastener is rounded, a captive nut is spinning, or the steering knuckle cannot be supported without straining the brake hose or ABS wire.
Professional assistance is also sensible when the car has collision damage, the control arm is not the only damaged suspension part, or you lack a torque wrench and a way to obtain an alignment. The repair is safety-related, so uncertainty about a critical connection is a valid reason to stop.
How to confirm the repair is complete
A successful replacement is more than a quiet first drive. Use the following checks before considering the job finished, then have the alignment measured rather than judging the wheel position by eye alone.
- The replacement arm matches the original mounting layout and the exact Camry application.
- All pivot bolts, ball-joint fasteners, sway bar hardware, and brackets are installed.
- Required one-time-use nuts or bolts have been replaced.
- Fasteners have been tightened with a calibrated torque wrench to the correct model-year specifications.
- The brake hose and ABS wire are routed as before and have adequate clearance.
- The wheel is torqued evenly, and no tool or support remains under the vehicle.
- The car does not pull, wander, scrape, or produce a new clunk during a cautious test drive.
- A wheel alignment has been completed or scheduled after the suspension repair.
Check your result
With the Camry parked on level ground, compare the repaired side with the other side from behind the wheel. The control arm should sit naturally, the tire should have clearances all around, and no bushing sleeve or bolt should appear visibly crooked.
Common problems after lower control-arm replacement
Most post-repair symptoms point to a small group of causes. Do not keep driving to “see if it improves” when the symptom involves steering control, wheel movement, or a loud impact noise.
| Symptom | Likely cause or next check |
|---|---|
| Steering wheel is off-center | Alignment changed, or the arm is not seated correctly; verify installation and schedule an alignment. |
| Clunk over bumps | Loose pivot or ball-joint hardware, sway bar link, or another worn suspension part; recheck torque and inspect the surrounding components. |
| Vehicle pulls to one side | Alignment, tire-pressure difference, bent component, or unequal suspension condition; stop if the pull is severe. |
| Squeak or harsh ride | Rubber bushing was tightened at full suspension droop, or the bushing is defective or misaligned. |
| ABS or traction-control warning | ABS wire or sensor was damaged, disconnected, or routed incorrectly; inspect the connector and wiring before driving normally. |
What if the pivot bolt will not line up?
Do not hammer the bolt through or use the bolt to draw the control arm into position. Check that the arm is facing the correct direction, support the knuckle at the proper height, and make sure the opposite pivot is not binding. Small adjustments to the support height usually align the holes.
What if the ball-joint stud spins?
The stud may not be seated in its tapered hole, or the retaining nut may be damaged. Apply the seating pressure specified by the repair instructions and use the correct method to hold the stud. If the taper or threads are damaged, replace the affected hardware or joint rather than relying on a partially tightened nut.
How should the old part and cleanup be handled?
Collect removed nuts, clips, and packaging so none are left near the brakes or driveway. Take the old control arm to an automotive recycler or parts store that accepts suspension components, and dispose of used penetrating-oil materials according to local rules. After the alignment, recheck tire wear periodically and pay attention to new noises.
Lower control arm replacement FAQs
These answers address common beginner concerns, but the repair manual for the exact Camry remains the authority for torque values and component-specific instructions.
Can I replace a Toyota Camry lower control arm without an alignment?
You can physically install the arm without an alignment machine, but you should not treat the repair as complete without checking alignment. A changed control arm can alter toe or camber, causing poor handling and rapid tire wear even when the installation looks correct.
Do I need to replace the ball joint with the control arm?
Only if the replacement assembly includes it, the existing joint is damaged, or the service procedure requires replacement. Inspect the dust boot, stud, and joint for looseness. A separate ball joint may be reusable if it is within specification and the repair manual permits reuse.
Why must the control-arm bushing be tightened at ride height?
Many rubber bushings work by twisting within their bonded rubber material rather than freely rotating. Tightening them while the suspension hangs can leave the rubber pre-twisted at normal ride height, which can cause premature failure or an abnormal ride.
Can I use an impact wrench on the control-arm bolts?
An impact wrench can help remove stubborn hardware, but use caution during installation. Start threads by hand and use a torque wrench for final tightening. An impact tool can over-tighten a bolt, damage a bushing, or spin a captive nut inside the subframe.
How do I know whether the left or right arm is bad?
Inspect both arms for torn bushings, a bent body, loose ball joints, and movement during a controlled suspension check. Noise can travel through the subframe, so the side that sounds loudest is not always the damaged side. A technician can confirm play with the vehicle safely lifted.
Finish the repair with a measured alignment
Learning how to replace lower control arm Toyota Camry parts means handling more than the removal and installation. The safe result depends on correct support, a matching component, properly seated connections, ride-height tightening where required, and a cautious inspection before normal driving.
After the test drive, have the Camry’s alignment checked and keep the alignment printout if the shop provides one. If the car still pulls, clunks, or shows a warning light, stop driving it normally and have the control arm, ball joint, wiring, and related suspension components inspected before the problem becomes a handling hazard.






