
How to Tighten Lower Control Arm Bolts Safely and Correctly
Knowing **how to tighten lower control arm bolts** is not just a matter of making the bolts very tight. The way you support the suspension during final tightening can affect bushing life, ride quality, and suspension movement. This matters most when the control arm uses bonded rubber bushings.
A common mistake during DIY suspension work is tightening the inner pivot bolts while the wheel and control arm hang at full droop. When the vehicle goes back on the ground, the rubber bushing may remain twisted at normal ride height. That constant twist can shorten its life and may cause noise or poor movement.
The safer method is simple. Install the control arm and snug the hardware first. Then bring the suspension close to its normal loaded position before applying final torque to rubber-bushing pivot bolts. Always use the torque value and tightening procedure listed for your exact vehicle.
In professional suspension work, one lesson matters more than almost anything else: **do not guess suspension torque specifications**. Two control arms that look almost identical may use different bolt sizes, torque values, torque-plus-angle procedures, or one-time-use fasteners.
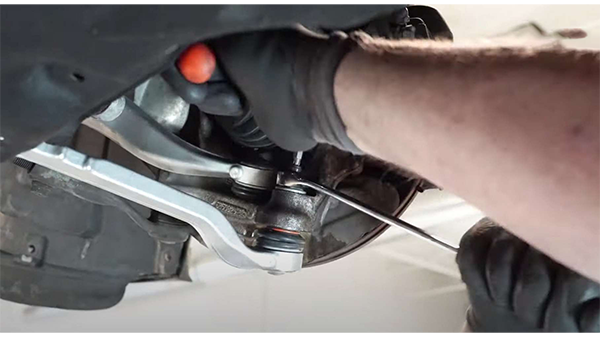
Why Lower Control Arm Bolts Must Be Tightened Correctly
The lower control arm connects the wheel-side suspension parts to the vehicle’s frame or subframe. Its inner mounting points often use large bolts that pass through bushings. These bolts must hold the arm in place while still allowing the suspension to move as designed.
Learning **how to tighten lower control arm bolts** correctly helps prevent movement at the mounting points. A loose bolt may let the arm shift, knock, or change wheel alignment. An improperly tightened rubber-bushing bolt can also place constant twist in the bushing.
The goal is not maximum tightness. The goal is the **correct clamping force at the correct suspension position**. That is why a torque wrench and vehicle-specific service information matter.

- ✦ Keeps the control arm secure
Correct torque creates enough clamping force to keep the control arm mounting hardware from moving during normal driving.
- ✦ Protects rubber bushings
Final tightening at normal ride height helps bonded rubber bushings rest near their neutral position.
- ✦ Supports stable alignment
A control arm that shifts at its mounts can change toe, camber, or caster depending on the suspension design.
- ✦ Reduces noise
Correctly secured suspension hardware can help prevent clunks or knocks caused by movement at a mounting point.
Why Rubber Bushings Change the Tightening Procedure
Many control arm bushings have an inner metal sleeve bonded to rubber. When the mounting bolt clamps that sleeve in place, much of the suspension movement comes from the rubber twisting rather than the sleeve freely spinning.
If you tighten this type of bushing with the arm hanging far below ride height, the rubber may already be twisted when the vehicle rests on its tires. That is why many service procedures call for final tightening at curb height or a specified suspension position.
- ✦ Important exception
Not every suspension joint uses a bonded rubber bushing. Spherical bearings, some aftermarket bushings, and other designs may have different procedures. Follow the instructions for the actual parts on the vehicle.
Tools You Need to Tighten Lower Control Arm Bolts
Before working under the vehicle, gather the correct tools. Lower control arm fasteners can require high torque, so a small general-purpose torque wrench may not have enough range.
Check your service information before starting. It should tell you the socket size, torque specification, whether an angle-tightening step is required, and whether the bolt or nut must be replaced.
For anyone learning **how to tighten lower control arm bolts**, good support equipment is just as important as the wrench. Never depend on a hydraulic floor jack alone while you are under a vehicle.
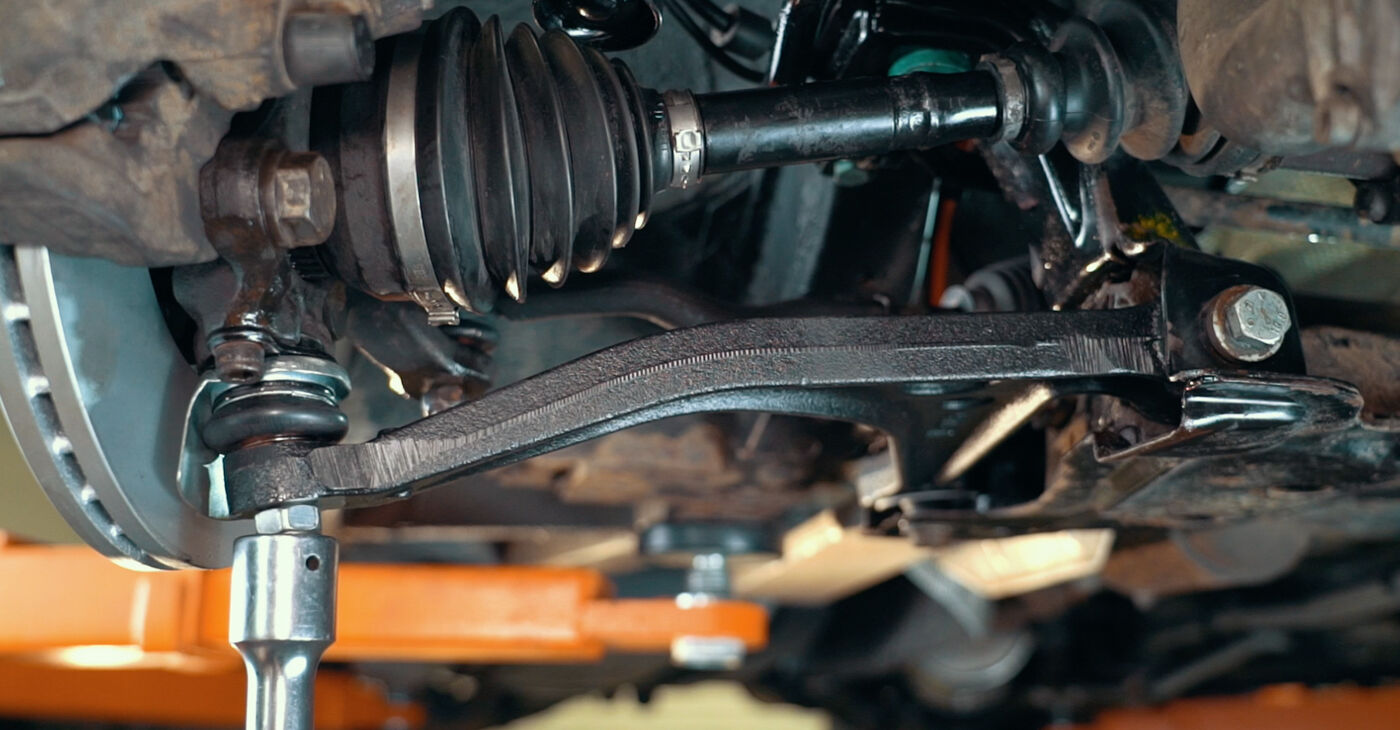
- ✦ Floor jack
Use a jack with enough capacity for the vehicle.
- ✦ Jack stands
Support the vehicle only at approved lifting or support points.
- ✦ Socket and wrench set
Use correctly sized six-point tools when possible to reduce the risk of damaging fastener heads.
- ✦ Torque wrench
Choose a calibrated torque wrench whose working range covers the required specification.
- ✦ Breaker bar
A breaker bar can help with initial loosening or positioning without abusing the torque wrench.
- ✦ Second jack or suitable support
This may be used under the control arm or hub area to bring the suspension toward normal ride height when the service procedure allows it.
- ✦ Service information
Use the factory service manual or trusted repair data for exact torque values and procedures.
- ✦ Paint marker
A paint marker is useful for marking alignment cams and for a visual check after final tightening.
Do You Need an Impact Wrench?
An impact wrench can save time when removing stubborn hardware, but it should not replace a torque wrench for final tightening. Impact tools can apply more or less torque than expected.
If you use an impact during assembly, stop before final torque. Finish the fastener by hand with the correct torque wrench or the specified torque-angle method.
How to Tighten Lower Control Arm Bolts Step by Step
The exact procedure differs between vehicles, but the basic process is similar on many cars, SUVs, and light trucks with rubber-bushed control arms. The steps below explain **how to tighten lower control arm bolts** without pretending that one torque value fits every vehicle.
Read the vehicle-specific repair procedure first. Some fasteners must be torqued with the vehicle resting on its wheels. Others can be tightened with the suspension supported at a specified measurement.

- ✦ Step 1: Park on a solid, level surface
Set the parking brake where appropriate, place the transmission in Park or in gear, and use wheel chocks.
- ✦ Step 2: Raise and support the vehicle
Lift the vehicle at approved points and place it securely on jack stands. Never work beneath a vehicle supported only by a floor jack.
- ✦ Step 3: Inspect the mounting hardware
Check the bolts, nuts, washers, sleeves, and mounting brackets. Replace damaged, badly corroded, stretched, or specified one-time-use hardware.
- ✦ Step 4: Install and snug the control arm bolts
Thread the hardware correctly and make it snug enough to hold the control arm in position. Do not apply final torque to bonded rubber bushing bolts yet unless the service procedure specifically tells you to.
- ✦ Step 5: Position the suspension at ride height
Use the method stated by the manufacturer. This may mean supporting the control arm or hub until the suspension reaches its normal loaded position, or placing the vehicle on ramps or an alignment-style lift.
- ✦ Step 6: Verify alignment cam positions
If the mounting bolt uses eccentric alignment cams, place them in their required position. Marks made before disassembly may help as a starting point.
- ✦ Step 7: Apply the specified torque
Set the torque wrench to the correct vehicle-specific value and tighten the fastener smoothly until the wrench indicates the target torque.
- ✦ Step 8: Complete any angle-tightening step
If the manufacturer specifies torque plus an additional angle, complete both stages exactly as directed. Do not replace an angle specification with a guessed torque value.
- ✦ Step 9: Recheck the repair
Confirm that each fastener is seated correctly, no tools remain underneath the vehicle, and no brake hose, ABS wire, or other component is stretched or trapped.
- ✦ Step 10: Check alignment
Get a wheel alignment when the repair or service information calls for one, especially if alignment cams were moved or a control arm was replaced.
How to Simulate Normal Ride Height
If the wheels must remain off the vehicle, a technician may carefully support the suspension from below until it reaches the specified ride-height position. The safest support point and measurement vary by suspension design.
Do not place a jack under a thin or weak part of the arm. Keep the main vehicle support on the jack stands. The secondary jack should position the suspension, not serve as the only thing keeping the vehicle in the air.
- ✦ Safer option when practical
Drive-on ramps or a four-post or alignment lift can keep the vehicle’s weight on the suspension while leaving access to the bolts.
Which Direction Should the Bolt Be Tightened?
When practical, hold the bolt head and apply final torque to the nut if the service manual specifies that method. Some designs require the opposite approach due to limited access or the way the fastener and bushing sleeve are designed.
Do not assume the nut is always the part that must turn. Follow the procedure for your vehicle, especially when special washers, cam bolts, prevailing-torque nuts, or coated fasteners are involved.
Why You Should Tighten Control Arm Bushings at Ride Height
This is one of the most important parts of **how to tighten lower control arm bolts**. With many bonded rubber bushings, the bolt clamps the inner sleeve so it cannot freely rotate. Suspension travel then twists the rubber around that sleeve.
Imagine tightening the bushing while the control arm hangs down. When you lower the vehicle, the arm rotates upward to its normal position. The rubber may stay twisted even though the car is sitting still.
Tightening at the correct loaded position puts the bushing closer to its natural resting point during normal driving. It can then twist in both directions as the wheel moves over dips and bumps.

- ✦ Less static bushing twist
The rubber starts closer to its intended neutral position.
- ✦ Better suspension movement
The bushing has more usable movement in both compression and rebound.
- ✦ Lower risk of early bushing damage
Reducing constant rubber strain can help avoid needless stress on a new bushing.
Does This Rule Apply to Every Control Arm?
No. This rule is most relevant to control arms with bonded rubber bushings. Polyurethane bushings, spherical joints, bearing-style pivots, and some aftermarket suspension parts can work differently.
Always follow the instructions supplied with aftermarket parts. Their lubrication, preload, washer, and tightening requirements may differ from the original equipment design.
How Tight Should Lower Control Arm Bolts Be?
There is **no universal torque specification** for lower control arm bolts. A compact sedan, pickup truck, performance car, and SUV may all use different fasteners and torque procedures.
Even on the same vehicle, the front and rear control arm mounting bolts may have different specifications. One fastener may require a normal torque value while another uses torque plus a specified number of degrees.
For that reason, an accurate guide to **how to tighten lower control arm bolts** should never give one generic number and tell every reader to use it. Find the specification for the exact year, make, model, engine or drivetrain where relevant, suspension position, and fastener location.

- ✦ Check the factory service manual
This is the preferred source for the vehicle’s original tightening procedure.
- ✦ Identify the exact bolt
Front, rear, forward-pivot, rearward-pivot, and cam bolts may all have different values.
- ✦ Check for torque-to-yield hardware
Some manufacturers specify replacement bolts or nuts after removal.
- ✦ Check thread condition requirements
Torque values may assume clean, dry threads or a factory coating. Adding oil or anti-seize can change clamping force.
Why Lubricating the Threads Can Change Torque
Torque is affected by friction. Oil, grease, and anti-seize can reduce thread friction, which may create more clamping force at the same torque setting.
Do not coat control arm hardware unless the service procedure or fastener manufacturer tells you to do so. If the specification assumes dry threads, lubricating them can make the result different from what the engineer intended.
What Torque Plus Angle Means
Some fasteners use a first-stage torque followed by an additional rotation, such as a specified number of degrees. The angle stage controls how far the fastener turns after the initial seating step.
If your repair manual lists an angle step, use an angle gauge or another approved method. Do not guess the angle by eye.
What to Do With Lower Control Arm Cam Bolts
Some lower control arm mounting bolts also act as alignment adjusters. These are often called **cam bolts** or eccentric bolts. Rotating them can change wheel alignment by moving the control arm’s mounting position.
When learning **how to tighten lower control arm bolts**, identify whether your vehicle uses these adjusters before loosening anything. A normal-looking bolt with an eccentric washer can be an important alignment part.
Marking the cam position before removal can help you put it close to where it started. However, a mark is not a substitute for a proper wheel alignment after suspension repair.

- ✦ Mark the original position
Use a paint marker to make reference marks on the cam washer and mounting bracket before loosening the bolt.
- ✦ Do not let the cam rotate during final tightening
Hold the adjuster in the required position while tightening the hardware.
- ✦ Inspect cam surfaces
Damaged tabs, washers, or slots can prevent the alignment setting from staying in place.
- ✦ Schedule an alignment
A professional alignment is wise after control arm replacement or whenever cam adjusters have been disturbed.
Can You Reuse the Old Cam Position?
You can often use the old marks as a starting reference if the vehicle drove correctly before the repair. New bushings or a replacement control arm can still change the suspension geometry slightly.
The final check should be made with alignment equipment. This is especially important if you notice an off-center steering wheel, pulling, or uneven tire wear.
Common Mistakes When Tightening Lower Control Arm Bolts
The mechanical steps may look simple, but several small mistakes can turn a control arm job into a repeat repair. Most problems involve incorrect suspension position, guessed torque, damaged hardware, or changed alignment settings.
When I review suspension repair procedures, the most important habit is to separate **snugging** from **final tightening**. Getting every bolt installed first gives you room to position the suspension correctly before locking the bushings in place.
Use the following checks whenever you perform **how to tighten lower control arm bolts** work at home.
- ✦ Tightening rubber bushings at full droop
This may leave bonded rubber bushings twisted when the vehicle returns to normal ride height.
- ✦ Guessing the torque
Suspension fasteners are safety-critical. Always find the correct specification instead of using a generic value.
- ✦ Using an impact for final torque
An impact wrench does not give the same controlled result as a properly used torque wrench.
- ✦ Applying lubricant without instructions
Oil or anti-seize can change the relationship between torque and clamping force.
- ✦ Reusing hardware that requires replacement
Some prevailing-torque nuts and torque-to-yield bolts should not be reused.
- ✦ Ignoring cam bolt position
Moving an eccentric adjustment bolt can change wheel alignment.
- ✦ Using the wrong torque wrench range
Use a tool that comfortably covers the target torque rather than working at or beyond its rated limit.
- ✦ Working under an unsupported vehicle
Never place yourself beneath a vehicle held only by a hydraulic jack.
Should You Use Thread Locker?
Do not automatically add thread locker to lower control arm bolts. Some vehicles use locking nuts, special coatings, or other retention methods that do not call for extra compound.
Use thread locker only when the manufacturer’s procedure or the instructions for the replacement suspension part specify it. The wrong product can affect future removal or change installation conditions.
How to Check the Repair After Tightening the Bolts
After you finish **how to tighten lower control arm bolts**, inspect the complete suspension area before driving. Make sure all nuts and bolts are seated, and confirm that any alignment cams remain in position.
Lower the vehicle carefully and look at its stance. Listen during the first slow drive for clunks, pops, rubbing, or other new noises. Stop and inspect the vehicle if anything feels unstable or unusual.
If a control arm or alignment adjuster was removed, a wheel alignment is often the next sensible step. Correct bolt torque does not guarantee correct wheel alignment.
- ✦ Check all fasteners
Verify each control arm fastener listed in the repair procedure.
- ✦ Inspect nearby components
Check the ball joint, sway bar link, ABS wiring, brake hose, and any brackets moved during the job.
- ✦ Check steering behavior
The vehicle should not suddenly pull, wander, or feel unstable.
- ✦ Listen for noise
A new clunk or knock after the repair deserves immediate inspection.
- ✦ Get an alignment when required
Alignment is especially important after changing a control arm, bushing, or eccentric adjustment position.
Do Lower Control Arm Bolts Need to Be Retorqued?
Do not assume every control arm fastener needs routine retightening. Many factory procedures specify one final torque during installation and no scheduled retorque.
Aftermarket suspension parts may have their own inspection or retorque schedule. Follow those instructions if they differ from the original equipment procedure.
Signs a Lower Control Arm Bolt May Be Loose
A loose suspension fastener can sometimes cause obvious symptoms, but these signs are not proof that the bolt itself is loose. Worn bushings, ball joints, tie rods, struts, wheel bearings, and other parts can create similar problems.
If you suspect loose control arm hardware, inspect the vehicle before continuing to drive it. Suspension movement at a mounting point can affect handling and alignment.

- ✦ Clunking over bumps
Movement at the control arm mount may create a knock or clunk when the suspension changes direction.
- ✦ Steering feels loose or inconsistent
A shifting control arm can change wheel position under braking or cornering.
- ✦ Alignment changes
The vehicle may pull, wander, or develop an off-center steering wheel.
- ✦ Uneven tire wear
Changes in suspension geometry can contribute to abnormal wear, though many other alignment problems can cause the same symptom.
- ✦ Visible movement or witness marks
Shiny metal, shifted cam washers, or marks around a mounting point may suggest that parts have moved.
Can You Drive With a Loose Control Arm Bolt?
A confirmed loose lower control arm mounting bolt should be treated as a safety issue. The control arm helps locate the wheel, so unwanted movement can affect steering, braking stability, and alignment.
Avoid normal driving until the cause is inspected and repaired. If the vehicle feels unstable, makes severe suspension noises, or shows obvious mounting movement, arrange safe transport rather than driving it.
Special Cases That Need Extra Care
Some vehicles make **how to tighten lower control arm bolts** more complex. Rust, aftermarket suspension parts, torque-to-yield fasteners, alignment cams, and limited access can all change the job.
If the service procedure requires special tools or a loaded-suspension measurement that you cannot reproduce safely, a repair shop may be the better choice. Suspension mounting hardware is not a good place to improvise.
- ✦ Severely rusted bolts
Heavy corrosion can weaken hardware, damage threads, or seize the bolt inside the bushing sleeve.
- ✦ Torque-to-yield bolts
Replace these when the manufacturer says they are single-use.
- ✦ Aftermarket control arms
Follow the part maker’s instructions if the bushings, bearings, or adjustment system differ from stock.
- ✦ Modified ride height
Lowered or lifted vehicles may use different suspension geometry and aftermarket adjustment parts.
- ✦ Damaged mounting brackets
Bent slots, damaged cam stops, or enlarged mounting holes need correction before final tightening.
What If the Bolt Is Stuck in the Bushing Sleeve?
Rust can bond the bolt to the inner sleeve of the bushing. Applying more force without a plan may damage the bracket, bolt, or surrounding parts.
Penetrating oil, careful impact use, heat in appropriate situations, or cutting the bolt may be part of the repair. Heat near fuel, rubber, brake components, or other sensitive parts creates serious risks, so use professional help when you are not equipped for that work.






