
How to Tighten Control Arm Bolts Safely and Correctly
Learning how to tighten control arm bolts is not just a matter of making the bolts as tight as possible. The correct method depends on the vehicle, the control arm design, the type of bushing, and the fastener specification. In many cars and light trucks, especially those with bonded rubber bushings, the suspension position during final tightening is just as important as the torque itself.
A common mistake in home garages is tightening control arm pivot bolts while the wheel is hanging at full droop. If a bonded rubber bushing is locked in that position, the rubber may stay twisted when the vehicle returns to normal ride height. That can shorten bushing life and may affect ride quality.
The safest approach is simple. Install the parts correctly, bring the suspension to the position required by the service procedure, and tighten each fastener to the exact specification for your year, make, model, and suspension setup. Never rely on a universal torque number because control arm specifications vary widely.
This guide explains how to tighten control arm bolts, when ride height matters, which tools you need, what mistakes to avoid, and how to check the repair before driving. The focus is on practical steps a U.S. DIY vehicle owner can follow while still respecting manufacturer-specific service information.

Why Correct Control Arm Bolt Tightening Matters
Control arms connect the suspension to the vehicle frame or subframe. Their pivot points must hold the arm securely while still allowing the suspension to move through its designed range. That makes correct fastener tightening a safety-critical part of suspension work.
If a bolt is too loose, the joint may move where it should not. You may hear clunks, notice unstable steering, or see alignment settings change. A loose mounting bolt can also damage the mounting holes or surrounding hardware.
Overtightening is not safer. Excess torque may stretch a bolt, damage threads, crush a sleeve, or make future removal difficult. The right goal is **specified clamping force**, not maximum tightness.
The bushing also matters. Many original-style rubber bushings are bonded between an inner sleeve and the surrounding rubber. The rubber twists as the suspension moves. This is why the arm’s position during final tightening can be so important.
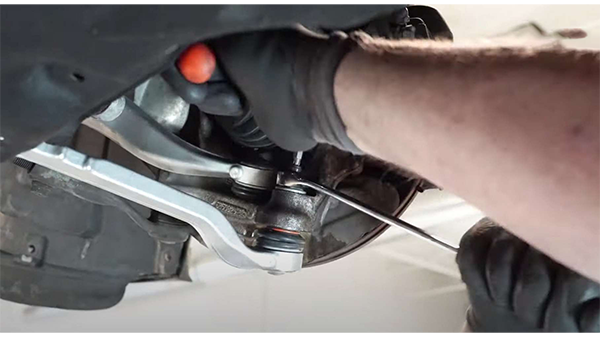
- ✦ Too loose
The arm or fastener may move, causing noise, alignment changes, wear, or unsafe handling.
- ✦ Too tight
Threads, bolts, sleeves, or mounting points can be damaged if the specified torque is exceeded.
- ✦ Wrong suspension position
A bonded rubber bushing can be preloaded or twisted when the vehicle returns to normal ride height.
- ✦ Correct method
Use the manufacturer’s procedure, correct ride-height position when specified, and an accurate torque wrench.
What Does Bushing Preload Mean?
Bushing preload means the rubber is already twisted before normal suspension movement begins. This often happens when a bonded rubber control arm bushing is tightened while the suspension hangs down, even though the service procedure calls for tightening at normal position.
Once the vehicle is lowered, the arm rotates upward. If the inner sleeve cannot rotate because the bolt is already clamped, the rubber stays twisted. Over time, that extra stress may lead to cracks, tearing, or early bushing failure.
- ✦ Bonded rubber bushings
Often need special attention to suspension position during final tightening.
- ✦ Other bushing designs
Some polyurethane, spherical, or rotating designs work differently, so follow the part maker’s instructions.
Tools Needed to Tighten Control Arm Bolts
Before learning how to tighten control arm bolts, gather the right tools. Suspension fasteners can require substantial torque, so your wrench and sockets must be sized for the job.
A torque wrench is the most important tool for final tightening. Use one whose working range comfortably covers the required specification. Do not use a small torque wrench beyond its rated limit.
You may also need a second wrench to hold the bolt head while tightening the nut. On some vehicles, access is tight and a long extension, swivel socket, or crowfoot may be needed. If you use special adapters, confirm whether they change the effective torque.

- ✦ Torque wrench
Use a properly sized and calibrated wrench for the final torque.
- ✦ Sockets and wrenches
Use the exact size so you do not round the bolt head or nut.
- ✦ Floor jack
Useful for raising the suspension carefully to the specified position.
- ✦ Jack stands
Support the vehicle securely before working underneath it.
- ✦ Wheel chocks
Keep the vehicle from moving while it is raised.
- ✦ Service information
You need the exact torque specification and tightening procedure for your vehicle.
Do Not Guess the Torque Specification
There is no single torque value that works for every control arm bolt. A compact car, full-size pickup, SUV, and performance vehicle can use very different fastener sizes and procedures.
Check the factory service manual, a reputable repair database, or official manufacturer service information. Some procedures specify a torque value plus an additional angle, while others use standard torque only.
- ✦ Vehicle-specific data
Match the specification to the exact year, make, model, suspension position, and fastener location.
- ✦ Torque-plus-angle
If an angle step is specified, complete both the torque and angle stages exactly as directed.
How to Tighten Control Arm Bolts Step by Step
The exact procedure varies by vehicle, but the following process explains the basic method for how to tighten control arm bolts. Always give the factory procedure priority if it differs from these general steps.
Work on a level surface. Chock the wheels, raise the vehicle at approved lifting points, and place it securely on jack stands. Never depend on a hydraulic floor jack as the only support while you work underneath the vehicle.

- ✦ Step 1: Check the installation
Make sure the control arm, bushings, washers, bolts, and nuts are installed in the correct direction and location.
- ✦ Step 2: Start all fasteners by hand
Thread nuts and bolts correctly before using powered or long-handled tools. This reduces the risk of cross-threading.
- ✦ Step 3: Snug the fasteners
Tighten the bolts enough to hold the control arm in place, but do not perform final torque yet if the procedure requires normal suspension position.
- ✦ Step 4: Position the suspension
Raise the suspension carefully with a jack under an approved load point until the control arm reaches the position specified by the manufacturer.
- ✦ Step 5: Set the torque wrench
Set your torque wrench to the exact specification for that fastener.
- ✦ Step 6: Tighten smoothly
Apply steady force until the wrench signals that the set torque has been reached.
- ✦ Step 7: Complete any angle step
If the procedure calls for extra degrees of rotation, use an angle gauge or approved torque-angle method.
- ✦ Step 8: Inspect the finished repair
Check bolt seating, washer position, clearance, brake hoses, ABS wiring, and nearby suspension parts before reinstalling the wheel.
How to Load the Suspension for Final Tightening
One common method is to support the vehicle safely on jack stands and use a floor jack to raise the lower control arm or wheel hub area toward normal ride position. The correct jacking point varies, so do not place the jack where it can damage a thin arm, ball joint, rotor, or other component.
Some procedures specify a measurement between suspension points rather than simply saying normal ride height. In that case, use the published measurement. This gives you a more repeatable suspension position.
- ✦ Keep the vehicle supported
The jack used to load the suspension should not replace the main jack stands supporting the vehicle.
- ✦ Watch stability
Stop if raising the suspension begins to lift the vehicle away from its stands or makes the setup unstable.
Tightening with the Vehicle on Ramps
On some vehicles, ramps can place the suspension close to normal loaded position and provide access to the control arm bolts. This can make final tightening easier when there is enough room underneath.
Only use ramps rated for the vehicle’s weight and place them on a firm, level surface. Chock the opposite wheels and make sure you can reach the fasteners without putting yourself in an unsafe position.
- ✦ Advantage
The vehicle’s weight naturally loads the suspension near normal ride height.
- ✦ Limitation
Some vehicles do not provide enough safe access to the control arm bolts while sitting on ramps.
Should Control Arm Bolts Be Tightened at Ride Height?
In many applications with bonded rubber bushings, yes. Final tightening at the specified ride position lets the bushing rest near its neutral position when the vehicle sits normally. This helps prevent constant twisting of the rubber.
However, this is not a universal rule for every suspension design. Some control arms use bushings or joints that rotate differently. Others have manufacturer procedures that specify a certain measured suspension position rather than full vehicle weight.
So, when deciding how to tighten control arm bolts, do not rely on a broad rule alone. Check the instructions for your exact vehicle and replacement part.

- ✦ OEM bonded rubber bushing
Often requires final tightening at normal or specified suspension position.
- ✦ Polyurethane bushing
May rotate around a lubricated sleeve and can have a different tightening procedure.
- ✦ Spherical bearing
Usually does not behave like bonded rubber, but the fastener still needs the specified torque.
- ✦ Aftermarket adjustable arm
Follow the arm manufacturer’s setup, lubrication, and torque instructions.
Why Tightening at Full Droop Can Cause Trouble
Imagine the control arm hanging down while the car is on jack stands. If you lock the bonded inner sleeve in that position, the rubber may be relaxed only while the wheel hangs.
Lower the vehicle and the control arm swings upward. The inner sleeve stays clamped while the outer part follows the arm. The rubber between them twists and can remain under stress during every mile the vehicle sits or drives.
- ✦ Possible result
The bushing may crack or tear sooner than expected.
- ✦ Possible symptom
You may notice a firm ride, squeaks, abnormal suspension behavior, or early bushing wear.
How Tight Should Control Arm Bolts Be?
Control arm bolts should be tightened to the exact specification published for your vehicle. There is no trustworthy universal answer such as 80, 100, or 150 lb-ft that applies to all cars and trucks.
Bolt diameter, thread pitch, material grade, mounting design, nut type, lubrication state, and suspension load can all affect the required torque. Even bolts that look nearly identical may have different specifications.
Some newer vehicles also use torque-to-yield or single-use suspension fasteners. These bolts are designed to stretch in a controlled way during installation. If the service manual says to replace the fastener, do not reuse the old one.

- ✦ Find the exact location
Front lower, front upper, rear upper, and rear lower control arm fasteners can all have different values.
- ✦ Check bolt replacement rules
Replace torque-to-yield or one-time-use bolts when the manufacturer requires it.
- ✦ Check dry versus lubricated threads
Do not add oil or anti-seize unless the procedure specifically calls for it because lubrication can change clamping force.
- ✦ Use correct units
Confirm whether the specification is shown in lb-ft, lb-in, or N·m before setting the wrench.
Why a Torque Wrench Matters
A torque wrench helps produce a controlled amount of fastener preload. This is much more reliable than tightening by feel, especially on suspension parts where the consequences of a loose or damaged fastener can be serious.
For best results, pull slowly and smoothly. Stop when a click-type wrench clicks once. Repeatedly clicking the wrench can add extra torque.
- ✦ Stay within the wrench range
Use a torque wrench that covers the specification without operating at or beyond its limit.
- ✦ Store it correctly
Follow the wrench maker’s storage instructions so it stays accurate.
What to Do If a Control Arm Bolt Will Not Tighten
If a control arm bolt keeps turning without reaching torque, stop. Do not keep forcing it. The bolt, nut, captive nut, or mounting threads may be damaged.
First inspect the exposed threads if possible. Look for flattened threads, metal shavings, corrosion, or a nut that spins with an internal mounting plate. A damaged fastener should usually be replaced with the correct specification part.
Rust can also make control arm work difficult. A corroded bolt may bind in the bushing sleeve or subframe even if the nut comes off. Heavy corrosion can turn a simple job into a major repair.
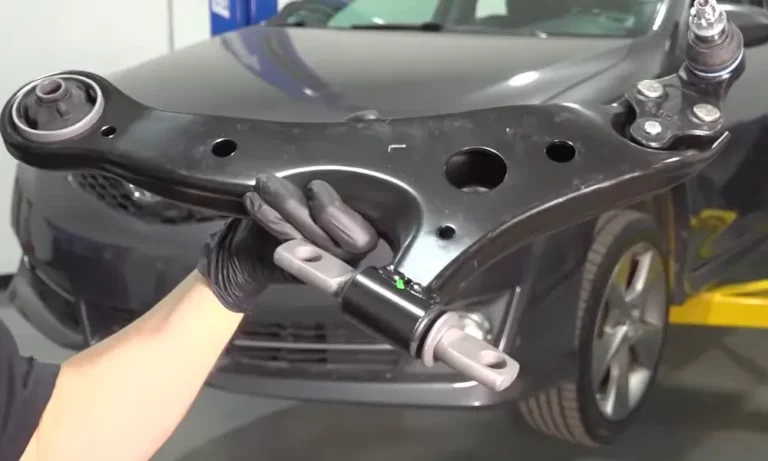
- ✦ Spinning nut
A captive nut inside the frame or subframe may have broken loose.
- ✦ Damaged threads
Replace damaged hardware rather than trying to reach torque on compromised threads.
- ✦ Bolt seized in sleeve
Rust may bond the bolt to the bushing sleeve and require additional removal work.
- ✦ Cross-threading
Stop immediately if the fastener becomes tight before it is properly seated.
Should You Use an Impact Wrench?
An impact wrench can help remove stubborn suspension hardware and may be useful for initial assembly when used with care. It should not replace a torque wrench for final control arm bolt tightening unless the vehicle manufacturer gives a specific approved method.
Impacts work quickly and can make it easy to overshoot the required torque. For the final step, use the correct torque procedure.
- ✦ Good use
Removal of stubborn hardware when safe access and proper sockets are available.
- ✦ Poor use
Guessing final torque based on impact gun settings or how long the tool hammers.
Common Mistakes When Tightening Control Arm Bolts
Knowing how to tighten control arm bolts also means knowing what not to do. Many suspension problems after a repair come from small installation errors rather than a bad new control arm.
One of the biggest mistakes is guessing the torque. Another is assuming all bolts should receive final torque while the vehicle is still high in the air. A third is reusing hardware that the manufacturer identifies as single-use.
A practical shop rule is to treat suspension hardware as a system. Check the bolt, nut, washers, bushing sleeve, control arm position, and mounting surfaces together rather than focusing only on the torque wrench.
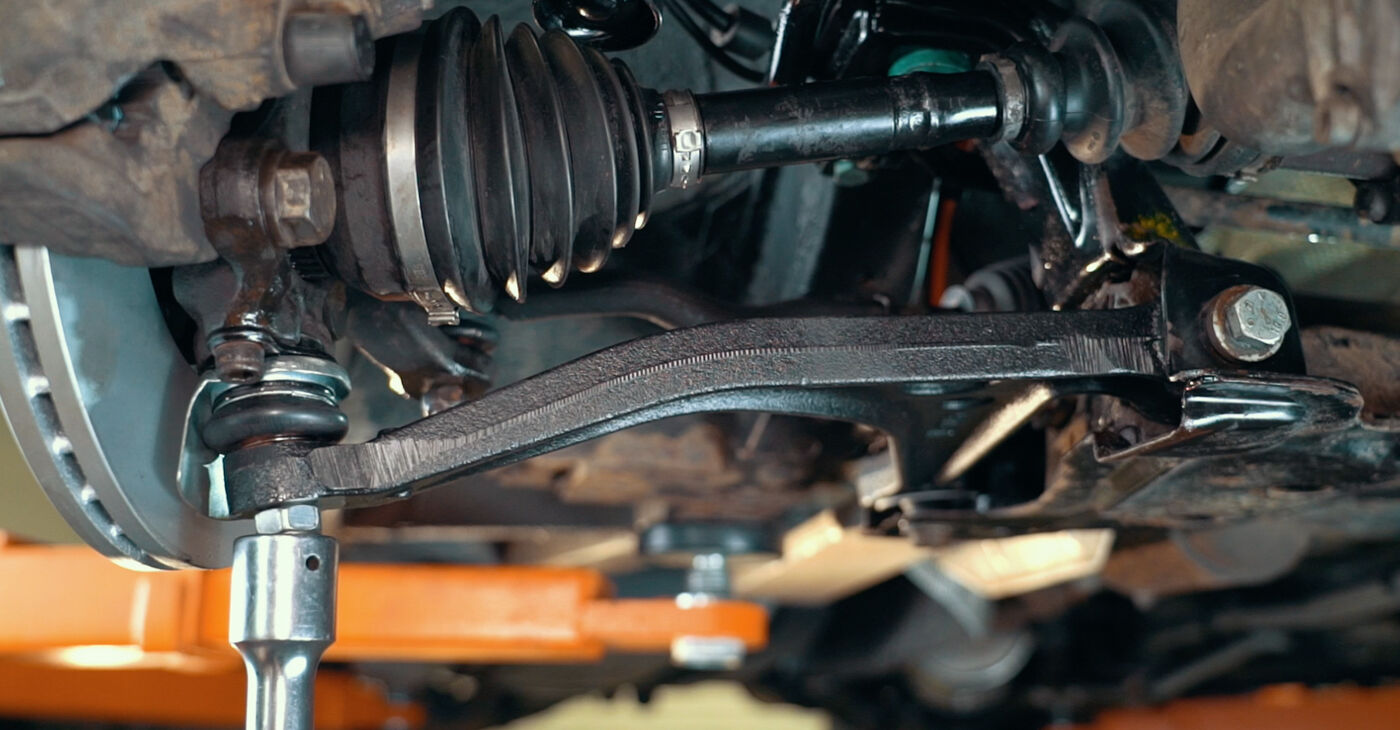
- ✦ Tightening by feel
A long breaker bar can produce far more torque than expected.
- ✦ Final torque at full droop
This can preload bonded rubber bushings when the procedure requires normal suspension position.
- ✦ Using the wrong specification
Torque values can differ between upper and lower arms or even between individual mounting bolts.
- ✦ Adding anti-seize without instructions
Lubricated threads can produce more clamping force at the same torque setting.
- ✦ Reusing damaged hardware
Rusty, stretched, rounded, or damaged bolts and nuts can weaken the repair.
- ✦ Forgetting alignment
Control arm work can affect camber, caster, or toe depending on suspension design.
Do Control Arm Bolts Need Thread Locker?
Do not automatically apply thread locker to every control arm bolt. Some fasteners use self-locking nuts, prevailing-torque nuts, locking washers, or other factory retention methods.
Adding a chemical thread locker can affect installation and future removal. Use it only when the factory procedure or the replacement control arm manufacturer specifies it.
- ✦ Follow specifications
Use the recommended locking method instead of adding products by habit.
Checks to Make After Tightening the Bolts
After you finish learning how to tighten control arm bolts and complete the repair, inspect the whole work area before driving. Confirm that each fastener is seated correctly and that nothing was left loose.
Check brake hoses and ABS sensor wires near the control arm. Make sure they are clipped into their original locations and cannot rub against the tire, axle, spring, or moving suspension parts.
Reinstall the wheel and tighten the wheel fasteners to their own specified torque. Lower the vehicle carefully. If the repair changed alignment hardware or suspension geometry, arrange for an alignment as soon as appropriate.

- ✦ Visual inspection
Check every bolt, nut, washer, bracket, and clip touched during the repair.
- ✦ Steering check
Turn the steering from side to side and listen for contact or unusual sounds when safe to do so.
- ✦ Short test drive
Begin with a slow drive in a safe area and listen for clunks, pops, or rubbing.
- ✦ Alignment
Have alignment checked when the repair or manufacturer procedure calls for it.
- ✦ Reinspection
If the service information requires a follow-up inspection or torque check, follow that interval.
Signs Something Is Wrong After the Repair
A newly installed control arm should not create new clunks, sharp pops, or obvious steering instability. If the vehicle pulls, the steering wheel sits off-center, or tire position looks unusual, stop and inspect the repair.
Do not assume a noise will simply go away after driving. Suspension fasteners and mounting points deserve immediate attention because they affect vehicle control.
- ✦ Clunking
May point to loose hardware, incorrect assembly, or another worn suspension part.
- ✦ Pulling
Can indicate an alignment change or a problem with suspension geometry.
- ✦ Squeaking
May come from bushing preload, dry aftermarket bushings, or another suspension joint.
- ✦ Uneven stance
Inspect the installation if one side appears much higher or lower after the repair.
Upper vs. Lower Control Arm Bolt Tightening
The basic principles for how to tighten control arm bolts apply to both upper and lower arms. Still, the access points, suspension position, fastener type, and torque values can differ.
Lower control arms often carry heavy suspension loads and may connect to a spring, shock, steering knuckle, or torsion-bar system. Upper arms may have easier access on some vehicles but can include alignment cams or eccentric bolts.
Never assume the torque for an upper control arm is the same as the lower arm. Check each mounting point separately in the service information.
- ✦ Lower control arm
Often has large frame or subframe pivot bolts and may need careful suspension loading before final torque.
- ✦ Upper control arm
May use separate pivot bolts, a cross-shaft design, or alignment-adjustment hardware.
- ✦ Rear control arms
Many multi-link suspensions have several arms, each with its own torque specification and installation position.
Be Careful With Alignment Cam Bolts
Some control arm mounting bolts use eccentric cams to adjust camber or caster. Moving these bolts can change wheel alignment even when the control arm itself is installed correctly.
Marking the original cam position may help with initial assembly, but it is not a substitute for a proper alignment. If an alignment adjustment was disturbed, have the vehicle checked with proper alignment equipment.
- ✦ Mark before removal
Reference marks can help return the hardware close to its former position.
- ✦ Verify afterward
Professional alignment equipment is the proper way to confirm final wheel angles.






