To remove a shock absorber top nut, secure the vehicle, support the suspension as needed, identify the correct nut, and use the proper socket and shaft-holding tool. If the nut is on a strut assembly with a compressed coil spring, do not loosen it until the spring is safely contained in an approved compressor or the complete assembly is secured by a qualified technician.
Across the United States, worn shocks and struts are common reasons for suspension service. A repair may call for removing a shock absorber, replacing a mount, or servicing a strut assembly. The top nut can look like an ordinary fastener, but its design and location affect how it should be removed.
The main challenge is often preventing the shock shaft from turning with the nut. A standard socket may loosen some fasteners, while others need a pass-through socket, a special strut tool, or an approved method for holding the shaft. Rust, limited access, and the vehicle’s suspension design can make the job harder.
Before starting, check the service information for your exact year, make, model, and suspension type. Some vehicles use a separate shock absorber that can be removed without disturbing a coil spring. Others use a MacPherson strut, where the upper retaining nut may hold a spring-loaded assembly together. These designs require different procedures, and confusing their fasteners can create a serious injury risk.
Understand Which Shock Absorber Top Nut You Need to Remove
The term shock absorber top nut can refer to more than one fastener. On a separate shock absorber, the upper mounting nut or bolt attaches the shock to the vehicle body or suspension. On a strut, the upper mount fasteners attach the complete strut assembly to the vehicle, while a center shaft nut may hold the upper mount and other parts on the strut shaft.
These fasteners do different jobs. Removing the upper mount nuts may allow a complete strut assembly to come out of the vehicle. Removing the center shaft nut can release parts that are under coil spring force. Always identify the exact fastener before putting a wrench on it.
Your vehicle’s service manual or a reliable repair database is the best source for the correct procedure. A visual inspection alone may not reveal whether a nut retains a spring-loaded assembly.
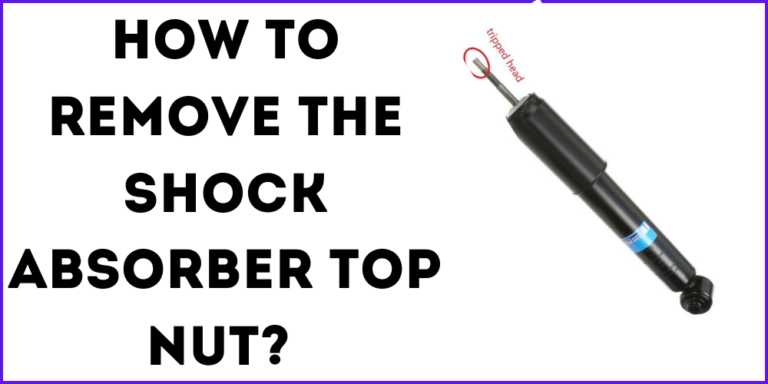
Source: shockabsorberpro.com
Separate shock absorber
Often has an upper mounting fastener that connects the shock to the body or suspension. Removing it normally does not release a coil spring, although the suspension must still be supported as specified.
MacPherson strut
Combines a damper and a structural suspension component, commonly with a coil spring around the strut. Its center shaft nut can retain spring-loaded components and must not be treated like an ordinary mounting nut.
Upper strut mount fasteners
Usually attach the strut assembly to the vehicle body. They are different from the center shaft nut and may be removed as part of the vehicle-specific strut removal procedure.
Why the Distinction Matters
A separate shock absorber generally controls suspension movement without serving as the main support for a coil spring. A strut can be part of the suspension’s structural load path. If a compressed spring is released without control, it can move with enough force to cause severe injury or damage.
If you cannot tell which nut you are looking at, stop and confirm the assembly layout before continuing. Removing the wrong fastener can turn a routine repair into a dangerous job.
Tools and Supplies Needed for Top Nut Removal
The right tools depend on the fastener design and available clearance. Gather the tools before raising the vehicle so you do not have to work under an unsupported car while searching for a socket or extension.
Do not assume that a universal socket size or torque value applies to every vehicle. Nut dimensions, thread direction, shaft shapes, and access vary. Confirm the requirements for your exact application.
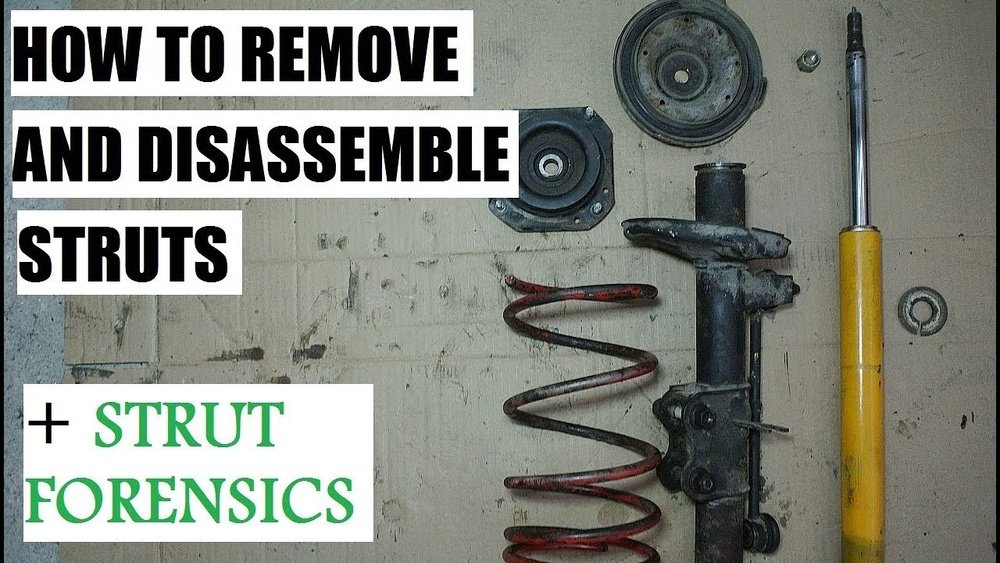
Source: m.media-amazon.com
Correct socket and ratchet
Use a properly fitting six-point socket when possible to reduce the chance of rounding the nut. Choose a suitable drive size and extension for the available clearance.
Shaft-holding or pass-through tool
Some shock shafts have a hex, internal socket, or other feature that lets a suitable tool hold the shaft while a separate tool turns the nut. Use the tool specified for the design.
Penetrating oil
Can help loosen corrosion on exposed threads. Apply it carefully and allow time for it to work, following the product instructions.
Vehicle lifting and support equipment
Use a suitable floor jack, properly rated jack stands, and wheel chocks on firm, level ground. A hydraulic jack alone is not a safe support.
Safety equipment
Wear eye protection and suitable work gloves. Keep hands and face away from loaded suspension parts and avoid loose clothing near moving tools.
Torque wrench
Use a suitable torque wrench for final installation when the manufacturer specifies a torque value. Removal force does not establish the correct tightening torque.
When a Strut Nut Socket Set Helps
A strut nut socket set may include hollow or pass-through sockets and tools that allow access to the shaft while the nut is turned. These tools are useful when the shaft extends through the nut or has a shaped end that must be held.
Check that the tool fits the actual fastener and shaft. A large collection of sockets is not a substitute for correct fit, access, and the manufacturer’s procedure. Do not force a tool that rocks on the nut or damages the shaft’s holding feature.
Check fit first
Confirm the socket size, depth, drive type, and clearance before applying force.
Keep the shaft protected
Avoid clamping the polished shaft with locking pliers or a pipe wrench. Scratches can damage the seal and cause fluid leakage.
Prepare the Vehicle Before Removing the Nut
Prepare the vehicle on a firm, level surface with enough room to work safely. Set the parking brake, switch off the engine, remove the key, and chock the wheels that remain on the ground. Follow the vehicle’s service procedure for lifting points and suspension support.
If the work involves a wheel-mounted suspension component, loosen the wheel fasteners slightly before lifting when the service procedure calls for it. Raise the vehicle at an approved lift point and place it on correctly rated jack stands. Never rely on a floor jack alone.
The correct support arrangement depends on the suspension design and which fastener you plan to remove. Some jobs require supporting a control arm or hub to prevent the suspension from dropping or stretching a brake hose, ABS wire, or other connection. Follow the specified procedure rather than guessing where to place a second jack.
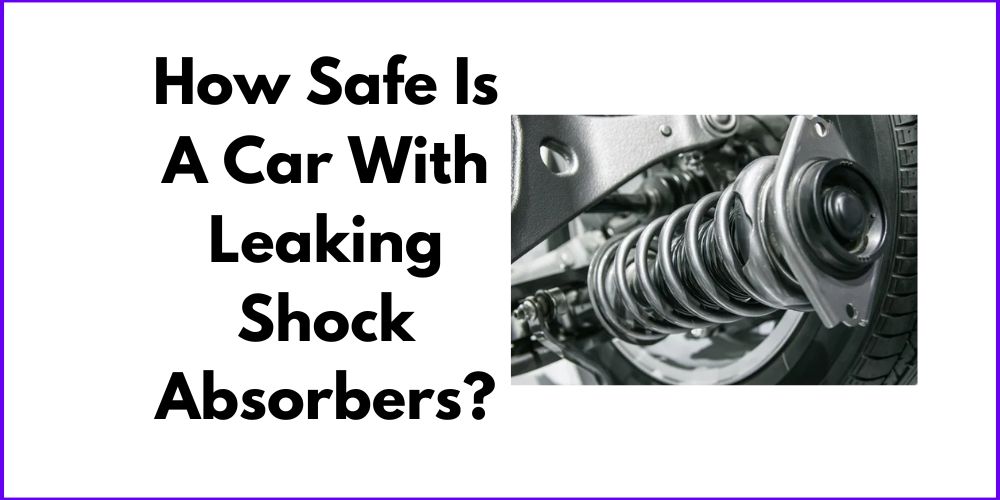
Source: img.freepik.com
Inspect the work area
Remove loose tools and debris, provide adequate lighting, and keep people away from the vehicle while it is raised.
Check nearby components
Look for brake hoses, ABS wiring, fuel lines, and other parts that could be strained as the suspension moves.
Confirm spring safety
If the center nut retains a coil spring, do not loosen it until the assembly is secured using the approved method and the spring is safely contained.
When to Stop Before Starting
Do not proceed if the vehicle shifts on its supports, the lift points are badly corroded, or the required spring-compression equipment is unavailable. A spring-loaded strut is not a safe place to improvise.
If the vehicle uses an unusual suspension design, an electronic active damper, or a special procedure that you cannot verify, have a qualified technician identify the correct method.
How to Remove a Shock Absorber Top Nut Step by Step
The following steps apply to a conventional, serviceable shock absorber or to the appropriate mounting fastener when the manufacturer’s procedure permits removal. They do not authorize removing a spring-loaded strut shaft nut from an unsecured assembly. Use the exact vehicle-specific procedure whenever it differs from this general sequence.
Work slowly and watch how the nut, shaft, mount, and surrounding parts move. The aim is to release the correct fastener without damaging the shaft, mount, threads, or nearby components.
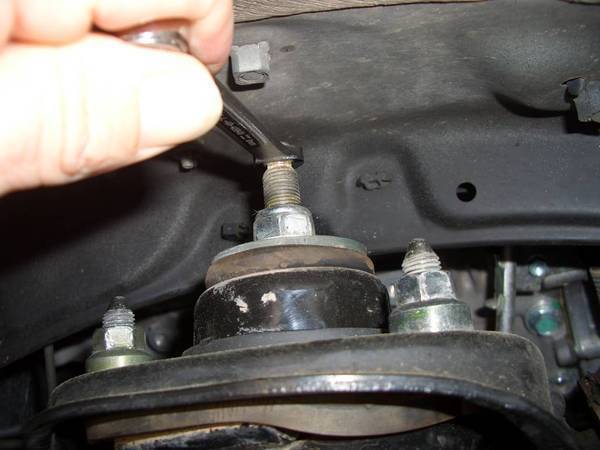
Source: i.ytimg.com
Step 1: Find the correct fastener
Identify the upper mounting nut or bolt from the service diagram. Confirm whether you are removing the shock mounting hardware or the center nut that retains a strut assembly.
Step 2: Expose the fastener
Remove only the covers, trim panels, or access components specified in the repair instructions. Store clips and fasteners safely and avoid pulling on nearby wiring.
Step 3: Clean the exposed area
Brush away loose dirt and rust so the socket seats fully. Keep debris out of openings and away from the shock shaft seal.
Step 4: Apply penetrating oil if needed
If the nut is corroded, apply an appropriate penetrating oil to the exposed threaded area. Allow it to soak according to the product directions and avoid contaminating brake parts.
Step 5: Fit the correct socket
Seat the socket squarely on the nut. Use a six-point socket where suitable and check that it does not wobble, slip, or contact nearby components.
Step 6: Hold the shock shaft when required
If the shaft turns with the nut, use the correct shaft-holding feature and a compatible pass-through or strut tool. Follow the specified removal method instead of gripping the polished shaft.
Step 7: Loosen the nut in a controlled way
Apply steady force with the appropriate hand tool when the fastener is safe to remove. Stop if the socket slips, the shaft spins uncontrollably, the mount twists, or the assembly begins to move unexpectedly.
Step 8: Remove the nut and retain loose parts
Once the nut is free, remove it by hand if practical and keep track of washers, spacers, and mount parts in their original order. Do not release any spring-loaded components unless the approved procedure specifically permits it.
Step 9: Inspect the parts
Check the threads, nut, mounting rubber, washers, and shaft for damage or corrosion. Replace damaged or single-use hardware as required by the manufacturer.
How to Tell When the Nut Is Fully Removed
The nut should turn off the threads without forcing the shaft sideways or pulling the mount apart unexpectedly. Once the threads disengage, the nut should lift away from the stud or shaft, and any separate washers should be removable in the order specified by the service information.
A nut that spins but will not come off may have damaged threads or may be turning with a rotating shaft. Do not keep applying force without diagnosing the cause. If the fastener is on a spring-loaded strut, stop and reassess the assembly before doing anything further.
How to Remove a Stuck Shock Absorber Top Nut
A stuck top nut is usually caused by corrosion, thread damage, excessive tightening, or the shock shaft turning with the nut. The safest approach is to identify the cause first, then use the least aggressive method that suits the fastener and assembly.
Avoid escalating straight to a long breaker bar or an impact wrench. Excessive force can round the nut, damage the shaft, twist a mount, or loosen a component that should remain assembled. On a strut, an uncontrolled attempt can also create a spring-related hazard.
Source: i.ebayimg.com
Use penetrating oil
Clean the exposed threads and apply penetrating oil where it can reach the corroded joint. Give it time to work and repeat only as directed by the product.
Improve socket engagement
Use the exact-size socket and seat it fully. Replace a worn or damaged socket before it rounds the nut.
Prevent shaft rotation
Use the shaft’s designed holding feature with the appropriate tool. If the shaft continues to spin, stop and confirm that the tool is compatible with the assembly.
Use controlled leverage
If the fastener and service procedure permit it, use a suitable hand tool with controlled force. Keep the tool aligned and your body out of the path it may take if it slips.
Seek professional help when necessary
If the nut is rounded, the threads are damaged, or spring containment is uncertain, have a suspension technician handle the removal.
Can You Use an Impact Wrench?
An impact wrench may remove some conventional shock mounting fasteners, but it is not suitable for every top nut. The vehicle manufacturer may prohibit impact tools on certain shaft nuts, and rapid rotation can damage a damper, mount, or internal component.
Do not use an impact wrench on a spring-loaded strut shaft nut unless the exact service procedure permits it and the spring is safely contained. Use the prescribed tool and method. An impact wrench should not be used to compensate for an incorrectly fitted socket or a shaft that is not being held properly.
Should You Apply Heat to a Stuck Nut?
Heat can damage seals, rubber bushings, protective coatings, nearby wiring, and other suspension parts. It can also create a fire risk around penetrating oil or other flammable material. A shock absorber may contain pressurized gas or fluid, making uncontrolled heating especially unsuitable.
Do not use a torch on an assembled shock or strut as a general stuck-nut solution. If the manufacturer’s procedure allows a particular heat method on a removed, disassembled component, follow that procedure and its safety requirements. Otherwise, choose a safer removal method or professional service.
Troubleshooting Common Top Nut Removal Problems
When a top nut will not come off, the motion of the nut and shaft provides useful clues. Stop as soon as the tool begins to slip or the assembly moves in a way you did not expect. Repeatedly applying more force without identifying the cause can make the repair more difficult.
Source: slickmotorz.com
The shaft spins with the nut
The nut is turning the shock shaft instead of moving along the threads. Use the shaft-holding tool designed for that assembly and check the service procedure. Never clamp the polished shaft with ordinary locking pliers.
The nut will not move
Possible causes include corrosion, excessive tightening, or a damaged fastener. Clean the area, apply suitable penetrating oil, verify the socket size, and use controlled force if permitted.
The socket slips off
The socket may be the wrong size, poorly seated, or worn. Stop before the nut becomes rounded, then select a correct, undamaged socket.
The nut turns but does not rise
The threads may be stripped, or the shaft may be rotating along with the nut. Inspect the motion carefully and stop if the threads cannot be engaged properly.
The mount moves or separates
The fastener may be retaining loaded parts, or the assembly may not be supported correctly. Stop immediately and restore a safe support arrangement before reassessing the procedure.
There is little tool clearance
A pass-through socket, offset tool, or model-specific service tool may be needed. Do not grind a tool or remove unrelated parts without confirming the approved method.
When a Nut or Shaft Is Damaged
A rounded nut may require a suitable extraction socket, but the tool must fit the available space and must not damage the shaft or nearby parts. Extraction tools can also make a fastener unsuitable for reuse, so plan to replace the nut when required.
If the shaft threads are damaged, do not force a new nut onto them. A damaged threaded connection may fail to hold the mount securely. Follow the manufacturer’s repair or replacement instructions for the affected component.
How to Reinstall the Shock Absorber Top Nut Correctly
Correct reinstallation matters as much as removal. A loose top nut can cause knocking, excess movement, or separation of mounting parts, while overtightening can damage threads, mounts, or the damper shaft.
Before assembly, clean and inspect the mating surfaces and threads. Replace damaged hardware and any single-use fasteners identified in the service manual. Keep washers, spacers, and mount parts in the correct order and orientation.
Use the manufacturer’s specified tightening method and torque value for the exact vehicle and fastener. The correct value can differ by model, suspension type, and whether the fastener is a nut, bolt, or center shaft retainer. Do not guess or use a generic torque value.
Source: urbsgarage.com
Confirm hardware condition
Check for stripped threads, rounded corners, corrosion, bent washers, and damaged rubber mounts. Replace parts as directed by the manufacturer.
Align the components
Make sure the mount and washers sit correctly before tightening. Do not use the nut to pull misaligned components into place.
Hold the shaft as specified
If the installation procedure requires a shaft-holding tool, use it to prevent unwanted rotation without damaging the shaft.
Tighten to specification
Use the specified torque and sequence. Follow any additional instructions for prevailing-torque nuts, new fasteners, or a particular tightening angle.
Check the completed installation
Verify that all fasteners are installed, covers are restored, and brake hoses and electrical wires are routed correctly. Lower the vehicle according to the service procedure.
Does Removing the Top Nut Mean You Need a Wheel Alignment?
Removing a separate shock absorber’s upper mounting nut does not automatically mean that an alignment is required. The need depends on the vehicle design and which suspension connections were disturbed.
Removing a complete strut may affect alignment if the procedure disturbs camber-adjusting bolts or other alignment-related joints. Check the service information and have the alignment measured when the manufacturer recommends it or when steering, tire wear, or suspension geometry indicates a problem.
Common Mistakes to Avoid
Many problems during shock absorber service come from treating every upper fastener as the same type of nut. Confirm the component, support the vehicle, and use the specified method before applying force.
Source: shockabsorberpro.com
Removing the center strut nut too early
This can release spring-loaded components if the coil spring is not safely contained. Confirm the assembly design before loosening the nut.
Working under a jack-supported vehicle
A jack can lower, shift, or fail. Use correctly rated jack stands on firm ground and approved lifting points.
Gripping the polished shaft
Pliers and pipe wrenches can scratch the shaft and damage the seal. Use the designed shaft-holding feature instead.
Using the wrong socket
A loose-fitting socket can round the nut and make later removal harder. Confirm the exact size and seat the tool fully.
Applying uncontrolled impact or heat
These methods can damage the damper, mount, seal, wiring, or nearby parts. Follow the vehicle-specific procedure and avoid improvised methods.
Guessing the final torque
An incorrect torque can damage hardware or leave the mount insecure. Use the manufacturer’s specification for the exact fastener.
When Professional Service Is the Better Option
Get help from a qualified suspension technician if you cannot identify the fastener, the coil spring cannot be contained safely, or the nut and shaft are badly damaged. Professional service is also appropriate when the repair requires special equipment you do not have.
A spring-loaded strut is not a suitable place to learn by trial and error. The cost of proper service is often preferable to the risk of an uncontrolled spring release or an insecure suspension repair.
Research Notes and Next-Question Gap Map
This article is a general repair guide, not a vehicle-specific service procedure. The core safety distinction is between a conventional shock mounting fastener and a center strut shaft nut that may retain a compressed coil spring. The correct procedure, tool selection, and torque specification must be verified for the vehicle being repaired.
The provided image list supplies image assets and descriptions, but image metadata does not establish a tested repair method or prove that a pictured tool fits every vehicle. No hands-on removal test is claimed here, and no universal socket size, torque value, or removal time is asserted.
Source: urbsgarage.com
How do I stop the shaft from spinning?
Reader stage: during removal. Basis: inferred next need from the common mechanical design of shaft-mounted nuts. Coverage in this article: answered. Reader benefit: explains why a shaft-holding tool may be needed. Evidence needed for a vehicle-specific answer: the manufacturer’s service procedure and shaft design.
Can I remove the center nut without a spring compressor?
Reader stage: before removal. Basis: inferred next need due to the risk of spring release. Coverage in this article: answered at the general safety level. Reader benefit: prevents an unsafe attempt. Evidence needed for exceptions: the exact vehicle’s approved service instructions.
What torque should I use when reinstalling the nut?
Reader stage: after removal. Basis: inferred next need. Coverage in this article: answered at the process level, but no universal value is given. Reader benefit: avoids guessed tightening values. Evidence needed: the exact year, make, model, suspension type, and fastener specification.
Can I use an impact wrench or torch?
Reader stage: troubleshooting. Basis: inferred next need from stuck fasteners. Coverage in this article: answered with limits. Reader benefit: reduces the risk of component damage and spring-related injury. Evidence needed for a particular vehicle: its service procedure and tool restrictions.
Do I need a wheel alignment afterward?
Reader stage: after installation. Basis: inferred next need. Coverage in this article: answered with vehicle-design qualifications. Reader benefit: helps determine whether further suspension checks are needed. Evidence needed: manufacturer alignment guidance and the connections disturbed during the repair.
Frequently Asked Questions
Q
What tool removes a shock absorber top nut?
The tool depends on the nut and shaft design. A correctly sized socket and ratchet may work for a conventional mounting nut. A shaft-mounted nut may require a pass-through socket and a compatible tool to hold the shaft still.
Check the vehicle’s service information before selecting the tool. Do not force a socket that does not fit or grip the shaft with pliers that can damage its sealing surface.
Q
Why does my shock absorber top nut keep spinning?
The nut may be turning the shock shaft instead of moving along the threads. Some designs need a separate shaft-holding tool while the nut is turned.
Use the holding feature designed for the assembly. If the shaft still spins, stop and check the tool fit and service procedure rather than applying more force.
Q
Can I remove a strut top nut while the strut is on the car?
Do not remove a center strut shaft nut merely because the strut is still mounted to the car. The nut may retain a compressed coil spring and other loaded parts.
Follow the exact service procedure. If the instructions require removal and safe containment of the complete strut assembly before loosening the center nut, do not skip those steps.
Q
Can I use an impact wrench to remove a shock absorber nut?
An impact wrench may be suitable for some conventional mounting fasteners, but it is not appropriate for every shock or strut nut. Rapid rotation can damage certain components, and the manufacturer may specify a different method.
Use an impact tool only when the vehicle-specific procedure permits it. Never use one to work around an unsecured coil spring or an unsuitable shaft-holding setup.
Q
What should I do if the top nut is rusted solid?
Clean the exposed area, apply suitable penetrating oil, and allow it to work according to the product directions. Confirm that the socket fits correctly and use controlled force only when the assembly is safe to service.
Avoid uncontrolled heat on an assembled shock or strut. If the nut begins to round, the threads appear damaged, or the fastener will not move with the correct tools, stop and seek professional help.
Q
Do I need to replace the top nut after removing it?
Not every shock absorber nut must be replaced, but some vehicles specify a new nut or other single-use hardware. A prevailing-torque nut, damaged fastener, or corroded nut may also require replacement under the manufacturer’s instructions.
Check the service manual and inspect the threads and bearing surfaces. Do not reuse hardware that the manufacturer identifies as single-use or that is damaged.
Q
How tight should the shock absorber top nut be?
Use the torque specification for the exact vehicle and fastener. There is no single torque value that applies to all shock absorbers, struts, and upper mounts.
Use a suitable torque wrench and follow any specified tightening sequence or angle procedure. Guessing can damage threads or leave the suspension mount insecure.
✦ Wrapping Up
Conclusion
Removing a shock absorber top nut starts with identifying the correct fastener and confirming how the suspension is assembled. A conventional shock mounting nut may be straightforward to remove with the right socket, while a strut center shaft nut can retain a dangerous amount of spring force.
Use the proper lifting and support equipment, keep the tool aligned, and hold the shaft with the method designed for the assembly when needed. If corrosion or damaged threads prevent safe removal, avoid escalating force without a clear plan. Follow the manufacturer’s procedure for reinstallation and use the specified torque.
For the most reliable result, confirm the exact year, make, model, and suspension layout before starting. If the repair involves a compressed spring and you lack the approved equipment or experience, have a qualified suspension technician perform the work.
💡 Key Takeaway
Before loosening anything, identify whether the nut is an upper mounting fastener or a center strut shaft nut. Confirm the vehicle-specific procedure, prepare the correct tools, and never release a spring-loaded assembly without approved containment.
Eric
Hi, I’m Eric Bennett, the person behind OffRoadTruckAccessories.com.
I created this blog to share my interest in trucks, off-road driving, automotive accessories, and DIY modifications. I enjoy learning how different truck accessories work, testing their usefulness, and understanding whether they are truly worth buying.
Shock absorbers are located near the wheels as part of the suspension system, usually between the vehicle’s body, frame, or subframe and a suspension component such as a control arm, axle, or wheel assembly. However, the exact answer to where are shock absorbers located on a car depends on the suspension design. Some vehicles have…
You should change shock absorbers when they are worn, leaking, damaged, or no longer controlling suspension movement properly. There is no single replacement interval that applies to every vehicle because shock absorber life depends on road conditions, vehicle weight, driving habits, suspension design, and component quality. If you are wondering when to change shock absorbers,…
A shock absorber is a suspension component that controls how quickly a vehicle’s suspension moves up and down after bumps, dips, braking, acceleration, and other road inputs. It works with the springs to prevent excessive bouncing and helps keep the tires in controlled contact with the road. So, what does a shock absorber do? It…
A gas shock absorber is a hydraulic shock absorber that uses pressurized gas, usually nitrogen, along with shock absorber oil to control suspension movement. The gas helps reduce oil foaming and keeps damping performance more consistent when the shock works repeatedly or under demanding conditions. If you are wondering what is a gas shock absorber,…