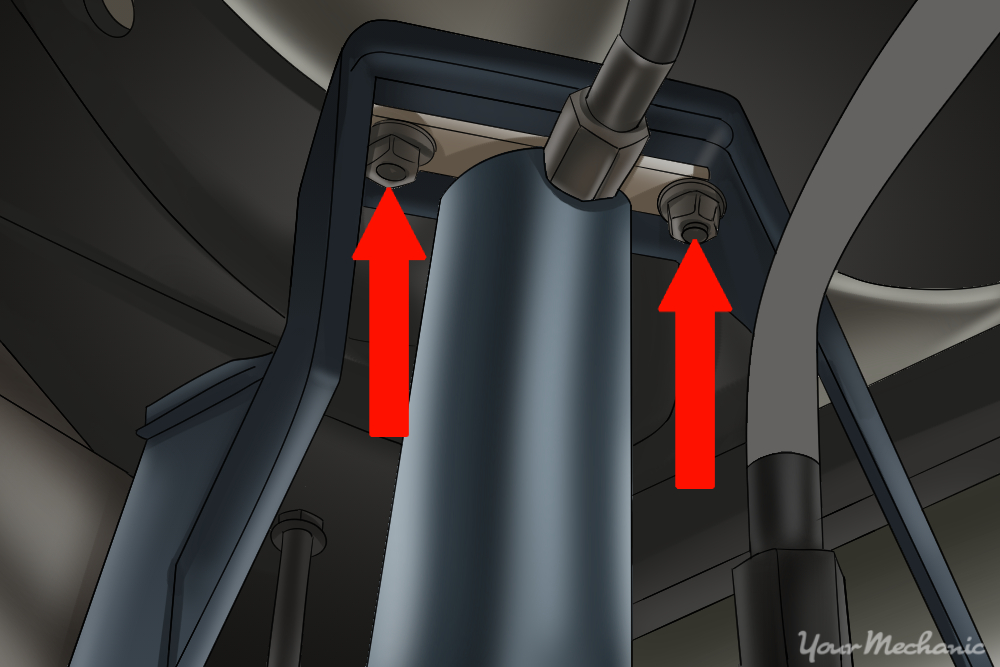
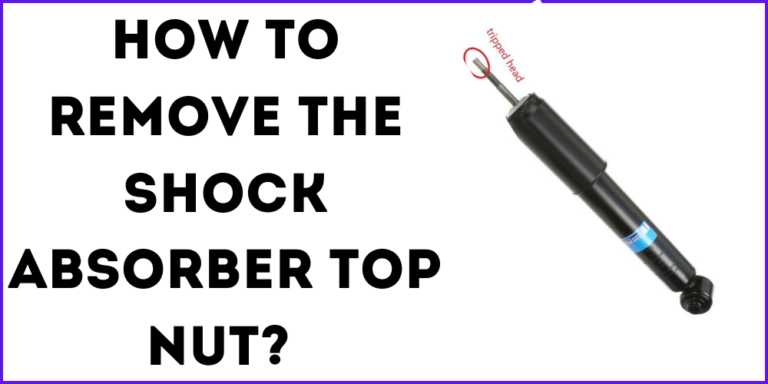
To remove a rear shock absorber top nut, secure the vehicle on level ground, support it with properly rated jack stands, locate the upper shock mount, and loosen the nut with the correct socket and wrench. If the shock shaft spins, use the specified shaft-holding tool. Never loosen a nut that could release a loaded spring or unstable suspension assembly.
In the United States, rear shock absorber repairs are common on passenger cars, pickup trucks, SUVs, and older vehicles with worn suspension parts. The upper shock nut can look simple to remove, but its location, corrosion, and connection to the shock shaft can make the job harder than expected. The correct method depends on the vehicle’s suspension design and the type of upper mount fitted.
Before starting, check the vehicle service manual for the approved lifting points, upper mounting arrangement, required tools, and tightening torque. Some rear shocks attach through the trunk or cargo area, while others are reached from underneath the vehicle or behind an interior trim panel. Certain vehicles use a separate shock absorber, while others use a strut assembly that may contain a compressed coil spring.
This guide explains how to identify the rear shock absorber top nut, prepare the vehicle, remove the nut, deal with common problems, and reinstall the hardware correctly. It also explains when a repair should stop because the suspension design or stored spring energy makes the job unsafe for a home mechanic.
The rear shock absorber top nut is the fastener that secures the upper end of the shock absorber to its mounting point. Depending on the design, it may hold a threaded shock shaft against rubber bushings and washers, or it may secure a shock eyelet or mounting bracket through a different fastener arrangement.
A shock absorber controls suspension movement by resisting rapid compression and extension. It helps the tires maintain contact with the road and reduces bouncing after the suspension moves over a bump. The top mount transfers forces between the shock and the vehicle body or chassis.
The exact removal method varies by make, model, year, and suspension design. A top nut that is accessible through a cargo compartment may be easy to reach, while one hidden above the axle or behind a wheelhouse liner may require additional access work.
Source: Shock Absorber Pro
Threaded shock shaft
A nut screws onto the threaded end of the shock piston rod. Some designs require a special tool to keep the shaft from rotating while the nut is loosened.
Rubber bushings and washers
These parts help isolate vibration and secure the shock. Their order and orientation must be recorded before removal.
Upper mounting bracket
Some shocks use a bracket or eyelet secured by a bolt rather than a nut directly on a threaded shaft. Follow the correct procedure for that design.
Shock Absorber Versus Strut: Why the Difference Matters
A conventional shock absorber is often a separate component from the coil spring. Removing its upper mounting nut may release the shock from the body without releasing the spring itself, provided the vehicle is designed that way and the suspension is properly supported.
A strut can serve as a structural part of the suspension and may be surrounded by a coil spring under substantial compression. Removing a strut’s center shaft nut can release stored spring energy if the assembly is not properly controlled. Do not treat a strut center nut like an ordinary rear shock mounting nut.
Separate shock
Follow the service procedure for the upper shock mount and support the suspension as required.
Spring-loaded strut
Do not remove the center shaft nut unless the manufacturer specifically directs it and the spring is controlled with the correct equipment.
Tools and Supplies Needed Before Starting
Gather the tools before lifting the vehicle. Using the correct socket and shaft-holding tool is usually more effective than applying increasing force with an ordinary wrench. The required tools depend on the fastener size, access angle, and the type of shock shaft.
Check the service information for your vehicle before buying a tool set or selecting a replacement nut. A socket that fits the nut may still be too deep or too wide to reach the fastener without contacting the shock shaft or surrounding mount.
Source: Snapklik.com
Socket and ratchet
Use the correct metric or SAE socket for the actual fastener. A six-point socket is generally useful for reducing the chance of rounding a tight nut.
Combination wrenches
A box-end wrench may fit where a socket cannot. A thin wrench may be needed to hold a shaft or inner fastener if the manufacturer specifies one.
Shock shaft-holding tool
Some shock absorbers have a hex recess, internal Torx feature, or flats that allow the shaft to be held while the nut turns. Use the correct tool rather than gripping a polished shaft with locking pliers.
Penetrating oil
A suitable penetrating product may help free exposed corroded threads. Follow its label and keep it away from brake friction surfaces and other incompatible materials.
Floor jack and jack stands
Use equipment rated for the vehicle’s weight and place it only at approved lifting and support points. A jack alone is not a safe support.
Wheel chocks and protective equipment
Chock the wheels that remain on the ground and wear eye protection and suitable gloves. Use a work light to inspect the upper mount.
Torque wrench
Use a torque wrench with an appropriate range to tighten the hardware to the vehicle or shock manufacturer’s specification during installation.
When a Specialized Shock Nut Socket Helps
Some upper shock nuts have a recessed design that makes it difficult to hold the shock shaft and turn the nut at the same time. A pass-through socket or purpose-built shock absorber socket may allow access to the nut while leaving the shaft-holding tool in place.
A specialized socket is useful only when its size and design match the hardware. A large multipiece kit is not necessary for every vehicle, so verify the required tool before purchasing one.
Confirm the dimensions
Check the nut size, shaft feature, and available clearance against the tool manufacturer’s specifications.
Avoid improvised extensions
Do not force a mismatched socket or use an unstable stack of adapters that could slip and damage the mount.
Safety Precautions Before Removing the Top Nut
Prepare the vehicle before reaching for the nut. Suspension components can move when their mounting points are released, and a vehicle supported incorrectly can fall. The safest procedure begins with the vehicle-specific service instructions, not with the first fastener.
Park on firm, level ground, select Park on an automatic transmission or the appropriate gear on a manual transmission, and apply the parking brake. Chock the wheels that remain on the ground. If the vehicle must be raised, use the approved lift points and support it with properly rated jack stands before working underneath it.
Do not rely on a hydraulic floor jack as the only support. Never place any part of your body beneath a vehicle that is held up only by a jack. If the vehicle has air suspension, follow the manufacturer’s instructions for disabling automatic leveling and supporting the vehicle before lifting it.
Source: eBay
Control suspension movement
Support the suspension or axle where the service procedure requires it. Do not allow the axle or control arm to drop suddenly when the shock is disconnected.
Identify stored spring energy
Do not loosen the center nut of a compressed-spring strut unless the exact procedure and suitable spring-control equipment are available.
Check access from inside and outside
Some upper mounts sit behind trunk trim, rear seat panels, or cargo-area covers. Remove only the panels required for access and avoid damaging clips or wiring.
Let hot parts cool
Do not work near a hot exhaust system or other hot components. Keep penetrating oil and other flammable products away from heat and ignition sources.
When to Stop and Seek Professional Help
Stop if the spring appears unstable, the vehicle shifts on its supports, the mounting structure is badly corroded, or the fastener begins to deform. A rounded nut or damaged shaft can make the repair more complex, and aggressive removal can damage a mount or nearby component.
A professional repair shop is also the safer choice when the service procedure requires a spring compressor, a special fixture, or equipment you do not have. Do not improvise around a safety-critical suspension component.
Vehicle will not remain stable
Stop work, keep clear of the vehicle, and arrange safe support before continuing.
Mounting metal is cracked or severely rusted
Have the structure inspected before the shock is removed or the vehicle is driven.
Strut spring is under tension
Use the specified spring-control procedure or have a qualified technician perform the repair.
How to Remove Rear Shock Absorber Top Nut Step by Step
The following procedure applies to a conventional rear shock with a threaded upper shaft and an accessible top nut. It is a general guide, not a substitute for the repair procedure for a specific vehicle. If your rear suspension uses a different mounting design, follow the manufacturer’s instructions instead.
Source: eBay
Step 1: Confirm the Correct Fastener
Locate the upper end of the rear shock absorber and identify the nut that secures the shock to its mount. Check whether the fastener sits inside the trunk, beneath a cargo-area cover, behind a trim panel, or underneath the vehicle near the wheelhouse.
Compare the assembly with the service diagram. Confirm that the nut is an upper shock mounting nut and not the center nut of a spring-loaded strut. If the design is unclear, do not loosen it until you have identified the correct procedure.
Record the original arrangement
Take a photo of the washers, rubber bushings, spacers, and nut before disassembly.
Check for access restrictions
Move only the trim or covers needed to reach the fastener and protect nearby wiring.
Step 2: Raise and Support the Vehicle if Needed
Some upper shock nuts can be reached from inside the vehicle without removing a wheel. Other designs require the vehicle to be raised to access the mount or relieve suspension load. Follow the service manual to determine whether the suspension should be loaded or unloaded during removal.
If lifting is required, loosen wheel fasteners slightly before lifting when wheel removal is part of the procedure. Raise the vehicle at the approved lifting point and set it securely on rated jack stands. Verify stability before working near or under the suspension.
Keep the vehicle stable
Do not continue if a jack stand is tilted, the ground is soft, or the vehicle moves when lightly checked from a safe position.
Support the axle when directed
Use an appropriate support method to control axle or suspension-arm movement as the shock is disconnected.
Step 3: Expose and Clean the Top Nut
Remove the required access cover or trim panel, then inspect the nut and exposed threads. Brush away loose dirt and flaky rust with a suitable brush. Keeping debris out of the mount makes it easier to inspect the threads and fit the correct tool.
If corrosion is present, apply a compatible penetrating oil to the exposed threaded area and allow it to work according to the product instructions. Avoid soaking rubber parts unnecessarily, and keep the product off brake rotors, pads, and other friction surfaces.
Inspect before applying force
Look for a distorted nut, damaged threads, cracked rubber, or rust that has weakened the mount.
Use controlled force
A clean, properly fitted socket is less likely to slip than an adjustable wrench on a tight fastener.
Step 4: Fit the Correct Socket
Place the correct socket fully over the nut. Keep the tool aligned with the fastener so the force is applied evenly. If the nut sits in a recess, use a compatible pass-through or shock absorber socket that provides enough clearance for the shaft-holding tool.
Turn the nut in the loosening direction, which is normally counterclockwise when viewed directly from the exposed nut side. Confirm that the fastener uses a standard right-hand thread before applying force, because unusual hardware or an incorrect viewing angle can lead to mistakes.
Avoid rounding the nut
If the socket rocks or does not seat fully, stop and verify the size and type of socket.
Keep tools aligned
Do not pull at an angle that could slip onto your hand or damage the surrounding mount.
Step 5: Hold the Shock Shaft if It Spins
If the nut turns but the shock shaft rotates with it, the nut may not loosen. Many shock shafts have a feature designed to accept an Allen key, Torx bit, or special holding tool. Check the shock manufacturer’s instructions to identify the correct feature and tool.
Fit the shaft-holding tool securely and turn the nut with the appropriate wrench or pass-through socket. Use steady, controlled force while preventing the shaft from rotating. Avoid gripping the polished shaft with pliers, because scratches can damage the shaft seal and lead to leakage.
Use the correct shaft feature
Match the tool to the actual recess or flats. Do not force an Allen key or Torx bit into a feature that does not fit.
Do not over-torque the holding tool
Small internal features can strip under excessive force. If the nut remains stuck, reassess the method rather than applying unlimited leverage.
Step 6: Remove the Nut and Retain the Hardware
Once the nut begins to turn freely, continue loosening it while keeping the shock shaft controlled if needed. Remove the nut carefully and retain the washers, spacers, and bushings in their original order. Some designs use different upper and lower bushings, so do not assume the parts are interchangeable.
Watch for any movement of the shock body or suspension. If the shock is being removed completely, support it as required before disconnecting the lower mount. Do not let the shock or suspension drop unexpectedly.
Keep hardware organized
Place the nut and small parts in a tray or label them in removal order.
Inspect the threads
Check the nut and shaft for stripped, flattened, or heavily corroded threads before reuse.
Step 7: Check the Mount Before Reassembly
Inspect the upper mount, rubber bushings, washers, and surrounding body metal. Replace parts that are cracked, torn, permanently deformed, or otherwise outside the manufacturer’s service limits. A damaged mount can cause knocking, vibration, and poor shock retention.
If the shock is being replaced, confirm that the new unit matches the vehicle and that its shaft, mount, bushings, and hardware are compatible. Use the specified replacement nut where the manufacturer requires new hardware.
Look for corrosion
Surface rust may be manageable, but deep corrosion or weakened mounting metal needs proper assessment.
Confirm the parts fit
Compare the new and old shock designs and verify the correct application before installing the replacement.
How to Remove a Stuck or Rusted Rear Shock Top Nut
A stuck top nut is often caused by corrosion, damaged threads, a nut that has seized onto the shaft, or a shock shaft that rotates instead of allowing the nut to loosen. The best approach is to identify which problem is present before applying more force. Repeatedly pulling harder on the same tool can round the nut or damage the mount.
Source: Amazon.com
Use Penetrating Oil and Allow Time
Apply a suitable penetrating product to the exposed threads and allow the product to work as directed on its label. If the threads are badly corroded, more than one application may be useful. Clean away excess product before continuing and keep it away from brake components and ignition sources.
Penetrating oil cannot restore damaged threads or repair a weakened mount. If the nut remains immovable, inspect the tool fit and the condition of the fastener before choosing another method.
Target the threaded joint
Apply the product where it can reach the nut and exposed threads rather than flooding the whole mount.
Use a Better-Fitting Tool
If the socket slips, stop immediately. Verify the nut size and use a properly fitting six-point socket or a suitable extraction socket if the nut has already rounded. Extraction tools need enough access and clearance to grip the damaged fastener safely.
Do not hammer a tool into place if doing so could damage a thin mount, a shock shaft, or nearby bodywork. When access is poor, a mechanic may have the appropriate low-profile or specialized tool for the job.
Avoid adjustable-wrench slippage
A poorly fitted adjustable wrench can damage the corners of a tight nut.
Address a Spinning Shaft
When the nut and shaft turn together, use the designed shaft-holding feature and the correct combination of tools. A pass-through socket can help where the nut must turn around a holding tool. Check the component instructions for any restrictions on impact tools or powered removal.
If the shaft feature is already stripped or inaccessible, stop before damaging the shock further. A damaged shock may need to be removed using a vehicle-specific procedure or handled by a repair shop.
Keep the shaft surface intact
Do not clamp locking pliers onto the smooth sealing surface of the piston rod.
Avoid Uncontrolled Heat and Excessive Force
Open flames and uncontrolled heating are poor choices around a shock mount. Heat can damage rubber bushings, seals, undercoating, fuel lines, wiring, and nearby body components. It can also create a fire risk when penetrating oil is present.
Do not extend a wrench with an improvised pipe or strike the mount in a way that could bend the bodywork. If a nut is seized beyond the reach of normal tools, use a documented removal method appropriate for the exact vehicle or seek professional help.
Stop if the mount deforms
Any bending, cracking, or movement of the mounting metal is a reason to stop and inspect the structure.
Common Problems and How to Diagnose Them
The symptom during removal often points to the next useful check. Use the table below to choose a measured response instead of applying more force without understanding why the nut will not move.
Source: Amazon.com
The nut will not turn at all
Check for corrosion, the correct socket size, adequate tool engagement, and any special service procedure. Apply compatible penetrating oil where appropriate.
The shock shaft spins with the nut
Use the designed shaft-holding feature with a compatible wrench or pass-through socket.
The socket slips off the nut
Stop and verify the size. Use a suitable six-point or extraction socket if the fastener is damaged.
The nut turns but does not come off
Inspect for damaged threads, a deformed nut, a retaining feature, or a shaft that is turning with the nut. Check the service information before continuing.
The mount moves as the nut loosens
Stop and support the assembly according to the manufacturer’s procedure. Determine whether the movement is normal mount release or an unsafe shift in the suspension.
The upper mount is heavily rusted
Assess the condition of the body metal and mounting hardware. Severe structural corrosion may require repair before the vehicle can be used safely.
Quick Decision Table
This table links common removal problems with a suitable first response. It does not replace vehicle-specific instructions, especially where a spring-loaded assembly or damaged structural mount is involved.
Minor surface corrosion
Clean the exposed area, apply compatible penetrating oil, and use the correctly sized socket.
Spinning piston rod
Identify the shaft-holding feature and use the correct holding tool.
Rounded nut
Use a suitable extraction method with enough clearance; stop if the mount may be damaged.
Stripped shaft threads
Plan for component or hardware replacement according to the service procedure; do not force a damaged nut back into place.
Cracked or deeply corroded mount
Arrange a proper structural inspection and repair before driving.
How to Reinstall the Rear Shock Absorber Top Nut
After removing the top nut, reinstall the shock and hardware in the order specified by the vehicle or shock manufacturer. The correct sequence matters because the bushings, washers, and spacers control how the mount sits and how the shock transfers force to the vehicle body.
Do not assume that tightening the nut as hard as possible is the right approach. Excessive tightening can crush rubber bushings, damage threads, or distort mounting parts, while insufficient tightening can allow movement and noise. Use the exact torque specification for the vehicle and component.
Source: urbsgarage.com
Check the Hardware and Bushing Order
Compare the parts with your photos and the service diagram. Replace damaged bushings, distorted washers, worn nuts, and other parts that the manufacturer identifies as non-reusable. If the new shock includes its own mounting hardware, follow its installation instructions and confirm that it matches the vehicle.
Use the correct nut
Do not substitute a nut with a different thread pitch, strength grade, or locking design.
Align the shock correctly
Make sure the shock shaft and upper mount sit in the correct position before tightening.
Tighten to the Manufacturer’s Specification
Start the nut by hand when the design permits, ensuring it threads smoothly without cross-threading. Hold the shock shaft with the specified tool if it starts to rotate, then use a torque wrench to tighten the fastener to the documented specification.
The required torque is not universal. It can vary by vehicle, model year, shock type, fastener size, and mount design. Obtain the value from the vehicle service manual or the component manufacturer’s instructions rather than guessing or copying a specification from another vehicle.
Follow any special tightening sequence
Some mounts have specific requirements for vehicle loading, bushing orientation, or final tightening position. Follow the documented procedure.
Do not reuse prohibited hardware
Replace one-time-use or self-locking fasteners when the service instructions require it.
Inspect Before Driving
Confirm that the upper mount is secure, the bushings are seated correctly, and all removed trim and wheel hardware have been reinstalled. If the shock was removed completely, verify the lower mounting hardware and any disconnected brackets or links as required by the repair procedure.
Lower the vehicle safely and perform a final visual inspection. Listen for unusual movement during a cautious check in a safe area, but do not drive if a fastener is loose, a mount is damaged, the vehicle sits unevenly, or the suspension behaves abnormally.
Check for loose hardware
Verify all disturbed fasteners using the specified torque and procedure.
Recheck after installation if directed
Follow any manufacturer instruction for post-installation inspection or retightening.
Research Notes and Important Limitations
This guide uses general suspension service principles and the provided automotive image references to explain the removal process. It is not a report of hands-on testing, and no vehicle-specific service manual was supplied for this task. Therefore, no universal nut size, torque value, removal time, or guaranteed method is claimed.
The most important variable is the exact suspension assembly. The same phrase, rear shock absorber top nut, can refer to different hardware across vehicles. A procedure that works for a conventional separate shock may be unsafe or incorrect for a strut with a compressed coil spring.
For a vehicle-specific repair, verify the procedure against the factory service information for the exact year, make, model, trim, and suspension package. Confirm the lifting points, spring-control requirements, fastener replacement rules, and tightening specifications before beginning.
Source: YouTube, Ponyo Garage
Documented general principle
The vehicle must be supported safely, the correct fastener must be identified, and the correct tool must be used for the shock shaft and nut.
Vehicle-specific information still required
The exact socket size, torque specification, required access method, and any special tool depend on the vehicle and component.
No universal removal guarantee
Severe corrosion, damaged threads, unusual mounting designs, and structural damage may require professional service.
Next Questions to Resolve Before the Repair
The key unresolved question for any particular vehicle is whether the upper nut can be removed independently of a spring-loaded assembly. The service manual and a clear view of the mounting design answer that question better than a generic procedure.
Another important question is whether the nut and bushings are reusable. The answer depends on the hardware design and the manufacturer’s service requirements. Inspecting the parts and checking the correct service information prevents unnecessary replacements and unsafe reuse.
Before starting
Confirm the suspension design, lifting procedure, and required tools.
During removal
Identify whether the nut is seized, rounded, or spinning with the shock shaft before choosing a remedy.
After removal
Inspect the mount and threads, then verify the correct hardware and torque specification for installation.
Frequently Asked Questions
Q
Can I remove the rear shock absorber top nut without removing the wheel?
Yes, on some vehicles. If the upper nut is accessible through the trunk, cargo area, or an opening near the suspension, wheel removal may not be necessary. Other vehicles require wheel removal or additional access work. Follow the service manual for the exact vehicle and ensure the vehicle is supported safely whenever lifting is required.
Q
Why does my rear shock absorber shaft spin when I loosen the top nut?
The shaft may rotate because the nut and shaft are turning together rather than the nut moving along the threads. Many shock absorbers have an internal hex, Torx feature, or flats for a holding tool. Use the specified tool to keep the shaft stationary while loosening the nut. Avoid gripping the smooth piston rod with pliers, as surface damage can cause seal failure.
Q
Should I use an impact wrench to remove a stuck shock top nut?
Only if the vehicle or shock manufacturer permits it and the tool is suitable for that fastener. Some shock shafts and internal holding features can be damaged by uncontrolled impact. Begin with the correct socket and shaft-holding method, and use penetrating oil when appropriate. If the nut remains seized, consult the documented removal procedure instead of applying excessive force.
Q
Can I use heat to loosen a rusted rear shock absorber nut?
Uncontrolled heat is not recommended around a shock mount. Heat can damage rubber bushings, shock seals, fuel lines, wiring, undercoating, and nearby body components. Penetrating oil can also create a fire hazard near heat or flames. If ordinary removal methods fail, use an approved vehicle-specific procedure or have a qualified technician handle the fastener.
Q
Do I need to replace the rear shock top nut after removal?
It depends on the fastener design and manufacturer instructions. Some applications permit reuse if the nut and threads remain in good condition, while others specify a new locking nut or other replacement hardware. Check the service manual and the replacement shock instructions before reassembly.
Q
What happens if I overtighten the rear shock absorber top nut?
Overtightening can damage the threads, distort mounting parts, or compress rubber bushings beyond their intended range. Under-tightening can allow movement, noise, or loss of secure mounting. Use a torque wrench and the exact specification for the vehicle and shock assembly rather than relying on feel alone.
Q
Can I drive with a loose rear shock absorber top nut?
Driving with a loose shock mounting nut is unsafe because the shock may move or separate from its mount, affecting suspension control and potentially damaging nearby parts. Do not drive until the mounting hardware has been inspected, installed correctly, and tightened to specification. If the mount is damaged or the shock is unsecured, arrange safe repair or transport.
✦ Wrapping Up
Conclusion
Removing a rear shock absorber top nut is usually manageable when the vehicle has a conventional separate shock and the correct tools are available. The essential steps are to identify the mounting design, support the vehicle and suspension safely, clean and inspect the fastener, use the correct socket, and hold the shock shaft when necessary.
A seized nut, spinning shaft, rounded fastener, or damaged upper mount calls for a careful diagnosis rather than more force. Avoid uncontrolled heat, improvised leverage, and any attempt to remove a spring-loaded strut center nut without the required procedure and equipment.
Before driving, inspect the mounting hardware, replace parts that cannot be safely reused, and tighten the assembly to the vehicle-specific specification. If the design or condition of the suspension is uncertain, use the factory service information or have a qualified mechanic complete the repair.
💡 Key Takeaway
Before loosening the nut, identify your vehicle’s exact rear suspension design and check its service procedure. Then use a correctly fitted socket and the specified shaft-holding tool, and reinstall all hardware to the documented torque.
Eric
Hi, I’m Eric Bennett, the person behind OffRoadTruckAccessories.com.
I created this blog to share my interest in trucks, off-road driving, automotive accessories, and DIY modifications. I enjoy learning how different truck accessories work, testing their usefulness, and understanding whether they are truly worth buying.
Shock absorbers are located near the wheels as part of the suspension system, usually between the vehicle’s body, frame, or subframe and a suspension component such as a control arm, axle, or wheel assembly. However, the exact answer to where are shock absorbers located on a car depends on the suspension design. Some vehicles have…
You should change shock absorbers when they are worn, leaking, damaged, or no longer controlling suspension movement properly. There is no single replacement interval that applies to every vehicle because shock absorber life depends on road conditions, vehicle weight, driving habits, suspension design, and component quality. If you are wondering when to change shock absorbers,…
A shock absorber is a suspension component that controls how quickly a vehicle’s suspension moves up and down after bumps, dips, braking, acceleration, and other road inputs. It works with the springs to prevent excessive bouncing and helps keep the tires in controlled contact with the road. So, what does a shock absorber do? It…
A gas shock absorber is a hydraulic shock absorber that uses pressurized gas, usually nitrogen, along with shock absorber oil to control suspension movement. The gas helps reduce oil foaming and keeps damping performance more consistent when the shock works repeatedly or under demanding conditions. If you are wondering what is a gas shock absorber,…