
How to Get Ball Joint Out of Control Arm: Key Facts and Guidance
A worn ball joint can make a vehicle wander, clunk over bumps, or develop uneven tire wear. When the joint is pressed into the control arm, removing it is often harder than removing the control arm itself. Rust, a retaining snap ring, and years of suspension load can make the old joint feel permanently installed.
The safest general answer to how to get ball joint out of control arm is to remove the control arm, confirm how the joint is retained, and push the joint out with a correctly sized ball joint press or hydraulic press. A hammer may help free rust in limited situations, but striking the joint or control arm aggressively can bend the arm, damage the press, or release stored force unpredictably.
This guide explains how to identify the joint style, support the assembly, remove a snap ring or rivets, press the old joint out, and check the result before installing a replacement. Vehicle designs vary, so use the service information for your specific year, make, model, and suspension layout whenever it gives a different procedure or tool requirement.
At a glance
- Confirm that the ball joint is replaceable separately before removing the control arm.
- Use a properly sized press with the control arm supported close to the joint housing.
- Stop if the arm is cracked, bent, badly corroded, or unsafe to support under load.
How to get ball joint out of control arm without damaging it
The procedure below applies primarily to a press-in ball joint, the common type fitted tightly into a machined bore in the control arm. Some joints are held by rivets, bolts, a threaded retaining ring, or the arm itself; those designs need different removal steps. Never force a press against an area that is not designed to carry the load.
Tools you will need
- Vehicle service information for torque specifications, removal details, and joint orientation
- Floor jack and properly rated jack stands to support the vehicle safely
- Wheel chocks and basic hand tools for wheel and control-arm removal
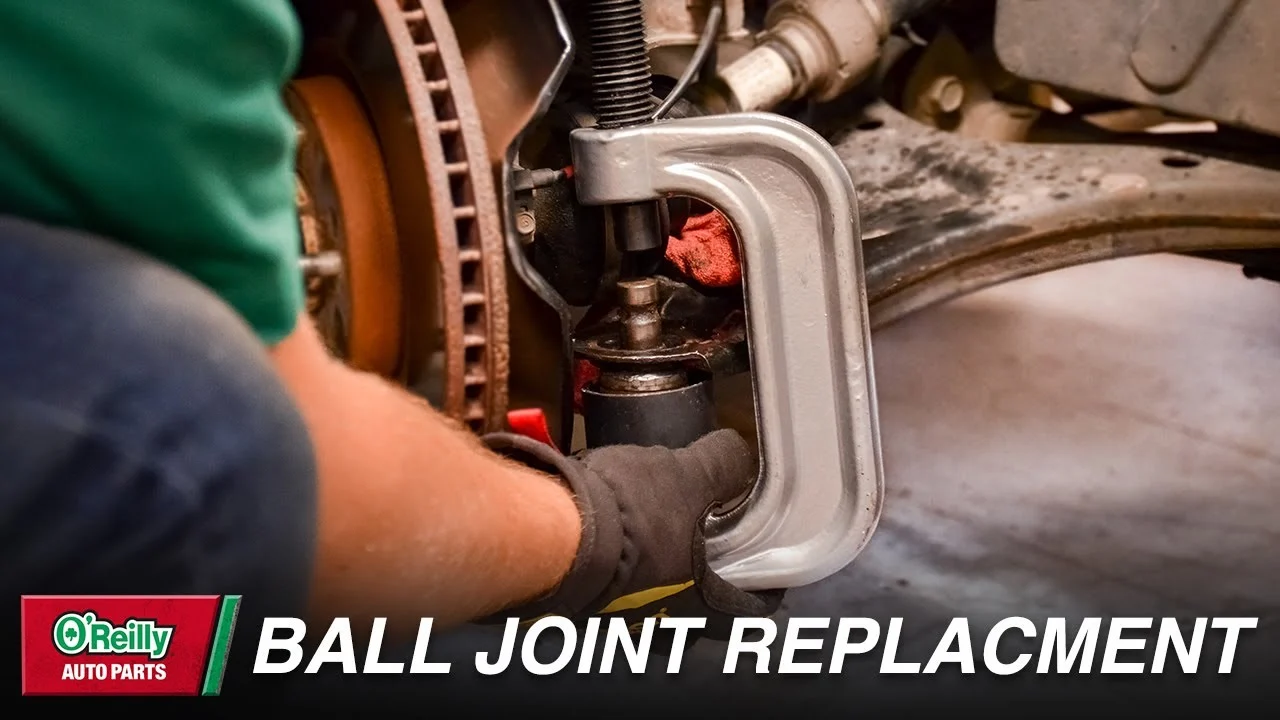
- Ball joint press kit with cups, adapters, and a forcing screw, or a suitable hydraulic shop press
- Snap-ring pliers if the joint uses an external retaining ring
- Angle grinder or drill only if the joint is riveted and the vehicle procedure permits removing the rivets
- Wire brush, penetrating oil, and eye protection for cleaning and pressing work
- Replacement ball joint and any required snap ring, retaining hardware, cotter pin, or control-arm fasteners

Step 1 Verify the replacement method and joint design
Before lifting the vehicle, look up the suspension parts for your exact vehicle. Determine whether the ball joint is a separate press-in component, part of a complete control arm, bolted into the arm, or secured with rivets. A few applications use a threaded joint or an unusual retaining plate, so a generic press procedure may not apply.
Compare the replacement joint with the installed part. Check the stud shape, housing diameter, snap-ring groove, grease-fitting location, and any alignment marks. If the replacement is sold only with a control arm for your application, replacing the complete arm may be the intended repair and may avoid a dangerous attempt to remove a non-serviceable joint.
Read the service information for whether the joint must be installed in a particular orientation. The grease fitting, stud angle, or housing notch may need to face a specific direction. Marking the old joint can help you understand its position, but the vehicle instructions take priority.
Step 2 Support the vehicle and remove the control arm
Park on a firm, level surface, set the parking brake, and chock the wheels that remain on the ground. Loosen the wheel lug nuts slightly, raise the vehicle at the specified lift point, and place it on jack stands under approved support points. Lower the vehicle gently onto the stands and confirm that it is stable before working underneath it.
Remove the wheel and inspect the control-arm connections. Depending on the suspension, you may need to disconnect the sway-bar link, brake hose bracket, ABS wire bracket, steering knuckle, ball-joint nut, shock or strut connection, and control-arm pivot bolts. Do not allow a brake caliper to hang by its hose; support it separately if it must be moved.
The coil spring deserves special attention. On many suspensions, a spring is captured under substantial force by the control arm. If removing the arm will release or disturb the spring, use the vehicle-specific spring-removal procedure and the correct compressor or fixture.
Do not remove a spring-retaining bolt simply because it is in the way.
Support the steering knuckle or hub assembly so it does not pull on the brake hose, ABS wiring, or other components. Remove the ball-joint nut only when the knuckle is supported and you understand how the joint separates. If the stud spins with the nut, use the correct counterhold rather than damaging the stud threads with uncontrolled force.
Important
Never work under a vehicle supported only by a floor jack. If a coil spring remains compressed in the control-arm assembly, stop and follow the manufacturer’s spring-removal method or have a qualified repair facility handle that part of the job.
Step 3 Clean the joint area and remove its retaining hardware
With the control arm on a stable workbench, brush dirt and loose rust away from the ball-joint housing. Identify the retaining feature before applying the press. A press-in joint may have a snap ring on one side, a flange on the other, or both a flange and a retaining ring.
Remove the snap ring with the correct pliers and make sure it is fully out of its groove. If rust has hidden the ring, clean the groove rather than prying blindly against the control arm. A ring that remains partly engaged can lock the joint in place and cause the press to load the arm unevenly.
Some original ball joints are riveted to the control arm instead of pressed into it. The rivet heads must be removed and the joint unfastened according to the service procedure. A grinder can create heat and sparks, while drilling can damage the control arm if the bit wanders.
Wear eye protection, shield nearby components, and do not grind near fuel, brake, or electrical parts.
Do not remove a flange, plate, or fastener that appears to be part of the control arm’s structure unless the repair instructions identify it as ball-joint hardware. If you cannot tell whether a feature is a retainer or part of the arm, pause and verify it before pressing.
Step 4 Position the control arm and press cups correctly
Choose a receiving cup large enough for the old joint to pass into without touching the cup’s inner wall. On the opposite side, use a smaller adapter that bears on the joint’s housing or flange, not on the grease fitting, stud, rubber boot, or thin edge of the control arm.
The control arm must be supported close to the ball-joint bore. If the arm is supported only at its far ends, the pressing force can flex or bend it. Set the arm so the receiving cup is centered beneath the joint and so the joint has a clear path out.
Apply a small amount of penetrating oil around the joint-to-arm seam if corrosion is present, but keep oil off the press threads and areas where you need a secure grip. Lubricate the forcing screw with the press manufacturer’s recommended lubricant. Make sure the press screw, cups, and arm are square before loading them.
For a C-frame ball joint press, check that the frame is fully seated on the control arm and that the forcing screw is centered. For a hydraulic shop press, use stable parallel supports and keep your hands out of the space between the ram, adapters, and control arm.
Step 5 Apply pressure gradually and monitor the assembly
Turn the forcing screw slowly, or operate the hydraulic press with controlled strokes. Watch the cups and the control arm from the side. The joint may move suddenly after corrosion breaks loose, so keep your body and face out of the potential movement path.
Successful pressing looks like a straight, even movement of the joint into the receiving cup. If the cup shifts, the arm tilts, the press screw leans, or the joint starts to cock sideways, release the load and reset the arrangement. Continuing while misaligned can deform the bore or send an adapter out under force.
Light tapping on the outside of the control-arm housing may help break surface rust while the press is unloaded, but do not hammer on a loaded press. Never extend the forcing screw with improvised pipe extensions unless the tool manufacturer specifically permits it; extra leverage can exceed the frame’s safe capacity.
Helpful tip
If the joint will not move with a correctly aligned press, stop and reassess the retaining ring, rivets, cup size, and pressing direction. More force is not a substitute for finding a hidden retainer or a support point that is bending the arm.
Step 6 Remove the old joint and inspect the control arm bore
Once the joint clears the bore, release the press gradually and remove the old part. Keep the old joint available for comparison until the new one has been confirmed against the vehicle and the control arm.
Clean the control-arm bore with a wire brush and inspect it in bright light. The bore should be round, free of deep grooves, and free of cracks or heavy corrosion. Some light surface rust is normal, but flaking metal, an oval opening, a split around the housing, or a control arm that has become thin is a reason to replace the arm rather than install another joint.
Check the arm for bends caused by an earlier impact. Compare its shape with the replacement part or the other side of the vehicle when appropriate. A new ball joint cannot correct a bent control arm, and pressing a joint into a distorted bore may not produce a secure fit.
A useful way to approach how to get ball joint out of control arm is to check your progress after each stage.
Step 7 Confirm the result before installing the replacement
Hold the replacement joint next to the empty bore and confirm that the housing diameter and retaining features match. The new joint should not be loose in the bore, and it should not require filing or machining to start straight. Do not sand the bore aggressively to make an oversized joint fit.
Check the pressing direction and orientation again. Many replacement joints have a shoulder or snap-ring groove that must face a specific side of the arm. If the service information calls for a particular mark or grease-fitting direction, identify that orientation before beginning installation.
At this point, the old ball joint should be completely out, the control arm should be structurally sound, and the replacement should be verified. If those conditions are not met, stop before installation and resolve the discrepancy rather than forcing an incompatible component.
What makes a ball joint difficult to remove?
A ball joint is designed to remain tightly fixed while the suspension moves around its stud. The housing is commonly an interference fit, meaning its outside diameter is slightly larger than the control-arm bore. Pressing it out requires force applied in a straight line while the arm is supported against that force.
Rust increases the friction between the housing and the bore. It can also form a lip around the exposed edge of the joint, making the joint seem larger than it was when installed. A retaining ring, rivet head, or flange can stop movement entirely if it is overlooked.
The control arm itself is usually formed from stamped steel, cast aluminum, or forged metal. It is strong in its intended directions but can bend when supported at the wrong points. This is why a properly sized press and close support matter more than simply using the largest available tool.
When a press-in joint is not the right diagnosis
Not every ball joint should be pressed out of a control arm. A complete replacement arm may contain a joint that is permanently installed, while another design may use bolts or a threaded retainer. Some aluminum control arms also require special adapters or have limited support areas.
If the replacement catalog lists a complete control arm but no separate joint for your exact configuration, confirm the application before disassembling anything. The phrase how to get ball joint out of control arm describes a method, not proof that the particular arm is serviceable.
A joint that is welded, heavily integrated into a forged assembly, or surrounded by cracked metal should not be treated as an ordinary press-in repair. Replace the complete assembly or obtain the manufacturer’s specified repair method.
How to check the repair before driving
Removing the old joint is only half the job. The control arm, replacement joint, and related fasteners must be reassembled correctly, and the suspension must be checked before the vehicle returns to the road. Follow the vehicle’s torque specifications and use new one-time-use hardware where required.

Inspect the installed joint and arm
After the replacement is pressed in, verify that it is fully seated against its shoulder or specified stop. Confirm that the snap ring is completely engaged around its groove and that the joint is not tilted. The rubber boot should be intact, evenly positioned, and free from contact with the control arm or other moving parts.
Make sure the grease fitting, if supplied, is accessible and oriented correctly. Do not fill a sealed joint unless the manufacturer provides a grease fitting and instructions for doing so. Excessive grease can damage a boot or conceal an installation problem.
Reconnect the suspension with correct fastener practice
Reinstall the control arm, ball-joint stud, pivot bolts, sway-bar connection, brackets, and any other removed parts in their original locations. Tighten each fastener to the specified torque. Many rubber-bushed control-arm pivot bolts must be final-tightened with the suspension at normal ride height so the bushing is not preloaded.
Install a new cotter pin when the design uses a castellated nut and cotter pin. Do not loosen a torqued nut to align the pin hole; tighten it farther within the specified procedure. If the vehicle uses a prevailing-torque or torque-to-yield fastener, replace it as instructed.
Perform a practical movement and alignment check
Before installing the wheel, look for pinched brake hoses, stretched ABS wires, missing clips, loose brackets, and contact between the ball-joint boot and nearby components. Move the steering through its range if the vehicle is safely supported and watch for binding or interference.
Install the wheel and tighten the lug nuts to specification. Lower the vehicle, settle the suspension, and recheck accessible fasteners. A control-arm or ball-joint replacement can change camber or toe, so arrange a professional wheel alignment before relying on the vehicle for normal driving.
Check your result
With the vehicle safely on the ground, the wheel should sit normally, the steering should move without binding, and there should be no visible gap at the ball-joint shoulder or retaining ring. Any new clunk, pull, or abnormal steering feel requires another inspection before driving farther.
Troubleshooting a stuck or damaged ball joint
Most pressing problems come from incorrect support, a missed retainer, or an adapter that is contacting the wrong part. The symptoms below point to the most likely correction.
| What you observe | What to check |
|---|---|
| The press loads up but the joint does not move | Confirm that all snap rings, rivets, plates, or threaded retainers are removed and that the pressing direction is correct. |
| The control arm begins to bend | Release pressure immediately and move the supports closer to the joint housing. Use the specified adapter or replace a damaged arm. |
| The joint comes out crooked | Center the receiving cup and forcing adapter. Check that the arm is level and that the cup is not touching the control-arm bore. |
| The replacement joint is loose | Stop installation. Measure or compare the parts and inspect the bore for wear, distortion, or corrosion; do not rely on adhesive or peening unless specifically prescribed. |
| The press frame or screw is damaged | Do not continue using it. A bent or cracked press can fail under load and should be replaced or professionally inspected. |
When heat or impact tools are inappropriate
Heat can damage rubber boots, seals, paint, bushings, and nearby components. It can also create fire hazards around brake cleaner, grease, fuel vapor, and underbody coatings. Use heat only when the vehicle and tool instructions specifically allow it and when the joint has been completely separated from heat-sensitive parts.
An impact wrench may over-tighten or shock-load a small press. It can also make it difficult to notice that an adapter has shifted. A hand-operated press gives better feedback and is usually the more controlled choice for a beginner.
Know when to stop
Stop and seek qualified help if the spring cannot be safely controlled, the control arm is cracked or badly corroded, the joint will not release after the retaining hardware is confirmed, or you do not have a stable way to support the arm. Also stop if the press is at an extreme angle or requires force that makes the frame visibly flex.
A repair shop with a suitable hydraulic press may complete the removal without replacing an otherwise good control arm. If the arm or its mounting points are damaged, replacing the complete control-arm assembly is generally safer than trying to salvage it.
Ball joint removal FAQs
These answers address common beginner questions that arise while planning or checking the repair.
Can I remove a ball joint with a hammer?
Sometimes a hammer is used to help break rust after the joint is properly supported, but hammering alone is not a reliable method for a tight press-fit joint. Heavy blows can bend the control arm, damage the bore, or create an uncontrolled release. A ball joint press or hydraulic press is the safer primary method.
Do I have to remove the control arm?
Usually, removing the arm gives you the safest access and lets you support the joint correctly. Some vehicles have enough clearance for an on-car press, but only use that approach when the vehicle procedure and tool manufacturer support it. Do not force an on-car setup if the press cannot remain square.
Should I replace the control arm instead of the ball joint?
Replace the complete arm when the joint is not separately serviceable, the arm is bent or cracked, the bore is damaged, or the installed bushings are also worn and the complete assembly is the approved repair. A separate joint is reasonable only when the arm passes inspection and the replacement part matches exactly.
How do I know which way to press the joint out?
Look for the joint’s flange, shoulder, snap-ring groove, and the direction shown in the service instructions. The joint normally exits through the side opposite the flange or retaining shoulder, but this is not universal. Never guess when the housing or arm shape is unfamiliar.
Is an alignment required after ball-joint replacement?
An alignment is strongly recommended because removing the control arm or disturbing suspension joints can change wheel position. Even if the vehicle appears to drive straight, a changed toe or camber setting can cause tire wear or affect handling.
Finish the repair with a careful inspection
Learning how to get ball joint out of control arm safely comes down to identifying the correct joint design, controlling the suspension spring, removing every retainer, and pressing the housing straight out with close support. The old joint should leave a clean, round bore, and the control arm should show no cracks, bending, or serious corrosion.
Before driving, install the matching replacement joint with its required retainer and orientation, torque the suspension hardware correctly, inspect the brake and ABS components, and arrange an alignment. If the arm cannot be safely supported or the press setup does not stay square, stop and have the removal completed with the proper equipment.






