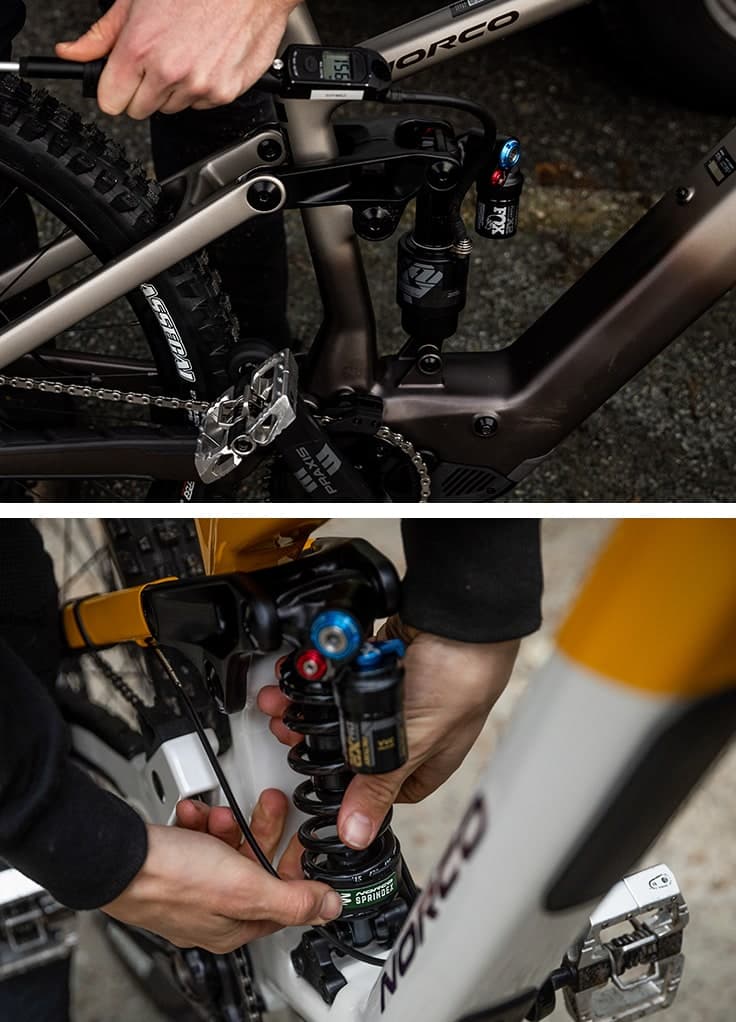
To adjust a bike shock absorber, check your bike’s manual, set the correct spring pressure or preload, measure sag with your normal riding gear, and tune rebound and compression if your shock supports them. Make one change at a time and test the bike on familiar ground.
For riders in the United States, a good bike suspension setup can make a real difference on rocky trails, forest paths, bike park runs, and rough neighborhood roads. The right settings help the tires stay in contact with the ground while the suspension absorbs bumps. However, the correct setup depends on the bike, shock design, rider weight, and type of riding. There is no single setting that works for every rider.
A bike shock absorber may use an air spring, a coil spring, or another spring design. Many mountain bikes also have controls for rebound and compression damping. These controls serve different purposes, so changing all of them at once makes it hard to find the cause of a poor ride. Start with the manufacturer’s setup instructions, establish the correct sag, and then adjust the damping in small steps. If the shock leaks, binds, or makes unusual noises, inspect it before riding.
Before adjusting your suspension, identify the type of shock fitted to your bike. A mountain bike may have a suspension fork at the front and a rear shock, while a road or hybrid bike may have only a front suspension fork or a basic spring unit. Some commuter bikes use simple suspension systems with limited adjustment.
A shock has two main jobs. Its spring supports the rider and absorbs impacts, while damping controls how quickly the suspension moves and returns. These functions work together, but they are not interchangeable. Changing spring pressure will not always fix a damping problem, and turning a rebound dial will not correct an unsuitable spring rate.
The owner’s manual is the best starting point because suspension designs vary. A dial marked with a plus or minus may control preload, compression, or another function depending on the model. Do not assume that two similar-looking shocks use the same adjustment method.
Source: i.ytimg.com
Air shock
Uses compressed air as the spring. A compatible shock pump changes the air pressure to suit the rider and setup requirements.
Coil shock
Uses a metal coil spring. Spring rate, fit, and sometimes preload affect the setup. The spring must match the rider and bike requirements.
Basic spring shock
Often uses a simple spring and limited damping controls. Some models allow preload adjustment, while others have no user-adjustable settings.
Suspension fork
Supports the front wheel and may offer air pressure, rebound, compression, or preload adjustments. Follow the fork manual rather than rear-shock instructions.
What Are Sag, Rebound, and Compression?
Sag is the amount the suspension settles under the rider’s weight. It gives the suspension room to move both into and away from the frame’s resting position. Too little sag can make the bike feel harsh and reduce available travel over dips, while too much can leave less travel for large impacts.
Rebound damping controls how quickly the shock extends after it compresses. Compression damping controls resistance as the shock compresses. Some shocks have separate high-speed and low-speed compression controls, but not all riders need to adjust both. Learn which controls your model has before turning them.
Sag
A starting measurement for spring setup, expressed as a percentage of available suspension travel.
Rebound
Controls the return speed after an impact. Too much rebound damping can make the shock return slowly; too little can cause a fast, unsettled return.
Compression
Controls resistance during compression. More damping may help limit excessive movement in some situations, but too much can make the ride harsh.
Gather the Tools and Prepare the Bike
A basic suspension adjustment usually requires little equipment, but using the correct tools matters. An air shock needs a shock pump rated for suspension service. A regular tire pump may not provide suitable control or a compatible connection, and its pressure gauge may not be accurate enough for this task.
You may also need a ruler or tape measure, a clean cloth, a helper to steady the bike, and the bike or shock manual. A small notebook or phone note can help you track changes. If the manufacturer specifies a torque value for a fastener, use an appropriate torque wrench rather than guessing.
Before working, inspect the shock body, seals, mounting hardware, and nearby frame parts. Look for oil residue, air loss, loose bolts, dents, cracks, or damage. Suspension parts operate under load, so do not attempt adjustments on a damaged unit.
Source: media-cdn.alltricks.com
Shock pump
Use one for air-pressure adjustments when required. Follow the shock’s maximum pressure limit and instructions for attaching and removing the pump.
Measuring tool
Use a ruler or tape measure to record the shock’s usable travel or the suspension measurement specified by the manufacturer.
Riding equipment
Wear the helmet, shoes, pack, water, and protective equipment you normally use so the setup reflects your real riding load.
Setup instructions
Check the recommended sag, pressure limits, preload limits, and adjustment procedure for your exact shock model.
Check the Bike Before Adjusting It
Make sure the tires are inflated to suitable pressures, the wheels are secure, and the suspension moves without obvious binding. Tire pressure changes how impacts feel, so a tire that is too hard or too soft can make suspension tuning confusing.
If you find a crack, bent part, loose mounting bolt, fluid leak, or repeated loss of air pressure, stop and arrange an appropriate inspection. Do not use suspension adjustments to hide a mechanical fault.
Safe work area
Place the bike on stable ground or use a suitable work stand without putting unintended force on the suspension.
Clean surfaces
Wipe dirt away from the shock and adjustment controls so grit does not enter sensitive parts.
Step 1: Set the Correct Sag
Sag is the best place to start because it establishes how much of the suspension travel the bike uses while supporting the rider. Set it with your normal riding gear and the bike in the position specified by its manufacturer. A helper can hold the bike upright while you sit or stand in your usual riding position.
The correct sag percentage depends on the bike’s suspension design and intended use. Some mountain bikes call for a setting near 25 to 30 percent of rear-wheel travel, but this is only a broad example, not a universal target. Use the manufacturer’s recommended range for your bike and shock.
Source: ridealigned.com
Start with the shock instructions
Find the recommended sag range and the exact method for measuring it. Some systems use a shock shaft indicator, while others specify a measurement at the wheel.
Use your normal riding position
Wear your usual gear and settle into the position that matches the riding style for which you are setting up the bike.
Read the indicator
Move the rubber O-ring or approved travel indicator to the seal before mounting, if your shock uses one. Dismount carefully and measure the movement according to the manual.
Adjust and repeat
Change air pressure or spring preload only as permitted, then repeat the measurement until it falls within the specified range.
How to Calculate Sag Percentage
To calculate sag percentage, divide the measured sag by the relevant suspension travel and multiply the result by 100. Use the same measurement basis for both values. Do not compare shock-shaft travel with rear-wheel travel unless the manufacturer’s instructions specifically support that method.
For example, suppose a hypothetical bike has 50 millimeters of usable rear-shock travel and its manual calls for 25 percent sag. The target shock sag would be 12.5 millimeters. If the manual instead defines the target using rear-wheel travel, use the rear-wheel travel measurement and method it specifies.
Formula
Sag percentage equals measured sag divided by the relevant suspension travel, multiplied by 100.
Hypothetical example
A 12.5 mm sag measurement on a shock with 50 mm of usable travel equals 25 percent sag.
Important limit
Do not treat an example percentage as the correct setting for every bike. Manufacturer guidance takes priority.
What If the Sag Is Too High or Too Low?
If sag is too high on an air shock, check the pressure and add air in small steps within the approved range. If sag is too low, reduce pressure in controlled steps and measure again. Follow the manufacturer’s pump instructions because removing or attaching a pump can affect the displayed pressure.
For a coil shock, the spring rate may be unsuitable if the sag cannot be set within the allowed preload range. Do not keep tightening the preload collar beyond the manufacturer’s limit. A different approved spring may be needed, and a suspension technician can confirm the correct choice.
Air shock
Use a suspension shock pump and recheck sag after each pressure change.
Coil shock
Check spring rate and permitted preload. Replace an unsuitable spring with a compatible option rather than forcing the adjustment.
Step 2: Adjust Air Pressure or Coil Spring Preload
Once you know the correct sag target, adjust the spring system that your bike uses. Air pressure affects how an air spring supports the rider throughout its travel. Coil spring rate determines how much force is needed to compress a coil, while preload changes how much the spring is compressed before the suspension carries the riding load.
Preload is often misunderstood. Adding preload to a coil spring does not turn an unsuitable spring into the right spring for a rider’s weight. It changes the initial spring compression and may alter sag within a limited range, but spring rate remains the main factor in how the coil responds to additional compression.
Source: i.ytimg.com
How to Adjust an Air Shock
Check the shock’s maximum pressure and the manufacturer’s recommended starting point. Attach the shock pump carefully, add or release air in controlled steps, and remove the pump as instructed. Measure sag again after each change. The pressure needed by one rider or bike may differ from another, even when both use similar-looking shocks.
Some air shocks use positive and negative air chambers or have special pressure-balancing procedures. If your model has these features, follow its exact instructions. Do not assume that one valve or one pressure reading tells the whole story.
Use the correct pump
A suspension shock pump allows controlled pressure changes and is designed for the relevant valve and pressure range.
Stay within the limits
Never exceed the pressure stated by the manufacturer or attempt to inflate a shock that shows signs of damage.
Recheck after changes
Measure sag again and confirm that the suspension returns smoothly before riding.
How to Adjust a Coil Shock
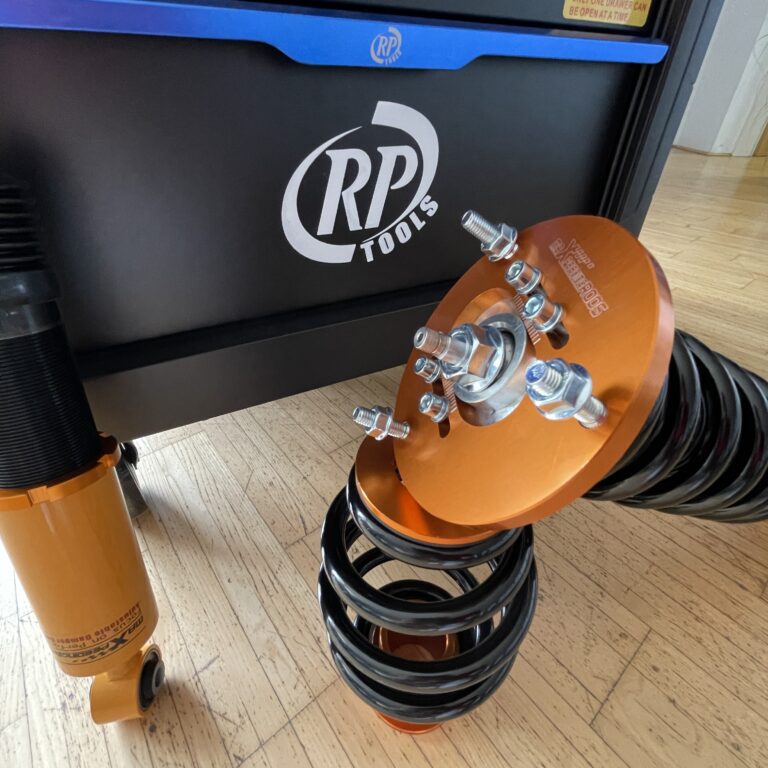
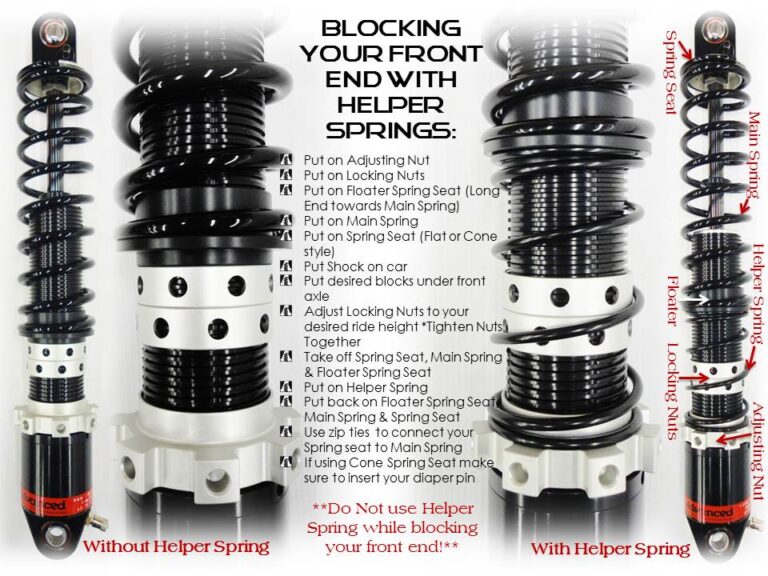
A coil shock may have a threaded preload collar or another approved spring adjustment. If the manual permits adjustment, make small changes and remeasure sag. Keep the spring properly seated and make sure the collar remains within the specified working range.
If the spring is loose when the suspension is fully extended, the collar reaches its limit, or the sag remains outside the recommended range, stop adjusting and check spring compatibility. Some shocks need specific spring lengths and rates, so physical fit alone does not prove that a spring is suitable.
Check spring markings
Confirm the spring rate, dimensions, and compatibility with the shock model.
Avoid excessive preload
Use only the adjustment range permitted by the manufacturer.
Get help when needed
A suspension shop can help select a suitable spring and inspect the shock if the setup cannot be corrected safely.
Step 3: Tune Rebound Damping
Rebound damping determines how quickly the suspension extends after being compressed. Once sag is correct, adjust rebound if your shock has a rebound control. The goal is to let the suspension recover in a controlled way without returning so fast that the bike feels unsettled or so slowly that it cannot recover before the next bump.
The dial may have a rabbit and turtle symbol, plus and minus marks, or numbered clicks. The meaning of the symbols and the direction of adjustment varies by model. Check the manual and count the clicks from a documented reference point rather than assuming every dial works the same way.
Source: keyassets.timeincuk.net
A Simple Rebound Adjustment Method
Begin with the manufacturer’s recommended setting or your current recorded setting. Make a small adjustment, then test the bike over a familiar section of trail or a safe, low-speed series of bumps. Change only rebound during this test so you can tell whether the adjustment helped.
If the rear of the bike feels as though it stays compressed through repeated bumps, rebound may be too slow. If the rear kicks back or the bike feels springy after impacts, rebound may be too fast. These are clues rather than final diagnoses, because tire pressure, spring setup, terrain, and other suspension settings also affect the feel.
Too much rebound damping
The shock may return too slowly, pack down over repeated bumps, or feel less ready for the next impact.
Too little rebound damping
The shock may extend too quickly, feel bouncy, or push the rider off line after an impact.
Make small changes
Adjust a few clicks or the smallest sensible increment, based on the manufacturer’s control design, and retest.
Step 4: Adjust Compression Damping
Compression damping controls resistance as the suspension moves into its travel. Some shocks offer a simple open, pedal, and firm lever, while others have a dial with several settings. Certain advanced shocks provide separate low-speed and high-speed compression controls. Adjust only the controls that your model actually includes.
A firmer setting can reduce excessive suspension movement during pedaling or smoother sections, if the shock is designed for that use. An open setting often allows more movement over rough ground. A firm setting is not automatically better for climbing, and it may reduce comfort or traction on uneven terrain. Follow any restrictions the manufacturer gives for using a lockout or firm mode.
Source: i.ytimg.com
Choose a Setting for Your Riding
For rocky trails, roots, and uneven ground, begin with the recommended open or trail setting. This usually gives the suspension more freedom to respond to impacts. For smooth pavement or steady climbs, a pedal or firmer mode may suit the bike if the manufacturer permits it.
If the bike feels harsh or skips across small bumps, try a less restrictive setting before changing the spring pressure again. If the bike uses too much travel under ordinary pedaling or feels overly active, inspect sag and consider a small compression adjustment. Compression damping cannot compensate for an incorrect spring rate or damaged suspension.
Open mode
Often suited to rough ground when you need the suspension to move freely.
Pedal or trail mode
May reduce unwanted movement during steady pedaling while retaining some suspension action.
Firm or lockout mode
Can reduce movement on smoother surfaces, but may be unsuitable for rough impacts. Use it only as directed by the manufacturer.
Step 5: Test the Setup and Make Fine Adjustments
After setting sag and damping, take a short, controlled ride on familiar ground. Start slowly and avoid jumps, steep drops, busy roads, and high-speed descents until the suspension feels predictable. The first test should help you notice basic problems, not push the limits of the bike.
Pay attention to how the front and rear suspension work together. If the front feels harsh while the rear feels soft, check both ends separately rather than assuming the rear shock is the cause. Tire pressure, rider position, fork settings, frame design, and terrain can all affect the overall ride.
Write down the baseline settings and every change. A simple record of air pressure, sag, rebound clicks, compression mode, tire pressure, and test conditions makes future adjustments easier. If a change makes the bike worse, return to the previous setting instead of adding more changes to compensate.
Source: i.ytimg.com
Test one variable at a time
Change air pressure, preload, rebound, or compression separately so the effect of each adjustment is easier to identify.
Use a repeatable route
Ride the same safe section at a similar speed and body position when comparing settings.
Check travel use
Use the approved travel indicator to see how much travel the suspension uses during normal riding. Do not aim to use all travel on every ride.
Return to the baseline
If the bike becomes harsh, bouncy, unstable, or difficult to control, restore the previous known setting and reassess.
Signs of a Good Suspension Setup
A useful setup feels controlled rather than simply soft or stiff. The suspension should absorb ordinary bumps without excessive bouncing, support the rider during normal movement, and return in a controlled way. The tires should track the ground without the bike feeling unsettled.
The suspension should also retain enough travel for larger impacts within the bike’s intended use. If it repeatedly bottoms out during normal riding, check sag, spring suitability, and manufacturer-approved damping settings. If it barely moves over rough ground, check pressure, preload, compression settings, and possible mechanical binding.
Controlled movement
The bike responds to bumps without repeated bouncing or a harsh, locked feeling.
Predictable handling
The bike remains stable and the wheels maintain useful contact with the riding surface.
Suitable travel use
Normal riding uses a reasonable amount of travel while leaving room for larger impacts.
How to Choose Settings for Different Riding Conditions
The best adjustment depends on where and how you ride. A bike used on smooth roads has different needs from a mountain bike used on rocky trails. Even on the same trail, a rider’s weight, riding style, tire choice, and suspension design can change the preferred setup.
Use the manufacturer’s starting settings first. Treat the examples below as general directions for testing, not exact pressure values or universal damping rules. The correct response is the setting that works within the bike’s specified range and keeps the bike predictable on the terrain you ride.
Smooth roads and paved paths
A firmer approved mode may reduce unwanted movement on smooth ground. Do not lock the suspension for rough impacts if the manual prohibits it.
Cross-country riding
Balance efficient pedaling with enough suspension movement to maintain control on roots, rocks, and uneven ground.
Technical trails
Start with suitable sag and an open or trail damping mode. Fine-tune rebound to prevent bouncing or packing down over repeated bumps.
Bike park riding
Use the bike and shock manufacturer’s guidance for larger impacts. If the suspension bottoms out repeatedly, have the spring setup and service condition checked.
Commuting with extra cargo
Account for the added load when measuring sag, and remain within the bike’s total weight limit and suspension specifications.
Do Weather and Temperature Matter?
Temperature can affect air pressure and damping behavior, particularly when a bike moves between very different temperatures. If the bike feels noticeably different after a large temperature change, recheck the setup using the manufacturer’s guidance rather than making a large adjustment based on feel alone.
Mud, dust, water, and road salt can also affect maintenance needs. Clean the exposed suspension surfaces with suitable products and methods, and avoid directing high-pressure water at seals or bearings. Do not apply oil or grease to suspension parts unless the manufacturer specifies it.
Large temperature changes
Recheck pressure and ride feel when needed, using the approved procedure for your model.
Wet or dirty rides
Clean the shock exterior and inspect exposed seals and mounting areas after riding.
Common Bike Shock Adjustment Problems and Fixes
If the suspension still feels wrong after adjustment, do not keep turning dials at random. First identify the symptom, then check the setting most closely related to it. Some problems come from setup, while others indicate worn seals, damaged parts, or a need for professional service.
The shock feels too soft
Check sag, air pressure or spring suitability, and compression settings. Do not exceed pressure limits or use excessive coil preload to mask the problem.
The shock feels too hard
Check sag, pressure, preload, and compression mode. Also confirm that the suspension moves freely and the tires are not overinflated.
The rear end bounces
Check rebound settings and verify that sag is correct. If the shock continues to bounce or loses damping, it may need service.
The suspension bottoms out often
Check the travel indicator, sag, spring rate, and approved damping settings. Repeated bottoming during normal riding calls for a closer setup or service check.
The shock loses air
Repeated pressure loss may indicate a valve, seal, or other fault. Stop relying on repeated inflation and arrange an inspection.
The shock leaks oil or makes new noises
Stop riding if there is a significant leak, binding, damage, or a sudden change in performance. Have the shock inspected by a qualified suspension technician.
When Should You Stop Adjusting and Get Service?
Stop and seek service if the shock has a damaged body, a persistent leak, unexplained pressure loss, loose mounting hardware, severe play, or a sudden loss of damping. These are not normal tuning issues. A bike with a failing shock can handle unpredictably, especially on rough ground.
Air shocks contain pressurized components, and some suspension units require special tools and procedures for internal service. Never loosen a pressurized air can, open a damper, or disassemble a coil assembly unless the manufacturer specifically authorizes the procedure and you have the required training and tools.
Stop riding
Do this when structural damage, major leakage, loose mounts, or unpredictable suspension behavior could affect control.
Use a qualified technician
Seek help for internal damper service, pressure-related faults, damaged parts, or spring replacement that requires special tools.
Bike Shock Adjustment Reference Table
Use this table to decide which part of the setup to check first. The symptoms are clues, not proof of a single cause. Verify the settings and limits for the exact shock model before making changes.
Excessive sag
Check air pressure or coil spring rate, then repeat the sag measurement.
Very little sag
Check pressure, spring suitability, and permitted preload. Confirm that the shock moves freely.
Slow return
Check whether rebound damping is too high and inspect for mechanical problems if the shock still moves slowly.
Fast return or kicking
Try a small increase in rebound damping if permitted, then test again.
Harsh ride over small bumps
Check tire pressure, sag, compression mode, and suspension condition before making further changes.
Frequent bottoming
Check sag, spring suitability, and approved damping settings. Seek professional help if the problem persists.
Keep a Simple Setup Record
A written setup record makes troubleshooting more reliable. Record the date, rider gear, air pressure or spring details, sag measurement, rebound clicks, compression mode, tire pressures, and the type of terrain used for testing.
When conditions change, adjust one item at a time and note the result. This turns suspension tuning into a repeatable process rather than a series of guesses.
Baseline
Record the manufacturer’s starting setting or your last known good setup.
Test change
Write down the single adjustment and the change in ride feel.
Final setup
Keep the setting that works for the intended terrain and remains within the manufacturer’s limits.
Safety Rules for Adjusting Bike Suspension
Suspension adjustment is usually straightforward when it involves approved external controls, but not every shock is designed for user service. Read the instructions before adjusting air pressure, preload, rebound, or compression. If a control is stuck, damaged, or unclear, do not force it.
Always check that the shock and fork mounting hardware are secure according to the manufacturer’s torque specifications. Do not ride with loose mounts or damaged frame attachment points. If you are unsure whether a noise or movement is normal, have the bike inspected before taking it onto demanding terrain.
Follow pressure limits
Use the specified shock pump and stay within the manufacturer’s minimum and maximum pressure range.
Do not open pressurized parts
Internal air chambers and dampers may contain pressure and require model-specific service procedures.
Use the right tools
Do not use pliers on adjustment dials or tighten hardware by guesswork when a torque specification is available.
Test at low speed
Confirm predictable handling on a safe, familiar route before riding fast or tackling difficult terrain.
Frequently Asked Questions
Q
How much sag should a bike shock absorber have?
The correct sag depends on the bike, shock design, and intended riding style. Some mountain bike rear shocks use a starting target around 25 to 30 percent of rear-wheel travel, but other bikes require different values. Check the owner’s manual and use its specified measurement method rather than applying one percentage to every bike.
Q
Should I adjust preload or rebound first?
Set the spring system and sag first, then adjust rebound. Sag establishes how the suspension supports your weight, while rebound controls how quickly it extends after compression. Adjust compression afterward if your shock offers that control and the ride still needs fine-tuning.
Q
Can I adjust a bike shock without a shock pump?
You can adjust external controls on some shocks without a pump, but an air shock normally needs a suitable suspension shock pump for accurate pressure changes. A regular tire pump is not a reliable substitute. If you do not have the correct tool, leave the air pressure unchanged until you can obtain one or visit a bike shop.
Q
Why does my bike shock feel too soft?
A shock may feel too soft because sag is excessive, air pressure is too low, the coil spring rate is unsuitable, or the compression setting allows more movement than you prefer. Check sag and the manufacturer’s starting settings first. If the shock bottoms out often or loses pressure, inspect it instead of making repeated unverified adjustments.
Q
How do I make my bike suspension less bouncy?
Check the sag first, then adjust rebound damping in small steps if the shock has a rebound control. A suspension unit that returns too quickly may need more rebound damping, but the direction and amount depend on the model. If the shock remains bouncy or loses damping, it may need service.
Q
Can I adjust the shock absorber on any bike?
No. Some bike shocks have adjustable air pressure, preload, rebound, or compression, while basic suspension units may offer only one adjustment or none. Identify the exact model and consult its manual before trying to change a setting. Never force a dial or modify a non-adjustable unit.
Q
How often should I adjust my bike shock absorber?
Check the setup when rider load, equipment, or riding needs change, and inspect the suspension regularly for leaks, damage, and loose hardware. You do not need to change damping settings before every ride if the bike is working well. Follow the manufacturer’s service schedule for cleaning, inspection, and internal maintenance.
✦ Wrapping Up
Conclusion
Learning how to adjust a bike shock absorber starts with identifying the shock type and following the manufacturer’s instructions. Set sag with your normal riding gear, adjust air pressure or permitted coil preload, and then tune rebound and compression if those controls are available. Make small changes and test them on familiar terrain.
A good setup should feel controlled and predictable, not simply soft or firm. Keep a record of your settings and return to a known baseline if a change makes the bike harder to control. If the shock leaks, loses pressure, binds, or shows damage, stop riding and arrange professional service instead of trying to correct the fault with more adjustments.
💡 Key Takeaway
Before your next ride, find the shock manual, check the manufacturer’s sag target, measure sag with your normal riding gear, and record the starting settings. Adjust one control at a time, test at low speed, and stop if you find a leak, damage, or unsafe handling.
Eric
Hi, I’m Eric Bennett, the person behind OffRoadTruckAccessories.com.
I created this blog to share my interest in trucks, off-road driving, automotive accessories, and DIY modifications. I enjoy learning how different truck accessories work, testing their usefulness, and understanding whether they are truly worth buying.
Shock absorbers are located near the wheels as part of the suspension system, usually between the vehicle’s body, frame, or subframe and a suspension component such as a control arm, axle, or wheel assembly. However, the exact answer to where are shock absorbers located on a car depends on the suspension design. Some vehicles have…
You should change shock absorbers when they are worn, leaking, damaged, or no longer controlling suspension movement properly. There is no single replacement interval that applies to every vehicle because shock absorber life depends on road conditions, vehicle weight, driving habits, suspension design, and component quality. If you are wondering when to change shock absorbers,…
A shock absorber is a suspension component that controls how quickly a vehicle’s suspension moves up and down after bumps, dips, braking, acceleration, and other road inputs. It works with the springs to prevent excessive bouncing and helps keep the tires in controlled contact with the road. So, what does a shock absorber do? It…
A gas shock absorber is a hydraulic shock absorber that uses pressurized gas, usually nitrogen, along with shock absorber oil to control suspension movement. The gas helps reduce oil foaming and keeps damping performance more consistent when the shock works repeatedly or under demanding conditions. If you are wondering what is a gas shock absorber,…