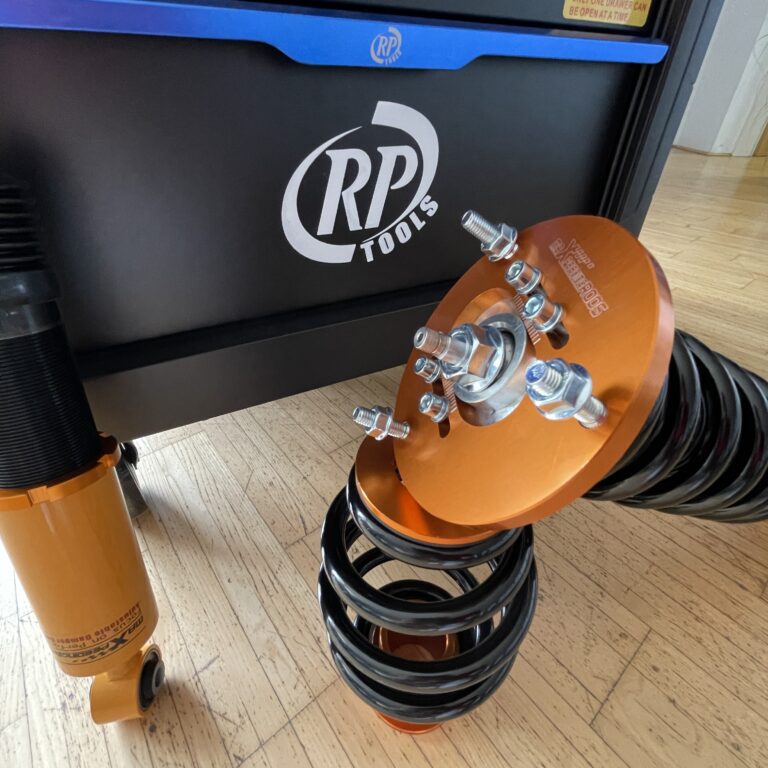
To adjust Spax shock absorbers, identify your exact damper model, check its adjustment instructions, and use the approved adjuster to change the damping setting in small steps. The adjuster direction, available range, and adjustment method vary by model, so never assume every Spax damper works the same way.
Drivers in the United States may adjust Spax shock absorbers to improve comfort on rough roads, reduce body movement on winding roads, or prepare a car for occasional track use. The correct setting depends on the vehicle, spring rate, tire choice, road surface, and damper design. A firmer setting is not always better, and an incorrect adjustment can reduce grip on uneven pavement.
Spax makes adjustable suspension dampers for various vehicles, including classic cars and performance applications. Some models use an accessible adjustment control, while others have different adjustment arrangements. Before turning a knob or screw, confirm the part number and read the instructions for that specific damper. If the adjustment mechanism is damaged, seized, or unclear, have a suspension specialist inspect it rather than forcing it.
This guide explains how to identify the correct adjustment method, change settings safely, test the result, and troubleshoot common problems. It also covers the difference between damping and ride height, because changing one does not automatically change the other.
Spax shock absorbers control how quickly a vehicle’s suspension moves after a wheel hits a bump, enters a dip, or transfers weight during braking and cornering. Springs support the vehicle and compress when the wheels encounter road changes. Shock absorbers control that movement so the body and wheels do not keep bouncing.
An adjustable damper lets the driver change a damping characteristic within the limits of its design. The aim is to balance body control, tire contact, comfort, and predictable handling. The adjustment does not add spring strength or increase the vehicle’s load capacity.
The exact function of a Spax adjuster depends on the damper model. Some dampers adjust a particular damping characteristic, while others may offer different adjustment features. Do not assume that a single control independently adjusts compression and rebound unless the manufacturer’s instructions confirm it.
Source: mossmotors.com
Ride comfort
A suitable damping setting can help the suspension absorb road disturbances without making the car feel unnecessarily harsh or unsettled.
Body control
Appropriate damping can limit excessive bouncing, pitching, and rolling during normal driving and direction changes.
Tire contact
The right setup helps the wheels respond to changing road surfaces. Excessive damping can prevent a wheel from following rough pavement effectively.
Vehicle balance
Front and rear damping settings influence how the car responds to steering and weight transfer, so changing one end may affect overall balance.
Damping Versus Ride Height
Damping controls suspension movement over time. Ride height describes the distance between the vehicle body and the road or another specified reference point. Adjusting a damper’s damping control usually does not raise or lower the vehicle.
Some suspension kits combine adjustable dampers with threaded spring seats or separate ride-height controls. Those features require their own instructions. If the goal is to eliminate tire rubbing or correct an uneven stance, changing damping alone may not solve the problem.
Damping adjustment
Changes the permitted damping behavior of the shock absorber.
Spring preload
Changes how a spring is compressed when the suspension is assembled. Its effect on ride height depends on the suspension design.
Ride-height adjustment
Changes the suspension’s installed geometry or spring-seat position when the system is designed to allow it.
What Are Rebound and Compression Damping?
Rebound damping controls the suspension as the spring extends after compression. Compression damping controls resistance as the suspension compresses. These are different functions, although the available controls depend on the damper design.
If a particular Spax model uses a single adjustment control, consult its documentation to learn which damping characteristics that control changes. A knob that feels similar to one on another brand or model does not prove that the internal mechanism works the same way.
Too little damping
The car may continue to bounce, pitch, or feel less controlled after a road disturbance.
Too much damping
The ride may become harsh, and the tires may struggle to follow uneven surfaces.
Identify Your Spax Shock Absorber Before Adjusting It
The first step is to identify the exact Spax damper fitted to the vehicle. Different product families and applications may have different adjustment mechanisms, permitted ranges, and installation requirements. An adjustment procedure that is correct for one model may be unsuitable for another.
Look for a part number on the damper body, label, packaging, purchase paperwork, or original installation record. Compare that number with the manufacturer’s documentation or the instructions supplied by the seller. If the label is hidden by dirt, clean the exterior gently without damaging it or removing identifying marks.
Also confirm whether the dampers are fitted to the front or rear axle and whether the vehicle still has its original suspension configuration. Modified springs, aftermarket mounts, or a previous owner’s changes can affect how the suspension behaves.
Source: rimmerbros.com
Check the part number
Use the complete number to locate the instructions for the specific damper rather than relying on a generic adjustment video.
Find the adjustment control
Depending on the model, the control may be located at an accessible end of the damper or elsewhere in the assembly. Do not remove parts until the instructions explain how to access it.
Confirm the adjustment range
Find out whether the control has numbered settings, defined clicks, a limited rotation range, or another approved method of adjustment.
Check the installed hardware
Look for signs of incorrect mounting, damaged brackets, leaking fluid, corrosion, or interference with nearby parts.
What If You Cannot Find the Model Number?
Take clear photos of the damper, its adjustment control, mounting points, and any visible markings. Contact Spax or a knowledgeable suspension supplier with the vehicle year, make, model, and suspension part details. Ask for the exact adjustment instructions before turning the control.
Avoid guessing based on appearance alone. Two dampers can look similar while having different internal designs or adjustment procedures.
Do not force an unknown adjuster
An unfamiliar screw or knob may be damaged by excessive rotation or the use of pliers.
Do not assume a universal click count
The number of clicks and the meaning of each setting must come from documentation for the exact model.
Tools and Safety Checks Before Adjusting Spax Shocks
Many accessible damping adjustments require little more than the correct model information, a suitable light, and a way to record the original setting. Some installations require additional access or tools. Follow the damper instructions instead of removing components simply to make adjustment easier.
Park on a firm, level surface, apply the parking brake, switch off the engine, and allow hot exhaust and suspension components to cool. If the vehicle must be raised, use equipment rated for the vehicle and support it with correctly placed jack stands on approved support points. Never work under a vehicle supported only by a jack.
Before adjusting, inspect the suspension for obvious damage. A broken spring, loose mount, leaking damper, or damaged adjuster needs attention before tuning. An adjustment cannot repair worn or broken parts.
Source: storage.googleapis.com
Useful items
A flashlight, the correct model instructions, a notebook or phone for recording settings, and any adjustment tool specified by the manufacturer.
Protective equipment
Wear suitable work gloves and eye protection when inspecting dirty or corroded suspension parts.
Stable vehicle support
Use a level work area and approved lifting and support points whenever access requires raising the vehicle.
Safe access
Make sure the adjustment control can be reached without placing your hands near a loaded spring or an unstable suspension component.
Should You Adjust the Shocks With the Wheels on the Ground?
That depends on the exact Spax model and where its adjuster is located. Some controls may be accessible with the vehicle standing normally, while other installations may require the wheel to be removed or the vehicle to be raised.
Follow the model-specific procedure for suspension loading and vehicle support. Do not loosen shock mounting bolts, spring seats, or other structural fasteners merely to gain access to a damping adjuster.
Accessible control
If the instructions permit adjustment with the vehicle on its wheels, keep the car parked securely and use the specified method.
Restricted access
If a wheel must be removed, support the vehicle correctly and follow the vehicle manufacturer’s lifting guidance.
How to Adjust Spax Shock Absorbers Step by Step
The safest method is to establish a known starting point, make a small change in the direction specified by the manufacturer, and evaluate the result under controlled driving conditions. The following process applies to the general tuning approach; the exact control movement must come from the instructions for your particular Spax damper.
Do not assume that turning clockwise always makes a shock firmer or that turning counterclockwise always softens it. The correct direction, adjustment limits, and starting position can vary. Some controls also have mechanical limits that must not be exceeded.
Source: rimmerbros.com
Step 1: Record the current setup
Write down the current setting for each damper if it can be identified. Photograph the controls and note any existing differences between the left and right sides.
Step 2: Clean the adjustment area
Remove loose dirt from around the control with a suitable brush or cloth. Keep grit out of the mechanism and avoid directing high-pressure water at seals or adjustment parts.
Step 3: Confirm the approved adjustment method
Check the model instructions for the starting point, permitted direction, number of available steps, and whether the vehicle must be loaded or unloaded.
Step 4: Make a small adjustment
Move the control by one permitted increment, or by the smallest useful amount allowed by the instructions. Never force it past a stop or use an extension tool to gain leverage.
Step 5: Repeat only as directed
If the manufacturer specifies matching settings across an axle, follow that procedure. Do not create left-to-right differences unless the vehicle setup and documented instructions justify them.
Step 6: Check the work
Make sure no fasteners were loosened, tools are removed, and all parts that had to be removed for access have been correctly reinstalled and secured.
Step 7: Test the vehicle
Drive at a legal, modest speed on a familiar route with smooth and mildly uneven pavement. Pay attention to bounce, harshness, steering response, and unusual sounds.
Step 8: Record the result
Write down the new setting and what changed. If the result is worse, return to the recorded setting using the approved method before trying a different small adjustment.
How Many Clicks Should You Adjust?
There is no single click count that is correct for every Spax shock absorber. The number of available adjustments and the change represented by each click depend on the model. If the manufacturer specifies a baseline or a procedure for counting clicks, use that method exactly.
For a damper with documented click settings, change only a small number of increments at a time and keep a written record. If the instructions do not establish how to identify the starting point, ask the manufacturer or a suspension specialist rather than rotating the control until it reaches a stop.
Start from a known setting
Use the manufacturer’s recommended baseline where available, especially when the current adjustment history is unknown.
Change one variable
Avoid changing damping, tire pressures, alignment, and spring settings together because it becomes harder to identify the cause of a handling change.
Keep a log
Record the date, setting, road conditions, vehicle load, and observed behavior so you can compare changes fairly.
How to Adjust Rear Spax Shock Absorbers
Rear dampers may have a different access point from the front dampers, especially on classic cars and vehicles with separate springs and shocks. Check whether the adjuster is reached from the wheel area, beneath the vehicle, or through another access point specified by the manufacturer.
Inspect the rear suspension mounts and nearby brake lines, exhaust components, and other parts before reaching into the area. Never move, bend, or disconnect these parts without an approved procedure. Apply the same controlled adjustment and testing process used for the front.
Check both sides
Inspect the left and right rear dampers and confirm that their model numbers and installed configurations are appropriate for the vehicle.
Watch for load sensitivity
Passengers, cargo, and towing loads can change how the rear suspension behaves. Stay within the vehicle’s load limits and use the recommended setup for the intended use.
Choosing a Suitable Damping Setting for Your Driving
The right setting is the one that gives the vehicle stable, predictable behavior without excessive harshness. It is not necessarily the firmest setting or the setting that feels best during a single slow drive around the block.
Begin with the manufacturer’s recommended baseline. Then consider the problem you are trying to solve. A car that bounces after a dip may need inspection and a suitable damping change, while a car that crashes over sharp bumps may be too firmly damped, have tire-pressure issues, or have worn suspension parts.
Road conditions matter. Smooth roads can hide problems that become clear on broken pavement, and a setup that feels acceptable on a dry road may behave differently in rain. Make adjustments on public roads only within legal limits and never test handling by deliberately provoking a skid.
Source: storage.googleapis.com
For daily driving
Favor predictable responses and comfort over a very firm setting. The tires should maintain useful contact with the road, including over uneven pavement.
For winding roads
Look for controlled body movement and consistent steering response. Excessive firmness can reduce grip when the pavement is bumpy.
For occasional track use
Use the damper manufacturer’s recommendations as a starting point and make changes only in a suitable controlled environment. Track setup also depends on tires, springs, alignment, and vehicle geometry.
For a loaded vehicle
Check the vehicle and suspension load limits first. A damping adjustment cannot compensate for overloaded springs or inadequate load capacity.
A Practical Setting Comparison
The following table describes common behavior patterns, not guaranteed outcomes for every Spax model. Use it to organize observations after a small, documented adjustment. The actual effect depends on the damper design and the rest of the suspension.
Softer relative setting
May improve comfort on some roads, but too little damping can allow continued bouncing or excessive body movement.
Middle or baseline setting
Provides a useful reference for comparison when it matches the manufacturer’s recommendation for the vehicle and damper.
Firmer relative setting
May improve body control in some conditions, but excessive damping can make the vehicle harsh and reduce the wheels’ ability to follow rough pavement.
Signs That Your Adjustment Is Working
A useful adjustment should produce a clear improvement in the problem you set out to address without introducing a new handling issue. For example, the vehicle may settle more cleanly after a dip while still absorbing smaller bumps without sharp impacts.
Pay attention to the whole car rather than judging the result by steering feel alone. Listen for new knocks, watch for unusual tire behavior, and check whether the car remains predictable on the same route. If it feels unstable or noticeably less controlled, stop the test and return to the previous safe setting if the mechanism is functioning normally.
Less repeated bouncing
The body settles in a controlled manner after a road disturbance.
No new harsh impacts
The car does not develop sharp jolts or a loss of composure after the change.
Consistent response
The vehicle behaves predictably during ordinary braking, steering, and driving over familiar roads.
Common Problems When Adjusting Spax Shock Absorbers
If the adjustment does not improve the ride, do not keep turning the control in search of a better result. First check whether the problem is actually related to damping. Tire pressure, alignment, spring condition, worn bushes, damaged mounts, and unsuitable tires can all affect comfort and handling.
A damper that leaks, knocks, binds, or fails to respond consistently may need inspection or replacement. Damping adjustment is intended to tune a functioning component, not restore a failed one.
Source: rimmerbros.com
The adjuster will not turn
Stop applying force. Corrosion, dirt, internal damage, or a mechanical limit may be involved. Check the instructions and have a seized control inspected.
The ride becomes too harsh
Return to the previous recorded setting using the correct procedure, then assess tire pressures, spring compatibility, and the condition of the suspension.
The car still bounces
Check for worn dampers, broken springs, loose mounts, and other faults. An adjustment may not resolve a mechanical problem.
One side feels different
Inspect both dampers, tires, springs, mounts, and alignment. Do not assume that changing the settings will correct an underlying defect.
A new knocking sound appears
Stop driving if the noise suggests a loose or damaged suspension component. Have the installation and mounting hardware inspected before continuing.
Can You Adjust Spax Shocks Without Removing Them?
Often, adjustment can be completed with the dampers installed if the controls are accessible and the model instructions permit it. The required access depends on the vehicle’s suspension layout and the location of the adjustment mechanism.
If access is blocked, use the approved procedure for removing a wheel or another specified component. Do not loosen structural suspension fasteners or remove a loaded spring without the correct service procedure and equipment.
When removal is unnecessary
Use the adjustment control directly if the instructions permit it and access is safe.
When removal is required
Follow the model-specific service instructions and vehicle lifting procedures, or ask a qualified technician to do the work.
Should You Set the Front and Rear Dampers the Same?
Not necessarily. Front and rear suspension systems have different jobs, and the correct settings depend on the vehicle’s design and the manufacturer’s recommendations. Some kits prescribe matching baseline settings, while others may specify different starting points.
Do not copy a setting from another vehicle just because it uses Spax dampers. Differences in vehicle weight, axle loads, spring rates, and suspension geometry can make the same nominal setting behave differently.
Follow the kit instructions
Use the prescribed front and rear baselines where available.
Avoid unsupported differences
Do not create arbitrary left-to-right or front-to-rear differences without a documented reason.
How to Maintain Adjustable Spax Shock Absorbers
Routine inspection helps keep adjustable dampers working as intended. Check the visible damper body and surrounding suspension for fluid leaks, dents, heavy corrosion, loose hardware, damaged dust covers, and signs of contact with nearby components.
Keep adjustment controls clean and use only the cleaning and maintenance methods allowed by the manufacturer. Avoid applying penetrating oil, grease, or other chemicals to the adjuster unless the instructions specifically permit them. An unsuitable product may affect seals or other materials.
There is no single service interval that applies to every Spax damper and vehicle. Follow the product instructions and the vehicle manufacturer’s maintenance schedule, and inspect the suspension after unusual impacts, track use, or the appearance of new noises or handling changes.
Source: rimmerbros.com
Look for fluid leaks
A persistent oil film or wet area on the damper body may indicate a problem that needs professional assessment.
Check mounts and bushes
Worn or loose mounting parts can cause knocks and poor control that damping adjustments will not correct.
Protect the adjuster
Keep dirt out of the mechanism and never force the control through resistance.
Inspect after severe impacts
A deep pothole, curb strike, or other hard impact can damage suspension parts even if the car still drives.
When Should Spax Shock Absorbers Be Replaced?
Replacement depends on the damper’s condition, mileage, use, and the manufacturer’s service guidance rather than one universal age or mileage limit. Persistent leaks, damaged bodies, failed adjustment mechanisms, and poor damping performance are reasons to arrange an inspection.
If one damper has failed, ask a qualified technician whether the other damper on the same axle should also be replaced. Replacing dampers in axle pairs is often appropriate to maintain balanced behavior, but the correct decision depends on the specific vehicle, component condition, and manufacturer’s guidance.
Visible damage
A bent body, cracked mount, or damaged adjustment mechanism requires assessment before the vehicle is driven normally.
Persistent loss of control
Continued bouncing or unstable behavior despite correct settings may indicate worn dampers or another suspension fault.
Repeated leakage
Have a leaking damper assessed rather than trying to compensate by changing its setting.
Research Notes and Important Model-Specific Limits
This guide uses a general suspension-tuning method and the product-identification information reflected in the supplied Spax product images. The images show examples of adjustable dampers and kits, but they do not establish the exact adjustment procedure, click count, or setting direction for every model.
A model-specific Spax instruction sheet remains the controlling source for the adjustment range, baseline setting, adjuster direction, and any required vehicle or suspension position. Those details should not be inferred from a product photograph or from instructions for a different damper.
The most useful next step is to identify the installed part number and obtain the matching instructions. Once that information is available, the driver can make a controlled change, evaluate the result safely, and determine whether the original complaint comes from damping or another suspension issue.
Source: rimmerbros.com
Documented product identification
The supplied image list identifies examples of Spax adjustable front dampers, rear dampers, and suspension kits.
Not established for every model
A universal click count, rotation direction, torque specification, or adjustment range cannot be confirmed from the supplied images alone.
Practical evidence standard
Use the exact manufacturer’s instructions for mechanical details and evaluate driving changes under consistent, safe conditions.
Next-Question Gap Map
The following questions are inferred from the adjustment task rather than presented as verified search-volume findings. The supplied material does not include Search Console data, inspected search results, or a complete set of model-specific Spax manuals. These questions identify useful follow-up information a reader may need.
What is the correct click setting for my Spax model?
Reader stage: before adjustment. Evidence needed: the exact damper part number and its manufacturer instructions. Priority: high.
Which direction makes my Spax shocks firmer?
Reader stage: during adjustment. Evidence needed: the correct model’s adjustment guide. Priority: high.
Why does my car still bounce after adjustment?
Reader stage: troubleshooting. Evidence needed: damper condition, spring condition, mounting inspection, and relevant vehicle service information. Priority: high.
Can I change ride height with my Spax adjuster?
Reader stage: setup planning. Evidence needed: the suspension kit design and its installation instructions. Priority: medium.
Frequently Asked Questions
Q
How do you adjust Spax shock absorbers?
Identify the exact damper model, read its instructions, record the existing setting, and use the approved adjuster to make a small change. Test the car on a familiar, safe route and record the result before making another adjustment. The correct direction and adjustment range depend on the model.
Q
Which way do you turn Spax shocks to make them stiffer?
There is no safe universal direction to recommend without the exact Spax model and its instructions. Check the manufacturer’s guidance for the adjustment direction and permitted range. Do not force the adjuster against a mechanical stop or assume that clockwise always means firmer.
Q
How many clicks should Spax shocks be set to?
Use the baseline and click count specified for your exact damper and vehicle application. There is no single setting that suits every Spax model, spring combination, and road condition. If the original setting is unknown, establish a documented reference using the manufacturer’s procedure rather than guessing.
Q
Can you adjust Spax shock absorbers while they are fitted to the car?
Yes, when the adjuster is accessible and the model’s instructions permit adjustment with the damper installed. Some vehicles require a wheel to be removed or other approved access steps. Support the vehicle correctly if lifting is necessary, and never work beneath a car supported only by a jack.
Q
Do firmer Spax shock settings improve handling?
A firmer setting may improve body control in some conditions, but excessive damping can make the ride harsh and reduce the tire’s ability to follow uneven pavement. The best setting depends on the vehicle, springs, tires, road surface, and intended use. Start with the manufacturer’s recommendation and assess changes safely.
Q
Do Spax shock absorbers adjust ride height?
A damping adjuster changes damping behavior, not normally ride height. Some suspension kits also include separate ride-height or spring-seat adjustments, but these are distinct mechanisms. Check the exact kit instructions before changing any spring seat or threaded body.
Q
What should I do if a Spax adjustment knob is stuck?
Stop turning it and avoid using pliers or an extension tool. Dirt, corrosion, internal damage, or a mechanical limit may be preventing movement. Check the correct adjustment instructions and arrange an inspection if the control remains stuck.
Q
Can I use the same Spax settings on every car?
No. The correct setup depends on the damper model, vehicle weight, spring rates, suspension geometry, tires, and intended use. Even two vehicles fitted with similar dampers may respond differently. Use the manufacturer’s baseline for the exact application and make changes only after evaluating the result.
✦ Wrapping Up
Conclusion
Learning how to adjust Spax shock absorbers starts with identifying the exact damper and understanding what its adjustment control changes. A careful setup uses the manufacturer’s instructions, a known starting point, small changes, and repeatable driving checks. The goal is controlled, predictable suspension behavior, not the stiffest possible ride.
If adjustment does not solve bouncing, harshness, or unstable handling, inspect the rest of the suspension instead of continuing to turn the control. Worn dampers, damaged springs, loose mounts, incorrect tire pressures, and alignment faults can produce similar symptoms. Have a qualified technician assess the car if there is leakage, damage, a seized adjuster, or a new suspension noise.
💡 Key Takeaway
Find the part number on your Spax shock absorbers, obtain the matching adjustment instructions, record the current settings, and make one small approved change at a time. Test safely and return to the previous known setting if the result is worse.
Eric
Hi, I’m Eric Bennett, the person behind OffRoadTruckAccessories.com.
I created this blog to share my interest in trucks, off-road driving, automotive accessories, and DIY modifications. I enjoy learning how different truck accessories work, testing their usefulness, and understanding whether they are truly worth buying.
Shock absorbers are located near the wheels as part of the suspension system, usually between the vehicle’s body, frame, or subframe and a suspension component such as a control arm, axle, or wheel assembly. However, the exact answer to where are shock absorbers located on a car depends on the suspension design. Some vehicles have…
You should change shock absorbers when they are worn, leaking, damaged, or no longer controlling suspension movement properly. There is no single replacement interval that applies to every vehicle because shock absorber life depends on road conditions, vehicle weight, driving habits, suspension design, and component quality. If you are wondering when to change shock absorbers,…
A shock absorber is a suspension component that controls how quickly a vehicle’s suspension moves up and down after bumps, dips, braking, acceleration, and other road inputs. It works with the springs to prevent excessive bouncing and helps keep the tires in controlled contact with the road. So, what does a shock absorber do? It…