You can test shock absorbers by hand by pressing down on a vehicle corner, releasing it, and watching how the suspension settles. Check for repeated bouncing, fluid leaks, loose mounts, uneven tire wear, and unusual movement. This simple test can reveal possible problems, but it cannot confirm that a shock absorber is working properly in every driving condition.
In the United States, cars, pickup trucks, SUVs, and vans travel on roads that range from smooth interstate highways to rough city streets and uneven rural roads. Over time, these conditions can wear suspension parts and affect ride comfort, tire contact, and vehicle control. A quick shock absorber check at home can help drivers spot warning signs before a minor concern becomes a larger repair.
Shock absorbers control the movement of the suspension springs. When they wear out, a vehicle may bounce after hitting a bump, lean more than usual, or feel unstable over rough pavement. However, worn tires, loose suspension parts, damaged springs, and other faults can cause similar symptoms.
This guide explains how to test shock absorbers by hand, what the results mean, and when a more detailed inspection is needed. The methods are suitable for an initial home check, not a substitute for a complete suspension diagnosis. Always follow the vehicle manufacturer’s service instructions and use safe inspection practices.
A shock absorber controls how quickly a vehicle’s suspension moves after a bump, dip, or change in road surface. It converts some of the suspension’s movement energy into heat through hydraulic resistance. This action helps the tires maintain contact with the road and keeps the body from continuing to bounce.
Most conventional shock absorbers use a piston that moves through hydraulic fluid inside a sealed tube. Small passages and valves resist the fluid’s movement, creating damping force. Many modern designs use gas pressure as part of their construction, but the basic job remains the same.
A suspension spring supports the vehicle’s weight and compresses when the wheel hits a bump. The shock absorber controls the spring’s movement. If the spring works without enough damping, the vehicle may continue to bounce after the initial impact.
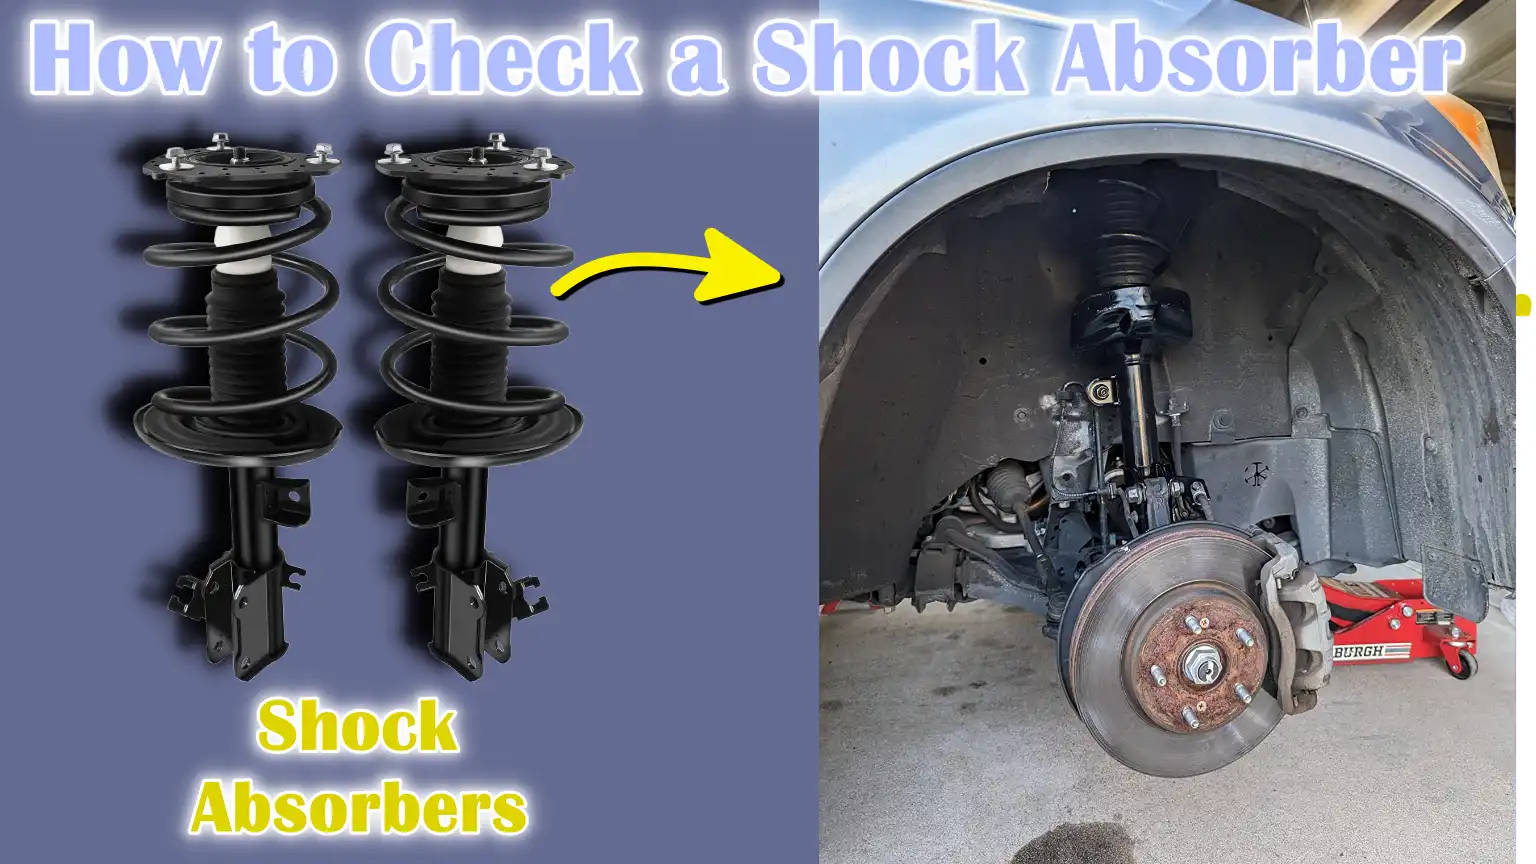
Some vehicles use separate shock absorbers and springs. Others use strut assemblies that combine a structural suspension component with a spring and damping unit. The correct inspection method depends on the design, so identify the suspension type before attempting any repair.
Source: YouTube, MarkDormanGarage
Shock absorbers
These control spring movement and help reduce bouncing after bumps.
Struts
These combine damping with a structural role in many suspension designs. A damaged strut may affect wheel alignment and handling.
Coil springs
These support the vehicle and absorb road impacts. A sagging or broken spring can cause symptoms that resemble shock absorber problems.
Why Shock Absorber Condition Matters
Worn shocks can allow extra wheel and body movement. This may reduce stability on rough roads, increase pitching during braking, and make it harder for the tires to follow uneven pavement. The effects depend on the vehicle, the severity of wear, the tires, and the road surface.
Shock absorbers also influence tire wear and ride comfort. Repeated wheel movement can contribute to irregular tire wear, although poor alignment, incorrect tire pressure, worn bushings, and damaged tires must also be considered.
Ride comfort
Weak damping can make bumps feel more pronounced and cause the vehicle to keep moving after an impact.
Handling
Excess suspension movement may affect steering response and stability during turns or sudden maneuvers.
Tire contact
A suspension that does not control wheel movement well may struggle to keep consistent contact with an uneven road.
Tools and Preparation Before Testing Shocks
You do not need special equipment for a basic hand test. A flat parking area, enough room to move around the vehicle, and a careful visual inspection are usually sufficient. A flashlight can help you see the shock absorber body and mounting points.
Park on firm, level ground and select Park on an automatic transmission or first gear on a manual transmission. Apply the parking brake and switch off the engine. If the vehicle has air suspension, electronic ride control, or an unusual suspension layout, consult the owner’s manual before applying pressure or attempting further checks.
Allow the exhaust system and nearby components to cool before inspecting areas near them. Keep your hands away from pinch points around springs, tires, linkages, and moving suspension parts. Do not place any part of your body under a vehicle for this test.
The bounce test does not require lifting the vehicle. Keeping all wheels on the ground is often safer for a basic check. If a later inspection requires raising the vehicle, use the specified lift points, correctly rated jack stands, and the manufacturer’s service procedure.
Source: dondodicarcustoms.com
Flashlight
Use it to look for oil residue, cracked rubber, corrosion, and damaged mounts.
Gloves
Optional work gloves can help protect your hands during a visual inspection, but they do not make moving suspension parts safe to touch.
Owner’s manual
Check for vehicle-specific suspension instructions, especially on vehicles with electronic or self-leveling systems.
Safe work area
Choose a level, firm surface away from traffic. Never perform the test beside moving vehicles.
Know Which Suspension You Have
Before inspecting the components, determine whether the vehicle uses conventional shocks, struts, or a combination. The front suspension may use struts while the rear uses separate shocks, or the layout may be different on a truck or SUV.
Some vehicles also have electronically controlled dampers or air suspension. These systems may behave differently during a hand test. Follow the manufacturer’s instructions rather than assuming that every vehicle should respond in the same way.
Conventional suspension
A hand bounce test can provide an initial clue about damping performance.
Electronic suspension
Use the specified diagnostic procedure if warning lights, adjustable damping, or unusual suspension behavior is present.
How to Test Shock Absorbers by Hand Step by Step
The simplest way to test shock absorbers by hand is to press down on one corner of the vehicle, release it, and observe how the suspension settles. Compare the response at other corners, but remember that differences between the front and rear suspension may be normal because their designs and spring rates can differ.
Use steady pressure rather than a sudden shove. Do not bounce violently, jump on the bumper, or press on thin body panels. If the vehicle’s design makes it difficult to apply pressure safely, skip the bounce test and use a visual inspection or professional assessment instead.
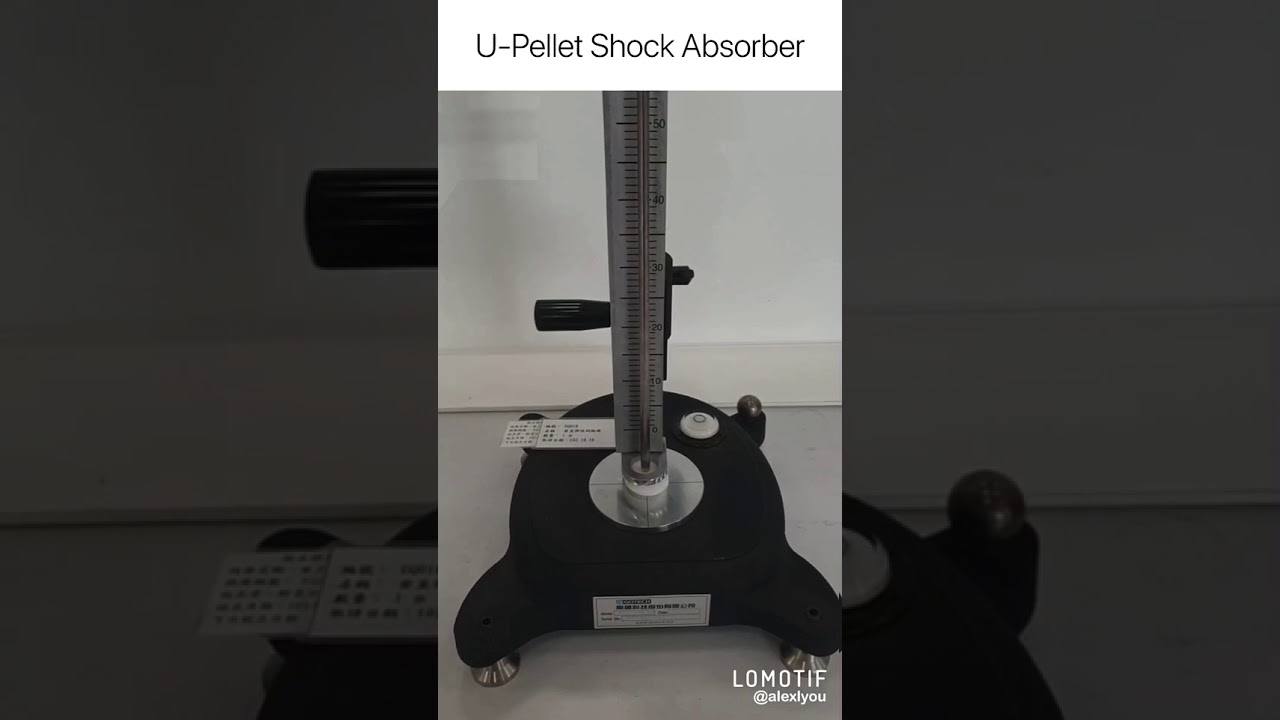
Source: YouTube, DDS
Step 1: Choose a suitable corner
Start at a solid body area above the wheel, such as an appropriate section near the fender. Avoid plastic trim, loose body panels, and delicate parts.
Step 2: Press down gently
Use your body weight to push the vehicle downward in a controlled way. Do not force the suspension beyond its normal movement.
Step 3: Release the pressure
Remove your hands and watch the body rise and settle. Keep your hands clear as the suspension returns.
Step 4: Observe the movement
Look for excessive repeated bouncing, a slow or uneven response, or a corner that behaves very differently from comparable corners.
Step 5: Check the other corners
Repeat the same gentle procedure at accessible corners. Account for differences in suspension design before judging the results.
Step 6: Record other signs
Note any visible leaks, damaged mounts, abnormal tire wear, clunks, or changes in handling that could support the initial finding.
What a Normal Bounce Test Looks Like
On many conventional passenger vehicles, the body rises after release and settles with little additional movement. The exact response varies by vehicle, suspension design, load, and test location. Some modern suspensions move very little when pressed by hand, so a small movement alone does not prove that the shocks are healthy.
The key is to look for a clear pattern of uncontrolled movement rather than counting a universal number of bounces. A vehicle that rises and continues to oscillate repeatedly deserves further inspection. A corner that barely moves may still have a problem, but the hand test alone cannot establish why.
Limited movement followed by settling
This is generally reassuring when no leaks, damage, or driving symptoms are present, but it does not rule out worn damping.
Repeated up-and-down movement
This may indicate inadequate damping, though spring condition and suspension design should also be checked.
A clear difference between comparable corners
This may point to a component problem, but confirm the finding with a visual inspection and other tests.
How to Interpret an Uneven Response
If one side keeps moving while the other settles quickly, do not immediately assume that the moving shock is defective. The tires, springs, bushings, body construction, and suspension geometry can affect the response. Repeat the gentle check under similar conditions and inspect both sides for visible damage.
If the result remains unclear, a technician can inspect the suspension on a lift and use appropriate diagnostic methods. A hand test is most useful as a screening step that helps decide whether a closer look is needed.
Repeatable difference
A consistent difference between comparable corners is more useful than a single uncertain observation.
Other warning signs
Fluid leakage, loose mounts, tire cupping, or poor handling make a professional inspection more important.
Inspect Shock Absorbers for Fluid Leaks and Damage
A visual inspection is an important second step because it can reveal problems that the bounce test misses. Look at the exposed shock absorber body, mounting areas, and nearby suspension parts from outside the vehicle. Use a flashlight if needed, and do not reach into gaps where the suspension could move.
A shock absorber may develop a fluid leak when its internal seal wears or becomes damaged. A persistent oily film or wet trail running down the body deserves attention, especially when combined with poor ride quality or repeated bouncing. However, dirt mixed with road grime can resemble oil, and a light film near a seal does not always mean the component has failed.
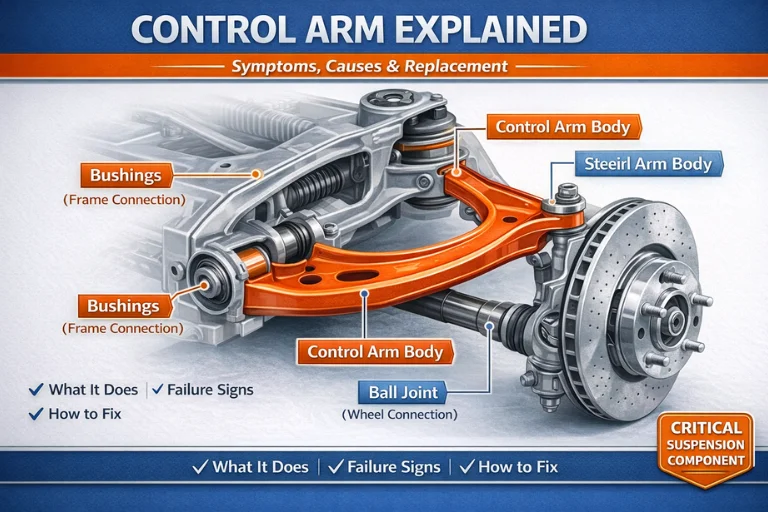
Inspect the upper and lower mounting points for missing fasteners, damaged rubber bushings, cracks, or signs of movement. Also look for dents, severe corrosion, and physical damage to the shock body. If the shock is hidden behind a wheel or other component, do not remove parts unless you know the correct procedure.
Source: knifepunchrecords.com
Persistent wetness
A fresh oil trail or repeated wetness on the shock body may indicate a seal leak and should be assessed.
Damaged mounts
Cracked bushings, loose hardware, or broken mounting points can cause noise and poor suspension control.
Physical damage
A bent body, deep dent, or severe corrosion can interfere with proper operation.
Noise near the suspension
Clunks or rattles may come from shock mounts, sway-bar links, ball joints, bushings, or other parts rather than the shock itself.
How to Tell a Leak From Normal Surface Residue
A heavy wet trail that runs down the shock body is more concerning than a slight film near the seal. Road dust may stick to leaked fluid and create a dark, sticky patch. If you see this pattern, arrange an inspection instead of trying to diagnose the seal by touching the fluid.
Do not clean the component and assume the problem is fixed if the oily residue returns. A qualified technician can determine whether the shock is leaking and whether the source is another nearby component.
Light residue
Monitor the area and compare it with the manufacturer’s inspection guidance.
Heavy or recurring fluid leakage
Have the shock inspected for replacement and check for other suspension damage.
Check Tires and Other Symptoms of Bad Shocks
The condition of the tires and the way a vehicle behaves on the road can provide clues that support a shock absorber inspection. These signs are not specific to shocks, so use them alongside the bounce test and visual checks. Never perform sudden steering or braking maneuvers on public roads to test suspension performance.
Look at the tread across each tire and compare the wear patterns. Repeated scalloped dips or cupped patches may occur when a wheel does not remain well controlled, but alignment faults, tire imbalance, worn bushings, and other issues can produce similar patterns. Check tire pressure against the vehicle placard as well, since incorrect pressure can affect handling and wear.
Drivers may also notice excessive nose dive when braking, extra body roll in turns, or repeated bouncing after bumps. Worn shocks can contribute to these symptoms, but brake problems, tire defects, spring damage, and other suspension faults must be ruled out before replacing parts.
Source: YouTube, Rajon Robidash
Uneven or cupped tire wear
Inspect the tires and suspension. Do not assume shocks are the only possible cause.
Excessive body movement
Extra pitching or rolling may suggest weak damping or another suspension problem.
Clunking or knocking
Inspect mounts, bushings, links, and joints as well as the shock absorber.
Poor stability over bumps
A vehicle that feels unsettled may need a suspension and tire inspection.
Longer or less controlled stopping
This requires prompt attention. Brake condition, tires, road conditions, and suspension performance may all play a role.
Can You Test Shocks While Driving?
Normal driving may reveal symptoms that do not appear during a stationary test. You might notice repeated bouncing over a mild road undulation, poor control over uneven pavement, or unusual body movement. These observations can help a technician narrow the diagnosis, but they cannot confirm a failed shock on their own.
Do not drive a vehicle that has severe instability, a loose suspension component, a visibly broken spring, or a shock mount that appears close to separating. Arrange professional inspection or towing when continued driving may be unsafe. Never test the vehicle by swerving, braking hard, or deliberately hitting potholes.
Mild, stable symptoms
Arrange an inspection soon and avoid aggressive driving until the cause is known.
Severe instability or visible damage
Stop driving when safe and arrange professional assistance.
Hand Test Results: What to Do Next
After checking each accessible corner, combine the observations instead of relying on one sign. Repeated bouncing together with visible leakage is more concerning than a single bounce-test result without other symptoms. A lack of visible leaks does not rule out internal wear, and a firm response does not prove that damping is correct.
Use the following table as a practical guide for deciding what to check next. It is a screening aid, not a universal pass-or-fail specification for every vehicle.
Source: knifepunchrecords.com
No clear problem found
If the body settles normally and no damage is visible, continue to monitor the vehicle. Investigate any persistent handling or tire-wear symptoms.
Possible weak damping
If the body continues to bounce, arrange a suspension inspection and compare the result with the vehicle’s design.
Visible leakage or damaged hardware
Have the component inspected promptly. Severe damage or unstable handling may make driving unsafe.
Unclear result
Ask a qualified technician to inspect the shocks, springs, mounts, tires, and related suspension parts.
Quick Decision Table
This table links common observations to reasonable next steps. The urgency depends on how severe the symptom is and whether other parts appear damaged.
Repeated bouncing with no visible leak
Possible weak damping or another suspension issue. Arrange a professional inspection.
Oil running down the shock body
Possible seal failure. Have the shock checked for replacement.
Clunking with normal bounce response
Inspect mounts, bushings, links, and joints. The shock may not be the source.
Cupped tires with unstable handling
Check tire condition, wheel balance, alignment, and suspension damping.
Normal response and no other symptoms
No obvious fault was found by hand, but further testing may be needed if the vehicle still handles poorly.
Common Mistakes When Testing Shock Absorbers by Hand
The most common mistake is treating the bounce test as a definitive diagnosis. Suspension systems differ, and a hand test does not reproduce every force a shock experiences during normal driving. A vehicle can pass the test and still have worn damping, internal damage, or a fault that appears only under certain conditions.
Another mistake is blaming every handling or tire problem on the shocks. Suspension components work together, and a broken spring, loose mount, worn bushing, bad tire, or alignment problem can produce similar signs. Replacing shocks without identifying the cause may waste money and leave the original problem unresolved.
Avoid unsafe inspection methods. Do not crawl beneath a vehicle that is resting on a jack, put your fingers between moving parts, or pull on a hot or damaged component. Do not remove a strut or spring assembly without the right tools and service procedure, because a compressed coil spring stores substantial energy.
Source: rxmechanic.com
Counting a fixed number of bounces
There is no single bounce-count rule that applies to every make and model. Judge the movement in context and check other evidence.
Testing only one corner
Check all accessible corners because wear may not be equal across the vehicle.
Assuming every wet spot is shock fluid
Confirm the location and pattern of the residue. Fluid from another component can spread to nearby parts.
Ignoring the tires
Tire pressure, tread condition, and uneven wear can affect ride quality and handling.
Replacing parts without diagnosis
Use the test results to guide further checks rather than treating them as automatic proof that a shock has failed.
Working under an unsupported vehicle
Keep the hand test on the ground. Use proper lifting equipment and support procedures if an underbody inspection becomes necessary.
When to Get Professional Help
Seek a qualified mechanic if the vehicle continues to bounce, has persistent fluid leakage, develops severe tire wear, or feels unstable. Professional inspection is also appropriate when the hand test gives mixed results or the suspension uses electronic dampers or a complex air system.
Stop driving when safe if a wheel appears loose, a spring is broken, the suspension has visibly separated, or the vehicle cannot be controlled reliably. A tow is safer than attempting to drive a vehicle with a serious suspension fault.
Prompt inspection
Arrange a check for persistent bouncing, suspected leaks, unusual noises, or uneven tire wear.
Stop and seek assistance
Do this for severe instability, a broken suspension component, or obvious structural damage.
Should You Replace Shock Absorbers in Pairs?
Shock absorbers on the same axle are often replaced in pairs to help maintain balanced damping from side to side. Replacing only one worn shock can leave the vehicle with different responses on the left and right, especially when the other shock has substantial wear. Follow the vehicle manufacturer’s recommendations and the findings of the inspection.
A leaking or damaged shock does not automatically mean every shock on the vehicle must be replaced. The condition of the other units, the vehicle’s mileage, the suspension design, and the repair guidance all matter. A technician can help determine whether an axle pair or a broader repair is appropriate.
If the vehicle uses struts, inspect the related mounts, bearings, boots, bump stops, and springs as part of the repair plan. Some components may need replacement because they are damaged or worn, but they should not be replaced without a reason. Alignment may be needed after certain strut or suspension repairs, depending on the vehicle design and the parts disturbed.
Source: www.youtube.com
Replace an axle pair when appropriate
This can help preserve similar damping characteristics on both sides of the same axle.
Inspect related hardware
Check mounts, bushings, boots, springs, and fasteners for damage or wear.
Follow service specifications
Use the correct parts and tightening procedures for the exact vehicle.
Do Not Replace Shocks Based on Mileage Alone
Shock absorber life varies with road conditions, vehicle load, driving style, part quality, and design. A vehicle driven often on rough roads may experience different wear from one used mostly on smooth highways. There is no single replacement interval that applies to every vehicle.
Use the owner’s manual and maintenance guidance for the vehicle, then consider the inspection findings and any changes in handling. Replace components when their condition and the manufacturer’s guidance support doing so, rather than relying only on age or mileage.
Use condition-based checks
Look for leakage, damage, repeated bouncing, and persistent handling symptoms.
Check the maintenance schedule
Use the exact vehicle manufacturer’s recommendations where available.
Research Notes and Next-Question Gap Map
This guide focuses on the primary task: screening shock absorbers by hand without specialized diagnostic equipment. The main improvement is to explain the limits of the bounce test alongside the procedure, rather than treating a particular number of bounces as a universal pass-or-fail rule.
The article also connects the hand test with visual inspection, tire wear, handling symptoms, and safety decisions. These are practical next steps inferred from the task and the possible consequences of misdiagnosing a suspension fault. They are not claims about measured search demand.
The supplied image list includes automotive inspection illustrations and video thumbnails. They provide visual context, but they are not independent evidence of shock absorber performance. No hands-on vehicle testing or measured bounce comparison was conducted for this article.
Source: YouTube, MarkDormanGarage
Question: How many times should a car bounce during a shock test?
Reader stage: during the test. Basis: inferred next need. Coverage in this article: answered with a vehicle-specific limitation. Benefit: avoids using a fixed bounce count as a universal diagnosis.
Question: Can a shock be bad without leaking?
Reader stage: interpreting results. Basis: inferred next need. Coverage in this article: answered. Benefit: explains why visual checks alone cannot rule out internal wear.
Question: What else causes repeated bouncing or tire cupping?
Reader stage: troubleshooting. Basis: inferred next need. Coverage in this article: answered at a screening level. Benefit: reduces the risk of replacing the wrong component.
Question: Is it safe to test shocks with the vehicle raised?
Reader stage: preparation. Basis: inferred next need. Coverage in this article: answered with safety limits. Benefit: discourages working under an unsupported vehicle.
Question: Should shocks be replaced in pairs?
Reader stage: after diagnosis. Basis: inferred next need. Coverage in this article: answered with qualifications. Benefit: helps readers plan repairs without assuming every shock on the vehicle needs replacement.
Evidence Scope and Verification Limits
The mechanical explanations in this article describe established suspension principles. The suggested home checks are screening methods, and their results must be interpreted in the context of the vehicle’s design and condition.
No specific make, model, year, or suspension configuration was supplied. Therefore, the article does not give vehicle-specific torque values, lifting points, electronic suspension procedures, or a universal shock replacement interval. Consult the correct service manual when those details are needed.
Documented mechanical principles
Shock absorbers resist suspension movement through damping and help control spring oscillation.
Practical analysis
Combining the bounce test with visible condition, tire wear, and handling symptoms provides more useful screening than relying on one observation.
Not established by this article
No universal bounce-count threshold or measured performance result has been established for every vehicle.
Frequently Asked Questions
Q
How many times should a car bounce during a shock absorber test?
There is no universal bounce-count limit for every car. Many conventional vehicles settle with little additional movement after the body is released, while suspension design can affect the response. Repeated oscillation is a warning sign, but it should be confirmed with a visual inspection and other symptoms.
Q
Can I test shock absorbers without removing the wheels?
Yes. You can perform a basic bounce test with all four wheels on the ground and inspect any shock components that are visible. Some shocks are hidden behind wheels or suspension parts, so a complete visual inspection may require professional equipment or wheel removal. Do not remove parts unless you can follow the correct service procedure safely.
Q
Can shock absorbers be bad even if there is no oil leak?
Yes. Internal wear or damage can reduce damping without producing an obvious external leak. A vehicle may also have weak damping that does not show up clearly during a hand bounce test. Consider handling changes, tire wear, mounting condition, and a professional inspection when symptoms persist.
Q
Can bad shock absorbers cause uneven tire wear?
Worn shocks can contribute to irregular or cupped tire wear by allowing excessive wheel movement. However, incorrect tire pressure, poor wheel alignment, wheel imbalance, and worn suspension parts can create similar patterns. Check the tires and the rest of the suspension before deciding which component needs repair.
Q
Is the bounce test enough to confirm that shocks are good?
No. The bounce test is a simple screening method, not a complete performance test. Some worn shocks may still produce a firm response when pressed by hand. If you notice fluid leakage, persistent bouncing, unusual noises, unstable handling, or irregular tire wear, arrange a more detailed inspection.
Q
Can I drive with a bad shock absorber?
Driving with a worn shock can reduce suspension control and may affect stability, tire contact, and braking behavior. The level of risk depends on the severity of the fault and the condition of the other components. Avoid unnecessary driving and arrange an inspection; if the vehicle is severely unstable or has visible suspension damage, stop driving when safe and arrange towing.
✦ Wrapping Up
Conclusion
Testing shock absorbers by hand is a simple way to look for early signs of suspension trouble. Press down gently on an appropriate body area, release it, and watch how the suspension settles. Repeated bouncing, visible oil leakage, damaged mounts, and unusual differences between comparable corners are reasons to investigate further.
Do not rely on the bounce test alone. Inspect visible components, check the tires, and consider symptoms such as excessive body roll, nose dive, clunks, and poor stability. Because several suspension problems can produce similar signs, a professional diagnosis may be needed before replacing parts.
Safety should guide every step. Keep the vehicle on firm, level ground for the hand test, avoid moving components, and never work beneath a vehicle supported only by a jack. If the suspension looks damaged or the vehicle feels unsafe to control, stop driving when safe and seek qualified help.
💡 Key Takeaway
Park on level ground, perform a gentle bounce test at each accessible corner, inspect visible shocks for leakage or damage, and record any unusual tire wear or handling symptoms. If you find repeated bouncing, a heavy oil leak, damaged mounts, or unstable handling, arrange a professional suspension inspection before deciding which parts to replace.
Eric
Hi, I’m Eric Bennett, the person behind OffRoadTruckAccessories.com.
I created this blog to share my interest in trucks, off-road driving, automotive accessories, and DIY modifications. I enjoy learning how different truck accessories work, testing their usefulness, and understanding whether they are truly worth buying.
Shock absorbers are located near the wheels as part of the suspension system, usually between the vehicle’s body, frame, or subframe and a suspension component such as a control arm, axle, or wheel assembly. However, the exact answer to where are shock absorbers located on a car depends on the suspension design. Some vehicles have…
You should change shock absorbers when they are worn, leaking, damaged, or no longer controlling suspension movement properly. There is no single replacement interval that applies to every vehicle because shock absorber life depends on road conditions, vehicle weight, driving habits, suspension design, and component quality. If you are wondering when to change shock absorbers,…
A shock absorber is a suspension component that controls how quickly a vehicle’s suspension moves up and down after bumps, dips, braking, acceleration, and other road inputs. It works with the springs to prevent excessive bouncing and helps keep the tires in controlled contact with the road. So, what does a shock absorber do? It…
A gas shock absorber is a hydraulic shock absorber that uses pressurized gas, usually nitrogen, along with shock absorber oil to control suspension movement. The gas helps reduce oil foaming and keeps damping performance more consistent when the shock works repeatedly or under demanding conditions. If you are wondering what is a gas shock absorber,…