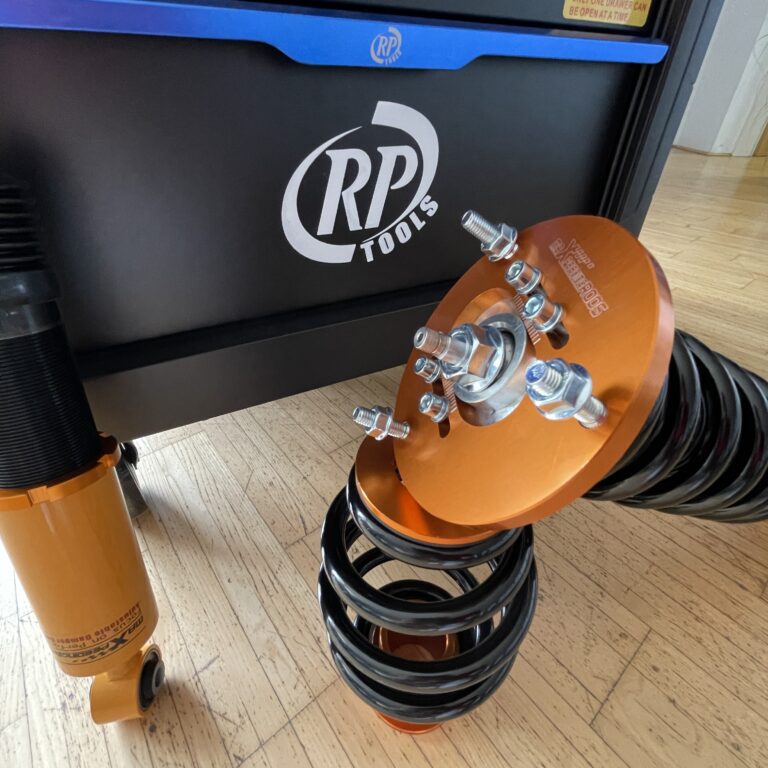
To test shock absorber compression, inspect the unit for leaks and damage, check its movement through the approved test procedure, and assess how well it resists motion and controls rebound. A hand test can reveal some faults, but it cannot confirm every internal failure.
On American roads, worn shock absorbers can affect how a car handles potholes, rough pavement, highway dips, and sudden stops. A vehicle that bounces too much or feels loose over bumps may have worn shocks, but tires, springs, bushings, and other suspension parts can cause similar signs. Start with a safe inspection before deciding which part needs repair.
The term shock absorber compression test can describe two different checks. A basic inspection looks at the shock’s movement and damping by hand, often after the part has been removed. A professional test bench measures the force the shock produces as it moves through a controlled range. These methods do not provide the same level of evidence.
This guide explains how to check shock absorber compression, what a normal response may look like, and when a hand test is not enough. The exact procedure depends on the vehicle and shock design. Use the vehicle service manual for model-specific instructions, and never compress a pressurized shock in an improvised fixture.
Shock absorber compression is the inward movement of the unit as the suspension responds to a bump. On a typical telescopic shock, the piston rod moves into the shock body as the suspension compresses. Hydraulic fluid passes through internal valves, which create resistance and help control the movement.
The spring supports the vehicle’s weight and stores energy as it compresses. The shock absorber helps control the spring’s movement and dissipates energy as heat. A weak shock may let the vehicle continue bouncing after a bump, while a shock that binds can resist normal suspension travel.
Many shocks are designed to provide different damping forces during compression and rebound. Compression damping controls inward movement, while rebound damping controls the spring as it extends. The balance depends on the vehicle, suspension design, load, and intended use.
Source: i.ytimg.com
Compression resistance
The force that opposes the shock’s inward movement. It varies with piston speed, valve design, temperature, and the shock’s operating condition.
Rebound resistance
The force that controls the shock as it extends. It may differ substantially from compression resistance.
Damping force
The resistance created by the shock’s internal hydraulic or other damping system as it moves.
Compression travel
The distance the shock can move inward within its designed operating range. It is not necessarily equal to the suspension’s total wheel travel.
Can You Test Compression Without Removing the Shock?
Yes, some preliminary checks can be done with the shock installed. Look for leaks, loose mounts, damage, uneven ride height, and excessive body motion. A gentle vehicle bounce check may also reveal poor damping, but it is only a screening test.
You generally cannot isolate a shock’s internal resistance accurately while it remains connected to the suspension. Springs, suspension geometry, bushings, tires, and the weight of the vehicle all affect the movement. Some modern suspensions also use electronically controlled dampers that require a specific diagnostic process.
Best use of an installed check
Identify visible damage, unusual movement, noise, or other reasons for further diagnosis.
Main limitation
The result does not provide a direct measurement of the shock’s compression damping force.
Tools and Safety Checks Before Testing
Gather the correct tools and identify the shock type before beginning. Many conventional automotive shocks can be inspected by hand when removed, but removal may require spring compressors or other specialized equipment. A complete strut assembly can contain a heavily loaded coil spring that can cause severe injury if released improperly.
Park on a firm, level surface and secure the vehicle against movement. If you need to raise it, use lifting points and appropriately rated jack stands as specified by the vehicle manufacturer. Never rely on a hydraulic jack alone to support a vehicle.
Let hot components cool before handling them. Wear safety glasses and suitable gloves, and keep fingers clear of pinch points. Never drill, cut, heat, or puncture a shock absorber to release pressure or fluid.
Source: fleetrabbit.com
Vehicle service manual
Use it to identify the correct shock, mounting arrangement, removal procedure, and any model-specific test limits.
Inspection light
Use a bright light to examine the shock body, rod, seals, mounts, and nearby suspension parts.
Appropriate lifting equipment
Use a suitable floor jack and rated jack stands when lifting is required. Follow the specified support points.
Measuring tools
A ruler or caliper may help document movement or dimensions when the service procedure calls for them.
Proper test fixture
A suitable fixture or shock dynamometer is needed for controlled force measurements. Do not improvise a powered compression rig.
Identify the Shock Type First
Conventional hydraulic shocks, gas-pressurized shocks, monotube dampers, twin-tube dampers, and electronically controlled units can behave differently during a hand test. Some units extend on their own because of internal gas pressure. Others may move differently depending on their construction and position.
Do not assume that a shock is defective just because it does not extend by itself, or that it is healthy because it does. Follow the test procedure for the exact part number. If the component’s construction or service limits are unknown, stop and obtain the correct information before applying force.
Gas-pressurized units
Internal gas pressure may help extend the rod, but extension behavior alone does not prove that the damping system is healthy.
Electronically controlled dampers
These may require electrical checks, scan-tool diagnostics, or manufacturer-specific testing in addition to mechanical inspection.
Strut assemblies
Do not dismantle a loaded spring assembly unless you have the required equipment and training.
How to Test Shock Absorber Compression by Hand
A hand compression test is most useful when the shock has been removed safely and the manufacturer permits manual movement. It can reveal obvious binding, rough travel, inconsistent resistance, or a unit that moves with little apparent damping. It cannot establish an exact damping-force value or prove that the shock performs correctly under road conditions.
Before testing, compare the component identification with the service information. Confirm that the rod, body, mounts, and test orientation match the instructions. If the manufacturer specifies a test bench, load limit, stroke, speed, or temperature range, use that procedure rather than a general hand test.
Source: i.ytimg.com
Step 1: Inspect the shock externally
Look for wet oil around the rod seal, dents in the body, a bent rod, corrosion, damaged bushings, loose fittings, and other visible defects.
Step 2: Confirm safe handling
Secure the unit as specified by the manufacturer. Keep your hands away from pinch points and do not clamp the polished rod or crush the shock body.
Step 3: Check the starting position
Note the rod position and any manufacturer instructions for priming or orienting the shock. Some designs require a prescribed preparation procedure before testing.
Step 4: Apply controlled manual force
If manual compression is permitted, move the rod slowly through the approved range using steady force. Do not use tools, body weight, a vehicle, or a powered device to force the unit beyond its normal travel.
Step 5: Feel for resistance
Note whether the rod moves smoothly and whether resistance feels consistent with the manufacturer’s description. A sudden hard spot, grinding sensation, or unexplained free movement deserves further investigation.
Step 6: Check extension if permitted
Allow the shock to extend or test rebound only as the manufacturer’s procedure directs. Observe the motion without treating self-extension speed as a universal pass-or-fail rule.
Step 7: Record the findings
Write down the part number, test conditions, visible damage, movement, unusual noise, and any differences between comparable units tested under the same procedure.
What Should a Healthy Shock Feel Like?
A serviceable shock will generally provide controlled resistance during movement and should not have obvious mechanical binding or damaged parts. The exact amount of resistance depends on the design and the speed of movement, so there is no single hand-force standard for all shocks.
Some dampers feel firm when moved by hand, while others move more easily. A shock can also feel acceptable at low hand speed yet perform poorly at higher piston speeds. Therefore, judge the result against the correct service procedure rather than against a different vehicle’s shock.
Potentially normal
Smooth travel and resistance consistent with the specified procedure, with no obvious damage or abnormal noise.
Needs further diagnosis
A sudden change in resistance, unexplained free travel, repeated sticking, grinding, or a clear difference from a known-good matching unit.
Not a reliable pass
The rod extending by itself or feeling firm during one slow movement. Neither observation proves full damping performance.
Why the Speed of Compression Matters
Damping force changes with piston speed and the internal valve design. Moving a shock slowly by hand is not the same as moving it quickly over a road bump. Some dampers also have separate high-speed and low-speed damping characteristics, where the terms describe damper shaft speed rather than vehicle speed.
A weak shock may still resist a slow hand movement. A shock with an internal restriction may feel unusually stiff yet fail to provide the intended damping balance. A controlled dynamometer test can show how force changes across the specified stroke and speed range.
Slow hand movement
Useful for spotting binding or obvious loss of resistance, but limited for measuring performance.
Controlled bench movement
Allows force to be measured at specified shaft speeds and positions when the equipment and test method are suitable.
How to Check Shock Compression While It Is Installed
An installed inspection is a useful first step because it can reveal leaks, loose mounts, damaged hardware, and suspension symptoms without removing the shock. Park the vehicle on level ground and inspect the suspension from a safe position. Do not crawl under a vehicle that is supported only by a jack.
Check both sides of the same axle and look for clear differences. A damaged shock may not be the only cause of uneven ride height or unusual tire wear, so examine the springs, tires, bushings, and mounting points as well. Follow the vehicle manufacturer’s inspection guidance if access is restricted or the suspension uses electronic controls.
Source: i.ytimg.com
Look for fluid leakage
A wet, oily trail around the seal or down the shock body can indicate leakage. Distinguish active leakage from a light film of residue or contamination, using the manufacturer’s inspection criteria.
Inspect the rod and body
Look for dents, corrosion, scoring, or a bent rod. Damage that interferes with rod movement can affect operation and may require replacement.
Check mounts and bushings
Loose fasteners, cracked rubber, worn bushings, and damaged brackets can cause noise or movement that may be mistaken for internal shock failure.
Review the tires
Cupping or scalloped wear may be associated with poor damping, but alignment, balance, tire pressure, and worn suspension parts can also contribute.
How to Perform a Basic Bounce Check
If the vehicle manufacturer permits a manual bounce check, press down firmly on a suitable part of the vehicle body near the wheel being checked, then release it. Keep clear of moving parts and do not use a bumper or body panel that is not designed to bear your weight.
Observe how the body settles. Repeated bouncing or an unusually loose response can indicate weak damping, but the result is not a precise shock test. Modern suspension layouts, vehicle mass, spring rates, and electronic dampers can change how the body responds.
If the body does not move much, do not assume the shock is good. A stiff spring, friction in the suspension, or the vehicle’s design can limit visible movement. Use the bounce check only alongside the visual inspection and any specified diagnostic procedure.
Repeated bouncing
May indicate inadequate damping, but should be confirmed by further inspection.
Clunks or rattles
May come from mounts, bushings, links, or other suspension components rather than the shock’s internal valves.
No obvious bounce
Does not rule out poor shock performance or a fault that appears only under certain loads and speeds.
How to Interpret Compression Test Results
Interpret the result in context. A hand test is a screening method, not a standardized measurement unless the manufacturer defines a specific procedure and acceptance range. The most useful result combines physical condition, movement, vehicle symptoms, and any available measured data.
When comparing two shocks, make sure they are the same type and part specification. Different part numbers can have different compression and rebound characteristics even when the units look alike. A comparison is meaningful only when the test conditions are sufficiently alike.
Source: i.ytimg.com
Smooth, controlled movement
This is encouraging when it matches the correct service procedure, but it does not prove that damping force is within specification.
Very little resistance
May suggest an internal fault, but the result depends on shock design, test speed, preparation, and operating temperature.
Excessive resistance or binding
May indicate internal damage, contamination, a bent rod, or a test method that does not suit the component.
Uneven response through the stroke
May point to a mechanical or hydraulic issue, particularly when the behavior is repeatable under the correct test conditions.
Oil leakage or structural damage
Requires evaluation against the manufacturer’s service criteria. A damaged rod or significant active leak can make the unit unsuitable for continued use.
Why a Shock Can Feel Good but Still Be Worn
A hand test applies a limited range of speeds and forces. It may not reveal worn valves, reduced damping at higher speeds, heat-related fade, or faults that appear only under road loads. A damper can therefore feel normal in the workshop yet fail to control wheel movement as intended.
A road test may help identify symptoms, but it should be performed only when the vehicle is safe to drive. If handling is unstable, the tire is damaged, or a suspension component is loose or broken, do not drive the vehicle to reproduce the symptom.
Low-speed test limitation
Manual movement does not reproduce every operating condition encountered on the road.
Temperature effects
Damper fluid and internal components can behave differently at different temperatures. Compare results under the specified conditions.
Vehicle-level factors
Tire condition, alignment, spring condition, bushings, and mounting hardware can affect symptoms and test interpretation.
Should You Replace Both Shocks on an Axle?
When one shock is worn or damaged, replacing shocks in axle pairs is often recommended so damping remains consistent from side to side. However, the correct repair depends on the vehicle manufacturer’s instructions, the suspension design, and the condition of the other unit.
Use matching parts with the required specifications. Do not mix incompatible shock types or assume that visually similar parts provide the same damping. If the vehicle has electronically controlled dampers, check whether programming, calibration, or additional setup is required.
Check the service information
Confirm whether paired replacement is required or recommended for the vehicle and component.
Inspect related parts
Check mounts, bushings, springs, fasteners, and any components that may have caused or been affected by the fault.
When a Shock Dynamometer Is Needed
A shock dynamometer is the preferred tool when the goal is to measure damping force rather than simply identify visible damage. The machine moves the damper through a controlled stroke while recording force against displacement or shaft speed, according to the test setup. The resulting curve can reveal differences between compression and rebound behavior.
Professional testing is especially useful for performance dampers, rebuilt units, racing applications, adjustable shocks, and cases where a hand check conflicts with the vehicle’s symptoms. It can also help compare a suspect unit with a known-good unit of the same specification.
A bench result is only as useful as the method behind it. The operator must use the correct fixture, stroke, speed, temperature, orientation, and manufacturer limits. A generic force value should not be treated as a pass standard for every shock.
Source: img.youtube.com
Measured compression force
Shows how the damper resists inward movement at the test conditions used.
Measured rebound force
Shows the damper’s resistance during extension, allowing comparison with compression behavior.
Force-versus-speed data
Helps show how damping changes as shaft speed increases or decreases.
Repeatable comparison
Can reveal differences between matching units when they are tested under the same controlled conditions.
What a Dynamometer Cannot Tell You by Itself
A bench test does not automatically establish how the whole vehicle will handle on every road. Tires, springs, geometry, load, and electronic controls also affect vehicle behavior. The test must be interpreted against the component specification and the vehicle’s symptoms.
A test result outside the expected range should prompt a review of the setup and component condition before a final decision. If the part is adjustable or rebuildable, a qualified technician may need to distinguish a setting issue from internal wear or damage.
Verify the part identity
Use the correct model and specification before comparing measured forces.
Check test conditions
Confirm that temperature, stroke, shaft speed, orientation, and setup meet the intended test method.
Interpret the full curve
Do not make a decision from one force reading when the specification requires assessment across a range of speeds or positions.
Common Mistakes When Testing Shock Compression
The most common error is treating one movement as a universal pass-or-fail test. Shock designs vary, and the force felt by hand is not a calibrated measurement. Use the hand test to identify obvious faults and to decide whether more testing is needed.
Another mistake is confusing a suspension symptom with a confirmed shock failure. Noise, poor ride quality, uneven tire wear, and body roll can have more than one cause. A reliable diagnosis checks the whole suspension system rather than replacing parts based on one clue.
Forcing a shock with tools
Can damage the unit or cause injury. Use only the approved test method and equipment.
Ignoring gas pressure
Self-extension can be normal for some designs and absent in others. It is not a universal health test.
Comparing unlike parts
Different shock models can have different intended damping forces and movement characteristics.
Skipping the external inspection
Leaks, bent rods, damaged mounts, and corrosion can provide important evidence before movement testing begins.
Using the bounce test as proof
A bounce check is only a preliminary screen. It cannot reliably detect every internal damper fault.
Ignoring temperature and preparation
Some procedures require a set temperature or prescribed cycling before measurement. Follow the applicable instructions.
When to Stop and Seek Professional Help
Stop testing if the shock is visibly bent, severely corroded, leaking heavily, or difficult to handle safely. Do not dismantle a pressurized unit or a loaded strut assembly without the correct equipment and training. If the vehicle has unstable handling, a broken spring, a loose suspension mount, or a damaged tire, arrange a safe inspection rather than continuing to drive.
A qualified technician can inspect the suspension, check for related faults, and use the correct service procedure or bench equipment. This is the best next step when symptoms are serious or the hand test does not give a clear answer.
Stop for structural damage
A bent rod, cracked mount, or damaged shock body needs professional evaluation and usually replacement of the affected part.
Stop for unsafe handling
Do not road-test a vehicle that cannot maintain stable control or has a loose or broken suspension component.
Get a measured test when needed
Use a suitable shop or specialist when a precise compression-force assessment is required.
Frequently Asked Questions
Q
How do you know if a shock absorber is compressing correctly?
Check for smooth, controlled movement and the resistance specified for the shock’s design. There should be no unexplained binding, grinding, or obvious loss of damping. Because shock designs vary, use the manufacturer’s procedure instead of relying on a universal amount of hand force.
Q
Should a shock absorber compress easily by hand?
Not always. The effort needed depends on the shock design, valve settings, gas pressure, shaft speed, and test conditions. A shock that feels firm is not automatically good, and one that moves easily is not automatically bad. Compare it with the correct specification.
Q
Should a gas shock extend by itself?
Some gas-pressurized shocks extend on their own because of internal gas pressure. The rate and amount of extension depend on the design and test conditions. Self-extension alone does not prove that the shock provides correct compression and rebound damping.
Q
Can a bounce test confirm that a shock absorber is bad?
A bounce test can reveal excessive body movement, but it cannot confirm every shock failure. Suspension geometry, spring stiffness, vehicle weight, and other worn parts affect the result. Combine the check with a visual inspection and use the specified diagnostic method if doubt remains.
Q
Can I test a shock absorber while it is still on the car?
You can inspect the installed shock for leaks, damage, loose mounts, and signs of poor suspension control. A bounce check may provide an additional clue when permitted by the vehicle manufacturer. However, an installed check does not isolate or accurately measure the shock’s internal compression damping.
Q
What is the most accurate way to test shock absorber compression?
For a quantitative assessment, use a suitable shock dynamometer with the correct fixture and test settings. It can measure damping force over a controlled range of movement and speed. Interpret the results against the exact component specification, since there is no universal compression-force limit for all shocks.
Q
Do shock absorbers need to be replaced in pairs?
Replacing shocks in pairs on the same axle is often recommended to help maintain consistent damping. Check the vehicle manufacturer’s requirements and inspect the other shock before deciding. Use compatible parts and follow any required calibration or setup procedure.
✦ Wrapping Up
Conclusion
Testing shock absorber compression starts with a careful inspection, followed by a controlled movement check when the component and procedure allow it. Look for leaks, damaged rods, binding, unusual resistance, and other clear faults. Then compare the findings with the correct service information instead of relying on a single hand movement.
A hand test is useful for basic screening, but it cannot measure every aspect of shock performance. If the shock feels abnormal, the vehicle shows signs of poor damping, or the diagnosis remains uncertain, a qualified technician can perform the appropriate checks or use a shock dynamometer. Safe testing and model-specific limits matter more than a universal rule.
💡 Key Takeaway
Identify the exact shock absorber, inspect it for damage, follow the manufacturer’s approved compression test, and seek a measured bench test if the hand-check result is unclear.
Eric
Hi, I’m Eric Bennett, the person behind OffRoadTruckAccessories.com.
I created this blog to share my interest in trucks, off-road driving, automotive accessories, and DIY modifications. I enjoy learning how different truck accessories work, testing their usefulness, and understanding whether they are truly worth buying.
Shock absorbers are located near the wheels as part of the suspension system, usually between the vehicle’s body, frame, or subframe and a suspension component such as a control arm, axle, or wheel assembly. However, the exact answer to where are shock absorbers located on a car depends on the suspension design. Some vehicles have…
You should change shock absorbers when they are worn, leaking, damaged, or no longer controlling suspension movement properly. There is no single replacement interval that applies to every vehicle because shock absorber life depends on road conditions, vehicle weight, driving habits, suspension design, and component quality. If you are wondering when to change shock absorbers,…
A shock absorber is a suspension component that controls how quickly a vehicle’s suspension moves up and down after bumps, dips, braking, acceleration, and other road inputs. It works with the springs to prevent excessive bouncing and helps keep the tires in controlled contact with the road. So, what does a shock absorber do? It…
A gas shock absorber is a hydraulic shock absorber that uses pressurized gas, usually nitrogen, along with shock absorber oil to control suspension movement. The gas helps reduce oil foaming and keeps damping performance more consistent when the shock works repeatedly or under demanding conditions. If you are wondering what is a gas shock absorber,…