
How to separate ball joint from control arm: DIY Guide Safely
A ball joint connects a control arm to the steering knuckle while allowing the suspension to move and the wheel to turn. When that joint wears out, separating it can be harder than removing the control arm itself. Rust, a tightly tapered stud, and years of road load can make the parts seem fused together even when no fastener remains.
The safest general approach is to support the vehicle correctly, remove the retaining hardware, and use a ball joint separator or press that matches the joint. A hammer can help release a tapered stud, but striking the threaded stud or forcing the control arm in an uncontrolled way can damage the knuckle, threads, or nearby suspension parts.
This guide explains how to separate ball joint from control arm on common vehicles, whether the joint is still attached to the steering knuckle or the control arm has already been removed. You will learn how to identify the joint style, choose between a press and a fork-style separator, recognize a part that is not safe to reuse, and verify the repair before driving.
At a glance
- Support the vehicle with jack stands and support the suspension as needed; never rely on a jack alone.
- Use a ball joint press or correctly sized separator instead of striking the joint randomly.
- Confirm the new joint is fully seated and arrange an alignment check after suspension work.
How to separate ball joint from control arm safely
The exact method depends on whether the ball joint is riveted, bolted, or press-fit into the control arm. A press-fit joint normally requires a ball joint press, while a riveted joint must be drilled or ground out before the replacement can be installed. The instructions below cover the common press-fit arrangement and explain where the alternatives differ.
Tools you will need
- Floor jack and properly rated jack stands for lifting and supporting the vehicle
- Wheel chocks to prevent movement
- Socket and wrench set, including the sizes specified by the vehicle service information
- Ball joint press with correctly sized receiving cups and adapters
- Ball joint separator or pickle fork for separating a tapered stud from the steering knuckle
- Torque wrench for reassembly
- Penetrating oil, wire brush, and shop rags for cleaning corrosion from the joint area
- Safety glasses, gloves, and hearing protection when cutting, drilling, or striking metal
- Optional: reciprocating saw, grinder, or drill for removing rivets or a joint seized in the control arm
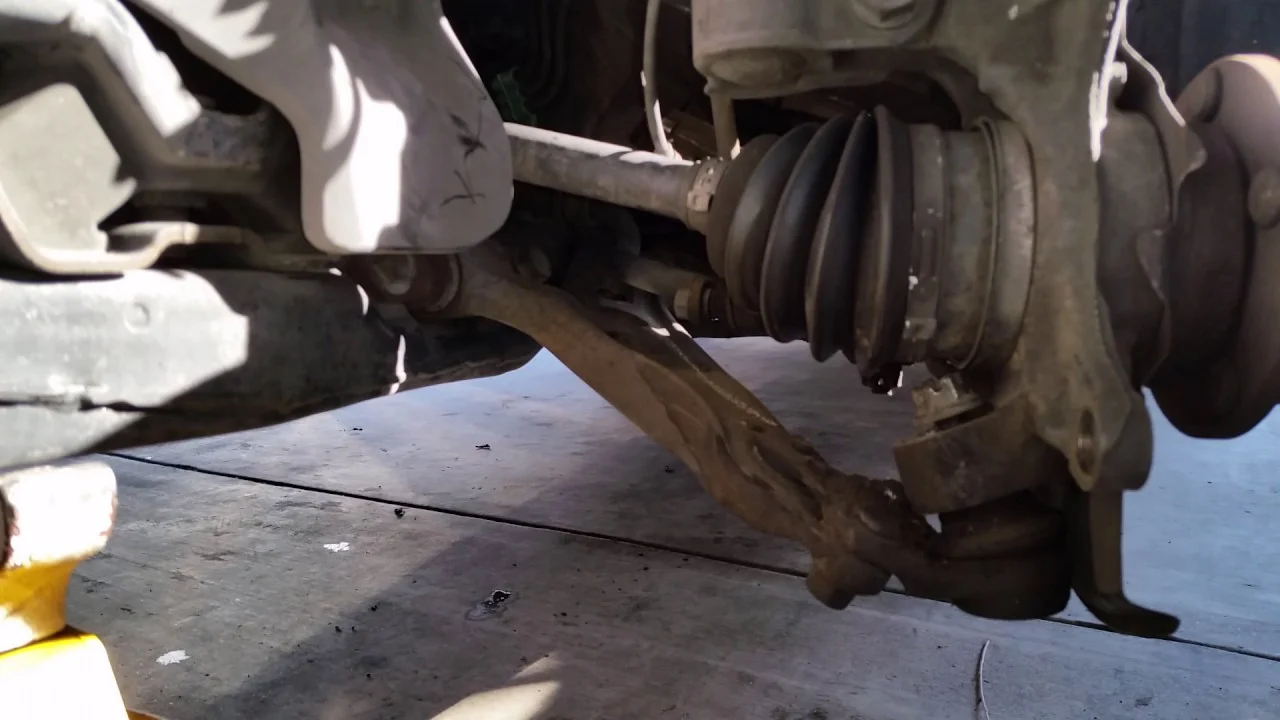
Step 1 Confirm the joint and replacement parts
Identify which ball joint you are removing before taking anything apart. On many vehicles, the lower ball joint is attached to the lower control arm, but some designs use an integrated control arm and ball joint or place the replaceable joint in the steering knuckle. Look up the vehicle-specific service information or compare the replacement part with the original.
Check whether the replacement includes a snap ring, dust boot, grease fitting, retaining nut, or new hardware. If the new joint is not shaped like the old one, stop and resolve the mismatch before disassembly. A joint with the wrong stud angle, housing diameter, or retaining method cannot be made safe by tightening it harder.
Step 2 Park, lift, and support the vehicle
Park on a firm, level surface, set the parking brake, and chock the wheels that will remain on the ground. Loosen the wheel lug nuts slightly before lifting if the wheel must be removed. Use the vehicle’s designated lift point, then place jack stands under approved structural support points.
Lower the vehicle gently onto the stands and give it a careful push to confirm it is stable. Keep the floor jack available as a secondary support while working, but do not treat a hydraulic jack as a substitute for jack stands. Suspension components can shift suddenly when the ball joint releases.
Important
Do not work beneath a vehicle supported only by a floor jack. If the support points are rusty, damaged, or unclear, stop and use a professional lifting procedure instead.
Step 3 Remove the wheel and expose the ball joint
Remove the wheel and place it under a solid part of the vehicle as an additional precaution. Clean loose dirt from the ball joint, steering knuckle, and control arm so you can see the retaining hardware and identify the direction in which the joint must be pressed.
Inspect the brake hose, wheel-speed sensor wire, sway-bar link, and any protective shields near the work area. Do not let the control arm hang from a brake hose or sensor wire. If the vehicle uses a coil spring mounted on the control arm, recognize that the spring may remain heavily loaded; follow the model-specific procedure or have the work done by a qualified technician.
Step 4 Separate the tapered stud from the steering knuckle
Many ball joints have a tapered stud that passes through the steering knuckle. Remove the cotter pin if present, then remove the retaining nut while leaving it threaded on by a few turns. The loose nut gives the stud a controlled stopping point while you break the taper free.
Use a ball joint separator if you intend to reuse the steering knuckle and ball joint components. A screw-type separator applies pressure between the control arm and knuckle and is generally the least damaging option. A pickle fork wedges between the parts and may tear the dust boot, so use it when the joint is being replaced and there is adequate clearance.
If using a hammer, strike the side of the steering knuckle near the tapered bore rather than the threaded end of the stud. Several firm blows can distort the bore microscopically and release the taper. Do not strike the steering arm, brake rotor, sensor, or the exposed threads.
Once the taper releases, remove the nut and support the steering knuckle so it cannot pull on the brake hose. Turn the knuckle out of the way only as far as the surrounding components allow.
Helpful tip
Paint or photograph the original hardware position before removal. This is especially useful when washers, spacers, or eccentric alignment hardware are present on the control arm.
Step 5 Remove the ball joint’s retaining hardware
Look closely at how the joint is held in the control arm. A press-fit joint may have a snap ring on one side. Remove the snap ring completely with snap-ring pliers, and clean the groove so no rust prevents the replacement from seating.
Some joints have a retaining circlip that is difficult to see under dirt or undercoating.
A bolted joint can be removed by taking out its bolts and nuts, but replace any one-time-use hardware if the service information requires it. A riveted joint must be drilled or ground away. Cut only the rivet heads, then drive the remaining rivet bodies out without enlarging or gouging the control-arm holes.
Before pressing, compare the control arm to the new joint. The joint normally has a shoulder or flange that must face a particular direction. Mark the orientation if it is not obvious.
Installing a joint upside down or with the grease fitting inaccessible can interfere with suspension movement or prevent proper lubrication.
Step 6 Set up the ball joint press squarely
A ball joint press is a large C-shaped forcing tool with cups that support the control arm and receive the joint as it exits. Select a receiving cup with an inside diameter larger than the joint housing, and select a pressing adapter that contacts the joint’s solid outer edge. Never press on the ball stud, dust boot, or a thin flange that can bend.
Position the press so its forcing screw, joint, control arm, and receiving cup are in a straight line. The cup must support the control arm close to the joint without covering the path of the joint. If the press sits at an angle, it can slip or distort the arm when force is applied.
Apply a small amount of lubricant to the press screw threads, not to the joint-to-arm fit if the service instructions prohibit it. Tighten the screw gradually and check the setup after each small movement. Keep your hands out of the space between the cups.
Step 7 Press the joint out of the control arm
Turn the press slowly while watching the joint and cups. A stiff joint may pop loudly when it breaks free, so wear eye protection and keep your body out of the tool’s direct line. Continue until the joint has moved fully into the receiving cup and can be lifted away.
If the joint will not move, release the pressure and inspect the setup rather than adding a long cheater bar immediately. Confirm that the snap ring or rivet material is gone, the receiving cup is large enough, and the press is square. Penetrating oil around the outer housing and moderate heat on the control arm may help, but keep heat away from bushings, brake components, wiring, and fuel or rubber parts.
For this part of the job, how to separate ball joint from control arm is mainly a question of controlling force. The press should push the joint straight through the arm; it should not twist the arm or force against a nearby bushing.
Step 8 Use a controlled alternative when a press is unavailable
A rental ball joint press is usually preferable to improvised tools. If the control arm has already been removed, a hydraulic shop press can remove the joint, provided the arm is supported with suitable blocks and the press bed is rated for the load. Keep the arm level and use a receiving tube that supports the arm without contacting delicate features.
For a joint that will be discarded, a pickle fork or carefully controlled cutting method may be appropriate, but neither is a universal substitute for a press. Do not heat a ball joint until its grease, boot, or surrounding coating smokes, and do not cut into a control arm, steering knuckle, or spring. A useful way to approach how to separate ball joint from control arm is to check your progress after each stage.
Stop and seek qualified help if the control arm bends, the press begins to walk, the support cups crack, or the joint remains immovable after you verify the retaining hardware and alignment. Excessive force can turn a replaceable joint into a damaged suspension assembly.
Step 9 Clean and inspect the control arm
After removal, clean the control-arm bore with a wire brush and remove rust flakes, burrs, and old sealant. Do not aggressively enlarge the bore. Measure or compare the cleaned opening with the replacement joint if the fit looks questionable.
Inspect the arm for cracks, elongated holes, distortion, deep corrosion, and damage from a previous removal attempt. Also check the control-arm bushings and nearby hardware. A new ball joint cannot correct a control arm that has lost its structural integrity or has severely worn bushings.
Step 10 Press the replacement joint into place
Verify the replacement joint’s orientation and place it at the control-arm opening. Use the press adapters so force is applied to the joint housing and the control arm is supported directly around the bore. Press slowly until the joint’s flange seats evenly against the control arm or reaches the position specified by the service information.
Install the new snap ring or retaining hardware exactly as designed. If the snap ring does not enter its groove completely, remove the joint and find the cause; do not rely on a partially seated ring. Install the dust boot without pinching it, and attach the grease fitting only if the joint is designed to be greased.
A successful installation has a level flange, an undamaged boot, a fully seated retaining ring, and no visible gap where the joint should meet the arm. The stud should move through its intended range without binding, but do not use excessive force to test it.
Step 11 Reconnect the knuckle and tighten the hardware
Guide the tapered stud into the steering knuckle without forcing it sideways. Install the retaining nut and tighten it to the vehicle manufacturer’s specification. If a castellated nut and cotter pin are used, never loosen the nut merely to align the pin hole; follow the specified method for final alignment.
Reconnect any removed sway-bar links, brake brackets, sensor brackets, and shields. Route wires and hoses through their original clips. If control-arm bolts were loosened, final tightening may need to occur at normal ride height so the rubber bushings are not preloaded in the wrong position.
Use a torque wrench for critical fasteners and replace cotter pins rather than reusing bent or damaged ones. Do not substitute generic bolts for suspension hardware unless their strength and dimensions match the vehicle requirement.
Step 12 Lower the vehicle and perform the initial checks
Reinstall the wheel and tighten the lug nuts in a star pattern. Remove the stands, lower the vehicle carefully, and torque the lug nuts to the specified value. Turn the steering from side to side while watching for a stretched brake hose, pinched sensor wire, boot contact, or interference between the control arm and nearby parts.
Roll the vehicle a short distance on private, level ground and apply the brakes gently. Listen for clunks and confirm that the steering returns normally. This is only an initial check, not proof that the alignment is correct.
Which removal method fits your ball joint?
Ball joints look similar from outside, but their attachment methods change the job. Identifying the design before applying force prevents damage and tells you whether the control arm can be reused.
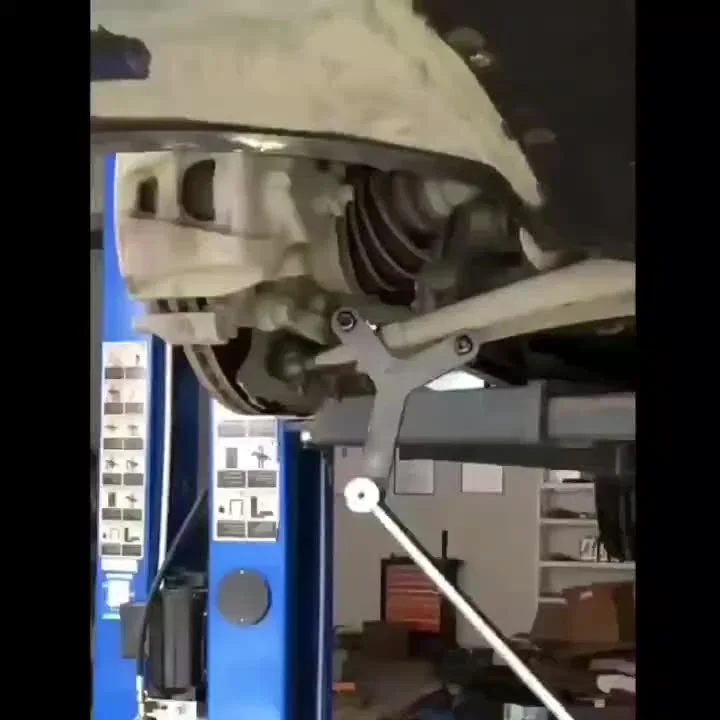
| Attachment | What to expect | Best general approach |
|---|---|---|
| Press-fit | Round housing installed tightly in the control arm, often with a snap ring | Use a ball joint press with correctly sized cups |
| Bolted | Flange secured by bolts or studs and nuts | Remove the hardware and inspect the mounting holes |
| Riveted | Factory rivets hold a flange to the arm | Drill or grind rivet heads away, then install the specified replacement |
| Integrated | The ball joint is part of the control arm or knuckle assembly | Replace the complete assembly if the design requires it |
Some vehicles also use a ball joint that is pressed into the steering knuckle rather than the control arm. In that case, the same principles apply, but the support points and press direction change. Follow the service information for the specific assembly instead of assuming every lower joint presses out in the same direction.
How to check the repair before driving
Visual inspection catches many assembly mistakes, but suspension work also requires a functional check. Compare both sides of the vehicle, because the undisturbed side can show the normal routing of a brake hose, sensor wire, boot, and control-arm hardware.
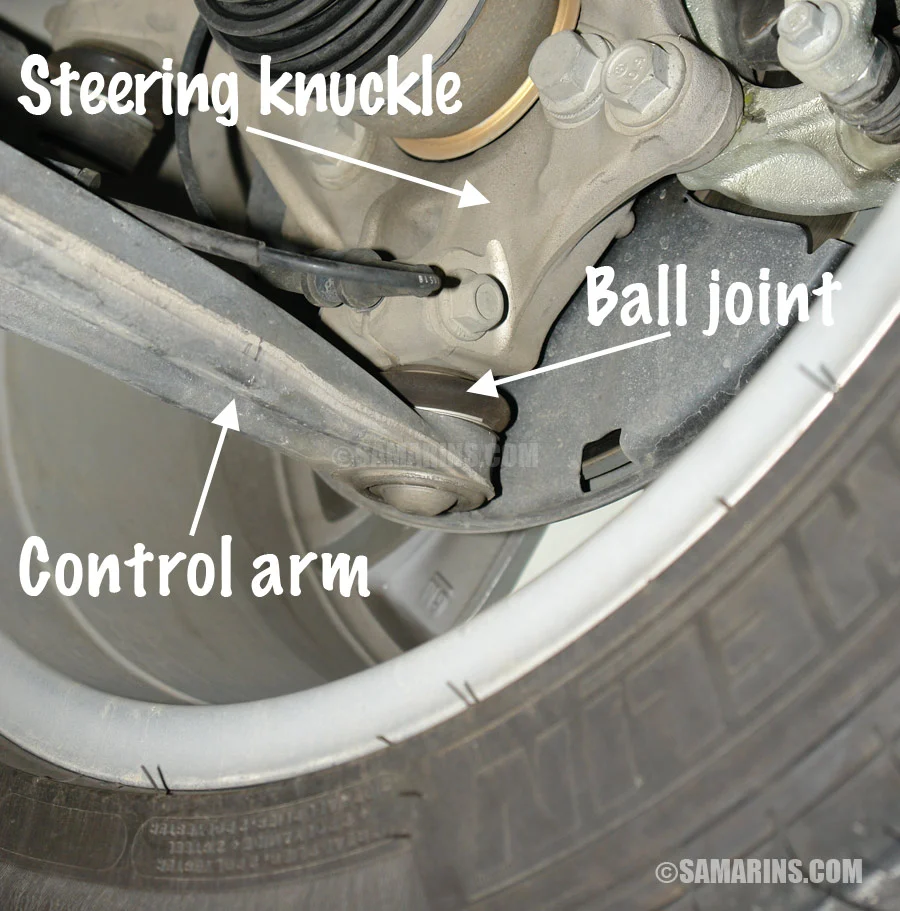
- Confirm the ball-joint flange is fully seated and the retaining ring is completely in its groove.
- Check that the dust boot is not twisted, torn, pinched, or rubbing the control arm.
- Verify that the tapered stud nut is torqued and secured with the required locking method.
- Make sure brake hoses and wheel-speed sensor wires have their original slack and clips.
- Check wheel-lug torque and make sure no tool or loose hardware remains near the brake assembly.
- Look for contact while steering fully left and right, without forcing the steering against its stop.
Any time a ball joint or control arm is replaced, arrange a four-wheel alignment or the alignment procedure specified for the vehicle. The control arm’s position affects camber and toe on many suspensions, and a vehicle can track poorly or wear tires even when the joint is installed correctly.
Check your result
Before normal driving, the wheel should be secure, the steering should move smoothly, and there should be no clunk, hose strain, or visible suspension interference. An alignment check remains the final verification.
What to do when the joint will not separate
Most failed attempts come from one of three causes: a retaining part was missed, the press is not aligned, or corrosion has locked the housing into the arm. Work through those possibilities before increasing force.
The press slips or will not stay centered
Release pressure and reposition the cups so they sit flat on strong parts of the control arm. A cup that touches a rounded edge or a thin flange can slide as the screw loads it. If the tool is bent, cracked, or too small for the joint, do not continue using it.
The joint moves but stops partway
Inspect for a snap ring, hidden retaining lip, or rivet material that remains in place. Also check whether the receiving cup has filled with the joint and is now blocking further travel. Clean the bore and re-center the press before trying again.
The tapered stud spins with the nut
Place a jack under the control arm to apply light upward pressure, or use the tool specified for that stud design to hold it. Do not use an impact gun against a spinning stud indefinitely, because it can damage the threads and heat the joint.
The control arm or knuckle is damaged
Stop if you see a crack, a visibly enlarged bore, a bent arm, deep corrosion, or a distorted steering-knuckle opening. Suspension components carry vehicle loads; replacing only the ball joint is not appropriate when the part that supports it is compromised.
Beginner questions about ball joint removal
Can I remove a ball joint with a regular C-clamp?
A regular C-clamp is not designed for the loads or clearances involved in a press-fit ball joint. Use a ball joint press with proper adapters, a correctly rated hydraulic press, or a professional service.
Should I use a pickle fork if I want to reuse the ball joint?
Usually no. A pickle fork commonly tears the dust boot and can damage the joint, so it is best reserved for a joint that will be replaced. A screw-type separator is gentler when the joint must remain serviceable.
Do I need to remove the control arm first?
Not always. Many press-fit joints can be removed with the control arm on the vehicle, but clearance, spring design, and the direction of press travel determine whether that is safe. Removing the arm may be necessary when the vehicle does not provide enough room for a press.
Can penetrating oil free a seized ball joint?
Penetrating oil can help with rust around the joint housing, but it will not replace a correctly aligned press. Apply it to the corrosion, allow it to work, and keep it away from brake friction surfaces and rubber components.
How do I know whether the ball joint is fully seated?
The joint’s flange should sit evenly against its specified shoulder, the snap ring should be fully visible in its groove, and the dust boot should not be compressed or twisted. Compare the finished position with the old joint and the replacement instructions.
Finish the job with a safe inspection
Learning how to separate ball joint from control arm is less about applying maximum force and more about identifying the attachment style, supporting the suspension, and pressing in a straight, controlled direction. Remove every retaining feature, protect the steering knuckle and control arm, and stop when the tool or component begins to deform.
After installing the replacement, verify the seating, locking hardware, brake and sensor routing, wheel torque, and steering clearance. Because ball-joint work can change suspension geometry, complete the repair with an alignment check and do not drive normally if the vehicle clunks, pulls, or shows any sign of structural damage.






