How to Replace Shock Absorbers: A Complete Step-by-Step Guide
Learning how to replace shock absorbers can save money and help you understand your car’s suspension. But this job is not just about removing one part and bolting on another. The exact steps depend on whether your car uses separate shocks, coil-over shocks, or complete strut assemblies.
A worn shock can make a car feel loose, bouncy, or hard to control. It can also affect tire contact with the road. Before starting, confirm that the shock is the real cause of the problem and check the service procedure for your exact year, make, model, and trim.
This guide explains how to replace shock absorbers in a clear way for a typical U.S. passenger vehicle. It also covers tools, safety, front and rear differences, common mistakes, and what to check after the repair.
What Do Shock Absorbers Do?
Shock absorbers control how fast the suspension moves. They work with the springs to help keep the tires in contact with the road. The spring supports the car’s weight, while the shock slows the spring’s movement.
Good shocks help the car stay stable after bumps, turns, braking, and quick steering changes. They also help reduce excess body movement. This is why worn shocks can change how a car feels even when the springs still look fine.
Before you learn how to replace shock absorbers, it helps to know what part your vehicle uses. A conventional shock is often separate from the coil spring. A strut is a larger suspension unit that may also form part of the steering and wheel location system.

- ✦ Shock absorber
A damper that controls suspension movement. It may sit beside a coil spring or inside a spring assembly, depending on the vehicle.
- ✦ Strut
A suspension assembly that can include a damper, spring seat, mounting hardware, and other parts. Many front-wheel-drive cars use front struts.
- ✦ Spring
The spring carries the vehicle’s weight and stores energy as the suspension moves. Never remove a loaded spring without the correct equipment and procedure.
Shock Absorbers vs. Struts
The terms shock and strut are often used as if they mean the same thing. They do not. A shock mainly controls movement, while a strut can be a structural part of the suspension.
This difference matters when learning how to replace shock absorbers. Replacing a simple rear shock may be a manageable home repair. Replacing a complete front strut can involve a compressed coil spring, which adds a serious safety risk.
How to Tell When Shock Absorbers Need Replacement
A leaking shock is one clear sign of trouble, but not every worn shock leaks badly. Internal wear can reduce damping while the outside still looks fairly clean. The best approach is to look at several symptoms together.
A car that keeps bouncing after a bump may have weak damping. You may also notice more nose dive under braking, extra body roll in turns, or a less settled feel on rough roads. Uneven or unusual tire wear can also point to suspension problems, although tires, alignment, bushings, and other parts can cause similar patterns.
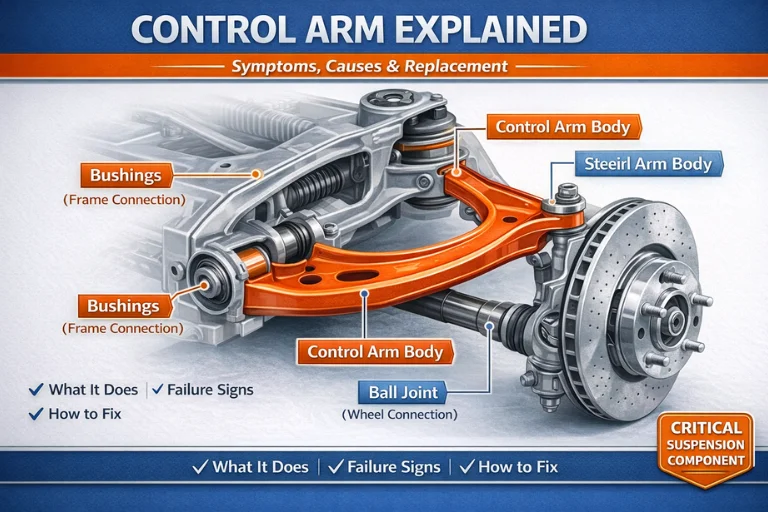
Do not replace shocks based on one symptom alone. Inspect the complete suspension and rule out worn control-arm bushings, ball joints, mounts, springs, tires, and alignment problems when needed.

- ✦ Fluid leakage
Oil or fluid around the shock body can indicate a failed seal. A light film may need further inspection, while heavy leakage is a stronger reason to replace the unit.
- ✦ Excessive bouncing
If the car continues to move several times after a bump, the shocks may no longer control spring movement well.
- ✦ Poor body control
Extra nose dive, body roll, or repeated movement after dips can suggest weak damping.
- ✦ Uneven tire wear
Irregular wear can occur when a tire does not stay firmly planted. Check the tire, wheel balance, alignment, and other suspension parts before blaming the shock.
- ✦ Knocking or clunking
Noise can come from a damaged shock mount or loose hardware, but it can also come from other suspension parts.
When to Inspect the Suspension
Inspect the suspension after a major pothole hit, collision, or other hard impact. Also inspect it when handling changes or a new suspension noise appears.
If the vehicle pulls, wanders, or feels unsafe, do not assume new shocks will solve the issue. Have the full suspension and steering system checked before driving far.
Tools and Parts You Need Before Starting
Good preparation makes learning how to replace shock absorbers much easier. Gather the correct replacement parts and tools before lifting the vehicle. Check the service manual for special tools, torque values, and the correct lifting points.
For many separate shock replacements, the basic tools include a floor jack, jack stands, wheel chocks, sockets, wrenches, and a torque wrench. Rusted hardware may also need penetrating oil, but use care around rubber parts and brakes.
Do not guess about replacement parts. Match the shock to the exact vehicle application. If the manufacturer calls for new mounting hardware, bushings, nuts, or other parts, replace them as directed.

- ✦ Floor jack
Use a jack with enough capacity for the vehicle and lift only at approved lifting points.
- ✦ Jack stands
Use properly rated stands on solid ground. Never rely on a floor jack alone to support a vehicle while you work underneath it.
- ✦ Wheel chocks
Chock wheels that stay on the ground to help prevent vehicle movement.
- ✦ Torque wrench
Use a torque wrench to tighten critical suspension fasteners to the vehicle maker’s specified torque.
- ✦ Correct replacement shocks
Verify the part number and fitment before installation. Check whether the package includes required hardware.
- ✦ Basic hand tools
A socket set, combination wrenches, extensions, and suitable breaker bar can handle many common suspension fasteners.
Safety Equipment
Wear safety glasses when working below the car. Gloves can protect your hands from sharp edges and dirt, but they should not replace safe tool use.
Work on a hard, level surface. Keep loose clothing, cords, and tools away from moving parts. If the job requires a coil spring compressor, use a tool made for that job and follow its instructions.
How to Replace Rear Shock Absorbers Step by Step
Rear shocks are often simpler to replace than front struts because the spring may be separate from the shock. Still, the layout varies by vehicle. Read the service instructions for your car before removing any hardware.
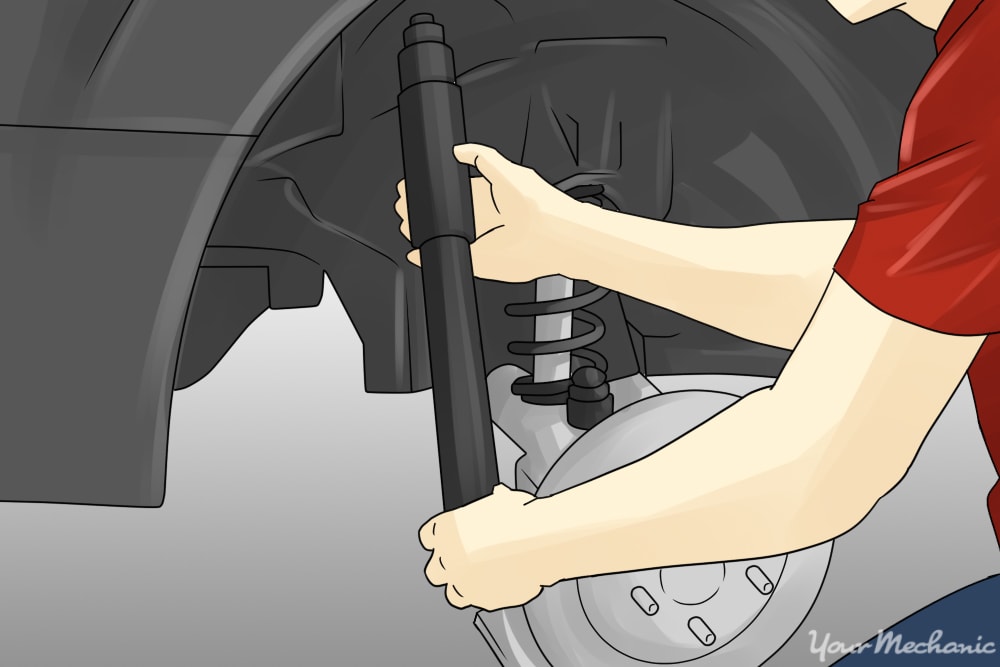
Start by parking on level ground, setting the parking brake, and chocking the wheels. Loosen the wheel lug nuts slightly if the wheel must come off, then lift the vehicle at the approved point and place it securely on jack stands.
Support any suspension component that may move when the shock is removed. This is important because removing a shock can allow part of the suspension to drop or shift.

- ✦ 1. Remove the wheel if required
Take off the wheel to gain access to the shock. Keep the wheel and lug nuts in a safe place.
- ✦ 2. Locate the shock mounts
Find the upper and lower shock mounting points. Clean dirt from the fasteners and apply suitable penetrating oil if needed.
- ✦ 3. Support the suspension
Place a suitable support under the suspension if the service procedure calls for it. Do not place a jack where it can damage a component.
- ✦ 4. Remove the old shock
Remove the mounting hardware in the order listed by the service manual. Some vehicles require access from inside the trunk or cabin.
- ✦ 5. Compare the new and old parts
Check the length, mounting points, bushings, and part number. Do not install a part that does not match the application.
- ✦ 6. Install the new shock
Position the new shock and install the hardware by hand first. Make sure the shock sits correctly before final tightening.
- ✦ 7. Tighten to specification
Use the vehicle maker’s torque values. Some suspension fasteners must be tightened with the suspension at a specified ride position.
- ✦ 8. Refit the wheel
Install the wheel and tighten the lug nuts in the correct pattern and to the specified torque.
Should You Replace Rear Shocks in Pairs?
Replacing shocks on the same axle as a pair is common because both sides then have similar damping characteristics. If one rear shock has failed, inspect the other side closely for leaks, damage, and wear.
Follow the vehicle maker’s guidance and the replacement part instructions. Do not mix parts with different designs or specifications unless the application specifically allows it.
How to Replace Front Shock Absorbers and Struts
Front suspension work can be more complex than rear shock replacement. Many cars use a MacPherson strut, where the spring sits around the damper. The spring can hold a large amount of stored energy, so removing the spring without the correct equipment can cause severe injury.
If you have a complete pre-assembled replacement strut, the job can be simpler because the spring and mount may already be assembled. Even then, the vehicle-specific removal process matters. Steering and suspension geometry can also be affected.
When learning how to replace shock absorbers at the front, first identify whether you have a separate shock or a strut assembly. If a spring must be transferred to the new strut, a professional repair shop is often the safer choice unless you have the correct spring compressor, experience, and service information.

- ✦ Check the strut design
Confirm whether the front suspension uses a complete strut assembly or a separate shock. The procedures are not the same.
- ✦ Inspect the mount
Check the upper mount, bearing, dust boot, bump stop, and spring seat. Replace worn parts as required.
- ✦ Do not loosen the center nut blindly
A strut center nut may hold the spring assembly together. Do not remove it until you know the correct procedure and the spring is safely controlled.
- ✦ Use a proper spring compressor
If the spring must be removed, use equipment designed for automotive coil springs and follow the tool and vehicle instructions.
- ✦ Check alignment needs
Some strut removal procedures can change wheel alignment. Check the service information and have an alignment performed when required.
When a Front Strut Job Should Go to a Shop
A complete strut replacement may be a reasonable DIY job for an experienced home mechanic with the right tools. Spring transfer work is different. A poorly secured spring can release with extreme force.
If you lack a proper spring compressor or are unsure which parts carry spring load, stop before disassembly. Paying a qualified shop for this part of the repair can reduce a major safety risk.
Common Mistakes to Avoid During Shock Replacement
Many suspension problems after a repair come from simple errors. A bolt may not be tightened correctly, a bushing may be installed in the wrong position, or a part may not match the vehicle. Taking time to check each step can prevent a second repair.
One of the biggest mistakes is treating every vehicle the same. The order of removal, tightening position, and required torque can vary. Always use the service information for your exact vehicle instead of relying on a generic procedure alone.

- ✦ Working under a jack-supported car
A hydraulic jack can move or lose pressure. Support the vehicle with properly rated jack stands before working underneath it.
- ✦ Using an impact tool without checking torque
An impact tool can over-tighten some fasteners. Use a torque wrench for final tightening where the service procedure specifies a torque.
- ✦ Reusing damaged hardware
Replace one-time-use nuts, bolts, or other hardware when the vehicle maker or part maker says to do so.
- ✦ Ignoring suspension bushings
A new shock cannot repair a worn bushing, broken mount, weak spring, or damaged control arm.
- ✦ Skipping the final inspection
Before driving, check that all tools are removed, fasteners are tight, hoses and wires are clear, and the wheels are installed correctly.
- ✦ Replacing only one side without checking the other
Inspect both sides of the axle. The opposite shock may have similar age and wear.
A Simple Final Safety Check
Before lowering the car, look over every part you touched. Check the shock mounts, nearby brake lines, ABS wires, wheel hardware, and suspension position.
After lowering the vehicle, torque the wheel fasteners as specified. Start with a slow test drive in a safe area. Listen for new noises and check that the car tracks and handles normally.
What to Do After Installing New Shock Absorbers
The repair is not finished when the new shock is bolted in place. The suspension needs a careful final check. Make sure all fasteners are at the correct torque and that nothing rubs or binds through normal suspension movement.
Take a short test drive on a familiar road. Start slowly and listen for clunks, rattles, or scraping. The car should feel controlled over bumps without unusual movement.
If you replaced front struts or removed parts that can affect steering geometry, check whether an alignment is required. An alignment can also help when tire wear or steering symptoms were part of the original problem.

- ✦ Check for leaks
Inspect the new shock and nearby parts after the test drive. A new shock should not show abnormal fluid leakage.
- ✦ Listen for noise
New knocking or rattling can indicate loose hardware, a damaged mount, or another suspension issue.
- ✦ Check steering feel
The vehicle should respond normally to steering input. Stop driving and inspect the vehicle if it pulls sharply or feels unstable.
- ✦ Check tire condition
Look for abnormal wear and confirm the tires remain properly inflated.
- ✦ Confirm alignment
Follow the vehicle manufacturer’s guidance on alignment after strut or suspension work.
How Long Do New Shocks Last?
There is no single replacement interval that fits every vehicle. Shock life depends on road quality, vehicle load, driving style, weather, and the condition of other suspension parts.
Instead of replacing shocks on a fixed schedule alone, inspect them when the vehicle develops symptoms or during routine suspension checks. A car driven on rough roads and heavy potholes may need closer inspection than one used mainly on smooth highways.