
How to Remove a Control Arm: Complete Step-by-Step Guide for DIY Mechanics
Learning how to remove a control arm can save time and money when repairing a vehicle’s suspension. While the exact steps vary by make and model, the overall process remains similar on most passenger cars, trucks, and SUVs in the United States.
Over the years, I have removed control arms from daily drivers, work trucks, and older project cars. The biggest lesson I learned is that preparation matters. Having the right tools, using penetrating oil on rusty fasteners, and following safety procedures can turn a frustrating job into a manageable weekend repair.
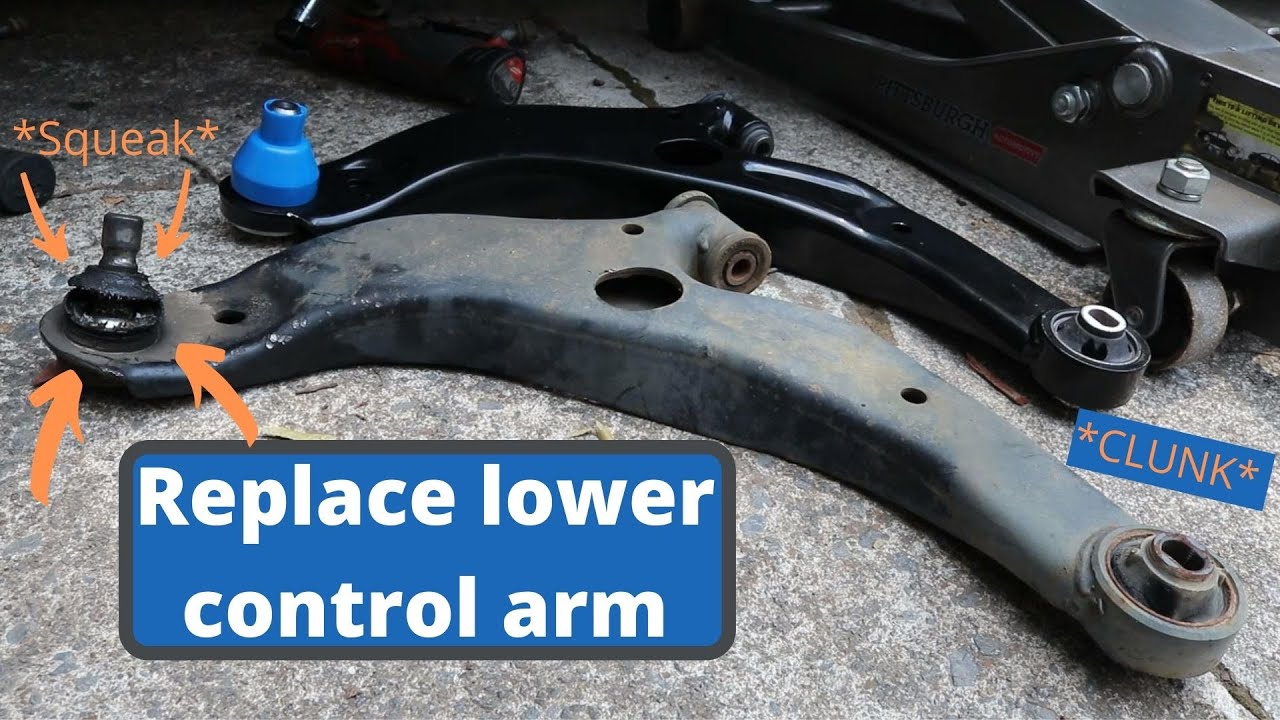
What Does a Control Arm Do?
A control arm is a key suspension component that connects the wheel assembly to the vehicle frame or subframe. It helps the wheel move up and down while maintaining proper alignment and handling.
Most vehicles use upper control arms, lower control arms, or both. Control arms contain bushings and often connect to the steering knuckle through a ball joint. When these parts wear out, drivers may notice clunking sounds, uneven tire wear, vibration, or poor steering response.

- ✦ Supports Suspension Movement
Allows controlled wheel travel over bumps and uneven roads.
- ✦ Maintains Alignment
Helps keep the wheel positioned correctly relative to the vehicle.
- ✦ Improves Handling
Contributes to stable steering and predictable vehicle control.
Signs a Control Arm Needs Replacement
Common symptoms include clunking noises, steering wander, uneven tire wear, vibration during braking, and visible bushing damage. If these symptoms appear, inspecting the control arm and related suspension parts is a smart next step.
- ✦ Clunking Noise
Often caused by worn bushings or ball joints.
Tools and Safety Equipment You Need
Before starting how to remove a control arm, gather all necessary tools. This prevents interruptions and improves safety.
Many control arm jobs require moderate mechanical experience. Rust, seized fasteners, and suspension tension can make the task more challenging than expected.

- ✦ Floor Jack
Used to raise the vehicle safely.
- ✦ Jack Stands
Support the vehicle while you work underneath.
- ✦ Socket Set
Needed for removing mounting bolts and nuts.
- ✦ Breaker Bar
Provides extra leverage on stubborn fasteners.
- ✦ Penetrating Oil
Helps loosen rusted bolts.
Important Safety Precautions
Never rely solely on a hydraulic jack. Always use quality jack stands on a solid, level surface. Wear safety glasses and gloves whenever working on suspension components.
- ✦ Work on Level Ground
Reduces the risk of vehicle movement.
How to Remove a Control Arm Step by Step
The exact process varies by vehicle, but the following procedure covers the general method used on most front suspension systems.
Read your vehicle service manual before beginning. Torque specifications and component locations can differ significantly between models.

- ✦ Step 1
Park on a level surface and engage the parking brake.
- ✦ Step 2
Loosen wheel lug nuts slightly before lifting the vehicle.
- ✦ Step 3
Raise the vehicle and secure it with jack stands.
- ✦ Step 4
Remove the wheel for access to the suspension.
Disconnect the Ball Joint
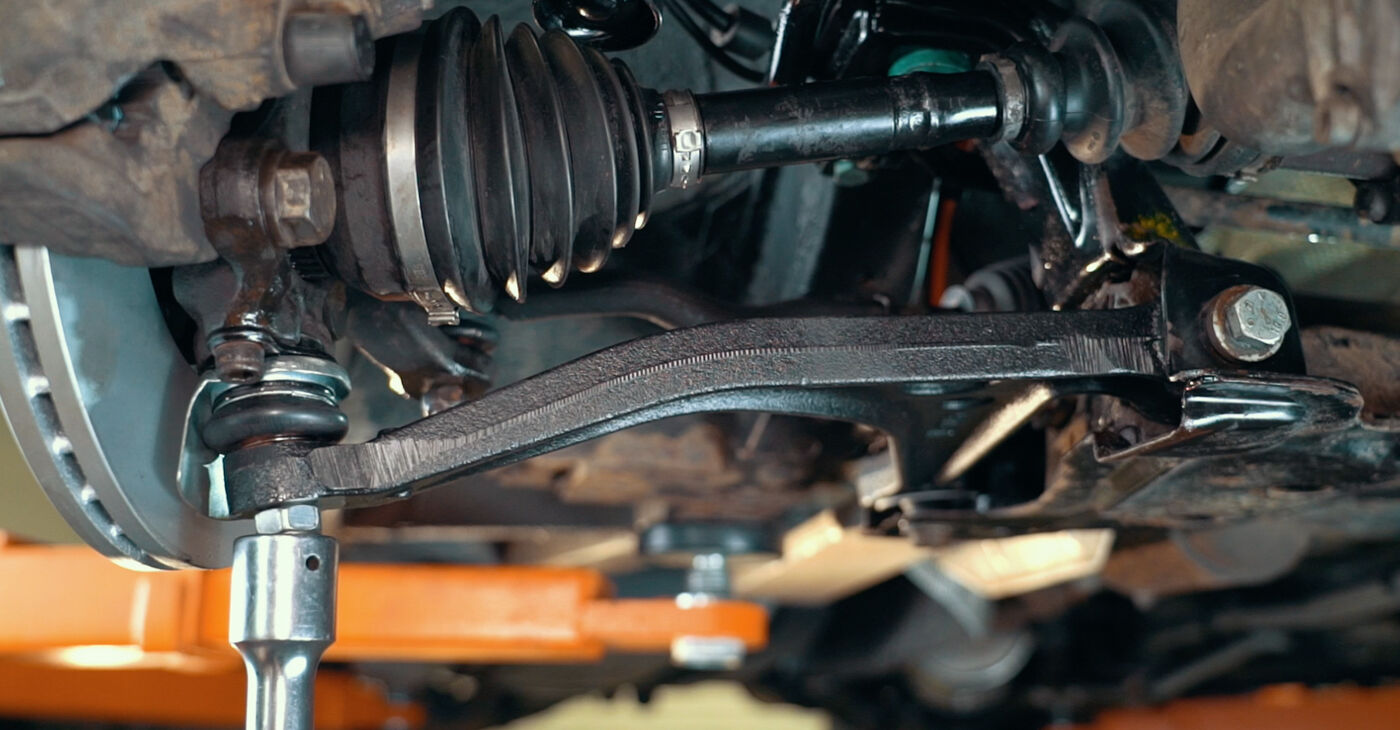
Many control arms connect to the steering knuckle through a ball joint. Remove the retaining hardware and separate the ball joint using the proper tool. Avoid striking sensitive components unnecessarily.
- ✦ Use a Ball Joint Separator
Helps prevent damage and speeds up removal.
Remove the Control Arm Mounting Bolts
Locate the control arm mounting bolts attached to the frame or subframe. Apply penetrating oil if needed. Remove the bolts carefully while supporting the control arm.
- ✦ Support the Arm
Prevents sudden movement during bolt removal.
Extract the Control Arm
Once all hardware is removed, carefully slide the control arm out of position. Some vehicles require slight manipulation of nearby suspension parts to create clearance.
- ✦ Inspect Nearby Parts
Check bushings, ball joints, and mounting points for wear.
Common Problems When Removing a Control Arm
One of the biggest challenges when learning how to remove a control arm is dealing with rusted or seized hardware. Older vehicles exposed to road salt often have bolts that refuse to move.
Patience is important. Rushing can strip threads, damage suspension parts, or create additional repair costs.

- ✦ Seized Bolts
Apply penetrating oil and allow it time to work.
- ✦ Stuck Ball Joint
Use the proper separator tool instead of excessive force.
- ✦ Limited Access
Some vehicles require removal of additional components.
Tips for Rusty Suspension Hardware
In areas where winter road salt is common, suspension bolts can become heavily corroded. Heat, penetrating oil, and quality tools often help break stubborn fasteners loose.
- ✦ Apply Penetrating Oil Early
Spray fasteners several hours before starting work.
Installing the New Control Arm
After you understand how to remove a control arm, installation is generally the reverse process. Position the new control arm carefully and install mounting hardware loosely at first.
Final tightening should follow manufacturer torque specifications. Incorrect torque can shorten bushing life and affect suspension performance.
- ✦ Compare Parts
Verify the new control arm matches the original.
- ✦ Use Correct Torque
Follow factory specifications whenever possible.
- ✦ Inspect Related Components
Replace worn ball joints or bushings if necessary.
Why Alignment Matters
A suspension alignment should be performed after replacing a control arm. Alignment ensures proper tire wear, handling, and steering performance.
- ✦ Protect Tires
Proper alignment reduces uneven tire wear.
Professional vs DIY Control Arm Removal
Many DIY enthusiasts successfully learn how to remove a control arm at home. The job is often manageable with basic mechanical experience and the right equipment.
However, heavily rusted vehicles or complex suspension designs may justify professional service. A technician can complete the work efficiently and identify additional suspension issues.

- ✦ DIY Advantages
Can reduce labor costs and build repair experience.
- ✦ Professional Advantages
Access to specialized tools and alignment equipment.
When to Seek Professional Help
Consider professional assistance if bolts are severely seized, structural rust is present, or you are uncomfortable working with suspension components.
- ✦ Safety First
Never continue if you feel unsure about the repair.






