
How to Press a Ball Joint Into a Control Arm Safely and Correctly
A worn ball joint can make a vehicle wander, clunk over bumps, or fail a safety inspection. If the joint is designed to press into the control arm, replacing it does not usually require replacing the entire arm—but the job depends on using the correct force in the correct direction. A crooked press, the wrong adapter, or an unsupported control arm can damage the new joint or create a serious safety risk.
Learning how to press a ball joint into a control arm is realistic for a careful beginner with a suitable ball-joint press, solid support, and the vehicle’s service information. The old joint must come out completely, the bore must be inspected, and the new joint must be pressed in squarely until its shoulder or retaining feature reaches the proper position.
This guide covers the complete process from identification and removal through installation and checks after reassembly. It also explains when a control arm is too damaged to reuse, why a general-purpose puller may be unsafe, how to handle a snap ring or boot, and when to stop and have a qualified technician finish the repair.
At a glance
- Confirm that your vehicle uses a press-fit ball joint before disassembly.
- Support the control arm and ball joint with adapters that match their diameters.
- Verify the joint is fully seated, retained, lubricated if required, and rechecked after installation.
How to press a ball joint into a control arm safely and correctly
A press-fit ball joint is held in a machined bore in the control arm. A C-frame ball-joint press applies straight-line force through an installation adapter while a larger receiving cup supports the opposite side. The procedure below assumes the control arm has already been removed from the vehicle and is on a stable work surface; pressing the joint while the arm is still loosely supported under a vehicle is not a safe substitute.
Tools you will need
- A vehicle-specific replacement ball joint, including any supplied snap ring, boot, grease fitting, or fasteners
- A heavy-duty C-frame ball-joint press with cups and adapters large enough for the joint and control arm
- Socket set, breaker bar, and hand tools for removing the control arm and retaining hardware
- Torque wrench for reassembly and ball-joint fasteners
- Wire brush, shop cleaner, and clean rags for preparing the control-arm bore
- Safety glasses and sturdy work gloves
- Optional: a bench vise with soft jaws to hold the control arm steady without crushing it
Step 1 Confirm the ball joint and control arm are compatible
Before applying force, compare the replacement joint with the one in the control arm and check the vehicle’s repair information. Some control arms use a press-fit joint, while others use a bolted or riveted joint, and some replacement arms include the joint already installed. A joint that looks similar but has a different body diameter, stud taper, snap-ring groove, or grease-fitting position is not an acceptable substitute.
Check whether the new joint has an orientation mark, a grease fitting, a notched flange, or a specific relationship to the control arm. The service instructions may identify a required angle or alignment mark. Photograph the old joint before removal, but use the vehicle’s specifications—not the photograph—as the final reference.
Inspect the control arm itself for cracks, bends, severe corrosion, or an oval-shaped ball-joint bore. The bore should be round and tight enough to retain the replacement joint. If the arm is cracked, substantially distorted, or the joint slid out with unusually little resistance, replace the arm rather than trying to make the new joint fit.
Important
Never rely on the press alone to correct a damaged control arm. A deformed bore can let the joint move after installation, causing loss of steering control.
Step 2 Remove every retaining part from the old joint
Look for a snap ring, circlip, retainer, bolts, rivets, or a flange that must be dealt with before pressing. A snap ring sits in a groove around the joint and may be hidden by dirt or corrosion. Remove it with suitable snap-ring pliers, and make sure it is completely out of the groove before setting up the press.
If the joint is riveted or has factory-installed retaining hardware, follow the vehicle-specific removal procedure. Rivets may need to be drilled or ground away, but do not remove material from the control-arm bore. Protect nearby rubber bushings from heat and grinding debris if the arm still contains them.
Clean enough dirt from the joint and bore to see the retaining features clearly. Trying to press out a joint with a snap ring still installed is a common mistake and can bend the control arm, break the press, or launch a damaged retainer.
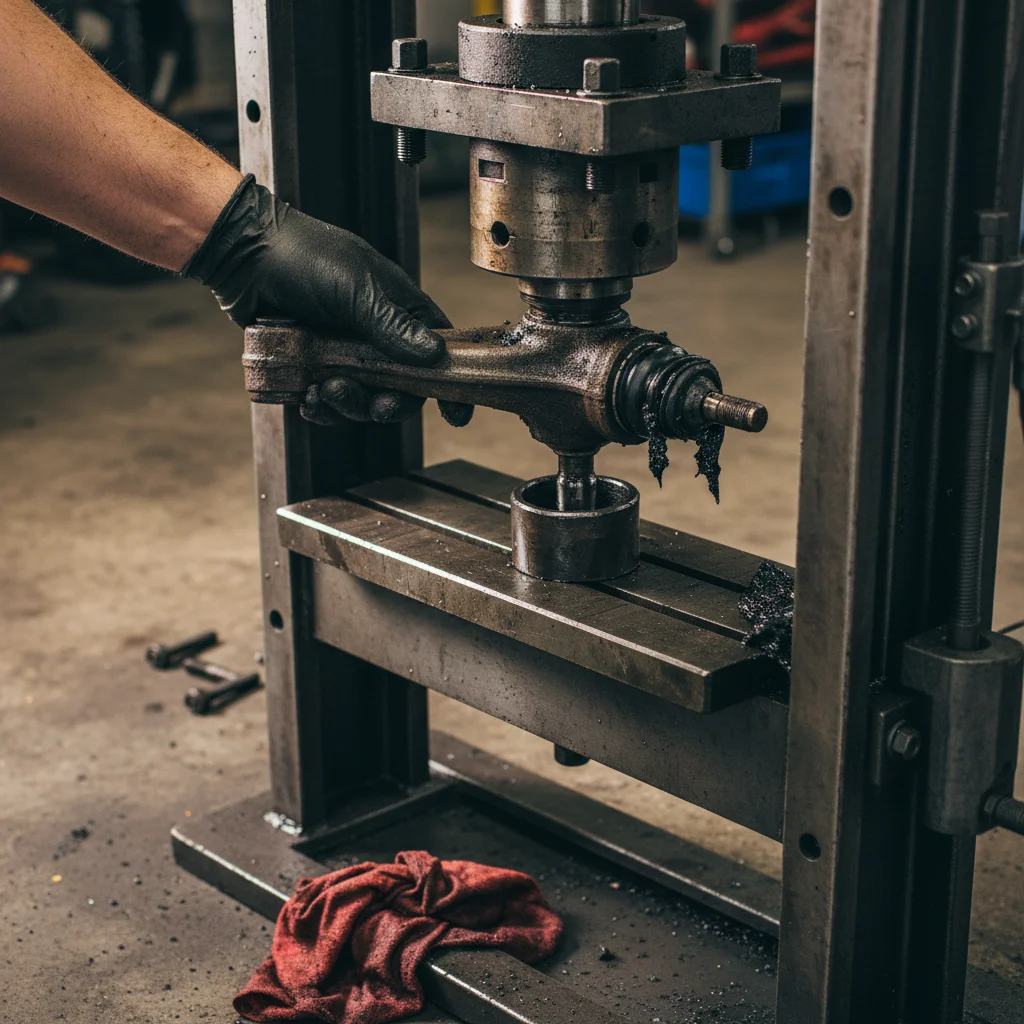
Step 3 Set the control arm securely in the press
Choose a receiving cup that is large enough for the old joint to pass into without contacting the control arm. The cup must support the control arm around the joint’s outer area, not press against the joint itself. On the opposite side, use an adapter that contacts the joint’s shell or flange evenly.
Arrange the press so its screw, adapter, ball joint, and receiving cup are all on the same centerline. The control arm should be stable and supported close to the bore. If the arm rocks, twists, or contacts the press unevenly, stop and rearrange it before turning the screw.
Wear eye protection and keep your hands away from the gap between the adapters. Inspect the press screw and threads for damage, lubricate the press screw if the tool instructions call for it, and do not add a cheater pipe that could overload the frame or adapters.
Step 4 Press the old ball joint out gradually
Turn the press screw slowly while watching the joint, adapters, and control arm. The old joint should begin moving through the bore and into the receiving cup. If the joint tilts, the adapter slips, or the arm starts bending, release the pressure and correct the setup rather than forcing it.
Rust may make the first movement difficult. Penetrating oil and gentle tapping on the control arm around the bore can sometimes help, but do not strike the press screw or heat a control arm near rubber components without knowing the material and service limits. If the press requires extreme force or the frame is visibly flexing, the equipment may be undersized or the joint may be seized beyond a safe home repair.
Once the joint is out, remove the control arm from the press and collect the old parts. Compare the removed joint with the replacement before cleaning the bore; this is a useful opportunity to catch an incorrect part before installation.
Step 5 Clean and inspect the ball-joint bore
Use a wire brush and cleaner to remove rust, dirt, and flakes from the bore and the surrounding seat. Clean only enough to restore the original metal surface. Do not enlarge the bore with a rotary tool, file, or abrasive paper simply to make the new joint easier to install.
Run a fingertip carefully around the bore after cleaning, watching for a raised ridge, cracks, deep pitting, or a section that is no longer circular. Compare the bore with the replacement joint and check that the joint can be started squarely by hand. It should not drop in loosely, and it should not require hammering to begin its entry.
A useful way to approach how to press a ball joint into a control arm is to check your progress after each stage.
Keep the bore and joint exterior free of heavy grease unless the manufacturer specifically permits it. Lubricant can make the joint slip during pressing or contaminate a retaining surface. A light film may be appropriate for some designs, but the replacement instructions take priority.
Step 6 Identify the correct installation direction
Most replacement joints go into the control arm from the opposite direction from which the old joint was removed, but that is not universal. Use the old joint, the service manual, and the new joint’s flange or snap-ring groove to determine the direction. The joint’s retaining shoulder must end up against the correct side of the arm.
Look for an arrow, notch, flat, or orientation mark. Some ball joints must be indexed so the stud has the intended range of motion, and some grease fittings must face a particular direction for access. Mark the control arm with a paint pen if that helps you preserve the alignment.
Set the receiving cup on the side where the joint’s flange or installed body will not be crushed. The installation adapter should push on the strongest part of the joint body, never on the ball stud, dust boot, grease fitting, or thin flange unless the adapter is specifically designed for that contact.
Step 7 Start the replacement joint squarely
Place the new joint at the mouth of the bore and confirm that it is level. Hold the control arm and joint steady while bringing the press into position, then apply light pressure. The joint should enter evenly around its circumference rather than disappearing on one side first.
After the first small amount of movement, stop and inspect the gap all the way around. An even gap indicates that the joint is likely aligned; a tapered gap means it has started crooked. Correcting a tilted joint early is much safer than trying to straighten it after it has traveled deep into the bore.
Helpful tip
Use a thin piece of paper or a visual sight line around the joint as an alignment check before full pressure. The press should push on the joint body while the receiving cup supports the control arm directly around the bore.
Step 8 Press the new joint fully into position
Continue turning the press slowly, pausing often to confirm that the adapters remain centered. Press until the joint’s shoulder contacts the specified seat or the retaining groove is fully exposed as described by the instructions. Do not stop merely because the joint feels tight; the required final position is determined by the design.
On a correct installation, the joint body will remain straight, its flange will sit evenly against the control arm, and there will be no visible gap where the joint is meant to seat. If the press becomes unusually hard to turn, stop and inspect the setup for a wrong adapter, incorrect direction, interference, or a damaged bore.
Do not press against the threaded stud to finish the job. The stud can bend or the ball-and-socket assembly can be damaged even if the external appearance seems acceptable. If the boot is pinched or torn during pressing, replace the joint or boot according to the manufacturer’s instructions rather than ignoring the damage.
Step 9 Install the retainer and service the joint
If the joint uses a snap ring, install the correct new or reusable ring only after confirming that the joint is fully seated. The ring should expand into its groove all the way around. Rotate or inspect it carefully to verify that no section is perched on top of the groove.
Install the dust boot, grease fitting, and any supplied seal or shield. A grease fitting should be tight but not over-tightened, and the boot should sit in its groove without twisting. If the joint is pre-lubricated or sealed, do not add grease unless its instructions allow it.
If the manufacturer specifies a particular grease, use that grease and stop when the boot is just beginning to swell. Overfilling can force the boot off its seat. A torn, loose, or displaced boot is a reason to stop before reinstalling the control arm.
Step 10 Reinstall the control arm and torque the hardware
Move the control arm back into the vehicle without striking the new joint or boot. Install the bolts, nuts, washers, and any alignment shims in their original locations, but leave components that use rubber bushings loose until the suspension is at the specified ride-height position if the service instructions require that procedure.
Use a torque wrench for the ball-joint fastener, control-arm bolts, and any other critical suspension hardware. Replace one-time-use nuts or bolts when specified. Do not estimate torque by feel, because overtightening can damage threads and undertightening can allow movement.
Reconnect the steering knuckle and any sway-bar link, brake hose bracket, or wheel-speed sensor hardware that was removed. Confirm that the brake hose and sensor wire are routed correctly and cannot stretch or rub as the suspension moves. Understanding how to press a ball joint into a control arm also means recognizing the limits of the method.
How to verify the pressed ball joint before driving
Installation is not complete when the joint reaches the control arm. The final checks should show that the joint is retained, undamaged, and correctly connected to the rest of the suspension. If anything looks uncertain, keep the vehicle supported and resolve it before installing the wheel.
With the control arm installed, inspect the joint from several angles. The flange or shoulder should be evenly seated, the snap ring should be fully in its groove, and the boot should not be folded, cut, or trapped against the control arm. There should be no visible gap at the intended seating surface.
Check that the ball stud moves through its normal range without binding against the control arm. Do not use excessive force to articulate it, and do not mistake normal resistance in a new joint for a defect. The stud should not feel loose, click, or move independently of the socket.
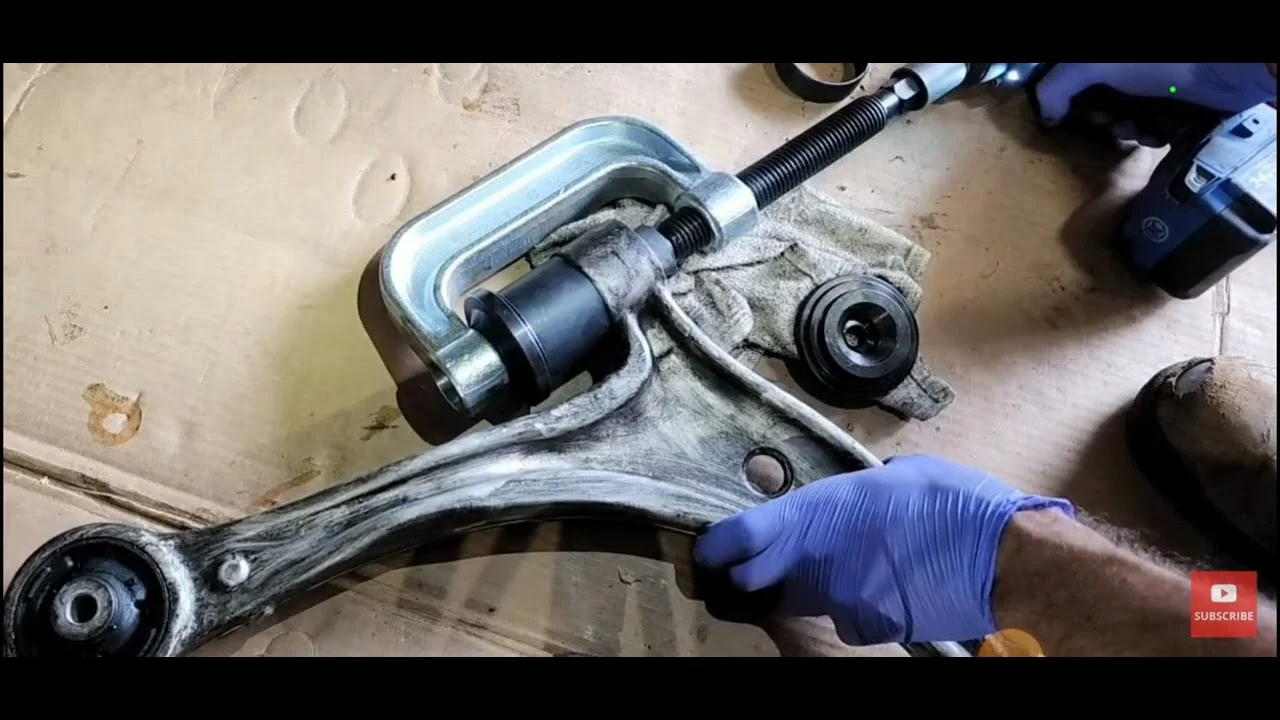
Check your result
A successful installation has an evenly seated joint, a fully engaged retainer, an intact boot, correctly torqued hardware, and no interference through the suspension’s normal movement.
After the wheel is installed and torqued, lower the vehicle using safe lifting procedures. Turn the steering from side to side while stationary and look for contact between the tire, boot, control arm, brake hose, and other components. Then perform a cautious low-speed check in a safe area, listening for clunks or scraping.
A control-arm or ball-joint replacement can change wheel alignment, especially if the arm position or shims were disturbed. Arrange an alignment check when the repair is complete. Stop driving if the vehicle pulls sharply, the steering wheel is badly off-center, the suspension clunks, or the joint shows any movement.
Press choices, compatibility, and safety limits
The most suitable tool for this repair is a heavy-duty ball-joint press with adapters selected for the specific joint. A hydraulic shop press can also work when the control arm is supported correctly and the operator can keep the joint perfectly aligned, but a large press does not automatically make an unsafe setup safe.
A hammer and drift are poor substitutes for a press-fit installation. Striking the joint can damage the control arm bore, deform the joint shell, and send metal fragments or tools outward. A generic gear puller may also apply force at the wrong points or fail under load.
Some replacement joints are supplied with an installation tool, while others require a press kit that must be rented or purchased. Check the adapter dimensions before beginning. The receiving cup needs enough internal clearance for the joint, and the pushing adapter must contact the joint’s sturdy outer body without touching the boot or stud.
Do not assume every control arm can be pressed safely at home. Seek professional help if the arm is heavily rusted, the bore is damaged, the press frame bends, the joint will not move with reasonable force, or you cannot identify the correct installation direction. Suspension parts are safety-critical, and uncertainty about retention is a valid reason to stop.
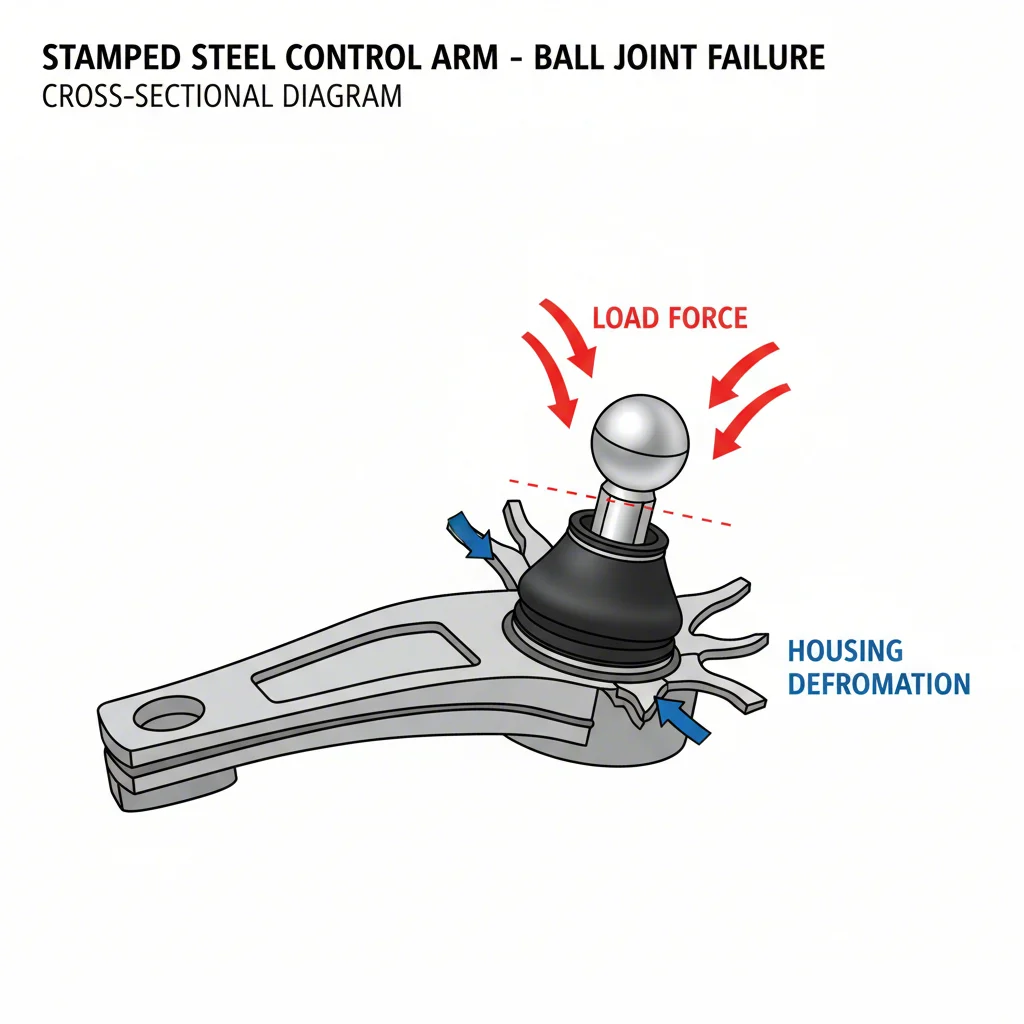
Troubleshooting a difficult ball-joint installation
Most pressing problems come from an incorrect direction, an unsupported control arm, or an adapter that is contacting the wrong surface. Release pressure before diagnosing the problem. Continuing to tighten the press can turn a correctable alignment issue into a damaged control arm or broken tool.
| What you observe | What to check |
|---|---|
| The joint starts crooked | Stop, reset the joint squarely, and make sure the receiving cup supports the arm evenly. |
| The press becomes extremely difficult to turn | Check for a retaining ring, wrong installation direction, wrong adapter, corrosion, or a damaged bore. |
| The flange does not sit evenly | Release pressure and inspect for debris, a tilted joint, an incorrect replacement part, or a bent control arm. |
| The snap ring will not fit | The joint may not be fully seated, the ring may be wrong, or the control-arm groove may be damaged. |
| The boot is torn or folded | Check adapter placement and replace the damaged boot or joint before reassembly. |
What if the old joint will not press out?
Confirm that all retainers have been removed and that the receiving cup is not contacting the joint. Reposition the arm so force is supported around the bore, then try again with a properly sized press. If the joint remains seized or the control arm starts to deform, stop and take the assembly to a shop with suitable equipment.
Can the new joint be hammered into place?
Hammering is not a reliable installation method for a press-fit joint. It can damage the joint, distort the bore, and leave the joint partially seated even when it appears close. Use a properly supported press or have the work performed by a qualified technician.
What does movement after installation mean?
Any looseness between the joint and control arm is unacceptable. Recheck the retaining ring, seating position, part number, and bore condition, but do not simply tighten surrounding hardware to hide the movement. Replace the control arm or joint as necessary and do not drive the vehicle until the cause is resolved.
Ball-joint pressing FAQs
These answers address common questions that arise when a beginner is preparing the control arm or checking the finished repair.
Can I press the ball joint while the control arm is still on the vehicle?
Usually, removing the control arm is the safer and more controlled approach. Some vehicle-specific procedures use an on-car press, but the tool must be designed for that application and the arm must be supported exactly as instructed. A floor jack under an unsecured control arm is not an adequate press support.
Should I grease a new ball joint before pressing it in?
Follow the replacement joint’s instructions. A sealed or pre-lubricated joint should not be filled automatically, while a serviceable joint may require the specified grease after installation. Heavy grease on the outside of the joint can interfere with a secure press fit.
How do I know which side of the control arm receives the press adapter?
The adapter pushes on the joint body from the side that allows the joint to travel into its seat, while the receiving cup supports the control arm around the bore. The old joint’s position and the manufacturer’s instructions help identify the direction, but the new joint’s shoulder and retaining groove are the final physical clues.
Does replacing a ball joint require a wheel alignment?
An alignment check is recommended after suspension work. The need for adjustment depends on the vehicle and whether the control-arm position or alignment hardware changed, but checking alignment can identify unsafe toe or camber changes that are not obvious from the driveway.
Can I reuse the old snap ring?
Only if the vehicle or ball-joint instructions allow it and the ring is undamaged. Many replacement joints include a new retainer for a reason. A ring that is stretched, rusty, bent, or unable to seat fully should be replaced with the correct part.
Finish the repair with a deliberate final check
Knowing how to press a ball joint into a control arm comes down to controlled force, correct support, and careful verification. Remove every retainer, keep the press centered, protect the boot and stud, and press the replacement joint only against its strong outer body until its specified seat and retaining groove are in position.
Before driving, confirm that the control arm is not damaged, the joint is fully retained, the hardware is torqued, and no hose, wire, or suspension component can bind. If the bore is loose, the press setup requires excessive force, or the finished joint has any play, stop and use a qualified suspension repair facility rather than treating an uncertain installation as complete.






