To compress a shock absorber, first identify its design and follow the manufacturer’s procedure. Many gas-charged shocks can be pushed inward by hand with steady force, while some require a shop tool. Never clamp the polished shaft, open a sealed shock, or confuse compressing a shock with compressing a coil spring.
For drivers and DIY mechanics in the United States, compressing a shock absorber may come up during a suspension repair, a replacement job, or a check of a new part. The correct method depends on the vehicle, the shock design, and the reason for compression. A conventional shock may move by hand, but a stiff unit may need a suitable fixture or professional equipment.
The most important distinction is between a shock absorber and a complete strut assembly. A shock controls spring movement, while a strut can also support vehicle loads and help locate the wheel. A coil spring stores substantial energy, so compressing it for removal is a separate task with much greater injury risk. Before starting, check the service manual and the instructions supplied with the exact replacement part.
Compressing a shock absorber means pushing its shaft and piston inward so the unit becomes shorter. This movement is part of normal suspension action. When a vehicle wheel rises over a bump, the suspension compresses and the shock resists that motion to help control body movement.
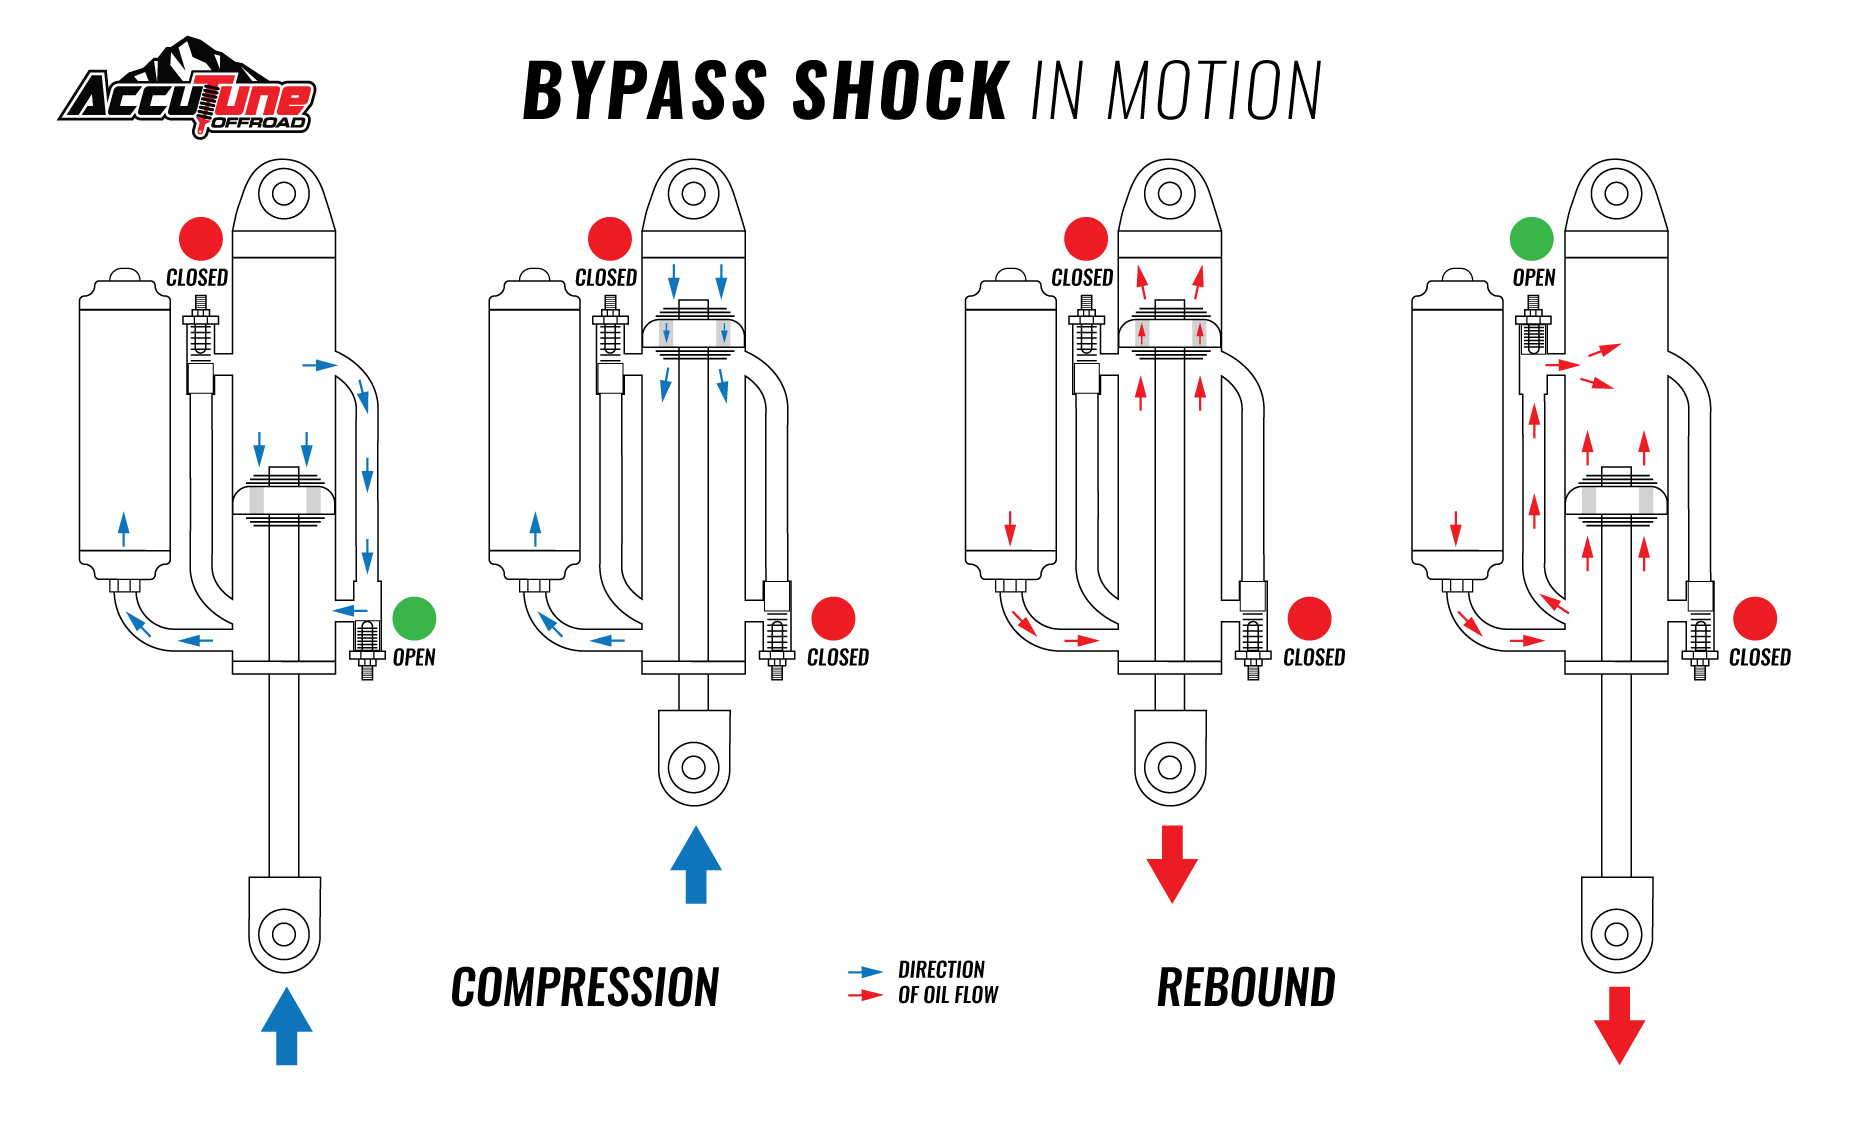
A shock absorber usually contains hydraulic oil, a piston, valves, seals, and a moving shaft. Many modern designs also contain pressurized gas to help limit oil foaming. When you push the shaft inward, the internal valves control how quickly the shaft moves. That resistance is normal, but the amount varies by model.
The phrase can also refer to compressing the coil spring around a shock or strut. That is a different operation. A spring compressor holds a spring under load so the spring can be removed or installed. The energy stored in a compressed spring can cause severe injury if the tool slips or the spring releases.
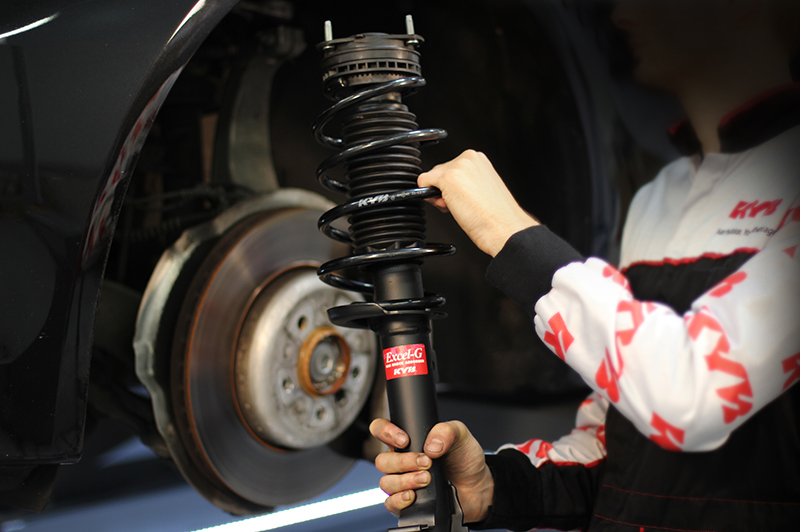
Source: inthegaragemedia.com
Shock compression
Moves the shock shaft into the body against its internal damping and, in some designs, gas pressure.
Spring compression
Shortens a coil spring using a suitable spring compressor. The tool and procedure must match the spring and suspension design.
Compression damping
Describes the resistance a shock provides as it shortens during suspension movement. It is not the same as the force needed to push a shock by hand.
Why Would You Need to Compress a Shock?
A mechanic may compress a standalone shock to check its movement, prepare it for fitting, or make it easier to align with a mounting point. Some replacement shocks are shipped in an extended position, while others use a strap or retaining clip to hold them in a shortened state.
The purpose matters. A basic movement check does not prove that a shock is healthy, and a shock that is difficult to compress is not automatically defective. Internal damping, gas pressure, temperature, and design all affect how it feels.
Installation
The shaft may need to move inward slightly to align the shock with its mounting points.
Basic inspection
Controlled movement can reveal obvious binding, rough spots, or an unusual lack of resistance.
Storage or transport
Some designs have specific handling and retention instructions. Follow the part maker’s directions rather than forcing the shaft.
Tools and Safety Checks Before You Start
For a basic hand-compression check, many conventional standalone shocks need no special tool. You need a clean, stable work area, the correct service information, and a way to support the shock without harming its surface. If the manufacturer requires a fixture or a different procedure, use that method instead.
Wear safety glasses and suitable work gloves. Keep fingers away from pinch points, and do not place your face over the shaft or mount. Even when a shock is not a highly dangerous component by itself, sudden movement or a slipping grip can cause injury.
If the shock is still attached to the vehicle, do not assume it is safe to loosen its fasteners. Vehicle suspension parts can carry load, and removing a loaded component may let the suspension shift. Use the vehicle’s specified lifting points and support the vehicle with properly rated jack stands on firm, level ground. Never work under a vehicle supported only by a jack.
Source: storage.googleapis.com
Service information
Confirm the part number, mounting arrangement, compression method, and any special handling instructions.
Stable support
Support the shock body in a way that prevents it from rolling or falling without crushing or distorting it.
Suitable equipment
Use only tools intended for the specific job. A vise, clamp, or improvised lever can damage the housing or shaft.
A clear work area
Keep the shaft path clear and make sure no one is standing where the shock could move if your grip slips.
When You Should Not Attempt the Job
Do not try to compress a visibly damaged, badly corroded, leaking, or bent shock. Do not proceed if the shaft is seized or the mounting eye is cracked. These signs call for inspection and usually replacement, not extra force.
A complete strut with a loaded coil spring needs a different safety plan. Unless you have the correct equipment and training, have a qualified suspension shop handle spring removal and reassembly. Some modern struts and adaptive suspension systems also have special procedures.
Gas pressure or sealed construction
Never drill, cut, heat, or dismantle a sealed shock to make it easier to compress.
Loaded coil spring
Do not loosen the center shaft nut on a strut while its spring remains compressed by the vehicle’s mount.
Uncertain design
Stop and check the service manual if you cannot tell whether the component is a shock, strut, coilover, or spring-damper assembly.
How to Compress a Standalone Shock Absorber by Hand
If the manufacturer’s instructions permit hand compression, use a slow and steady push on the shock’s intended mounting points. Do not jerk the shaft or use body weight in a way that could make the part slip. This method is suitable only for shock designs that are meant to be compressed by hand.
Before applying force, compare the replacement shock with the old part. Check the overall length, mounting style, shaft diameter, body shape, and part number. A replacement that looks similar may have different internal characteristics or may belong to a different suspension package.
Source: vida-digna.org
Step 1: Inspect the shock
Look for oil leakage, shaft damage, corrosion, bent mounts, and shipping straps or clips. Do not remove a retention device until the instructions say to do so.
Step 2: Position it securely
Place the shock in a stable position on a workbench or suitable support. Keep the polished shaft clear of abrasive surfaces and hard edges.
Step 3: Hold the mounting points
Grip the intended end mounts or other manufacturer-approved areas. Avoid gripping the polished shaft with pliers or locking tools.
Step 4: Apply gradual pressure
Push the shock inward along its normal axis. Use a smooth motion and stop if the shaft binds, moves at an angle, or requires unexpected force.
Step 5: Observe the movement
Note whether the shaft moves smoothly and whether the resistance changes in an unexpected way. Do not treat hand force alone as a pass-or-fail test.
Step 6: Let the shock extend as directed
If the design is self-extending, keep your hands clear while the shaft returns. If the manufacturer specifies another handling method, follow that instruction.
What Should a Compressible Shock Feel Like?
A conventional gas-charged shock may resist inward movement and then extend when released. The force can feel firm because the piston moves oil through small valves while the gas charge affects the unit’s response. Some shocks extend slowly, and others move more readily.
There is no single correct hand-force value for every shock. A heavy-duty truck shock, a small passenger-car shock, and a performance damper can behave very differently. Compare movement only with the manufacturer’s documented procedure or a known-good part of the same design.
A shock that does not extend fully by itself is not automatically faulty. Some designs have little or no self-extension, and damping characteristics differ. Likewise, easy movement alone does not prove that the valves and seals are working correctly.
Smooth resistance
Consistent movement without obvious binding can be a useful basic observation, but it does not establish full serviceability.
Uneven movement
Repeated sticking, grinding, or a sudden mechanical stop may indicate damage or a design-specific feature that needs verification.
Oil around the shaft
A wet film may need closer inspection. Fresh oil running down the body is more concerning than a light surface film or road grime.
How to Hold a Shock Without Damaging It
Support the shock through a suitable mounting eye, bracket, or approved fixture. If a vise is necessary, use a manufacturer-approved holding location and suitable protective jaws. Do not tighten a vise around a thin shock tube unless the service procedure specifically permits it.
The polished shaft is a precision surface. Scratches can damage the seal as the shaft slides in and out, which may cause leakage or early failure. Keep grit, metal filings, and sharp tools away from the shaft and seal area.
Keep the shaft straight
Apply force along the shaft’s normal travel path rather than sideways.
Protect the seal area
Do not use the shaft as a handle or clamp it with serrated jaws.
Avoid improvised extensions
Long bars and pipes can create uncontrolled force and may bend the shaft or damage the internal assembly.
How to Compress a Shock That Is Hard to Push In
If a shock feels too stiff to compress by hand, do not immediately assume it is stuck. Some shocks have strong damping or gas pressure, and some are not designed for manual compression. First check the part number and the maker’s instructions.
Next, inspect the shock for damage. Look for a bent shaft, dented housing, rust, leaking oil, or a mount that may be catching on the support. A shock that is held at an angle can also bind during a basic hand check.
If the instructions call for a fixture, use the specified equipment or ask a suspension shop to perform the test. Do not increase force with a hammer, hydraulic jack, long lever, or improvised press. Excess force can turn a sound part into a damaged one or release it unexpectedly.
Source: storage.googleapis.com
Check the part number
Verify that the shock matches the exact vehicle, axle, suspension option, and mounting style.
Check alignment
Make sure the shaft and body are aligned and that the mounting points are not obstructed.
Review the instructions
Some dampers require a specified bench test, while others should not be compressed manually.
Stop if resistance is abnormal
Binding, a sudden hard stop, visible bending, or damage means you should stop rather than force the unit.
Can You Use a Hydraulic Press?
A hydraulic press should not be used as a general way to force a shock absorber to shorten. The press can apply more load than the shaft, body, mounts, or internal components can safely handle. It can also hide the warning signs that you would notice during a slow manual check.
Use a press only when the manufacturer specifies an appropriate fixture, support points, force limits, and procedure for that exact component. If those details are not available, do not improvise. A professional damper service facility may have the right equipment to inspect or test the unit.
Appropriate use
A purpose-built fixture and documented procedure for a compatible component.
Inappropriate use
Pressing a shock between random blocks, clamping its shaft, or adding force until it moves.
How to Compress a Strut Spring Safely
Compressing a coil spring is not the same as compressing a shock absorber. A strut spring can store enough energy to cause severe injury if it escapes its restraints. Never try to shorten a spring by standing on it, using straps, tightening random clamps, or pressing it against the floor.
The safest option for many DIY mechanics is to have a qualified shop remove and install the spring using equipment designed for the exact assembly. If you are trained and have the specified tool, follow the vehicle service manual and tool instructions from start to finish.
Do not loosen the central strut shaft nut until the spring is properly restrained according to the service procedure. That nut may retain a spring-loaded assembly, and releasing it at the wrong time can cause the mount and spring to move violently.
Source: storage.googleapis.com
Use a rated spring compressor
The tool must be compatible with the spring’s size, shape, and load. Follow its instructions for placement and engagement.
Check every contact point
Before applying load, confirm that the tool’s hooks or jaws are seated as required and that no part is bent or damaged.
Keep clear of the spring path
Keep your body and hands away from areas where the spring, compressor, or mount could move if the setup fails.
Do not improvise a release
Never loosen a compressor or strut nut simply because the spring appears short enough. Follow the documented removal and assembly sequence.
What If the Shock and Spring Are a Complete Assembly?
Some replacement units are supplied as complete assemblies with the spring already installed. These may reduce the need to handle a loose coil spring, but the assembly still needs the correct vehicle-specific installation procedure. Check whether the unit is intended to be installed as a complete assembly.
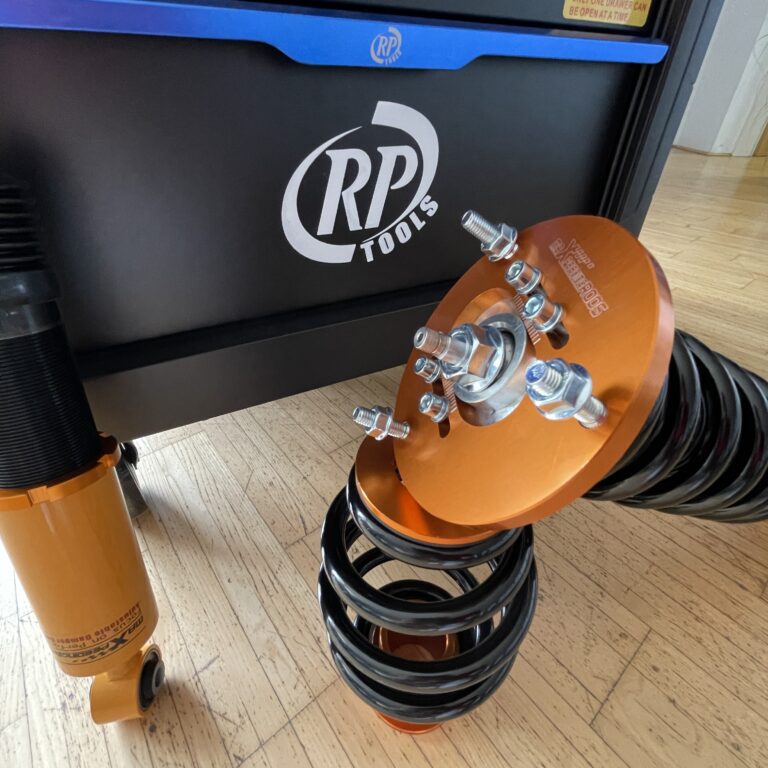
Coilovers can also combine a damper and spring, with some designs offering adjustable ride height or damping. Do not assume that an adjustment collar compresses the damper itself. Read the manufacturer’s instructions to identify which adjustment changes spring preload, ride height, or damping.
Complete strut assembly
Usually installed as a unit according to the vehicle and part maker’s instructions.
Separate spring and damper
May require dedicated spring-compression equipment and a more involved procedure.
Adjustable coilover
Requires the correct setup procedure so ride height, preload, and damping are not confused.
How to Compress a Shock for Installation
For installation, compress a shock only as much as needed and only if the manufacturer permits it. Many shocks can be aligned by moving the suspension or the mounting points according to the vehicle service procedure, rather than forcing the shock shaft inward.
Check the new shock against the original unit before fitting it. Differences in extended length, compressed length, mounting hardware, or body diameter can affect installation. A part that needs extreme force to fit may be incorrect, incorrectly positioned, or obstructed.
Follow the specified torque values for mounting bolts and nuts. Do not guess torque or use an impact tool to tighten fasteners unless the service procedure permits it. Some suspension bushings must be tightened at a specified vehicle ride height to avoid twisting the rubber when the suspension is at rest.
Source: accutuneoffroad.com
Step 1: Confirm fitment
Match the shock part number and all mounting dimensions to the vehicle application.
Step 2: Prepare the mounting points
Check bushings, sleeves, bolts, brackets, and alignment before placing the shock.
Step 3: Align without forcing
Use the service-manual method to position the suspension or shock. Do not use the mounting bolt to pull misaligned parts together.
Step 4: Secure the hardware
Install the correct fasteners and tighten them to the vehicle manufacturer’s specifications.
Step 5: Complete the repair checks
Check that the shock moves through its intended range without interference and that all disturbed components are secured.
Why Does a New Shock Extend by Itself?
Some gas-charged shocks extend when released because internal gas pressure pushes the shaft outward. This behavior can make the unit harder to position during installation, especially when access is tight.
Do not assume that self-extension is a defect or that every shock should behave the same way. Check the instructions for the exact part. If a retaining strap is supplied, leave it in place until the shock is correctly positioned and the installation procedure calls for its removal.
Use the supplied retention method
Follow the maker’s directions for any shipping strap, clip, or temporary retainer.
Do not tie down the shaft with improvised restraints
Unrated straps or wire can slip, damage the component, or release suddenly.
Recheck the mounting arrangement
If the shock will not align without excessive force, verify fitment and the vehicle’s installation procedure.
How to Tell Whether a Shock Absorber Is Working
A hand-compression test can reveal obvious binding or abnormal movement, but it cannot confirm that a shock is safe or effective on the road. A damper may move smoothly by hand and still have worn valves, weak damping, or an internal fault.
Start with a visual inspection. Look for fluid leaking down the body, a damaged shaft, dented housing, loose mounts, cracked bushings, or corrosion that affects structural integrity. A small amount of surface residue may need closer assessment, so distinguish a light film from fresh oil that runs down the shock.
Consider the vehicle’s behavior as well. Excessive bouncing, poor body control, unusual tire wear, nose dive under braking, or instability over bumps can have several causes. Worn shocks are one possibility, but tires, springs, bushings, alignment, and other suspension parts can produce similar symptoms.
Source: startmycar.co.za
Visible leakage
Fresh oil running down the shock body can indicate a failed seal and warrants inspection.
Binding or damaged shaft
A shaft that sticks, bends, or has deep scratches may not operate correctly and should not be forced.
Poor vehicle control
Repeated bouncing or unstable handling calls for a full suspension inspection rather than relying on a bench test alone.
Unusual tire wear
Cupping or uneven wear may be associated with suspension problems but can also result from tire, balance, or alignment issues.
Can You Use the Bounce Test?
A bounce test involves pressing down on a suitable part of the vehicle body and watching how the suspension settles. It can sometimes reveal excessive oscillation, but its results depend on suspension design, spring stiffness, vehicle weight, and the location where force is applied.
The test is not reliable enough to rule out a faulty shock. Some worn dampers do not produce an obvious bounce, and other suspension faults may affect the result. Use it only as a preliminary observation and arrange a proper inspection when symptoms remain.
A useful observation
The body continues to oscillate noticeably after being released, which may justify further inspection.
A misleading result
The vehicle settles quickly, but the shock still leaks, binds, or performs poorly under real driving conditions.
Common Mistakes When Compressing Shock Absorbers
The most common mistake is applying more force when a shock will not move. Resistance may be normal for the design, or the part may be damaged or incorrectly supported. More force does not provide a reliable diagnosis.
Another mistake is treating a shock and a spring as one component with one compression method. A shock’s internal resistance is not the same as the energy stored in a coil spring. Using the wrong tool can damage the part or create a serious hazard.
Finally, do not use a hand test as the only basis for deciding whether to replace a shock. The condition of the shaft, seals, mounts, vehicle handling, and the manufacturer’s service criteria all matter.
Source: www.youtube.com > Don’t be a chicken DIY
Clamping the polished shaft
This can scratch the shaft and damage the seal, leading to leakage or poor operation.
Using a hammer
Impact can damage internal components, bend the shaft, or cause loss of control over the part.
Heating the shock
Heat can damage seals, alter components, and create pressure-related hazards. Never heat a sealed shock to make compression easier.
Opening a sealed shock
Drilling or cutting can release pressurized gas or oil and expose the person doing the work to injury.
Ignoring a mismatch
A shock that does not fit or align may be the wrong part. Verify the application instead of forcing it into place.
Guessing fastener torque
Incorrect tightening can allow movement, damage bushings, or affect suspension performance. Use the specified torque and procedure.
What to Do If the Shock Will Not Compress or Extend
Stop applying force if the shock will not move as expected. Check the part number, the manufacturer’s handling instructions, and whether a retaining device or mounting feature is affecting movement. Inspect the shaft and body for obvious damage.
If the instructions do not explain the behavior, ask the parts supplier or a qualified suspension technician to identify the unit. Do not dismantle a sealed shock or try to free a suspected internal jam with impact tools.
If the shaft binds
Stop and inspect the shaft, alignment, and housing. Do not force it through a hard spot.
If the shock leaks
Have it assessed against the manufacturer’s replacement criteria. Do not try to reseal a non-serviceable unit.
If the part seems incorrect
Check the vehicle year, make, model, engine, trim, axle, and suspension option before proceeding.
Choosing the Right Compression Method
The right method depends on what you are trying to compress and which component you have. A hand check may be suitable for a standalone shock when the maker permits it. A complete strut with a coil spring needs a different approach, and some specialized dampers require a professional fixture.
Use the table below as a starting point, not as a substitute for the service manual. If the instructions for your exact part differ from this general guide, follow the manufacturer.
Source: accutuneoffroad.com
Standalone conventional shock
Use controlled hand pressure if the maker permits it. Stop if movement is rough or abnormal.
Gas-charged shock
Expect resistance or self-extension on some designs. Follow the documented handling method.
Complete strut with coil spring
Do not compress the spring by hand or with improvised restraints. Use the specified equipment or have a qualified shop do the work.
Adjustable coilover
Identify the adjustment and follow the manufacturer’s setup procedure. Ride height and damping adjustment are separate functions on many designs.
Damaged or seized shock
Do not force compression. Arrange an inspection and replacement or specialist service as appropriate.
Does Shock Size Change the Method?
Yes. Shock size, piston area, internal valve design, gas pressure, and intended vehicle use can affect the force needed to move the shaft. A heavy-duty truck damper may feel very different from a compact-car shock, even if both are functioning as designed.
Vehicle use also matters. Shocks intended for towing, off-road driving, or performance use may have different damping characteristics from standard replacement parts. Do not compare them by hand feel alone or assume that a stiffer shock is always better.
Vehicle application
Confirm that the part matches the vehicle and its suspension package.
Damper design
Check whether the unit is twin-tube, monotube, gas-charged, adjustable, or otherwise subject to a special procedure.
Intended use
Choose the correct component for normal driving, towing, hauling, or off-road use rather than relying on how hard it is to compress.
Frequently Asked Questions
Q
Should a shock absorber be easy to compress by hand?
Not always. The force needed depends on the shock’s design, damping, gas pressure, and size. Some conventional shocks can be compressed by hand, while others feel very stiff or are not intended for this type of check. Follow the manufacturer’s procedure rather than using hand force as a universal test.
Q
Why does my gas-charged shock extend after I compress it?
Some gas-charged shocks use internal pressure that pushes the shaft outward when the compressive force is removed. The speed of extension varies by design. Self-extension alone does not prove that the shock is good or bad, so inspect the part and follow its service instructions.
Q
Can I compress a shock absorber with a vise?
Do not clamp the polished shaft or crush the shock body in a vise. If the manufacturer allows a vise or holding fixture, use the specified mounting point and suitable protective jaws. If no approved holding method is provided, use another recommended method or have a suspension shop handle the test.
Q
Can I compress a coil spring without a spring compressor?
Do not try to compress a loaded suspension coil spring by standing on it, using straps, or improvising clamps. A spring stores substantial energy and can cause severe injury if it slips free. Use a compatible, properly rated spring compressor according to the tool and vehicle instructions, or have a qualified shop perform the work.
Q
How can I tell if a shock absorber is bad?
Look for fresh oil leakage, shaft damage, binding, damaged mounts, or signs of poor vehicle control such as excessive bouncing or instability. These symptoms need context because worn tires, springs, bushings, and alignment problems can cause similar issues. A hand-compression check alone cannot confirm that a shock is serviceable.
Q
Can I use a hydraulic jack or press to compress a shock?
Do not use a jack or press as an improvised way to force a shock shorter. Excess load can bend the shaft, damage the housing, or cause the component to slip. Use powered equipment only when the exact shock manufacturer specifies a suitable fixture and a documented procedure.
Q
Do I need to compress a new shock before installing it?
Not in every case. Some shocks can be compressed by hand for alignment, while others are installed using a vehicle-specific procedure or arrive with a retention device. Check the instructions for the replacement part and do not force the shaft just to make the shock fit.
✦ Wrapping Up
Conclusion
Learning how to compress shock absorbers starts with identifying the component and its intended procedure. Many standalone shocks can be compressed with slow, steady hand pressure, but the required force and return movement vary by design. A stiff shock is not automatically defective, and a shock that moves easily is not automatically healthy.
Keep the shaft and seals protected, avoid improvised clamps and presses, and never open or heat a sealed shock. If the job involves a loaded coil spring, use the correct spring-compression equipment and service procedure or leave the work to a qualified suspension shop. Stop if the component binds, leaks, appears damaged, or will not align without excessive force.
💡 Key Takeaway
Before applying force, identify the exact shock or strut, check its manufacturer’s instructions, and decide whether the task involves the damper shaft or a loaded coil spring. Use only the approved method, and stop if anything moves or behaves unexpectedly.
Eric
Hi, I’m Eric Bennett, the person behind OffRoadTruckAccessories.com.
I created this blog to share my interest in trucks, off-road driving, automotive accessories, and DIY modifications. I enjoy learning how different truck accessories work, testing their usefulness, and understanding whether they are truly worth buying.
Shock absorbers are located near the wheels as part of the suspension system, usually between the vehicle’s body, frame, or subframe and a suspension component such as a control arm, axle, or wheel assembly. However, the exact answer to where are shock absorbers located on a car depends on the suspension design. Some vehicles have…
You should change shock absorbers when they are worn, leaking, damaged, or no longer controlling suspension movement properly. There is no single replacement interval that applies to every vehicle because shock absorber life depends on road conditions, vehicle weight, driving habits, suspension design, and component quality. If you are wondering when to change shock absorbers,…
A shock absorber is a suspension component that controls how quickly a vehicle’s suspension moves up and down after bumps, dips, braking, acceleration, and other road inputs. It works with the springs to prevent excessive bouncing and helps keep the tires in controlled contact with the road. So, what does a shock absorber do? It…
A gas shock absorber is a hydraulic shock absorber that uses pressurized gas, usually nitrogen, along with shock absorber oil to control suspension movement. The gas helps reduce oil foaming and keeps damping performance more consistent when the shock works repeatedly or under demanding conditions. If you are wondering what is a gas shock absorber,…