To check shock absorbers off the car, inspect the body for leaks, dents, rust, and damaged mounts, then test how the shaft moves and returns according to the manufacturer’s specifications. A hand test can reveal obvious faults, but it cannot confirm that a shock absorber performs correctly under driving conditions.
For drivers and home mechanics across the United States, checking removed shock absorbers can help identify suspension parts that need repair before they go back on a vehicle. You may be inspecting shocks during a brake job, replacing worn suspension parts, or checking a used component before installation. A careful bench inspection can reveal damage that is hard to see when the shock is still mounted.
The key is to know what the test can and cannot prove. A shock absorber may look clean and still have weak damping, while a stiff unit may feel normal by hand even if its performance is poor under load. Gas-charged shocks, hydraulic shocks, and adjustable designs may also behave differently. Always use the service information for the exact part whenever a test result is unclear.
This guide explains how to inspect a removed shock absorber, check for fluid loss, assess shaft movement, identify damaged components, and decide when professional testing or replacement is the safer option. It also explains common testing mistakes and why a simple push test is not enough to establish roadworthiness.
What You Need Before Testing a Removed Shock Absorber
Gather the right tools and prepare a clean work area before you begin. A basic inspection usually needs little more than good lighting, a clean cloth, gloves, and a way to support the component without damaging it. More advanced testing may require manufacturer specifications or a dedicated shock absorber tester.
First, identify the part. Check the vehicle application, part number, and shock design. A conventional hydraulic shock, a gas-charged twin-tube shock, a monotube shock, and an adjustable shock may have different movement and pressure characteristics. Do not apply a test method meant for one design to another without checking the instructions.
If the shock has just been removed, clean off loose dirt so you can distinguish old grime from fresh fluid. Do not use a harsh solvent on rubber seals or protective coatings unless the product instructions permit it. Keep the polished shaft free from grit, which can damage the seal when the shaft moves.
Source: CloudFront-hosted image supplied in the provided image list
Safety glasses and gloves
Use eye protection and suitable gloves when handling dirty or damaged parts. Hydraulic fluid and rust particles can irritate skin and eyes.
Clean cloth and flashlight
Use these to inspect the body, shaft, seals, welds, and mounting points for fluid, corrosion, and physical damage.
Secure support
Support the shock at a sturdy body section with a padded fixture if needed. Never grip or clamp the polished shaft.
Service information
Check the manufacturer’s procedure for the exact shock design, including any specified orientation, stroke test, or bench-test requirement.
Know Which Type of Shock Absorber You Have
Most conventional shock absorbers use hydraulic fluid and internal valves to control movement. Some also contain pressurized gas to help reduce foaming and maintain damping performance. Monotube and twin-tube designs can respond differently during manual testing, so a universal rule about how fast a shock should extend is not reliable.
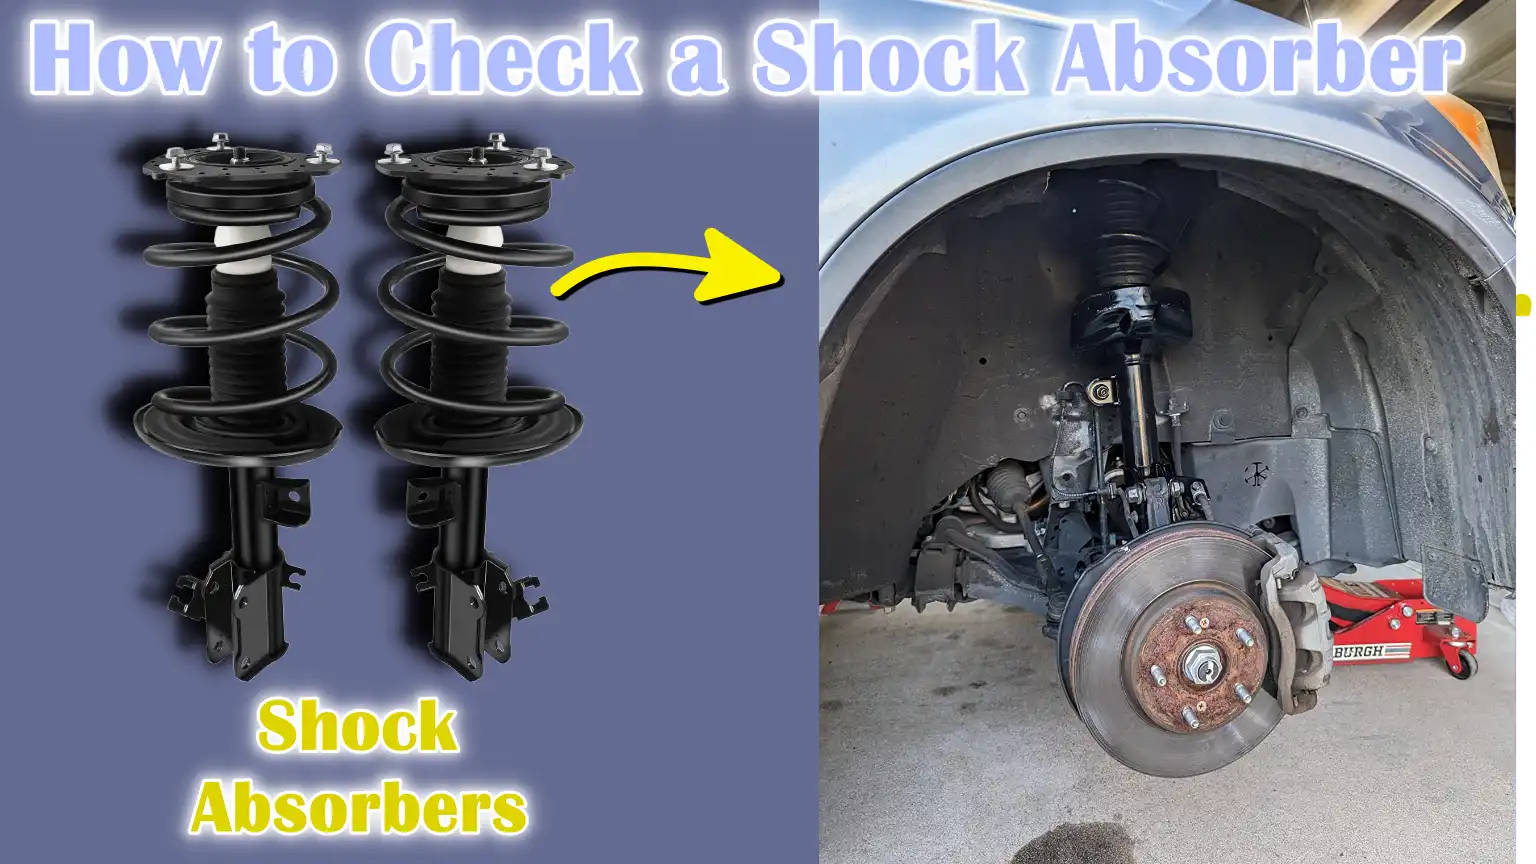
Some vehicles use struts instead of separate shocks at one or more wheels. A strut is a structural suspension component and may contain a coil spring. If the removed assembly includes a spring, do not loosen its center nut or dismantle it unless you have the correct spring compressor, training, and procedure. A compressed suspension spring stores dangerous energy.
Conventional hydraulic shock
Check for leaks, shaft damage, abnormal movement, and damping behavior using the approved test procedure.
Gas-charged shock
Account for gas pressure when assessing shaft movement. Extension force by itself does not prove that the shock is healthy.
Adjustable shock
Set the adjustment as directed by the manufacturer before comparing its movement or resistance with specifications.
Step 1: Inspect the Shock Absorber Body and Mounts
Begin with a visual inspection because physical damage can make further testing unnecessary or unsafe. Place the removed shock on a clean work surface and examine its full length. Look for dents, deep rust, cracks, damaged welds, loose parts, and signs that the body has been crushed or struck.
Pay close attention to the mounting eyes, studs, threads, brackets, and bushings. A cracked mount or badly distorted eye can prevent secure installation. Torn rubber bushings, missing sleeves, or damaged threads may also create noise and unwanted movement even if the hydraulic unit still provides damping.
Inspect the shaft for scratches, pits, bends, and corrosion. The shaft passes through a seal during operation, so damage to its polished surface can cut or wear the seal and cause fluid loss. Light surface dirt can be cleaned away, but deep pitting or a bent shaft is not a problem to fix with sandpaper or improvised straightening.
Rotate the shock gently in your hands to examine hidden areas. Do not force a bent mounting eye into alignment or attempt to repair a cracked pressure body. If the body, shaft, or a load-bearing mount is damaged, follow the manufacturer’s replacement guidance rather than relying on a movement test.
Source: Rx Mechanic
Look for dents and cracks
A dent that affects the cylinder or a crack in the body or mount is a strong reason to reject the component.
Check the shaft surface
The shaft should not have deep scratches, heavy pitting, or visible bending that could damage the seal or interfere with movement.
Inspect all mounting parts
Look for damaged threads, worn rubber, missing sleeves, loose hardware, and distorted mounting eyes.
Check the dust cover
A damaged dust boot can allow dirt to reach the shaft and seal. Check whether the boot and bump stop need replacement under the service procedure.
How to Recognize a Damaged Shock Shaft
A healthy shaft should be straight and have a smooth working surface. Hold the shock securely and inspect the shaft from different angles under good light. If it appears bent, has deep corrosion, or shows a sharp scratch where it passes through the seal, do not treat the shock as serviceable merely because it still moves.
Do not use pliers, locking grips, or a metal vise directly on the shaft. These tools can leave marks that damage the seal. A damaged shaft generally requires replacement of the shock or an approved professional repair, depending on whether the unit is designed to be rebuilt.
Passes inspection
The shaft has no obvious bend, deep pits, or damaging marks on the working surface.
Needs further evaluation
Light staining or uncertain surface marks require cleaning and comparison with the manufacturer’s service criteria.
Reject or replace
A clearly bent shaft, severe pitting, or damage that compromises the seal or movement makes the shock unsuitable for normal reuse.
Step 2: Check for Shock Absorber Fluid Leaks
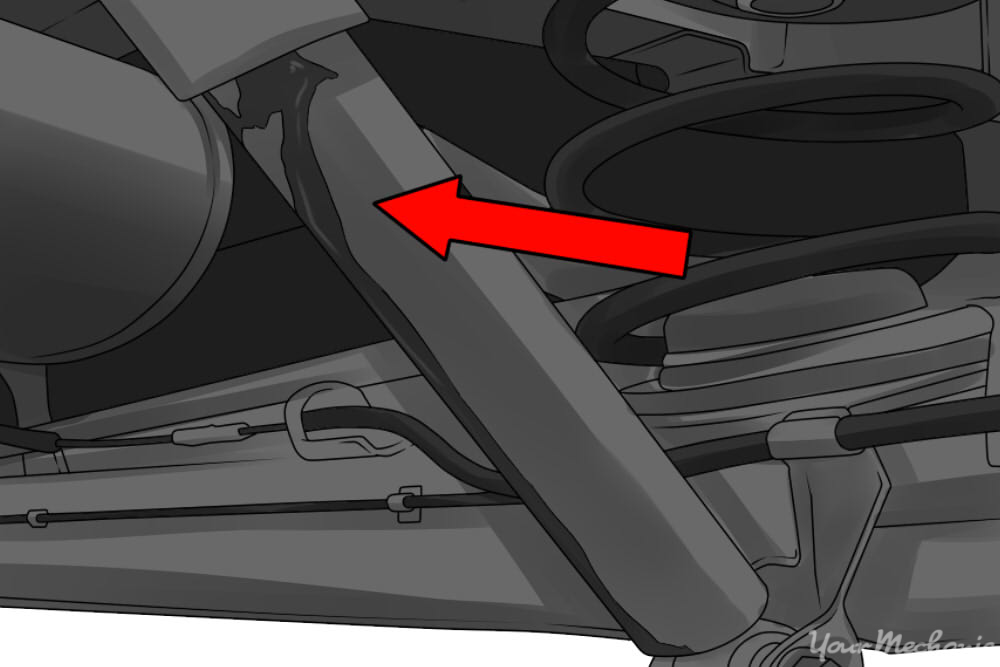
Look for hydraulic fluid around the shaft seal and down the outer body. Fresh oil that forms a wet trail or drips from the shock is more concerning than a light film of residue. Fluid loss can reduce damping performance and may indicate that the seal has failed.
Wipe the body with a clean cloth, then inspect it again under good light. This helps you distinguish an active leak from old dirt, grease, or residue left during removal. If the surface becomes wet again around the seal or a damaged area, investigate further rather than assuming the unit is sound.
Not every damp-looking shock is defective. A thin film near the seal may occur without a substantial leak, and road dirt can hold moisture or other fluids. The manufacturer’s leak criteria should determine whether the condition is acceptable. Do not apply a universal rule based only on how shiny or oily the body looks.
A leaking shock should not be returned to service without checking the applicable repair guidance. Many sealed shock absorbers are replaced rather than rebuilt. A rebuildable unit may require a qualified specialist, correct seals, proper fluid, and pressure-control equipment.
Source: Don Dodi Car Customs
Dry body and seal
No visible wet trail or fresh fluid appears after cleaning and reinspection. This supports, but does not prove, serviceability.
Light residue
Clean the area and compare the remaining film with the manufacturer’s inspection criteria before deciding whether the shock can be reused.
Active fluid leak
Fresh oil runs down the body, drips, or returns after wiping. Treat this as a warning and follow the replacement or specialist-testing guidance.
Can You Test a Shock Absorber That Has No Leaks?
Yes, but the absence of leaks only removes one possible sign of failure. Internal valves can wear, fluid can lose its intended performance, and other internal damage can reduce damping without leaving visible oil outside the housing.
After the leak inspection, continue with the shaft and movement checks. If the shock looks clean but the vehicle previously showed excessive bouncing, poor stability, or uneven tire wear, do not assume the problem has been solved. A controlled bench test or diagnosis of the full suspension may be needed.
No leak does not mean full health
A dry exterior cannot confirm that the internal valves control suspension movement correctly.
Use other evidence
Combine the visual inspection with the approved movement test, vehicle symptoms, and professional measurements when available.
Step 3: Test Shock Absorber Movement by Hand
A manual movement test can reveal binding, rough travel, or an obvious loss of resistance. However, perform it only if the shock manufacturer’s instructions permit manual cycling. Some units are pressurized or have specific handling requirements, and a simple hand test is not a standardized measurement of damping force.
Secure the shock by a suitable body section with the shaft clear of the bench. Keep your hands away from pinch points and avoid sudden movements. If the unit is designed for manual cycling, move the shaft or shock body slowly through a portion of its working stroke, following the manufacturer’s recommended orientation and method.
Pay attention to the quality of movement rather than judging the shock by strength alone. Depending on the design, the shock may show resistance in both directions or a different response during compression and extension. Look for a consistent, controlled feel without sudden free movement, scraping, sticking, or a repeated dead zone.
Do not force a shock to its mechanical limits simply to see whether it bottoms out. Do not strike the shaft, use a vehicle jack to compress it, or use a power tool to drive the mechanism. If the shock cannot be moved safely by hand, stop and use the specified test method instead.
Source: YouTube, MasterMind Tech
Smooth movement
The unit moves without obvious binding or grinding when tested in the manner approved for its design.
Consistent resistance
The movement has a controlled feel through the tested portion of the stroke, in line with the manufacturer’s expectations.
Free movement or dead spots
An unexpected area with little resistance, sudden changes in feel, or erratic movement warrants further testing.
Binding or grinding
Rough, notchy, or stuck movement may indicate internal damage, shaft problems, or another mechanical fault.
How to Interpret Compression and Extension
Compression occurs when the shock shortens, while extension occurs when it lengthens. Internal valves control the flow of hydraulic fluid during these movements. Many shocks are designed to provide different damping forces in compression and extension, so the two directions do not have to feel identical.
Some gas-charged shocks extend on their own because internal gas pressure pushes the shaft outward. That extension force is not the same as damping force. A shock may extend strongly and still have weak damping, while another design may not behave the same way at all.
A shock that moves with no expected resistance, repeatedly sticks, or produces unusual internal noises deserves closer examination. Even so, hand feel is a qualitative check, not a pass-or-fail measurement. Compare the result with the exact part specification or use a calibrated shock dynamometer if a definitive assessment is required.
Do not expect equal force
Compression and extension may have different resistance by design.
Do not time extension as a universal test
There is no single extension time that applies to every shock design, temperature, and condition.
Repeat only as directed
Use the specified number of cycles and test conditions instead of repeatedly pumping the shock without a procedure.
Step 4: Check for Abnormal Noise and Mechanical Binding
Listen and feel for unusual noises as the shock moves, but treat sound as supporting evidence rather than a final diagnosis. Grinding, scraping, clunking, or repeated clicking can point to damage or loose internal parts. A faint sound by itself does not always mean failure, especially if the design contains components that move during operation.
Move the shaft slowly through the approved portion of the stroke. If the movement catches at a particular point, stop and inspect the shaft for damage or contamination. Do not continue forcing a unit that binds, because additional force may damage a seal or hide the cause of the problem.
A clunk heard when moving a shock by hand can also come from a loose mount, worn bushing, or a removable component. Check the mounting hardware and bushings separately. Do not confuse movement in a damaged mount with internal failure of the hydraulic mechanism.
If the noise or binding cannot be explained by an external part, compare the unit with the manufacturer’s criteria or arrange professional testing. A sealed shock absorber that shows clear internal mechanical faults is usually a replacement candidate unless its design specifically supports rebuilding.
Source: AutoDeal
Grinding or scraping
Inspect for shaft damage, contamination, and abnormal internal movement. Stop if the shaft binds.
Clunking or knocking
Check mounting eyes, bushings, sleeves, and hardware before attributing the sound to internal failure.
Repeated sticking
A consistent binding point needs further investigation and should not be dismissed because the shock can still move.
Can You Shake a Shock Absorber to Test It?
Shaking the unit can reveal loose external parts or an obvious rattle, but it is not a reliable damping test. A shock can make little noise while its internal valves are worn. Conversely, a removable bracket or loose mounting sleeve can rattle even when the hydraulic mechanism is functional.
Use shaking only as a quick secondary check after inspecting the body and mounts. If you hear a clear internal rattle that is not explained by the design, follow the manufacturer’s diagnostic procedure. Do not shake or strike a pressurized unit aggressively.
Useful result
A clear rattle may help identify a loose or damaged component that needs investigation.
Important limitation
No rattle does not prove that the shock absorbs suspension movement correctly.
Step 5: Use a Bench Tester for a More Reliable Result
A dedicated shock absorber dynamometer provides more useful evidence of damping performance than a hand test. The machine moves the shock through a controlled stroke and measures the force produced at specified speeds and conditions. The resulting force-versus-velocity data can help identify weak damping, irregular force, or differences between test cycles.
Bench-test results are meaningful only when the equipment and procedure suit the shock design. Temperature, stroke length, shaft speed, orientation, adjustment setting, and the manufacturer’s specifications can affect the result. A generic force value without these details is not enough to judge every shock absorber.
If a removed shock has no obvious external damage but its history suggests poor performance, a qualified suspension shop can determine whether bench testing is available and appropriate. This can be useful for rebuildable performance shocks, racing components, or parts whose replacement cost makes further evaluation worthwhile.
A bench test does not automatically establish that the entire suspension is safe. Mounts, springs, bushings, control arms, tires, and vehicle alignment may still need inspection. Use the test result as one part of a broader diagnosis.
Source: Rx Mechanic
Controlled stroke
The tester moves the shock through a defined range instead of relying on subjective hand pressure.
Measured damping force
The machine records the force produced under stated test conditions.
Comparison with specifications
Results should be compared with the correct part data or a valid reference test, not an arbitrary universal number.
Professional interpretation
A trained technician can account for gas pressure, temperature, adjustment settings, and design differences.
When Is Professional Testing Worth It?
Professional testing is worth considering when a shock is expensive, rebuildable, adjustable, or part of a specialized suspension system. It can also help when visual inspection and hand movement provide conflicting results. For a common sealed shock with a bent shaft, an active leak, or a damaged mount, replacement may be more practical than paying for an unnecessary test.
Ask the shop which test conditions it uses and whether it can compare the result with the correct specification. If no reliable reference data exists, the test may still reveal inconsistent behavior, but the technician should explain what the findings establish and what remains uncertain.
Consider a test
The shock is a serviceable performance part, the fault is uncertain, or accurate damping measurements will affect the repair decision.
Consider replacement
The shock is sealed and disposable, has clear structural damage, or shows an active leak that meets the manufacturer’s replacement criteria.
How to Decide Whether the Shock Absorber Is Good or Bad
Make the decision by combining all inspection findings rather than relying on one movement test. A shock with a straight shaft, intact mounts, no significant leak, and smooth movement may pass a basic inspection, but those findings do not guarantee correct damping under road conditions. If the vehicle showed poor handling before removal, investigate the reason for those symptoms.
A component with a bent shaft, cracked body, damaged pressure housing, or mount that cannot be secured should not be returned to service. An active hydraulic leak or abnormal binding also requires action according to the manufacturer’s criteria. If the evidence remains uncertain, use a proper bench test or replace the unit when the manufacturer does not provide an acceptable way to confirm its condition.
The table below summarizes common findings and sensible next steps. It is a diagnostic guide, not a universal service specification. The exact replacement threshold depends on the shock design and the vehicle manufacturer’s instructions.
Source: CloudFront-hosted image supplied in the provided image list
Likely acceptable for further evaluation
The body and mounts are intact, the shaft is undamaged, there is no significant leak, and movement appears consistent with the approved test method.
Needs additional testing
The shock looks sound but has unexplained performance symptoms, uncertain resistance, or inconsistent movement.
Replace or professionally assess
The unit has structural damage, a bent or deeply pitted shaft, an active leak, damaged mounting points, or clear abnormal binding.
Common Inspection Findings and Their Meaning
Use the following comparison to decide what to do after the inspection. If several warning signs appear together, the case for replacement becomes stronger. A single uncertain observation should prompt verification rather than an unsupported diagnosis.
Oil streaks returning after cleaning
Possible active leakage at the seal or body. Compare with the manufacturer’s leak criteria and replace or repair as directed.
Bent shaft or deep pitting
The sealing surface or movement may be compromised. Do not attempt to straighten the shaft or polish away deep damage.
Little resistance by hand
Possible weak damping, but the result depends on design and test method. Confirm using specifications or a dynamometer.
Strong outward extension
May reflect gas pressure rather than healthy damping. Do not use extension force alone to pass the shock.
Rough or intermittent movement
Possible binding, internal damage, shaft problems, or contamination. Stop forcing the unit and investigate.
Damaged mounting eye or bushing
The assembly may not secure properly or may produce noise. Replace damaged parts according to the service procedure.
Common Mistakes When Testing Shock Absorbers Off the Car
The biggest mistake is treating a hand test as a complete diagnosis. Manual movement can identify some faults, but it cannot reproduce the full range of operating speeds, temperatures, and loads experienced on the road. A shock that feels firm is not automatically good, and a shock that feels easy to move is not automatically defective.
Another mistake is comparing different shock absorbers without accounting for their designs. A gas-charged unit may extend on its own, while another type may behave differently. Different damping settings, internal construction, and test orientations can change the feel of the component.
Improper handling can also create damage. Clamping the shaft, striking the body, using power tools to cycle the unit, or opening a sealed pressure chamber can injure the person testing it and ruin the part. Follow the manufacturer’s handling rules and stop if you do not know how the unit is pressurized or assembled.
Source: YouTube, DDS
Using the bounce test as proof
The bounce test applies to an installed suspension and is only a screening method. It does not replace a removed-shock inspection or measured test.
Assuming every shock should self-extend
Self-extension depends on design and internal pressure. Check the specification before drawing conclusions.
Forcing a stiff shock
Do not use tools or excessive force to overcome resistance. The unit may have a design feature or a fault that requires a different procedure.
Ignoring the vehicle’s original symptoms
A removed shock may look normal while the vehicle’s handling problem comes from another suspension part, a tire, or an alignment issue.
Reusing damaged hardware
Inspect bolts, nuts, washers, bushings, and sleeves. Replace hardware that the manufacturer identifies as single-use or damaged.
Safety Rules for Removed Shocks and Struts
Treat pressurized shock absorbers as sealed components unless the manufacturer provides a specific service procedure. Never drill, cut, heat, or puncture the body to release pressure. Internal gas and hydraulic fluid may escape suddenly, and hot or pressurized fluid can cause injury.
If the removed assembly includes a coil spring, assume it can store enough energy to cause severe injury. Do not remove the spring or loosen the center shaft nut until the assembly has been safely disassembled using the correct equipment and procedure. If you lack the tools or training, have a suspension shop handle the work.
Avoid the pressure chamber
Never open or puncture a sealed shock to inspect its internals.
Protect the shaft
Keep the polished rod away from clamps, pliers, grit, and sharp tools.
Control spring energy
Use the correct spring compressor and manufacturer procedure, or leave spring-loaded strut disassembly to a qualified shop.
Dispose of parts responsibly
Follow local waste and recycling rules for used hydraulic components and fluid. Do not pour hydraulic fluid onto the ground or into drains.
What to Do After Testing the Shock Absorber
After the inspection, record the part number, visible condition, leak findings, shaft condition, and movement observations. If the shock passes the basic checks but its damping performance remains uncertain, note that limitation rather than labeling it definitively good. Use the manufacturer’s test specification or professional measurements to resolve the uncertainty.
If you decide to replace the shock, confirm the correct part for the vehicle, axle, trim, suspension package, and any performance modifications. Some manufacturers recommend replacing shocks in pairs on the same axle to maintain balanced damping. Follow the vehicle and component manufacturer’s instructions rather than assuming the same replacement rule applies to every design.
Before installation, inspect related parts such as upper mounts, bushings, bump stops, dust boots, and fasteners. Worn surrounding parts can cause noise or affect suspension function even when the replacement shock is correct. Torque fasteners to the specified values and in the specified suspension position; do not guess at torque values.
After installation, follow the repair manual for any required alignment check, calibration, or electronic suspension procedure. Take a cautious road test only when all components are secured and the vehicle is safe to operate. If handling, noise, or ride symptoms remain, diagnose the complete suspension rather than assuming the shock was the only cause.
Source: AutoDeal
Keep inspection notes
Record leaks, shaft damage, binding, mount condition, and any test results so the replacement decision is traceable.
Verify replacement fit
Match the part to the exact vehicle and suspension configuration.
Inspect related components
Check mounts, bump stops, dust boots, bushings, springs, and fasteners as appropriate.
Follow installation specifications
Use the correct torque values, tightening sequence, alignment instructions, and required electronic procedures.
Should Shock Absorbers Be Replaced in Pairs?
Replacing shocks in pairs on the same axle is commonly recommended because a new shock and a significantly worn shock may control suspension movement differently. Uneven damping can affect stability, comfort, and vehicle response. However, the correct repair depends on the vehicle manufacturer’s instructions, the shock design, and the condition of the remaining unit.
If only one shock is damaged, inspect the other side and check the service guidance before deciding. For vehicles with specialized or electronically controlled suspension, follow the specified replacement and calibration procedure.
Check both sides
Inspect the opposite shock for leakage, damage, and signs of wear before completing the repair.
Follow vehicle-specific guidance
Use the manufacturer’s recommendations for paired replacement and any required setup procedures.
Frequently Asked Questions
Q
Can you tell if a shock absorber is bad when it is off the car?
You can identify many obvious faults off the car, including active fluid leaks, bent shafts, damaged mounts, severe corrosion, and abnormal binding. However, a visual inspection and hand test cannot always confirm damping performance. If the shock looks normal but its condition remains uncertain, use the manufacturer’s approved test procedure or a suitable shock dynamometer.
Q
Should a shock absorber extend by itself when compressed?
Some gas-charged shock absorbers extend on their own because internal gas pressure pushes the shaft outward. Other designs may behave differently. Self-extension alone does not prove that the damping system works correctly, so compare the behavior with the specifications for the exact part.
Q
How much resistance should a shock absorber have by hand?
There is no universal amount of hand resistance for every shock absorber. Resistance depends on its design, internal valves, gas pressure, adjustment setting, temperature, and the speed at which it moves. Look for behavior that matches the manufacturer’s test procedure rather than using a generic rule about how hard the shock should feel.
Q
Can a shock absorber be bad without leaking oil?
Yes. Internal valve wear, loss of damping performance, and other internal faults can occur without an obvious external leak. A dry body is a useful inspection finding, but it does not establish that the shock controls suspension movement correctly.
Q
Can I test a shock absorber with a vise?
A suitable padded fixture may support the shock body during an approved test, but never clamp the polished shaft or crush the pressure tube. Improper clamping can damage the component and create a safety hazard. If the manufacturer’s procedure does not explain how to secure the shock, use a qualified shop.
Q
Is the bounce test accurate for a removed shock absorber?
No. The bounce test is performed on an installed vehicle and gives only a rough indication of suspension behavior. Once the shock is removed, the bounce test is no longer applicable. Visual inspection, an approved manual movement test, and professional bench testing are more relevant to evaluating the removed component.
Q
Can I repair a leaking shock absorber at home?
Many factory shock absorbers are sealed and intended to be replaced rather than opened. Some performance or specialized units are designed for professional rebuilding with the correct seals, fluid, tools, and pressure-control equipment. Do not open or drill a sealed or pressurized shock absorber. Check the manufacturer’s service information before attempting any repair.
✦ Wrapping Up
Conclusion
Learning how to check shock absorbers off car starts with a careful visual inspection, followed by leak checks and a controlled movement test when the manufacturer permits it. Look for damage to the shaft, body, seals, mounts, and bushings, and pay attention to abnormal binding or movement. These checks can reveal many faults without specialized equipment.
Still, a shock absorber that looks clean and feels firm by hand is not guaranteed to perform correctly on the road. Gas pressure, internal valve design, and operating conditions all affect the result. When the diagnosis remains uncertain, a suitable bench test or qualified suspension technician can provide better evidence than guesswork.
💡 Key Takeaway
Clean and inspect the removed shock, check for active leaks and shaft damage, and perform only the movement test approved for its design. Replace clearly damaged parts, and seek a specification-based bench test when hand inspection cannot confirm safe damping performance.
Eric
Hi, I’m Eric Bennett, the person behind OffRoadTruckAccessories.com.
I created this blog to share my interest in trucks, off-road driving, automotive accessories, and DIY modifications. I enjoy learning how different truck accessories work, testing their usefulness, and understanding whether they are truly worth buying.
Shock absorbers are located near the wheels as part of the suspension system, usually between the vehicle’s body, frame, or subframe and a suspension component such as a control arm, axle, or wheel assembly. However, the exact answer to where are shock absorbers located on a car depends on the suspension design. Some vehicles have…
You should change shock absorbers when they are worn, leaking, damaged, or no longer controlling suspension movement properly. There is no single replacement interval that applies to every vehicle because shock absorber life depends on road conditions, vehicle weight, driving habits, suspension design, and component quality. If you are wondering when to change shock absorbers,…
A shock absorber is a suspension component that controls how quickly a vehicle’s suspension moves up and down after bumps, dips, braking, acceleration, and other road inputs. It works with the springs to prevent excessive bouncing and helps keep the tires in controlled contact with the road. So, what does a shock absorber do? It…
A gas shock absorber is a hydraulic shock absorber that uses pressurized gas, usually nitrogen, along with shock absorber oil to control suspension movement. The gas helps reduce oil foaming and keeps damping performance more consistent when the shock works repeatedly or under demanding conditions. If you are wondering what is a gas shock absorber,…