To soften shock absorbers, check whether your vehicle has adjustable damping, then use the manufacturer’s recommended settings to reduce damping force. If the shocks are not adjustable, inspect the tires, suspension parts, and replacement shock specifications before changing components.
Drivers across the United States may notice a harsh ride on city streets, rural roads, highways, or rough pavement. A vehicle that jolts over small bumps may have firm suspension settings, unsuitable replacement shocks, incorrect tire pressure, or worn suspension parts. The right fix depends on the vehicle and the cause of the problem.
Shock absorbers control how quickly suspension springs compress and rebound. They do not normally set the vehicle’s ride height or carry its full static weight. Softer damping can improve comfort in some cases, but too little damping may cause extra bouncing, poor tire contact, and less stable handling.
Before making changes, identify the type of shock absorber installed. Some performance shocks and coilovers have damping adjusters, while many factory shocks have fixed settings. A fixed shock cannot be made softer with an external adjustment unless its design provides that function. This guide explains the safe options for cars, trucks, and motorcycles.
Softening shock absorbers usually means reducing the force they use to resist suspension movement. This force is called damping. When a wheel travels over a bump, the suspension spring compresses and then extends. The shock absorber controls that motion so the body does not continue bouncing.
A shock with high damping force can feel firm because it resists suspension movement more strongly. A shock with lower damping force may allow the wheel to move more freely over small bumps. However, spring stiffness, tire pressure, suspension geometry, and seat comfort also affect how the driver feels the road.
The goal is not to make the suspension as soft as possible. The goal is to balance comfort, tire contact, braking stability, steering response, and control under the vehicle’s normal load.
Source: s1.cdn.autoevolution.com
Compression damping
Compression damping controls resistance as the suspension compresses when a wheel hits a bump or the vehicle takes a load.
Rebound damping
Rebound damping controls how quickly the suspension extends after compression. Too much can make the wheel respond poorly to a series of bumps, while too little can cause repeated bouncing.
Spring rate
The spring rate describes how much force is needed to compress a spring by a given distance. A stiff spring can create a harsh ride even when the shock settings are suitable.
Ride height
Ride height is the vehicle’s resting height. Changing it is not the same as softening shock damping, and an incorrect ride height can reduce suspension travel.
Why a Vehicle May Feel Too Firm
A harsh ride can have more than one cause. Performance-oriented suspension parts may use firm springs and damping settings. Oversized wheels with low-profile tires may also transmit more road impact into the cabin.
A shock absorber that does not match the vehicle’s springs can create poor ride quality. Worn bushings, damaged mounts, seized suspension joints, and bottoming suspension can also cause sharp impacts or unusual noises. These problems need diagnosis rather than a softer setting alone.
Firm adjustable settings
The damping controls may be set for track use, heavy loads, or aggressive driving rather than everyday comfort.
Incorrect tire pressure
Overinflated tires may make bumps feel sharper. Check the pressure when the tires are cold and use the vehicle placard or owner’s manual.
Limited suspension travel
Lowered springs, incorrect ride height, or unsuitable bump stops may cause the suspension to hit its travel limit.
Damaged or mismatched parts
Worn mounts, binding components, or incompatible springs and shocks can cause harsh or uneven suspension movement.
Step 1: Identify Whether Your Shocks Are Adjustable
First, determine whether your shock absorbers have an adjustment feature. This is the most direct way to soften damping without replacing the suspension. Check the owner’s manual, shock manufacturer’s instructions, or the exact part number before turning any control.
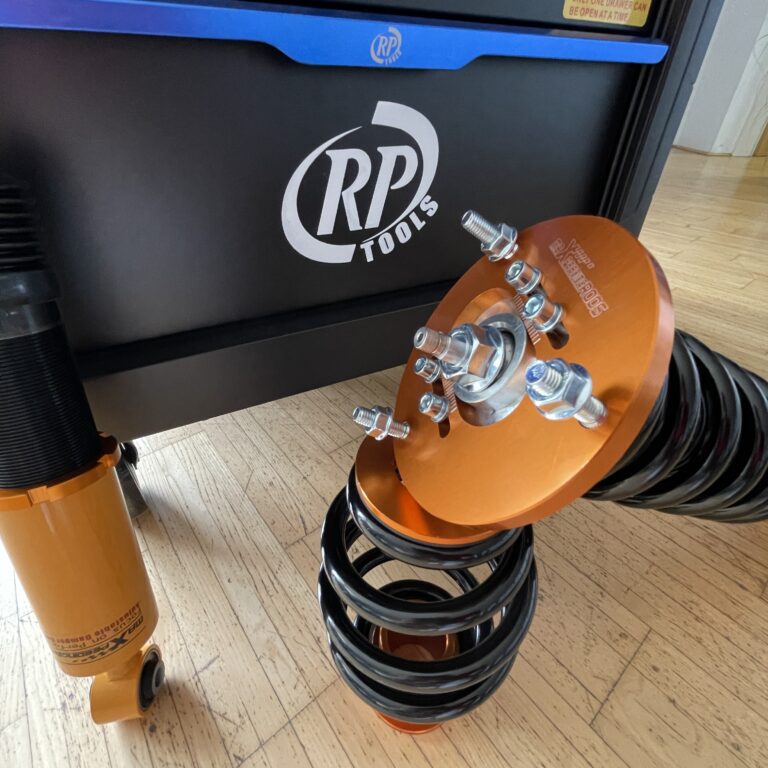
Some adjustable shocks have a dial, knob, or screw that changes damping. Some coilovers provide separate compression and rebound adjustments, while others use one combined control. Certain systems offer electronic adjustment through a factory switch or vehicle menu.
Many standard factory shocks have no user adjustment. If yours are fixed-damping units, do not assume that a bolt, cap, or mounting nut is an adjuster. Turning a mounting fastener can loosen a safety-critical connection without changing damping.
Source: daiyama.com
Read the part number
Match the number on the shock or its packaging to the manufacturer’s documentation to identify the correct adjustment method.
Look for a documented control
Check for a labeled dial, numbered knob, or electronic setting that the manufacturer identifies as a damping adjustment.
Confirm the adjustment range
Determine which direction reduces damping and whether the control changes compression, rebound, or both.
Check adjustment limits
Follow the specified range and turning limits. Never force a control beyond its stop or loosen a sealed shock body.
How to Tell Whether a Knob Makes the Ride Softer
A knob’s direction is not universal. On one model, turning toward a lower number may reduce damping. Another model may use clicks, labeled modes, or a different direction. Use the exact manufacturer’s instructions rather than guessing.
A control may adjust rebound only, compression only, or both together. Reducing rebound damping does not necessarily soften the initial impact from a sharp bump if compression damping remains firm. Make sure you understand what the control changes before testing the result.
Single-adjustable shocks
These often change one damping characteristic or use a linked adjustment. Verify the function for the exact model.
Double-adjustable shocks
Separate compression and rebound controls allow more precise tuning, but both must remain within the manufacturer’s limits.
Electronic suspension
Select a documented comfort-oriented mode if the vehicle offers one. The system may change more than shock damping, depending on its design.
Step 2: Adjust Damping for a Softer Ride
If your shocks are designed for manual adjustment, use the manufacturer’s procedure to move toward a softer setting. Work on a parked vehicle in a safe location, and make sure the suspension is accessible without placing yourself under an unsupported vehicle.
Record the original setting before making a change. If the control uses clicks, count from the specified reference point rather than assuming that the current position is the softest or firmest setting. Some manufacturers require a particular method to establish the reference position.
Change one setting at a time, then test the vehicle under controlled conditions. This helps you determine whether the adjustment improved comfort or caused excessive body movement. Never tune suspension on public roads through sudden maneuvers or high speeds.
Source: vehq.com
A Safe Adjustment Procedure
Begin with the shock manufacturer’s instructions for your exact model. If the instructions require the adjuster to be accessed with the suspension unloaded, follow that requirement. Use proper lifting equipment and approved support points when lifting is necessary.
Move the adjuster only within its stated range. If the instructions identify a softer direction, make a small change toward that setting. Do not assume every shock uses the same number of clicks or the same clockwise direction.
After adjustment, secure any access covers and check that no tools or loose parts remain near the suspension. If the manufacturer’s procedure requires professional calibration or electronic setup, have that work completed before driving.
Record the baseline
Write down the current setting at each adjustable shock so you can return to it if the ride or handling becomes worse.
Change one variable
Adjust only the control you intend to test. Changing several settings at once makes the results harder to interpret.
Keep left and right settings appropriate
Follow the manufacturer’s recommended settings for both sides of an axle. Do not create arbitrary side-to-side differences.
Test at low speed
Use a familiar, quiet route with ordinary bumps and smooth pavement. Avoid hard braking, sharp turns, and aggressive maneuvers during the first test.
How to Judge the Result
A useful adjustment should reduce harsh impacts without creating uncontrolled movement. Small road imperfections may feel less sharp, but the vehicle should still respond predictably to steering and braking.
Pay attention to repeated bouncing, excessive body roll, nose dive, delayed settling, and a loose feeling over uneven roads. These signs can indicate that the damping is too low or that another suspension problem remains.
Improved comfort
The vehicle passes over ordinary bumps with less harshness and without repeated bouncing.
Stable handling
The vehicle remains predictable during gentle steering and braking, with no new signs of poor control.
No new noises
The suspension does not develop fresh clunks, knocks, rubbing, or signs of loose mounting hardware.
Step 3: Check Tire Pressure and Tire Setup
Before replacing shocks, check tire pressure because it can affect how sharp bumps feel. Use a reliable pressure gauge when the tires are cold, then compare the reading with the recommended pressure on the driver’s door placard or in the owner’s manual.
Do not use the maximum pressure molded into a tire’s sidewall as the normal inflation target. That number is not a substitute for the vehicle manufacturer’s recommended pressure. If the vehicle carries an unusual load or uses approved alternative tires, check the applicable guidance.
Tire size and construction also affect ride comfort. Low-profile tires have shorter sidewalls and may provide less cushioning over sharp edges than a suitable tire with a taller sidewall. Wheel and tire changes must still meet load, clearance, and fitment requirements.
Source: storage.googleapis.com
Tire Checks That Can Reduce Harshness
Inspect the tires for uneven wear, bulges, cracks, damage, and an unsuitable size. A damaged tire needs prompt attention. Uneven wear can also point to alignment, inflation, or suspension issues that should be corrected rather than hidden by a softer shock setting.
If the vehicle has aftermarket wheels or tires, compare their specifications with the vehicle requirements. Returning to a suitable factory-size setup may improve comfort when the current combination uses an unnecessarily short sidewall, but the result depends on the exact vehicle and tire.
Correct cold inflation
Inflate the tires to the recommended vehicle pressure rather than lowering pressure to soften the ride.
Suitable tire dimensions
Use approved tire and wheel sizes with the correct load rating and clearance.
Healthy tires
Replace tires with structural damage or excessive wear and investigate any unusual wear pattern.
Step 4: Check Springs, Bushings, and Suspension Travel
If the tires and shock settings are correct, inspect the other parts that shape ride comfort. Springs support the vehicle and determine much of its resistance to compression. Bushings and mounts allow controlled movement while reducing vibration and noise.
Lowering springs, heavy-duty springs, and some load-supporting suspension kits can make a vehicle feel firmer than its original setup. A shock absorber cannot fully correct a spring rate that is unsuitable for the vehicle’s weight or intended use.
Suspension travel matters as well. If a vehicle repeatedly hits its bump stops, the resulting impact can feel much harsher than normal damping. Incorrect ride height, unsuitable lowering parts, worn components, or a heavy load may contribute to this problem.
Source: pmmonline.co.uk
Inspect for Signs of a Suspension Problem
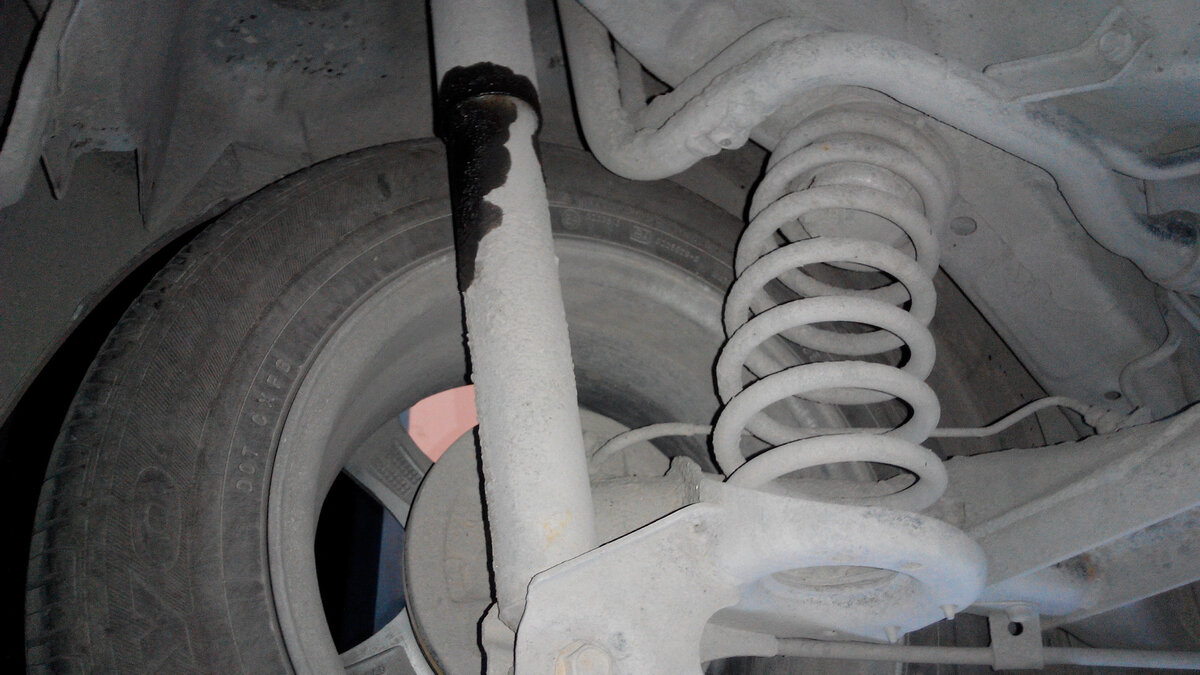
Look for visible oil leakage from a shock, damaged rubber mounts, broken springs, loose parts, or a vehicle that sits unevenly. A light film on some shock designs may not mean the same thing as an active leak, so use the manufacturer’s inspection criteria.
A visual inspection cannot confirm that every internal component works correctly. Clunks, steering changes, repeated bouncing, tire cupping, and a sudden change in ride quality may require a qualified technician to inspect the suspension on a lift.
Shock leaks or damage
Have a leaking, bent, dented, or damaged shock assessed and replaced if it no longer meets the manufacturer’s service criteria.
Broken or unsuitable springs
Replace damaged springs with correct parts. Do not cut a spring or heat it to change its rate.
Worn mounts and bushings
Repair worn or damaged components that cause binding, vibration, noise, or unwanted movement.
Bottoming out
Check ride height, spring suitability, bump stops, load, and available suspension travel.
Why Preload Is Not the Same as Damping
Some coilovers allow spring preload or ride height to be changed. Preload affects how the spring is positioned and how the suspension behaves through its travel. It is not the same as the shock’s compression or rebound damping adjustment.
Changing preload may affect comfort, available travel, and handling, depending on the suspension design. Do not reduce preload simply because the ride feels firm. Follow the coilover manufacturer’s setup instructions and maintain the specified spring seating, ride height, and travel.
Damping adjustment
Changes resistance to suspension movement through a shock absorber.
Spring preload
Changes the spring’s initial compression or installed condition, depending on the suspension design.
Ride-height adjustment
Changes the resting height through the parts designed for that purpose and may affect alignment and suspension geometry.
Step 5: Choose Softer Replacement Shocks When Needed
If the shocks are fixed-damping units and the suspension still feels too firm after basic checks, a suitable replacement may be the right answer. Choose shocks designed for the exact vehicle, spring setup, axle load, and driving conditions rather than choosing by appearance or price alone.
A standard replacement shock may provide a more comfortable ride than a firm performance-oriented unit, but this is not guaranteed for every vehicle. Shock valving, spring rate, vehicle weight, tire setup, and suspension design all affect the final result.
If the vehicle has been lowered or fitted with aftermarket springs, check that the shocks are compatible with those springs and the available travel. A shock intended for a different suspension setup may ride poorly or reach its travel limits too often.
Source: msg.equipment
Compare Replacement Options
The best replacement is one that provides suitable damping while preserving safe handling and proper suspension travel. Factory-style replacement parts are a sensible starting point for a vehicle that is used mainly for everyday driving and still has its original springs and ride height.
Adjustable shocks offer more tuning options, but they may cost more and require careful setup. Heavy-duty or towing-oriented shocks may be appropriate for specific loads, yet their damping characteristics may not suit a lightly loaded vehicle seeking maximum comfort.
Factory-style replacement
Consider this when the vehicle retains its standard springs and you want to restore the intended ride and handling.
Comfort-focused compatible shocks
Consider these when the manufacturer confirms suitability for your exact vehicle and spring configuration.
Adjustable shocks
Consider these when you need to tune damping for different approved uses and can follow the setup instructions.
Performance or heavy-duty shocks
Check the intended use carefully because firm damping may be unnecessary or uncomfortable for a lightly loaded daily driver.
Replace Shocks in a Matched and Safe Setup
Follow the vehicle and shock manufacturers’ replacement instructions. Shock absorbers often need to be replaced in axle pairs to maintain consistent damping between the left and right wheels, unless the manufacturer specifies a different procedure.
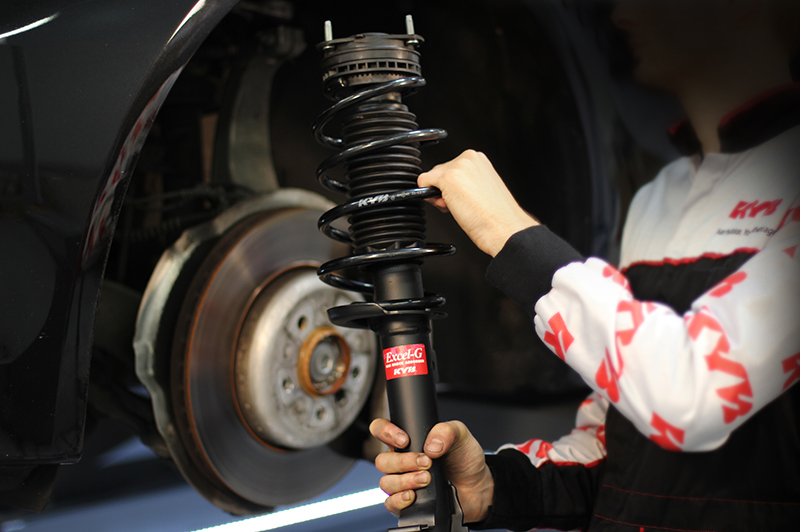
Some front suspension assemblies combine the spring and shock into a strut. These assemblies can contain highly compressed springs. Use the correct spring compressor and service procedure, or have a qualified shop complete the work if you lack the proper tools and training.
After installation, tighten fasteners to the specified torque and at the suspension position required by the service manual. Complete any required alignment, calibration, or system reset before returning the vehicle to normal use.
Confirm part fitment
Verify the year, make, model, trim, drivetrain, suspension package, and any spring modifications.
Use correct tools
Follow the specified lifting, support, spring-compression, and fastening procedures.
Check the completed installation
Inspect mounting points, hose and wire clearance, suspension movement, and any required alignment.
Can You Soften Shock Absorbers Without Replacing Them?
Yes, if the shocks have a manufacturer-approved damping adjustment, you may be able to soften them without replacing the units. Correcting tire pressure or repairing a suspension fault may also improve comfort even though neither action changes the shock’s internal damping.
A fixed shock generally cannot be softened through an external adjustment. Cleaning the shock body or spraying lubricant on it does not change its internal damping characteristics. If the unit is unsuitable, damaged, or worn out, replacement with the correct part is usually the appropriate option.
Avoid attempts to modify the shock’s internal valves, drill its body, release its gas charge, or open a sealed cylinder. Such changes can damage the unit and create serious safety risks. Rebuilding is appropriate only for designs intended to be serviced by trained personnel using the correct parts and procedures.
Source: mail.freeasestudyguides.com
Methods That Do Not Reliably Soften a Fixed Shock
A shock absorber is a precision damping component. Its internal passages, valves, fluid, seals, and sometimes gas pressure work together to control suspension movement. Changing these parts without the correct specifications can cause unpredictable damping or failure.
The safest approach is to identify the reason for the harsh ride and use a documented adjustment or a compatible replacement. Do not rely on unverified advice that recommends changing fluid, drilling holes, cutting springs, or loosening mounting hardware.
Do not drill the shock
Drilling can release pressurized gas or fluid, damage the damping system, and make the shock unsafe.
Do not open a sealed unit
A sealed shock is not designed for casual disassembly or fluid changes.
Do not cut or heat springs
These methods can cause spring failure, unsafe ride height, and inadequate suspension travel.
Do not loosen mounting bolts
Mounting hardware secures the suspension. It is not a damping control and must remain correctly tightened.
How to Soften Motorcycle Shock Absorbers
Motorcycle suspension needs the same balance between comfort and control as car suspension, but rider weight, luggage, passenger weight, and riding conditions play a larger role in setup. Start by checking the motorcycle’s manual and identifying which suspension settings are adjustable.
Some motorcycles offer preload adjustment, rebound damping, compression damping, or a combination of these features. Not every motorcycle has all of them, and the correct procedure varies by model. Use the manufacturer’s recommended baseline before changing any setting.
A motorcycle that feels harsh over small bumps may have excessive damping, incorrect tire pressure, unsuitable spring setup, binding suspension components, or inadequate travel. A motorcycle that feels soft but continues to bounce may instead need more damping or a mechanical inspection.
Source: i.ytimg.com
Motorcycle Suspension Checks
Check tire pressure according to the motorcycle manual, including any specified difference for riding with a passenger or luggage. Inspect the tires and suspension for damage or leaks before making adjustments.
If the motorcycle has a documented damping adjuster, make a small change in the softer direction identified by the manufacturer. Record the original position and change only one setting at a time. Test at a conservative speed in a safe area before normal riding.
Preload should be set for the intended rider and load according to the motorcycle manufacturer’s method. It affects suspension sag and available travel, but it is not a direct substitute for damping adjustment. If you cannot achieve the specified sag or the suspension remains harsh, professional setup may be needed.
Check rider load
Account for the rider, passenger, and luggage when following the motorcycle’s setup recommendations.
Keep tires at the specified pressure
Do not lower tire pressure below the required level to make the motorcycle feel softer.
Verify suspension condition
Have leaking fork seals, damaged shocks, worn bearings, and binding parts assessed.
Preserve handling
Do not continue riding if a change causes unstable steering, excessive bouncing, or loss of predictable control.
Common Mistakes When Trying to Soften Suspension
The most common mistake is treating every harsh ride as a shock absorber problem. Tire pressure, spring rate, wheel size, ride height, and damaged suspension parts can produce similar symptoms. Changing damping before checking these factors may waste money or make handling worse.
Another mistake is reducing damping too far. A vehicle may feel comfortable over one bump but become unsettled over a series of bumps. The suspension must control the spring’s movement while keeping the tire in contact with the road.
Avoid copying settings from another vehicle or another shock model. Two vehicles can have different weights, spring rates, suspension geometry, and damping requirements even when their shock absorbers look similar.
Turning the wrong control
Identify whether the adjuster changes compression, rebound, preload, or ride height before making a change.
Changing multiple settings together
Adjust one variable at a time so you can identify which change affected comfort and control.
Using low tire pressure
Do not lower tire pressure below the recommended level as a substitute for suspension tuning.
Ignoring a damaged component
Repair or replace unsafe parts instead of attempting to mask the symptoms with different settings.
Testing at high speed
Evaluate changes cautiously in a safe setting and stop if the vehicle becomes unstable or unpredictable.
When to Stop and Get Professional Help
Stop driving and arrange an inspection if the vehicle has a broken spring, a loose suspension component, a visibly damaged shock, severe instability, or a sudden and unexplained change in handling. A leaking shock, unusual tire wear, or repeated bottoming also deserves prompt attention.
Seek qualified help if a coilover adjustment is unclear, a suspension spring must be compressed, the vehicle has electronic suspension faults, or a motorcycle’s handling changes after adjustment. Suspension errors can affect braking, steering, and tire contact, so comfort should never take priority over safe control.
Immediate concern
Severe instability, broken parts, or loose suspension hardware calls for stopping in a safe place and arranging professional assistance.
Technical uncertainty
Use a qualified technician when the correct adjuster, setting range, torque value, or replacement specification cannot be confirmed.
Persistent harshness
Request a full suspension and tire inspection if the ride remains uncomfortable after the basic checks.
Quick Troubleshooting Guide for a Harsh Ride
Use the following table to narrow down likely causes before spending money on new shock absorbers. These are diagnostic clues, not definitive diagnoses. More than one fault can exist at the same time, and the vehicle’s service manual should guide the final repair.
Harsh impacts over small bumps
Check tire pressure, tire and wheel specifications, damping settings, and suspension binding.
Repeated bouncing after a bump
Inspect shock performance, spring condition, and damping settings. Excessive bouncing may indicate insufficient damping.
Sharp knocks over bumps
Inspect mounts, bushings, links, ball joints, and suspension travel. Do not assume the shock alone is responsible.
Harshness after lowering the vehicle
Check spring compatibility, shock travel, bump stops, ride height, and alignment.
Ride worsens with cargo
Check the vehicle’s load limits, tire pressure guidance, spring setup, and shock suitability for the intended load.
One side rides differently
Inspect for a damaged spring, leaking shock, uneven tire pressure, worn mounts, or other side-specific faults.
A Practical Order for Diagnosis
Begin with the easiest safe checks: tire pressure, visible tire damage, unusual vehicle loading, and any documented damping settings. Next, review recent changes such as new tires, aftermarket wheels, lowering springs, or replacement shocks.
If those checks do not explain the problem, have the suspension inspected. A qualified technician can assess component condition, mounting hardware, spring suitability, ride height, and suspension travel. This approach is more reliable than repeatedly changing settings without a clear diagnosis.
First
Check tire pressure, tire condition, vehicle load, and any recent changes.
Second
Identify adjustable shocks and verify their documented settings and operating range.
Third
Inspect springs, mounts, bushings, leaks, ride height, and available travel.
Finally
Repair damaged parts or select compatible replacement shocks, then verify comfort and handling.
Next-Question Gap Map
The following editorial map identifies practical questions that follow naturally from the main task. These are inferred reader needs, not verified search-volume findings. No live search-question dataset or competitor-page comparison is claimed here, so competitor coverage remains unchecked.
Can I soften non-adjustable shocks?
Stage: Before repair. Basis: Inferred next need. Competitor coverage: Not checked. Benefit: Helps readers avoid unsafe modifications. Evidence needed: Exact shock design and manufacturer service guidance. Priority: High. Placement: Fixed-shock troubleshooting section.
Will softer shocks improve comfort without hurting handling?
Stage: During adjustment. Basis: Inferred next need. Competitor coverage: Not checked. Benefit: Explains the comfort-control trade-off. Evidence needed: Manufacturer tuning guidance and vehicle-specific setup requirements. Priority: High. Placement: Damping adjustment and testing sections.
Should I change preload or damping?
Stage: Before adjustment. Basis: Inferred next need. Competitor coverage: Not checked. Benefit: Prevents confusion between spring setup and shock control. Evidence needed: Exact suspension design and adjustment manual. Priority: High. Placement: Springs and preload section.
Do I need new shocks if the ride is harsh?
Stage: After troubleshooting. Basis: Inferred next need. Competitor coverage: Not checked. Benefit: Helps distinguish adjustment, repair, and replacement. Evidence needed: Component inspection and compatible replacement specifications. Priority: High. Placement: Replacement-shock section.
How can I soften motorcycle suspension?
Stage: Vehicle-specific follow-up. Basis: Inferred next need. Competitor coverage: Not checked. Benefit: Addresses rider load, tire pressure, and motorcycle setup. Evidence needed: Motorcycle-specific owner and service manuals. Priority: Medium. Placement: Motorcycle suspension section.
Frequently Asked Questions
Q
Can you make shock absorbers softer?
Yes, if the shocks have a manufacturer-approved damping adjustment. Use the documented softer setting and test the vehicle carefully. If the shocks are fixed-damping units, you generally need to identify the cause of the harsh ride or replace the shocks with compatible parts.
Q
Which way do you turn shock adjusters to soften them?
The direction depends on the shock model. Some adjusters use numbered settings or clicks, while others use different control arrangements. Check the manufacturer’s instructions to identify the softer direction and the allowed adjustment range before turning anything.
Q
Does reducing rebound damping make a car ride softer?
Reducing rebound damping can help the suspension extend more freely after a bump, especially when excessive rebound damping limits wheel movement over a series of bumps. However, it may not reduce the sharp impact at the moment the wheel hits an obstacle if compression damping is the main cause. Too little rebound damping can also cause repeated body movement, so use the recommended settings.
Q
Can tire pressure make shock absorbers feel stiff?
Tire pressure does not change the shock’s internal damping, but it can change the way road impacts reach the cabin. Overinflated tires may make the ride harsher. Check the recommended cold pressure on the vehicle placard or in the owner’s manual instead of lowering pressure below the specified level.
Q
Will softer shock absorbers make my car bounce more?
They can. Reducing damping too much may allow the springs and vehicle body to continue moving after a bump. The correct setting should provide comfort while keeping the suspension controlled during steering, braking, and travel over uneven pavement.
Q
Can I soften shock absorbers by changing their oil?
Do not attempt to change the fluid in a sealed shock absorber. Fluid characteristics and internal valve design affect damping, and changing them without the correct specifications can cause unpredictable performance or failure. Service only shock designs that are intended to be rebuilt, using the manufacturer’s procedures and suitable parts.
Q
Are softer shocks better for rough roads?
A suitable comfort-oriented damping setup can help on rough roads, but the softest possible setting is not always best. The suspension also needs enough control to keep the tires in contact with the road and prevent excessive body movement. Tire choice, spring rate, suspension travel, and vehicle load matter too.
Q
Should shock absorbers be replaced in pairs?
Shock absorbers are commonly replaced in axle pairs so both sides have consistent damping. Follow the vehicle manufacturer’s service guidance and inspect the other shocks and suspension components at the same time. Correct fitment and compatible parts are essential for predictable handling.
✦ Wrapping Up
Conclusion
Learning how to soften shock absorbers starts with finding the real cause of a harsh ride. If your shocks have damping adjusters, use the manufacturer’s instructions and make small changes within the specified range. If they are not adjustable, check tire pressure, tire and wheel setup, springs, mounts, and suspension travel before choosing replacement parts.
A softer ride should not come at the expense of steering, braking, or tire contact. Avoid drilling sealed shocks, changing their fluid without approved service procedures, cutting springs, or loosening mounting hardware. When the suspension is damaged or the correct setup is unclear, have a qualified technician inspect it.
💡 Key Takeaway
Check your tire pressure and suspension condition first. Then identify your exact shock absorber model and confirm whether it has a documented softer setting. Make only approved adjustments, test carefully, and replace unsuitable or damaged parts rather than modifying sealed shocks.
Eric
Hi, I’m Eric Bennett, the person behind OffRoadTruckAccessories.com.
I created this blog to share my interest in trucks, off-road driving, automotive accessories, and DIY modifications. I enjoy learning how different truck accessories work, testing their usefulness, and understanding whether they are truly worth buying.
Shock absorbers are located near the wheels as part of the suspension system, usually between the vehicle’s body, frame, or subframe and a suspension component such as a control arm, axle, or wheel assembly. However, the exact answer to where are shock absorbers located on a car depends on the suspension design. Some vehicles have…
You should change shock absorbers when they are worn, leaking, damaged, or no longer controlling suspension movement properly. There is no single replacement interval that applies to every vehicle because shock absorber life depends on road conditions, vehicle weight, driving habits, suspension design, and component quality. If you are wondering when to change shock absorbers,…
A shock absorber is a suspension component that controls how quickly a vehicle’s suspension moves up and down after bumps, dips, braking, acceleration, and other road inputs. It works with the springs to prevent excessive bouncing and helps keep the tires in controlled contact with the road. So, what does a shock absorber do? It…
A gas shock absorber is a hydraulic shock absorber that uses pressurized gas, usually nitrogen, along with shock absorber oil to control suspension movement. The gas helps reduce oil foaming and keeps damping performance more consistent when the shock works repeatedly or under demanding conditions. If you are wondering what is a gas shock absorber,…