
How to Remove Seized Control Arm Bolts Safely and Easily
Learning how to remove seized control arm bolts can save a suspension job that seems impossible. The main mistake is using more force before finding out why the bolt is stuck. A control arm bolt can seize in its threads, rust inside a mount, or bond to the steel sleeve inside a rubber bushing.
This problem is common on older cars and trucks in the United States. It is even more common where winter road salt is used. Years of water, salt, and dirt can turn a simple suspension bolt into one solid rusted part.
I treat seized suspension bolts in stages. I start with the least damaging method. Then I move to stronger tools only when needed. This protects the control arm mount, saves time, and lowers the risk of breaking hardware.
This guide explains how to remove seized control arm bolts with penetrating oil, hand tools, impact tools, heat, an air hammer, and cutting tools. It also explains what to do when the bolt spins but will not come out.

Why Control Arm Bolts Seize
Before learning how to remove seized control arm bolts, you need to know what is holding the bolt. Rust is the most common cause. Moisture gets between the bolt and the parts around it, then corrosion locks them together.
Some control arm bolts pass through a steel sleeve inside a rubber bushing. Rust can bond the bolt to that sleeve. In this case, the nut may come off and the bolt may even turn, but the bolt still refuses to slide out.
Alignment bolts can be harder. They may pass through eccentric washers, sleeves, or slotted mounts. Rust can lock several parts together at once.

- ✦ Thread rust
Rust forms between the bolt and nut or inside a threaded mount.
- ✦ Bushing sleeve corrosion
The bolt rusts to the inner metal sleeve of the control arm bushing.
- ✦ Road salt
Salt speeds up corrosion and can make suspension bolts very hard to remove.
- ✦ Dirt and moisture
Water and debris can stay trapped around suspension mounts for years.
- ✦ Bent hardware
A bent bolt can bind inside the control arm or mounting bracket.
How to Tell Where the Bolt Is Seized
Watch what happens when you try to turn the bolt. If the nut will not move, the problem may be in the threads. If the nut is off and the bolt turns but does not slide, suspect the bushing sleeve.
If the bolt moves a short distance and then stops, rust may have built up on the exposed shank. A bent bolt can cause the same sign.
- ✦ Bolt will not rotate
The threads or bolt shank may be heavily rusted.
- ✦ Bolt rotates but will not slide
The bolt is often seized to the bushing sleeve.
- ✦ Bolt moves only partway
Rust buildup, sleeve damage, or a bent bolt may be blocking it.
Tools You May Need to Remove a Seized Control Arm Bolt
You do not need every tool on this list for every job. Start with basic hand tools and work up. Having stronger options ready can keep a simple suspension job from turning into a full-day fight.
Use good six-point sockets when possible. A six-point socket grips rusty bolt heads better than a twelve-point socket. It also lowers the chance of rounding the head.
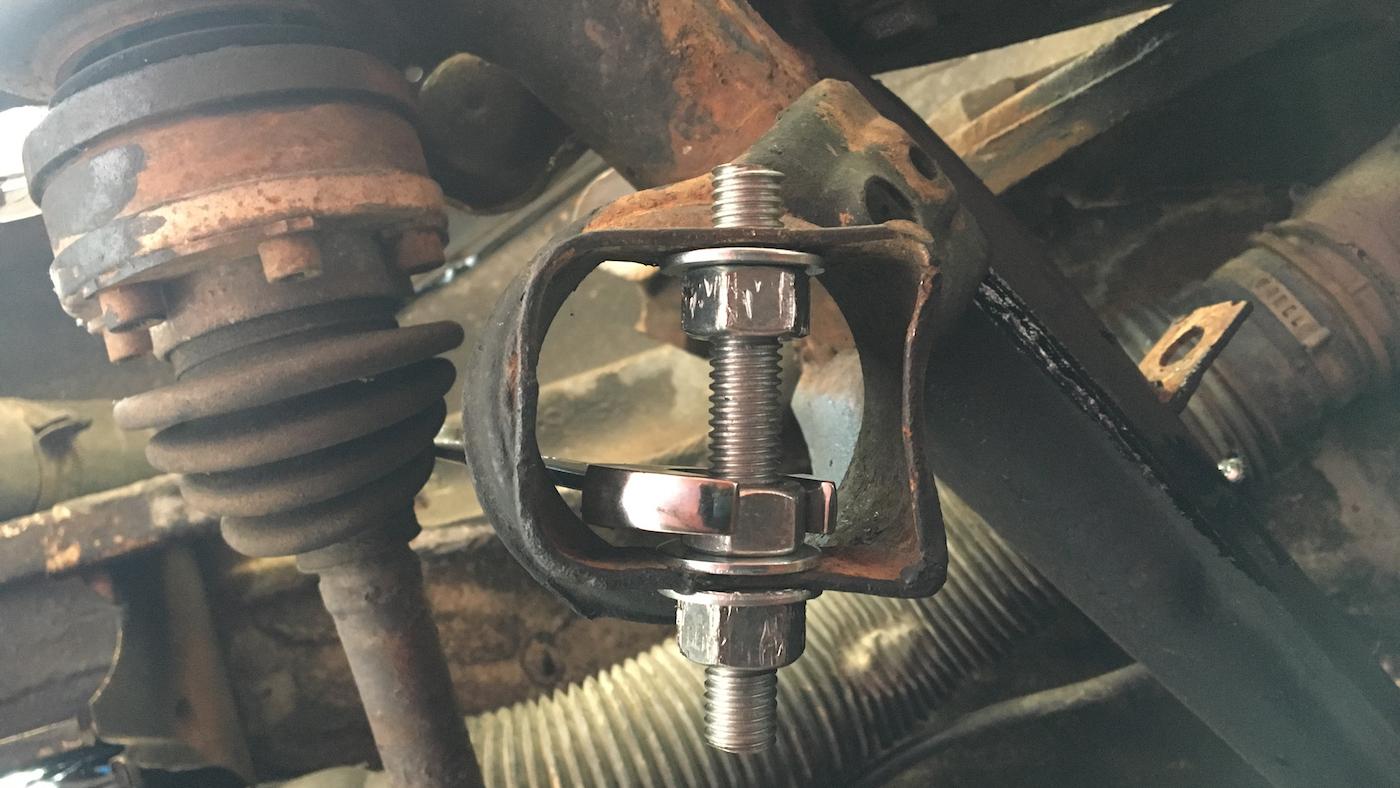
- ✦ Penetrating oil
Helps work into rusty threads and small gaps around the bolt.
- ✦ Wire brush
Removes loose rust and dirt before you turn the hardware.
- ✦ Six-point sockets
Give better grip on rusty nuts and bolt heads.
- ✦ Breaker bar
Adds slow and controlled turning force.
- ✦ Impact wrench
Uses repeated impacts to help break a rust bond.
- ✦ Hammer
Can shock the bolt or help drive it through the mount.
- ✦ Air hammer
Adds rapid force to the end of a stubborn bolt.
- ✦ Torch or induction heater
Heat can expand surrounding metal and weaken corrosion.
- ✦ Reciprocating saw
Can cut through a bolt trapped inside a bushing.
- ✦ Cutoff wheel
Useful when there is safe access to the bolt.
Safety Gear Matters
Rust, metal chips, and broken cutting blades can fly toward you. Wear eye protection and gloves. Use hearing protection with impact tools and saws.
Never work under a car held up only by a floor jack. Place the vehicle on strong jack stands at proper lift points. Keep your body away from parts that may move when the bolt comes free.
- ✦ Eye protection
Protects your eyes from rust, sparks, and metal chips.
- ✦ Jack stands
Support the vehicle on a firm and level surface.
- ✦ Fire safety
Keep a fire extinguisher near you if you use heat.
How to Remove Seized Control Arm Bolts Step by Step
The best way to learn how to remove seized control arm bolts is to use a staged process. Do not jump straight to a torch or saw. Many bolts come free with cleaning, penetrating oil, and the right tool.
Support the suspension before removing major control arm hardware. A control arm can move when its bolt comes out. A spring-loaded suspension part can also store a large amount of force.

- ✦ Step 1: Lift and secure the vehicle
Park on firm ground, chock the wheels, lift the vehicle, and support it with jack stands.
- ✦ Step 2: Support the control arm
Use a jack when needed so the arm does not drop or twist as the bolt comes out.
- ✦ Step 3: Clean the exposed hardware
Brush away loose rust, mud, and scale from the nut, bolt head, and exposed threads.
- ✦ Step 4: Apply penetrating oil
Wet the threads and any open gap where the bolt enters the bracket or bushing sleeve.
- ✦ Step 5: Let it soak
Give the oil time to work. More time often helps on heavy rust.
- ✦ Step 6: Try controlled movement
Turn the bolt slightly in both directions instead of forcing it only one way.
- ✦ Step 7: Use impact force
An impact wrench can shock the rust bond while turning the bolt.
- ✦ Step 8: Drive the bolt out
If the nut is removed, use a punch or air hammer on the bolt end when access allows.
- ✦ Step 9: Add heat if needed
Heat the surrounding metal with care, then try turning or driving the bolt again.
- ✦ Step 10: Cut the bolt as a last resort
Cut through the bolt on both sides of the bushing when it is fused to the sleeve.
Start by Turning the Bolt Back and Forth
Small movement can break rust without snapping the bolt. Try loosening the bolt a little, then turn it back. Add more penetrating oil as a gap begins to open.
Do not use a very long pipe for more leverage unless you know the mount can take the load. Too much steady force can twist a captive nut or break a bolt.
Strike the Bolt Without Damaging the Threads
If you plan to reuse the bolt for a short time during the repair, protect its threads. Thread the nut back on until it sits near the end. Strike the nut or use a suitable punch.
For a bolt that will be replaced, an air hammer can work well. Use a blunt tool that stays centered on the bolt.
What to Do When the Bolt Spins but Will Not Come Out
This is one of the most common problems when learning how to remove seized control arm bolts. The nut comes off. The bolt turns. Yet the bolt will not slide out.
In many cases, the bolt has rusted to the inner steel sleeve of the control arm bushing. When you turn the bolt, the sleeve may turn with it. More torque will not pull the bolt out because the rust bond is on the bolt shank, not the threads.
At this point, focus on pushing, vibrating, heating, or cutting the bolt. Do not waste time trying to unscrew a bolt that is no longer held by threads.

- ✦ Load and unload the control arm
Raise or lower the arm slightly with a jack. This can remove pressure from the bolt.
- ✦ Use an air hammer
Rapid blows can break rust between the bolt and sleeve.
- ✦ Turn while pushing
Rotate the bolt with an impact wrench while a helper pushes it from the other side.
- ✦ Heat the sleeve area
Careful heat may help break the rust bond, but nearby rubber and fuel parts must be protected.
- ✦ Cut through the bolt
If the bolt is fused inside the sleeve, cutting is often the cleanest final solution.
Why a Seized Bushing Sleeve Is So Difficult
The inner sleeve sits tightly around the bolt. Rust fills the small space between them. Over time, the bolt and sleeve can act like one piece of metal.
Penetrating oil may have trouble reaching the middle of a long sleeve. That is why impact force or cutting becomes more useful on severe cases.
How to Use Heat on a Seized Control Arm Bolt
Heat can help when rust has locked a bolt to its mount. The goal is to expand the metal around the bolt and disturb the corrosion. Heat is useful, but it also adds risk.
Do not point a flame at rubber bushings, brake hoses, fuel lines, wiring, undercoating, or plastic parts. Some suspension bushings can burn or release harmful smoke. An induction heater can be a safer option when you have access to one.
If you use a torch, work in short cycles. Heat the surrounding metal rather than holding the flame on the bolt for a long time. Then try the impact wrench or air hammer while the parts are still hot.

- ✦ Clear the area
Remove oil, leaves, rags, and other items that can burn.
- ✦ Protect nearby parts
Shield brake hoses, wiring, rubber, and painted surfaces.
- ✦ Heat the surrounding part
Expansion around the bolt can help loosen the rust bond.
- ✦ Use short heating cycles
Avoid heating one point for too long.
- ✦ Keep an extinguisher nearby
Any open-flame repair should include basic fire protection.
When You Should Avoid a Torch
Do not use open flame when fuel or vapor is present. Avoid it near damaged fuel lines, fuel tanks, leaking fluids, and areas packed with flammable material.
If you cannot clearly see what is behind the metal you plan to heat, choose another method. An air hammer, press tool, or cutting tool may be safer.
When and How to Cut a Seized Control Arm Bolt
Sometimes the fastest way to remove seized control arm bolts is to stop trying to save them. If a bolt has become one piece with the bushing sleeve, cutting may cause less damage than hours of hammering.
A reciprocating saw with a strong metal-cutting blade works well in many control arm mounts. Slide the blade between the bushing and mounting bracket, then cut through the bolt. You may need to cut both ends.
A cutoff wheel can also work if there is enough space. Take care not to cut the vehicle’s mounting bracket. A small cut in a structural suspension mount can turn a simple repair into a much larger job.

- ✦ Plan the cut first
Find the safest path before starting the saw or grinder.
- ✦ Protect the mount
Keep the blade away from the control arm bracket and frame.
- ✦ Use the right blade
Choose a blade made for thick metal and hardened fasteners.
- ✦ Control sparks
Keep sparks away from fuel, rubber, wiring, and dry debris.
- ✦ Replace cut hardware
Never reuse a bolt that has been cut, ground, or badly damaged.
Cutting a Bolt Seized Inside a Bushing Sleeve
If the bolt is fused to the sleeve, cut between the sleeve and each mounting ear when space allows. Once both sides are cut, the control arm can usually come out with the center part of the bolt still trapped inside the bushing.
The bushing will normally need replacement after this type of repair. Many technicians replace the full control arm if the bushing is not easy to service on its own.
How to Remove Seized Alignment and Cam Bolts
Some control arm bolts also adjust wheel alignment. These are often called cam bolts or eccentric bolts. They can rust to the bushing sleeve just like a normal control arm bolt.
Mark the position of the eccentric washers before removal if you need a reference for assembly. Still, do not treat the old position as a final alignment setting. Suspension work can change toe, camber, or caster.
If an alignment bolt is badly seized, replace the bolt, nut, and eccentric hardware as a set when the vehicle design calls for matched parts. Damaged eccentric washers can make accurate alignment hard or impossible.

- ✦ Mark the old position
A paint mark can provide a rough reference during reassembly.
- ✦ Inspect eccentric washers
Replace bent, worn, or badly rusted alignment hardware.
- ✦ Check the mounting slot
Make sure cutting or rust has not damaged the alignment slot.
- ✦ Get an alignment
Have the wheel alignment checked after control arm or alignment bolt work.
Do Not Force a Seized Cam Bolt Through the Mount
Heavy hammering can bend a thin mounting ear or damage an alignment slot. Stop if the bracket starts to move. Cut the bolt instead when that method places less stress on the vehicle.
Common Mistakes When Removing Seized Control Arm Bolts
Knowing how to remove seized control arm bolts is also about knowing when to change your method. A rusty bolt can waste hours if you keep repeating a method that is not working.
The goal is not to prove that the bolt can be saved. The goal is to remove the control arm without damaging the car. Replacement hardware is often far cheaper than repairing a bent or cut suspension mount.
- ✦ Using too much leverage too soon
A huge breaker bar can snap the bolt or damage a captive nut.
- ✦ Using a twelve-point socket
It can round a rusty bolt head more easily than a six-point socket.
- ✦ Hammering without supporting the arm
Suspension load can pinch the bolt and make removal harder.
- ✦ Heating rubber parts
Excess heat can destroy bushings and create smoke or fire.
- ✦ Cutting without checking behind the mount
A blade or wheel can damage brake lines, wiring, or structural metal.
- ✦ Reusing badly rusted bolts
Deep rust, damaged threads, or a stretched bolt are good reasons to replace it.
Do Not Keep Hammering a Bolt That Is Not Moving
Repeated hard blows can mushroom the bolt end. They can also bend the control arm mount. If a few controlled attempts make no progress, switch to heat, vibration, or cutting.
What to Inspect After the Seized Bolt Comes Out
Removing the bolt is only part of the job. Heavy corrosion can damage the bushing, mounting bracket, bolt hole, and alignment parts. Inspect everything before installing new hardware.
Clean loose rust from the mounting area. Look for cracks, stretched holes, bent ears, and deep metal loss. Do not hide structural rust with grease or paint and assume the part is safe.
Check the control arm bushing too. If heat, cutting, or heavy hammering damaged it, replace the bushing or control arm before driving the vehicle.
- ✦ Mounting holes
Check for elongation, cracks, severe rust, and cutting damage.
- ✦ Bushing
Look for torn rubber, separated rubber, heat damage, or a loose sleeve.
- ✦ New hardware
Compare the new bolt length, diameter, thread, and grade with the correct specification.
- ✦ Alignment parts
Check eccentric washers and alignment slots for wear or bending.
- ✦ Nearby parts
Inspect brake hoses, ABS wiring, and other items near the repair.
How to Install the New Control Arm Bolt Correctly
Once you know how to remove seized control arm bolts, correct installation helps stop the problem from returning. Clean the mounting surfaces and use new hardware when the old bolt is badly rusted or damaged.
Follow the vehicle maker’s torque procedure. Suspension bolts can have different torque values even when they look similar. Some designs also use torque-plus-angle fasteners that may need replacement after removal.
For rubber control arm bushings, final tightening may need to happen at normal ride height. Tightening some bonded rubber bushings while the suspension hangs can twist the rubber at rest and shorten bushing life.
- ✦ Use correct hardware
Match the required bolt size, strength, nut, and alignment parts.
- ✦ Clean the mounting area
Remove loose rust and dirt before assembly.
- ✦ Follow the torque specification
Use the service information for your exact year, make, and model.
- ✦ Set ride height when required
Bonded rubber bushings may need final torque with the suspension loaded.
- ✦ Check wheel alignment
Control arm work can change alignment and tire wear.
Should You Use Anti-Seize on the New Bolt?
Use anti-seize only when the service information or repair procedure allows it. Lubricant changes friction, so it can change the clamp load produced by a given torque value.
Some technicians protect exposed areas from corrosion without coating the threads. The correct method depends on the vehicle and fastener design.
When a Seized Control Arm Bolt Should Be Left to a Professional
Some seized bolts are reasonable DIY jobs. Others are not. Stop when removal starts to threaten a structural mount, fuel system, brake line, or spring-loaded suspension part.
A repair shop may have an induction heater, powerful air hammer, lift, specialty press tools, and better cutting access. These tools can make a severe rust job much safer.
Professional help also makes sense when the vehicle has major frame or subframe corrosion. Removing one bolt does not fix weakened structural metal.
- ✦ Severe structural rust
A badly rusted subframe or mounting point needs careful inspection.
- ✦ No safe cutting access
Do not cut blindly near fuel, brake, or electrical parts.
- ✦ Spring pressure
Some suspension layouts can release dangerous stored energy.
- ✦ Damaged captive nut
A spinning nut inside a closed frame section can require major access work.
- ✦ Bent suspension mount
A damaged bracket may need professional repair before the vehicle is safe.






