
How to Cut Lower Control Arm Bolts Safely: Step-by-Step Guide
Learning **how to cut lower control arm bolts** becomes necessary when rust locks a bolt inside the metal sleeve of a control arm bushing. The nut may come off, yet the bolt still will not slide out. Penetrating oil, an impact wrench, heat, and a hammer may make no real difference because the bolt and sleeve have effectively rusted together.
The key is not simply cutting through steel. You must first know what is loading the control arm. Some U.S. cars, trucks, and SUVs use the lower arm to support a coil spring or coilover assembly. Cutting the wrong bolt while that spring is loaded can allow the arm to move with great force.
This guide explains **how to cut lower control arm bolts** with a reciprocating saw, cutoff tool, or angle grinder. It also covers where to make the cut, how to protect nearby parts, what to do when the bolt is seized in the bushing sleeve, and how to install the replacement hardware correctly.

Why Lower Control Arm Bolts Get Stuck
A lower control arm usually pivots on rubber or hydraulic bushings. A steel bolt passes through a steel inner sleeve in each bushing. Over time, water and road salt can enter the small space between those parts.
Rust can then bond the bolt to the sleeve. This problem is common on vehicles driven in areas that use road salt during winter. The bolt may turn with the bushing, yet refuse to slide out of the mount.
This is the main reason people search for **how to cut lower control arm bolts**. In severe cases, cutting the bolt on both sides of the bushing is faster and safer than spending hours beating on a frozen bolt.
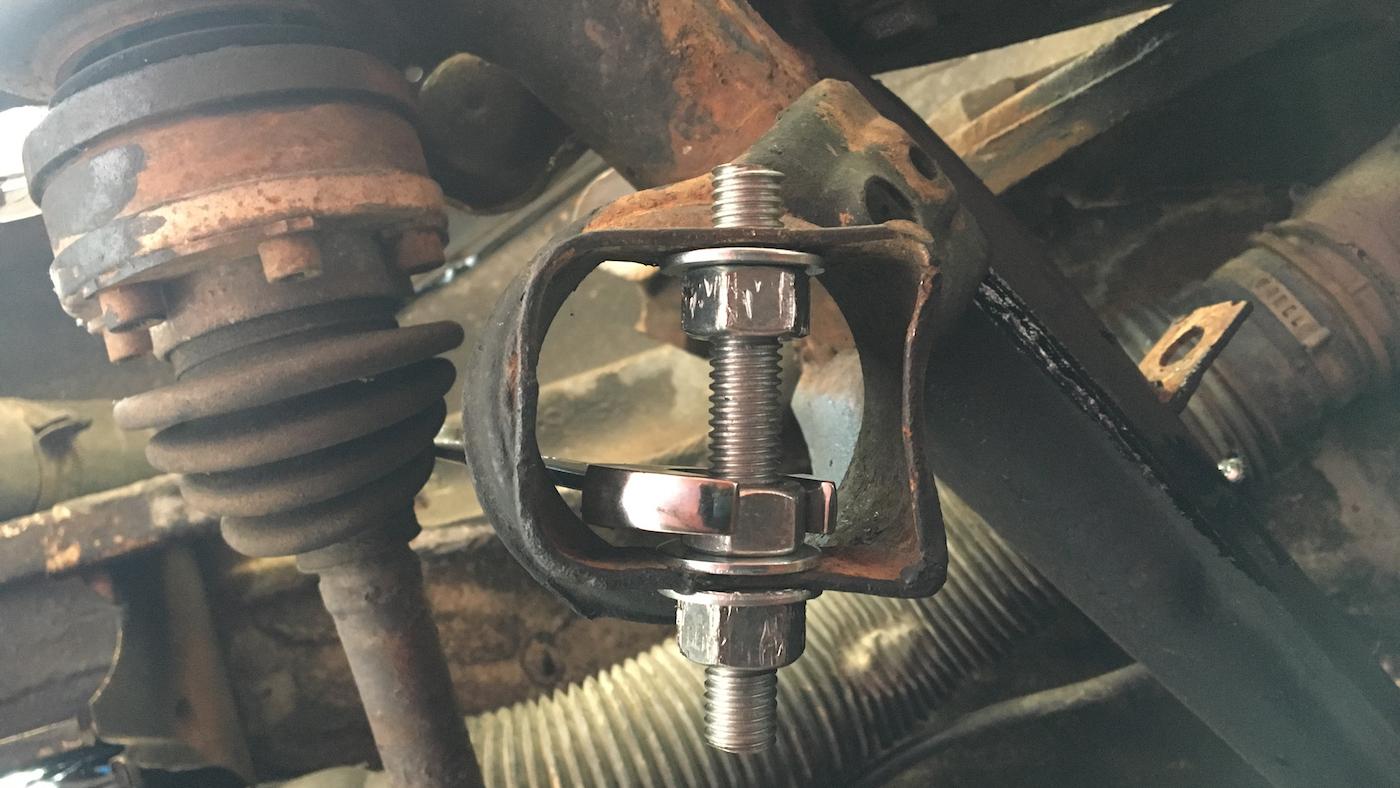
- ✦ Rust and road salt
Moisture and salt promote corrosion between the bolt and the metal bushing sleeve.
- ✦ Bolt seized to sleeve
The bolt may become bonded to the inner sleeve even after the nut has been removed.
- ✦ Bent hardware
A bent bolt may bind inside the sleeve or suspension bracket.
- ✦ Damaged threads
Mushroomed or rusted threads can stop a bolt from passing back through the mount.
How to Tell If the Bolt Is Seized Inside the Bushing
Remove or loosen the nut and try to rotate the bolt. If the bolt turns but the entire inner bushing sleeve turns with it, rust may have bonded them together. Another clue is a bolt that moves only a tiny amount when struck with a hammer.
Do not keep using larger hammers without checking what is moving. Heavy blows can bend a mounting bracket, damage threads, or deform nearby suspension parts.
- ✦ Sleeve turns with bolt
This strongly suggests corrosion between the bolt shank and sleeve.
- ✦ Bolt will not slide
A bolt that rotates but cannot move sideways is often seized in the sleeve.
Safety Checks Before Cutting a Lower Control Arm Bolt
Safety is the most important part of learning **how to cut lower control arm bolts**. Before touching a saw or grinder, determine whether the control arm is supporting a spring, coilover, steering knuckle, or another loaded component.
Never depend on a hydraulic floor jack alone. Raise the vehicle on a firm, level surface and support it with correctly rated jack stands at approved lift points. Keep a jack under the suspension only when the repair procedure calls for it.
If a coil spring sits between the lower control arm and frame, the arm may be holding significant spring force. Follow the factory service procedure for unloading or removing that spring before cutting a pivot bolt. If you are unsure how the spring is retained, this is a good point to have a qualified repair shop handle the job.
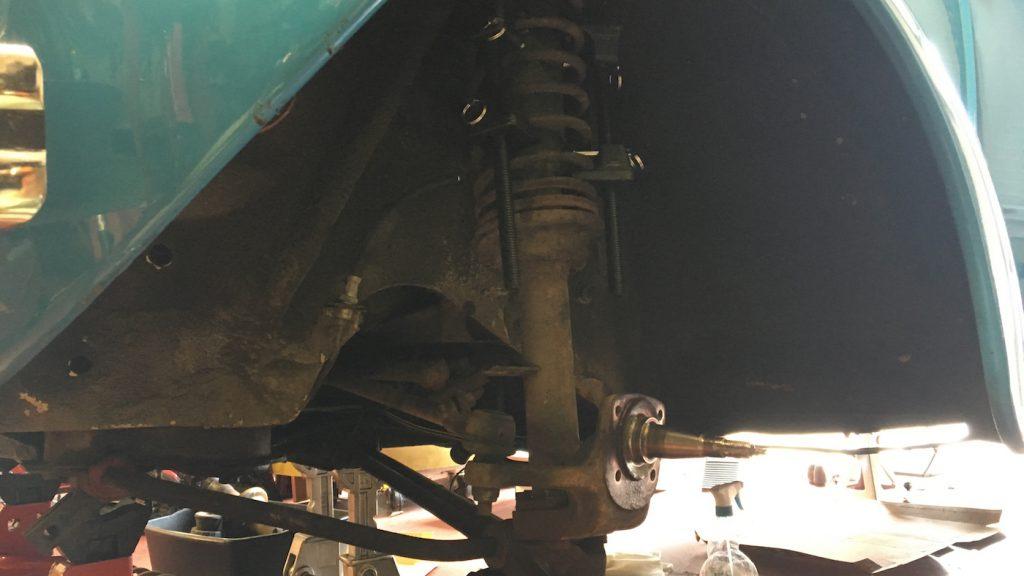
- ✦ Support the vehicle
Use correctly rated jack stands on a solid and level surface.
- ✦ Check spring placement
Confirm whether a coil spring or coilover applies force to the lower control arm.
- ✦ Wear eye protection
Cutting metal throws sharp chips, sparks, rust, and broken blade fragments.
- ✦ Wear hearing protection
Reciprocating saws and grinders can produce damaging noise.
- ✦ Protect fuel and brake parts
Keep sparks and blades away from fuel lines, brake hoses, wiring, CV boots, and rubber parts.
- ✦ Have a fire extinguisher nearby
This is especially important when using tools that create sparks.
Do Not Cut a Loaded Suspension Bolt
A control arm can move suddenly when its mounting bolt is removed. The risk becomes much greater when a coil spring pushes directly against that arm.
Do not assume that placing a jack under the arm makes every design safe. Check the repair information for your exact year, make, model, and suspension type before releasing a structural suspension fastener.
- ✦ Know the load path
Identify what parts will move when the bolt no longer holds the arm.
- ✦ Control spring force
Unload or restrain the spring using the vehicle maker’s specified procedure.
Tools You Need to Cut Lower Control Arm Bolts
The best tool for **how to cut lower control arm bolts** depends on access. In many cases, a reciprocating saw works well because its narrow blade can slide between the control arm bushing and the mounting bracket.
Choose a blade made for thick metal. A good bi-metal blade can handle normal suspension hardware. A carbide-tooth metal blade may last longer when cutting a hardened or heavily rusted bolt.
An angle grinder or compact cutoff tool can work when there is enough room around the bolt. These tools cut fast, but they throw many sparks and are harder to use safely in a narrow suspension pocket.

- ✦ Reciprocating saw
Often the most practical choice for cutting between a bushing and its mounting bracket.
- ✦ Metal-cutting blades
Use quality bi-metal or carbide blades designed for thick steel.
- ✦ Angle grinder
Useful when the bolt head or exposed shaft is easy to reach.
- ✦ Compact cutoff tool
Helpful in tight areas when its wheel can reach the bolt without touching other parts.
- ✦ Penetrating oil
Worth trying before cutting and useful for other rusted hardware.
- ✦ Pry bar
Helps create a small working gap when the arm and mount allow safe movement.
- ✦ Replacement hardware
Have the correct new bolt, nut, and related parts ready before starting.
Best Saw Blade for a Seized Control Arm Bolt
Use a short blade when space is tight. A shorter blade tends to flex less and is easier to control. Pick a blade long enough to pass through the full bolt without letting the saw’s shoe strike the mounting bracket.
A fine-to-medium tooth metal blade usually provides better control than a coarse demolition blade. If a normal bi-metal blade quickly loses its teeth, a carbide metal-cutting blade may be a better choice.
- ✦ Bi-metal blade
A practical choice for many standard automotive bolts.
- ✦ Carbide blade
Useful for difficult, hardened, or severely corroded fasteners.
How to Cut Lower Control Arm Bolts Step by Step
The basic method for **how to cut lower control arm bolts** is to cut through the bolt on one or both sides of the bushing sleeve. This frees the control arm even when the center section of the bolt remains rusted inside the old bushing.
Before cutting, inspect both sides of the mounting bracket. Look for brake hoses, ABS wires, fuel lines, CV boots, steering parts, and other items that a moving blade could hit. Use a thin metal shield where practical to protect nearby parts.
Do not rush the cut. A controlled cut keeps the blade centered on the bolt and reduces the chance of damaging the suspension bracket.

- ✦ Step 1: Confirm the suspension is unloaded
Make sure the control arm can be released without uncontrolled spring or suspension movement.
- ✦ Step 2: Remove the nut
Take off the nut if possible so you have a clear view of the bolt and mount.
- ✦ Step 3: Try normal removal first
Use penetrating oil, hand tools, an impact tool, and careful hammering before deciding to cut.
- ✦ Step 4: Find the cutting gap
Look for the narrow space between the bushing and the suspension mounting ear.
- ✦ Step 5: Protect nearby parts
Move hoses and wires away when the service design permits, and place a metal shield behind the cut.
- ✦ Step 6: Seat the saw shoe
Press the reciprocating saw shoe firmly against a stable surface to reduce vibration.
- ✦ Step 7: Cut the first side
Start slowly and keep the blade centered on the bolt rather than the mounting bracket.
- ✦ Step 8: Cut the other side if needed
If the bolt remains trapped in the sleeve, cut through the bolt on the opposite side of the bushing.
- ✦ Step 9: Remove the control arm
Once both bolt ends are free, carefully work the old arm or bushing out of the mount.
- ✦ Step 10: Inspect the bracket
Check the mounting ears and bolt holes for cuts, cracks, distortion, or heavy rust.
Where Should You Cut the Bolt?
When a bolt is seized to the inner sleeve, the usual cut point is in the small gap between the bushing and each mounting ear. Cutting on both sides leaves the seized center section inside the old bushing while freeing the control arm.
Keep the blade as close to the old bushing as practical without cutting the suspension bracket. Damage to the bracket can turn a normal control arm job into a much larger repair.
- ✦ Cut beside the bushing
This separates the seized bolt and sleeve from the suspension mount.
- ✦ Protect the mounting ear
Do not allow the blade or cutoff wheel to remove material from the bracket.
How to Reduce Saw Vibration
A reciprocating saw cuts much better when its shoe stays firmly against the work. Excess movement makes the blade bounce and can bend it.
Start at a lower speed until the blade forms a small groove in the bolt. Then increase speed as needed while keeping steady pressure on the saw.
- ✦ Brace the saw
Keep the shoe firmly planted whenever access allows.
- ✦ Start slowly
A slow start helps keep the blade from walking across nearby metal.
What to Try Before Cutting the Bolt
Cutting should usually be a last resort. Before using the **how to cut lower control arm bolts** method, give the bolt a fair chance to come out normally. This can save the original control arm if its bushing is still usable.
Start by cleaning exposed threads and applying penetrating oil to both sides of the bushing sleeve. Give the oil time to work. Then try rotating the bolt in both directions instead of only applying force in the removal direction.
If the bolt rotates independently from the bushing sleeve, repeated rotation and moderate tapping may slowly work it free. If the inner sleeve rotates with the bolt as one solid unit, cutting becomes much more likely.

- ✦ Penetrating oil
Apply it where the bolt enters each side of the bushing sleeve.
- ✦ Impact wrench
Short impact pulses may break rust between the bolt and sleeve.
- ✦ Breaker bar
Use controlled force and stop if the bolt or bracket begins to deform.
- ✦ Hammer and punch
Moderate blows may move a bolt after rust has been loosened.
- ✦ Heat
Heat may help in some repairs, but it requires care around rubber, fuel, brake parts, coatings, and other heat-sensitive components.
When to Stop Trying to Hammer the Bolt Out
Stop if the bolt head starts to deform, the mounting bracket bends, or the bushing sleeve clearly moves with every strike. At that point, more force may damage parts that you want to reuse.
A clean controlled cut can be less destructive than repeated heavy hammering. This is especially true when you already plan to replace the lower control arm or bushing.
- ✦ Bracket movement
Stop if the suspension mounting ears begin to bend or spread.
- ✦ Mushroomed bolt
A deformed bolt end may become even harder to remove through the mounting hole.
Reciprocating Saw vs Angle Grinder for Control Arm Bolts
A reciprocating saw is usually my preferred style of tool for explaining **how to cut lower control arm bolts** because it can reach into narrow gaps. Its blade also produces fewer sparks than an abrasive cutoff wheel.
An angle grinder cuts quickly when the bolt is exposed. The downside is that the wheel needs more clearance and can easily touch a bracket, bushing, hose, or nearby metal.
A compact cutoff tool sits between those two options. It can fit into some areas that a full-size grinder cannot, but it still creates sparks and needs enough space for the wheel.

- ✦ Reciprocating saw
Best for narrow spaces beside the control arm bushing and for controlled straight cuts.
- ✦ Angle grinder
Fast on exposed bolt heads or shafts but requires more room and careful spark control.
- ✦ Compact cutoff tool
Useful in medium-clearance areas where a small wheel can reach the bolt.
Which Tool Is Best in a Tight Suspension Mount?
A reciprocating saw is often the better choice when only a thin gap exists between the bushing and bracket. You can select a narrow metal blade and guide it directly into that gap.
If the saw blade cannot enter straight, do not force it at a sharp angle. Look for access from the opposite side or use a different cutting tool that gives you better control.
- ✦ Prioritize control
The safest tool is the one you can keep away from the suspension bracket and nearby lines.
What If the Bolt Is Seized Inside the Bushing Sleeve?
A bolt rusted to the bushing sleeve is one of the hardest control arm problems. The bolt, sleeve, and rubber bushing may act like one piece. Trying to drive the bolt out can tear the rubber while leaving the steel sleeve firmly attached.
This is the situation where knowing **how to cut lower control arm bolts** saves time. Cut through the bolt between the bushing and bracket on both sides. The control arm can then come out with the center section of the bolt still trapped inside its old sleeve.
If you are replacing the complete control arm, you normally do not need to separate that seized center section. If you plan to reuse the arm and replace only the bushing, the remaining bolt section will need to be removed during bushing service.
- ✦ Cut both ends
This frees the bushing assembly while leaving the seized center portion inside the sleeve.
- ✦ Replace damaged bushings
Do not reuse a bushing that has been torn, burned, crushed, or badly distorted during removal.
- ✦ Inspect the arm
Check for cracks, deep rust, bends, or damage before deciding to reuse it.
Can You Save the Old Control Arm?
Sometimes. If the arm is straight and rust-free, a serviceable press-in bushing may allow the arm to be reused. You still need to remove the old bushing and seized bolt section without damaging the bushing bore.
On many vehicles, replacing the complete arm is more practical because it comes with new bushings already installed. Compare parts cost, labor, and the condition of the ball joint before choosing.
- ✦ Check bushing serviceability
Some control arms have replaceable bushings while others are commonly serviced as complete assemblies.
- ✦ Check the ball joint
If the ball joint is worn and supplied with the new arm, complete arm replacement may make more sense.
Common Mistakes When Cutting Lower Control Arm Bolts
The hardest part of **how to cut lower control arm bolts** is avoiding damage to everything around the bolt. The cut itself is simple once access is safe and the blade is in the correct spot.
One common mistake is letting the blade rub against the suspension mounting ear. Even a small cut can remove protective coating and start corrosion. A deep cut can weaken the bracket.
Another mistake is beginning work without replacement hardware. Suspension bolts can be vehicle-specific in diameter, length, strength grade, shoulder design, or cam alignment hardware.
- ✦ Cutting into the bracket
Keep the blade against the old bushing side rather than the structural mounting ear.
- ✦ Ignoring spring load
Never release a control arm pivot without knowing how the spring and suspension are supported.
- ✦ Damaging brake or ABS parts
Check the full blade travel path before starting the saw.
- ✦ Reusing cut hardware
A bolt that has been cut, heavily heated, stretched, or badly corroded must be replaced.
- ✦ Using random replacement bolts
Use hardware that meets the exact size, strength, and design required for the vehicle.
- ✦ Skipping alignment
Control arm work can change wheel alignment and tire wear.
Avoid Heating Rubber and Hydraulic Bushings
Open flame near a bushing can damage rubber and produce smoke. Some modern bushings may contain fluid. Heat can also harm paint, undercoating, nearby wiring, brake hoses, and other parts.
If heat is part of the approved repair approach, protect the surrounding area and use it with care. Cutting is often easier when the old control arm or bushing will be replaced anyway.
- ✦ Control heat
Keep heat away from rubber, hoses, wiring, fuel components, and sealed suspension parts.
How to Install the New Lower Control Arm Bolt
After you finish **how to cut lower control arm bolts**, clean the mounting area before installing the replacement arm. Remove loose rust and inspect the bolt holes and mounting ears. The new bolt should pass through without needing extreme force.
Use the correct replacement bolt and nut for the vehicle. Suspension hardware carries major loads, so bolt diameter and length are not the only details that matter. Strength grade, shoulder length, locking features, and cam hardware may also be important.
Start all hardware by hand. Do not use the nut to pull a badly misaligned control arm into position because this can damage threads or the mounting bracket.
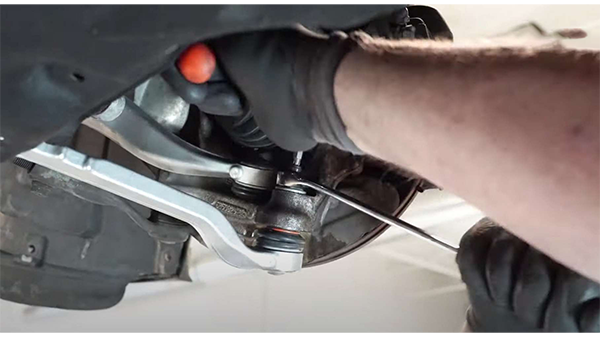
- ✦ Clean the mount
Remove loose rust and debris without enlarging the factory bolt holes.
- ✦ Use correct hardware
Match the factory specification for bolt type, nut, strength, and alignment hardware.
- ✦ Install bolts by hand first
Make sure the bolt passes through the mount correctly before tightening.
- ✦ Follow torque specifications
Use the service information for the exact year, make, model, and suspension design.
- ✦ Check alignment
Schedule or verify wheel alignment after control arm replacement when the repair can affect suspension geometry.
Why Final Bushing Torque Position Matters
Many bonded rubber control arm bushings should be finally tightened near normal ride height. Tightening them while the suspension hangs can preload the rubber when the vehicle returns to the ground.
That preload may shorten bushing life. Follow the factory procedure because suspension designs differ, and some fasteners have different tightening requirements.
- ✦ Use the specified position
Torque bonded rubber bushing fasteners at the suspension position required by the manufacturer.
- ✦ Use a torque wrench
Suspension hardware should be tightened to the correct specification rather than by feel.
Should You Apply Anti-Seize to the New Bolt?
Do not automatically coat every new suspension bolt with anti-seize. Lubricants can change the relationship between tightening torque and clamping force.
Follow the vehicle maker’s service information. If the specification calls for clean, dry threads, install them dry. If a specific lubricant or corrosion protection is required, use only the recommended type.
- ✦ Follow service data
Thread condition can affect the clamping force produced by a given torque value.
When You Should Let a Repair Shop Handle the Job
Knowing **how to cut lower control arm bolts** does not mean every seized bolt should be handled at home. Suspension work becomes much harder when a spring must be compressed, a mounting bracket is badly rusted, or there is little room for a cutting tool.
Professional help is also wise when you cannot identify what will move after the bolt is cut. A technician with a lift can often support the suspension at the correct points and get safer access around the seized fastener.
Stop if the structural mounting area has major rust, cracks, or previous repair damage. Cutting out a bolt will not solve a weak suspension mounting point.
- ✦ Loaded coil spring
Get professional help if safe spring unloading requires tools or procedures you do not have.
- ✦ Severe structural rust
A damaged control arm mount may require more than normal parts replacement.
- ✦ Poor cutting access
Do not make a blind cut where you cannot protect nearby hoses, wires, or structural parts.
- ✦ Unclear suspension design
Use professional service information or a qualified technician before releasing a major suspension fastener.
Signs the Mount Needs More Than a New Bolt
Surface rust is common, but deep scaling, cracks, enlarged bolt holes, or thin metal around the mounting point need closer inspection. The bolt depends on that mount to hold the control arm securely.
Do not hide structural damage with a new bolt and washer. Have the mounting area evaluated before the vehicle returns to the road.
- ✦ Cracked metal
Cracks around a control arm mount can affect suspension strength.
- ✦ Elongated holes
A worn or damaged mounting hole can prevent the bolt from locating the arm correctly.
Tips for Making the Job Easier
Good preparation makes **how to cut lower control arm bolts** much easier. Confirm replacement parts before taking the vehicle apart. It is frustrating to cut an old bolt and then discover that the correct replacement is not available locally.
Take photos of washers, cam plates, bolt direction, and suspension parts before removal. This matters on vehicles that use eccentric cam bolts for alignment.
Keep several metal-cutting blades available. Rusted suspension hardware can wear out blades quickly, and trying to finish the job with a dull blade creates more heat and vibration.
- ✦ Buy hardware first
Confirm that the correct replacement bolt and nut are available before cutting the original.
- ✦ Photograph cam positions
Marking alignment hardware gives you a useful reference during reassembly.
- ✦ Use fresh blades
A sharp blade cuts straighter and requires less force.
- ✦ Keep the blade cool
Avoid forcing a dull or overheated blade through the bolt.
- ✦ Inspect both sides
Know exactly what sits behind the bolt before the blade breaks through.
What to Do With Alignment Cam Bolts
Some lower control arm bolts use eccentric cams to adjust camber or caster. Mark their position before removal if possible, but those marks are only a starting reference after new parts are installed.
Have the wheel alignment checked after the repair. New bushings and control arms can change suspension position even when the cam hardware appears to return to the same marks.
- ✦ Mark before removal
Record the original position of cam plates when the design uses them.
- ✦ Align after repair
Use a proper alignment to confirm the final suspension geometry.






