
How to Replace Lower Control Arm Chrysler Town and Country
Learning **how to replace lower control arm Chrysler Town and Country** can save a large part of the labor cost of a front suspension repair. The job is possible for an experienced DIY owner with good hand tools, strong jack stands, and enough room to work safely. The exact steps can change by model year, so identify your van before removing any suspension parts.
The lower control arm links the front suspension to the vehicle structure and helps control wheel movement. On many Chrysler Town and Country models, the arm uses rubber bushings at the body or subframe and a ball joint connection near the steering knuckle. Wear in these parts may cause clunks, loose steering, poor tire wear, or movement under braking.
One of the most important practical points is not to treat this as a simple remove-and-replace bolt job. Rust, loaded suspension parts, tight ball-joint connections, and bushing position can make the repair harder than it first appears. Careful support, correct tool use, and proper final tightening matter as much as installing the new part.

Before You Replace the Lower Control Arm
Before learning **how to replace lower control arm Chrysler Town and Country**, make sure the control arm is actually the problem. A worn ball joint, torn control arm bushing, damaged sway bar link, loose tie rod, or worn strut can cause similar sounds.
Inspect both front sides before buying parts. Look for cracked rubber bushings, excessive ball-joint movement, bent metal, or a control arm that shifts when the wheel is loaded. If the arm was damaged by a curb or pothole impact, inspect the wheel, tire, steering knuckle, strut, and subframe too.
Model year matters. A 2005 Chrysler Town and Country may not use the same exact suspension design, bolt arrangement, or replacement steps as a 2014 model. Always match the replacement arm to the VIN, year, engine, and suspension configuration.
- ✦ Confirm the failed part
Check the bushings, ball joint, control arm body, and nearby steering and suspension parts before taking the van apart.
- ✦ Check the replacement arm
Compare the new control arm with the old one. Mounting holes, bushing positions, ball joint design, and overall shape should match.
- ✦ Review service information
Use repair information for your exact model year to confirm torque values, fastener replacement rules, and any model-specific steps.
Common Signs of a Bad Lower Control Arm
A damaged lower control arm does not always produce one clear symptom. You may hear a dull clunk when driving over bumps or when changing from acceleration to braking. Steering can also feel less stable if a bushing or ball joint has too much play.
Uneven front tire wear may occur when worn parts allow the wheel position to change. However, tire wear alone does not prove that the control arm is bad. Alignment problems and other worn suspension parts can produce similar patterns.
- ✦ Clunking noise
A worn bushing or ball joint may knock when the suspension moves.
- ✦ Steering movement
The vehicle may feel loose or may shift slightly during braking.
- ✦ Visible bushing damage
Rubber that is torn, separated, or badly cracked may allow excess control arm movement.
- ✦ Uneven tire wear
Changed suspension geometry can contribute to abnormal tire wear.
Tools and Parts You May Need
The correct tools make **how to replace lower control arm Chrysler Town and Country** much safer and easier. You do not need a full professional shop, but you do need equipment that can support the vehicle securely.
Rust is common on suspension hardware, especially on vans driven in areas that use road salt. Penetrating oil, a breaker bar, and a quality impact wrench can help. Do not rely on an impact wrench for final torque.

- ✦ Replacement lower control arm
Use the correct left or right arm for your exact Chrysler Town and Country.
- ✦ Floor jack
Use a jack rated for the weight of the vehicle.
- ✦ Jack stands
Support the van on approved structural lifting points before working underneath it.
- ✦ Wheel chocks
Chock the wheels that remain on the ground.
- ✦ Socket and wrench set
Suspension fasteners may require several socket and wrench sizes.
- ✦ Breaker bar
Useful for loosening tight or corroded bolts.
- ✦ Torque wrench
Required for accurate final tightening.
- ✦ Ball joint separator
Helps separate the ball joint from the steering knuckle when needed.
- ✦ Penetrating oil
Useful on rusted suspension bolts and nuts.
- ✦ Safety glasses and gloves
Protect yourself from rust, dirt, tools, and falling debris.
Should You Buy a Complete Control Arm?
A complete control arm assembly is often easier for a home mechanic because the bushings are already installed. Some assemblies also include a ball joint, but this varies by part and model year.
Read the product description carefully. Do not assume that every Chrysler Town and Country lower control arm includes a new ball joint, mounting hardware, or grease fitting.
- ✦ Complete assembly
Usually reduces the need for pressing old bushings out and new bushings in.
- ✦ Check included hardware
New nuts, bolts, or cotter pins may not come with every replacement arm.
How to Replace Lower Control Arm Chrysler Town and Country Step by Step
The basic process for **how to replace lower control arm Chrysler Town and Country** is similar across many front-wheel-drive models. You remove the wheel, free the control arm from the steering knuckle, remove its body-side mounts, and install the new arm.
The exact order can vary. Some years provide better access if another bracket, sway bar connection, or nearby component is moved first. Never force a part simply because a general guide says it should come out.

- ✦ Step 1: Park on a level surface
Set the parking brake, place the transmission in Park, and chock the rear wheels.
- ✦ Step 2: Loosen the wheel nuts
Break the front wheel lug nuts loose slightly before raising the vehicle.
- ✦ Step 3: Raise and support the van
Lift the front with the proper jacking point and place the vehicle securely on jack stands.
- ✦ Step 4: Remove the wheel
Remove the lug nuts and wheel to expose the suspension.
- ✦ Step 5: Inspect the work area
Identify the control arm mounts, ball joint connection, brake hose, ABS wiring, and nearby parts before loosening hardware.
- ✦ Step 6: Support the suspension if needed
A small jack under a safe suspension point can help control movement. Do not lift from a weak or unsupported part.
- ✦ Step 7: Disconnect the ball joint
Remove the required ball-joint fastener and separate the joint from the steering knuckle using the proper method for your model.
- ✦ Step 8: Remove the control arm mounting bolts
Remove the bolts or nuts that secure the control arm bushings to the subframe or body structure.
- ✦ Step 9: Remove the old control arm
Work the arm out carefully while watching the CV axle, brake hose, ABS wire, and other nearby parts.
- ✦ Step 10: Position the new control arm
Place the new arm in the same orientation as the original and start the mounting hardware by hand.
- ✦ Step 11: Reconnect the ball joint
Seat the ball joint correctly in the steering knuckle and install the proper fastener.
- ✦ Step 12: Tighten the hardware correctly
Use the torque specifications and tightening sequence listed for your exact model year.
- ✦ Step 13: Reinstall the wheel
Install the wheel, lower the vehicle, and torque the lug nuts in the recommended pattern.
- ✦ Step 14: Check the repair
Inspect the area again, test steering movement, and confirm that no hose or wire was stretched or trapped.
Separating the Ball Joint Safely
The ball joint can be one of the hardest parts of the job. Corrosion may hold the joint tightly in the steering knuckle even after the retaining hardware is removed.
Use a suitable separator or the service procedure for your model. Avoid uncontrolled hammering near the CV axle, wheel bearing, brake hose, or ABS sensor. If the joint will not separate, stop and check whether any retaining fastener is still installed.
- ✦ Protect the boot
If the ball joint will be reused, avoid tearing its rubber dust boot.
- ✦ Watch the axle
Do not pull the steering knuckle outward far enough to damage or separate the CV joint.
Removing the Control Arm Bolts
Control arm bolts can be very tight because they carry suspension loads and are exposed to road spray. Clean visible threads and apply penetrating oil before using heavy force.
Make note of bolt direction, washers, brackets, and any special hardware before removal. Taking a clear photo before disassembly can make installation much easier.
- ✦ Use six-point sockets
They can reduce the chance of rounding a tight suspension bolt.
- ✦ Do not damage the subframe
If a bolt is seized inside a bushing sleeve, forcing it can damage surrounding parts.
How to Remove a Stuck Lower Control Arm
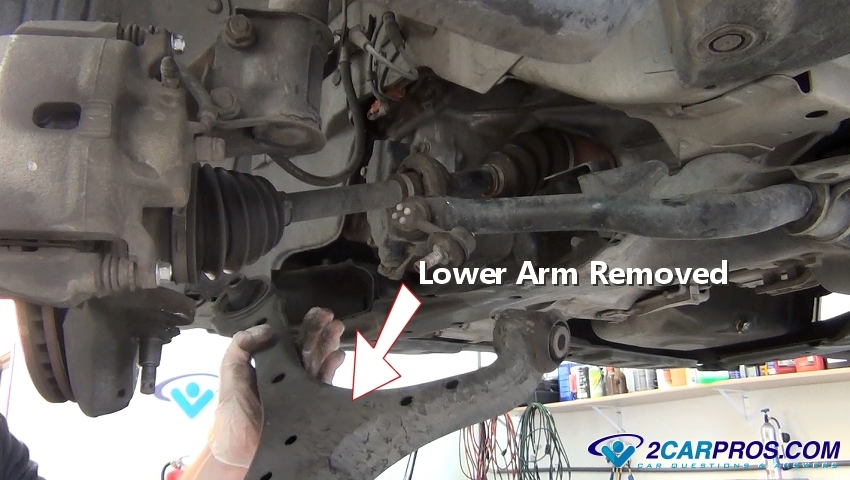
A stuck arm is common when learning **how to replace lower control arm Chrysler Town and Country** on an older van. Rust may seize a bolt to the metal sleeve inside a bushing. The ball joint may also be difficult to release.
Start with the least aggressive method. Clean the area, apply penetrating oil, confirm that every retaining fastener is removed, and use controlled force. Excessive prying can bend brackets or damage the subframe.
If a bolt turns but will not slide out, the bolt may be rusted to the inner bushing sleeve. Severe cases can require cutting equipment and new hardware. That is often the point where professional help becomes the safer option.
- ✦ Apply penetrating oil
Give the product time to work around exposed threads and metal joints.
- ✦ Use controlled leverage
Use a suitable pry bar only against strong structural points.
- ✦ Check bolt alignment
Suspension tension can bind a bolt. Slightly changing suspension support may remove that pressure.
- ✦ Replace damaged hardware
Do not reuse a bolt or nut with damaged threads, heavy corrosion, or an incorrect locking feature.
When Rust Changes the Job
Town and Country vans used in northern U.S. states may have far more corrosion than vehicles from dry regions. A job that looks simple on a clean vehicle can become much harder when the bolt, sleeve, and bushing have rusted together.
Plan for extra time if the suspension has heavy rust. Never place your body beneath an unsupported vehicle while applying high force to a breaker bar.
- ✦ Inspect mounting points
Heavy rust around the subframe or control arm mount needs more attention than normal surface corrosion.
Installing the New Lower Control Arm Correctly
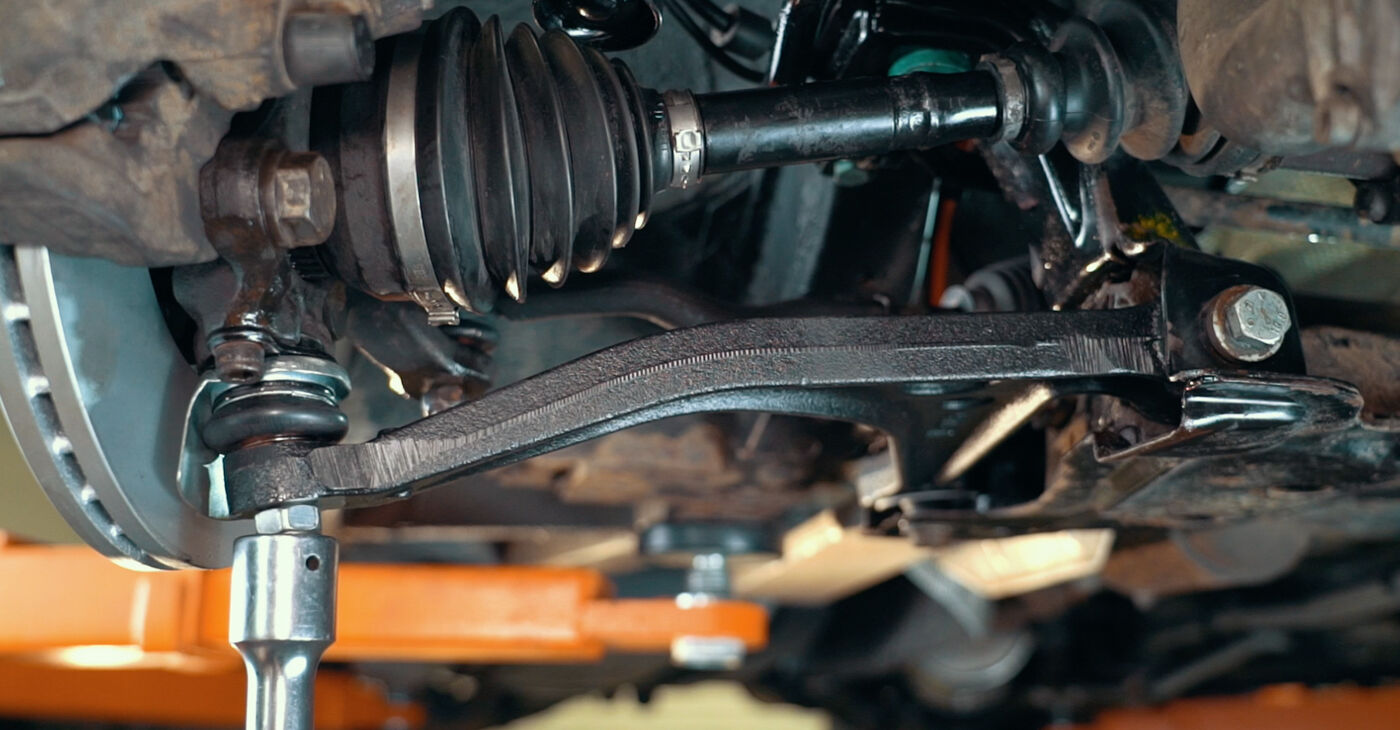
Correct installation is the most important part of **how to replace lower control arm Chrysler Town and Country**. Do not force the new arm into place if it does not line up. First compare its dimensions, bushing locations, and ball joint position with the old part.
Start major fasteners by hand before tightening them. This reduces the chance of cross-threading and gives you enough movement to align the other mounting points.
Rubber control arm bushings deserve special care. Some suspension bushings should receive final torque when the arm is near its normal ride position. Tightening them while the suspension hangs can twist the rubber when the van returns to the ground.
The correct procedure depends on the design and model year. Follow Chrysler service information or the instructions supplied by a reputable replacement part maker.
- ✦ Compare old and new parts
Confirm the replacement arm matches before installation.
- ✦ Start bolts by hand
Thread each fastener several turns before using power tools.
- ✦ Avoid bushing preload
Follow the correct ride-height tightening procedure where required.
- ✦ Use specified torque
Do not guess at suspension torque values.
- ✦ Use new locking hardware when required
Some suspension nuts or bolts are designed for limited or one-time use.
Why Ride-Height Torque Can Matter
Many rubber suspension bushings work by twisting as the control arm moves. If a bonded rubber bushing is locked in the wrong position, normal vehicle weight may hold the rubber in a constant twist.
That can shorten bushing life and affect how the suspension moves. Follow the exact procedure for your van rather than assuming every bushing uses the same method.
- ✦ Simulate normal position
Where specified, support the suspension so the control arm sits close to its normal loaded angle before final tightening.
Torque Specifications and Fastener Safety
There is no single torque number that safely applies to every Chrysler Town and Country lower control arm. Fastener size, suspension design, model year, and mounting location can differ. Using a random torque specification from another year can leave a joint too loose or damage the fastener.
For this reason, a responsible guide to **how to replace lower control arm Chrysler Town and Country** should not give one universal torque value. Check a factory service manual, trusted repair database, or service information matched to your VIN and model year.
Always use a calibrated torque wrench for final tightening. An impact wrench is useful for removal, but it is a poor substitute for controlled final torque.
- ✦ Control arm mounting bolts
Torque to the specification for your exact year and suspension design.
- ✦ Ball joint fastener
Use the correct torque and any required new nut, bolt, or locking device.
- ✦ Wheel lug nuts
Torque the lug nuts to the specification listed for the vehicle and wheel setup.
- ✦ Recheck hardware
Before driving, make sure every fastener removed during the job has been installed and tightened.
Should You Replace Both Lower Control Arms?
You do not always have to replace both lower control arms at the same time. If one arm is damaged by an impact and the other side is tight and healthy, replacing only the damaged side can be reasonable.
Age-related bushing wear is different. If both arms are the same age and one side has badly worn rubber, inspect the other side closely. It may be near the end of its useful life as well.
Replacing both can make sense on a high-mileage van when both sides show wear. It can also reduce the chance of paying for another alignment soon after replacing the opposite side.
- ✦ Replace one side
Reasonable when only one arm is damaged and the opposite side passes inspection.
- ✦ Consider both sides
Useful when both arms have similar mileage and both show cracked bushings or joint wear.
- ✦ Inspect related parts
Check tie rods, sway bar links, struts, ball joints, and wheel bearings while the front suspension is accessible.
Do New Control Arms Come With Ball Joints?
Some complete lower control arm assemblies include a new ball joint. Others include only the arm and bushings. The answer depends on the replacement brand and the suspension design.
Check the part listing before ordering. If your new arm does not include the ball joint and the existing joint is worn, plan to replace it separately.
Do You Need a Wheel Alignment After Replacement?
A professional wheel alignment is strongly recommended after **how to replace lower control arm Chrysler Town and Country** is completed. The lower control arm helps position the wheel, so replacing it can affect suspension geometry.
Even if the van seems to drive straight, small alignment changes can cause tire wear. An alignment check can also reveal another suspension problem that needs attention.
Drive only enough to confirm that the repair feels secure before arranging the alignment. If the steering feels very loose, the wheel sits at an odd angle, or you hear a new loud noise, stop and inspect the repair before continuing.
- ✦ Steering wheel position
An off-center steering wheel may indicate an alignment issue.
- ✦ Vehicle pull
Pulling to one side can come from alignment, tire, brake, or suspension problems.
- ✦ Tire protection
Correct alignment helps prevent rapid or uneven tire wear.
Common Mistakes to Avoid
Most problems with **how to replace lower control arm Chrysler Town and Country** come from rushed work rather than the basic design of the part. Suspension hardware carries heavy loads, so small mistakes can have serious results.
Do not work under a vehicle supported only by a hydraulic jack. Do not guess torque values. Do not leave the ball joint or control arm bolts partly tightened because the parts appear to fit.
Another common mistake is damaging a nearby brake hose or ABS wire while moving the steering knuckle. Watch these parts throughout the job and make sure they are routed correctly before reinstalling the wheel.

- ✦ Using only a floor jack
A hydraulic jack can move or fail. Use strong jack stands on proper support points.
- ✦ Guessing torque
Incorrect torque can allow movement or damage threads and fasteners.
- ✦ Cross-threading bolts
Start suspension fasteners by hand before using a ratchet or impact wrench.
- ✦ Stretching the brake hose
Support the steering knuckle and watch hose and ABS wire movement.
- ✦ Ignoring alignment
A van that appears to drive normally may still have alignment angles that cause tire wear.
- ✦ Buying the wrong arm
Verify side, year, engine, and suspension application before starting the repair.
When You Should Stop and Use a Repair Shop
Professional help is the safer choice if the subframe has structural rust, a mounting bolt is badly seized, the ball joint cannot be separated safely, or you do not have secure lifting equipment.
You should also stop if a mounting hole or bracket appears bent after collision or curb damage. Installing a new control arm will not correct a damaged structural mounting point.
- ✦ Severe structural rust
A weak control arm mounting area requires professional inspection.
- ✦ Bent mounting points
Collision damage may require measurement or structural repair.
- ✦ No torque information
Get the correct service data before final assembly rather than guessing.
Final Checks Before Driving
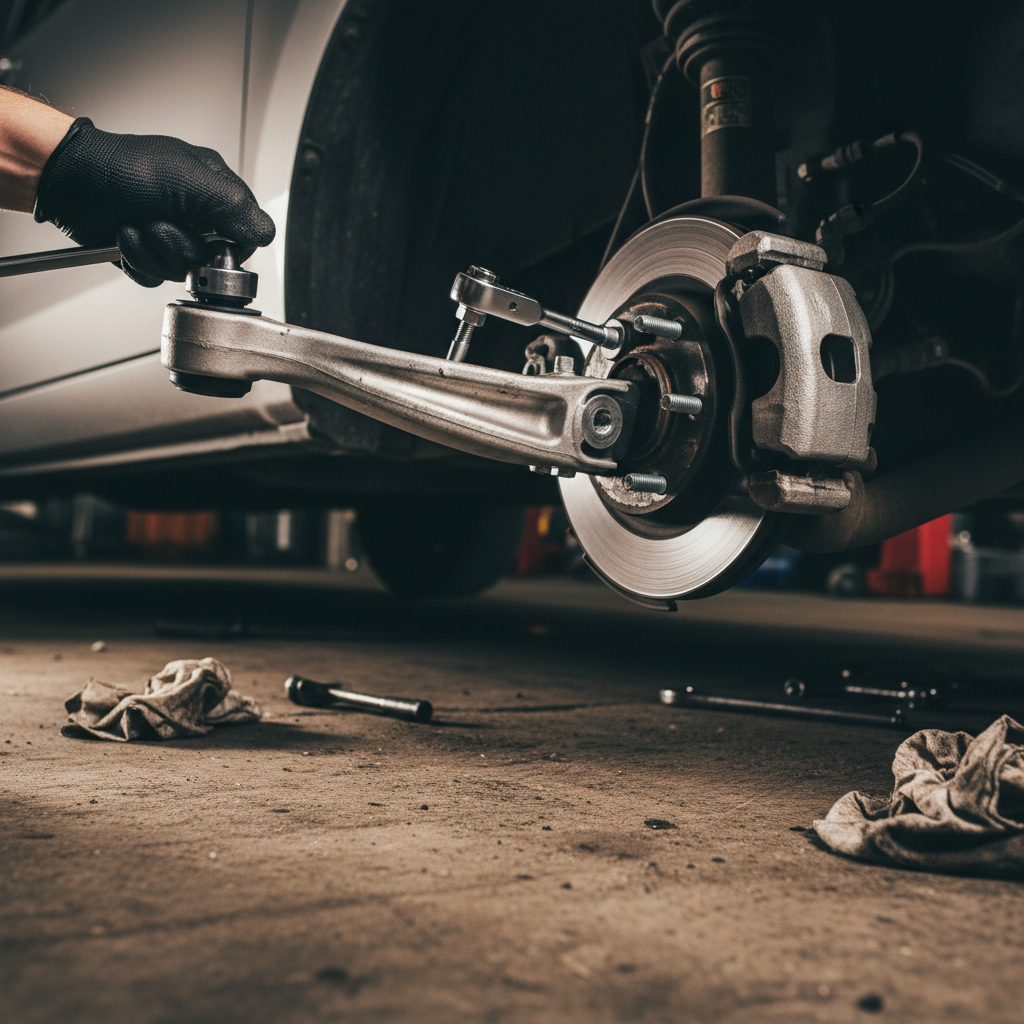
After finishing **how to replace lower control arm Chrysler Town and Country**, inspect the repair before the van leaves the work area. Check every fastener you touched and make sure the ball joint is fully seated.
Turn the steering slowly from side to side while watching for interference. Confirm that the brake hose and ABS wire have enough free movement and are not rubbing against the tire, axle, or suspension.
Start with a slow test drive in a safe area. Listen for clunks and note how the steering feels. Stop immediately if the vehicle wanders badly, makes a severe new noise, or feels unstable.
- ✦ Check every fastener
Verify that no mounting bolt, nut, bracket, or wheel fastener was missed.
- ✦ Inspect hose routing
Make sure brake and ABS lines are secure and have enough movement.
- ✦ Test at low speed
Begin with a short, slow drive before normal road use.
- ✦ Schedule alignment
Have the front alignment checked after the suspension repair.






