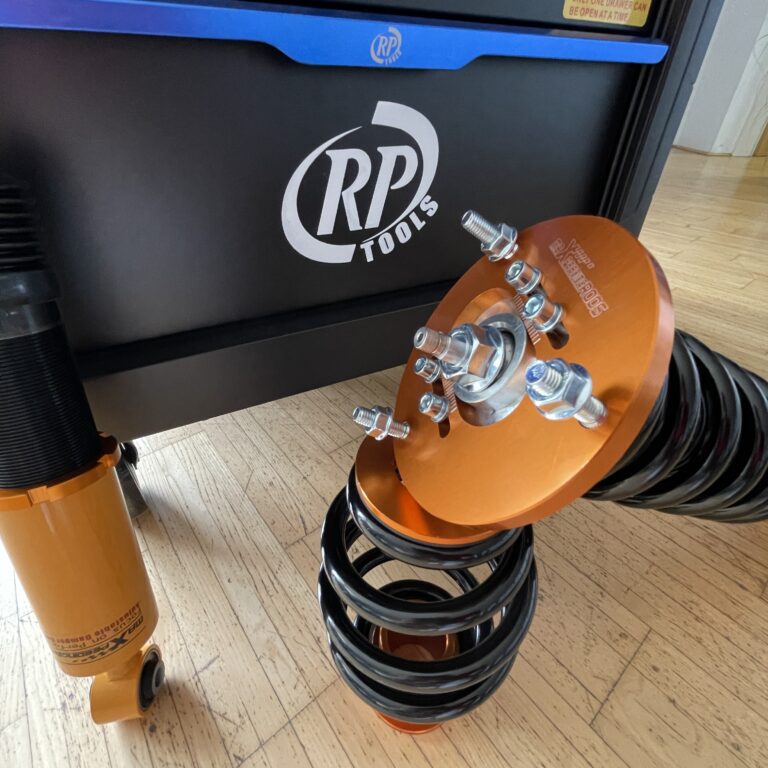
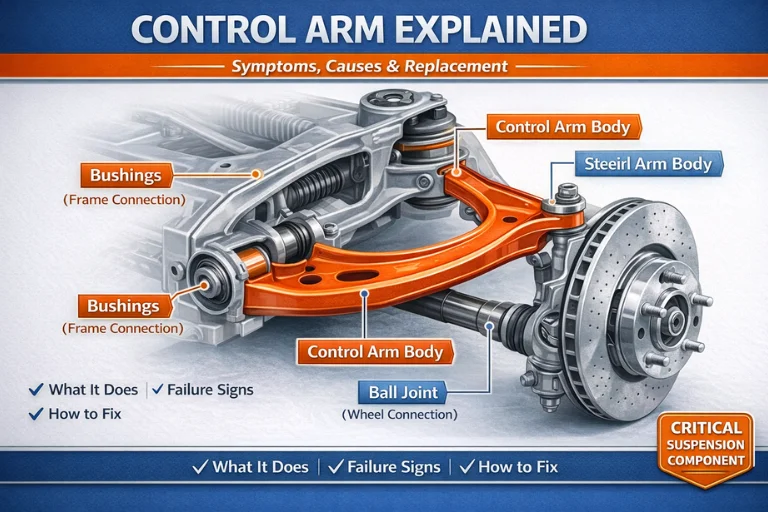
To change shock absorbers, park on level ground, secure the vehicle, support it with properly rated jack stands, remove the wheel, unbolt the old shock, install the correct replacement, tighten all fasteners to the manufacturer’s specifications, and inspect the suspension before driving. The exact process depends on your vehicle and whether it uses separate shocks or strut assemblies.
For drivers across the United States, worn shock absorbers can make daily trips on city streets, interstate highways, and rough rural roads less comfortable and harder to control. Common warning signs include repeated bouncing, fluid leaks from a shock, poor body control, and uneven tire wear. Replacing a worn shock can restore much of the suspension’s intended damping, but the correct repair depends on the vehicle’s design and the condition of its other suspension parts.
Changing shock absorbers is a manageable home repair on some vehicles, especially when the shocks are separate from the springs. Other vehicles use struts that support the vehicle and contain a compressed coil spring. These designs require different procedures and may need special equipment. Before starting, consult the factory service information for your exact year, make, model, trim, and suspension setup.
This guide explains how to prepare the vehicle, remove old shocks, fit new parts, check the installation, and recognize when professional service is the safer option. It also covers common mistakes, replacement costs, and the difference between changing a separate shock absorber and replacing a complete strut assembly.
Shock absorbers control the movement of a vehicle’s suspension springs. When a tire moves over a bump, the spring compresses and then tries to extend. The shock absorber slows that repeated movement so the body does not keep bouncing.
Shocks help the tires maintain contact with the road and support predictable handling during braking, cornering, and changes in road surface. They do not normally hold up the vehicle’s weight by themselves. Coil springs, leaf springs, and other suspension components carry that load, depending on the design.
Worn shocks may cause a vehicle to bounce more than expected, pitch during braking, or feel unstable over uneven pavement. These symptoms can also result from worn tires, damaged springs, loose suspension parts, or alignment problems, so inspection is necessary before replacing components.
Source: club.autodoc.co.uk
Separate shock absorber
A damping unit mounted between suspension components. It can often be replaced without removing or compressing the coil spring.
Strut assembly
A structural suspension component that often combines a damper with a coil spring and upper mount. Replacement may require spring-compression equipment or a complete assembly.
Shock mount and bushing
Parts that secure the shock and help limit unwanted vibration, noise, and movement.
Do All Cars Have Separate Shock Absorbers?
No. Many vehicles use separate shocks at the rear and struts at the front, while others use different combinations. Some trucks and SUVs use separate shocks at both axles. The arrangement depends on the suspension design, not simply on whether the vehicle is a car, truck, or SUV.
Check the owner’s manual, factory service information, or a reliable vehicle-specific parts catalog. A replacement procedure for one vehicle may not apply to another vehicle, even when both share the same brand.
Separate shocks
Usually suitable for a straightforward replacement when the spring remains safely installed and the mounting points are accessible.
Complete strut assembly
May be a practical replacement option when the procedure requires spring handling, but the assembly must match the vehicle’s exact configuration.
Signs That Your Shock Absorbers Need Replacing
Look for changes in ride control, visible damage, and abnormal suspension movement before deciding to replace the shocks. No single symptom proves that a shock has failed, so combine a visual inspection with a review of how the vehicle behaves.
A light film of residue around a damper does not always mean it has failed. Heavy wetness, a trail of fluid, damaged seals, or a shock that no longer controls suspension movement provides stronger reason for further inspection. Follow the vehicle maker’s service criteria when judging a borderline condition.
Source: Professional Motor Mechanic, pmmonline.co.uk
Repeated bouncing
The vehicle continues to oscillate after a bump instead of settling promptly.
Fluid leakage
The shock body shows substantial oil leakage or signs of a damaged seal.
Poor body control
The vehicle dives, pitches, rolls, or feels less stable than it did before.
Uneven tire wear
Cupping or scalloped wear may be linked to poor damping, although tire balance, alignment, and worn suspension parts can also contribute.
Knocking or rattling
A loose mount, worn bushing, damaged fastener, or another suspension component may be responsible.
Inspect the Suspension Before Buying Parts
Park the vehicle on level ground and inspect the visible shock bodies, mounts, bushings, and nearby components. Look for bent parts, broken springs, corrosion, damaged wiring, and loose hardware. Do not crawl under an unsupported vehicle to perform this check.
If the symptoms are unclear, have a qualified technician inspect the suspension. Replacing shocks will not correct a broken spring, damaged control arm, worn ball joint, or incorrect wheel alignment.
Check both sides of the axle
Compare the condition of the left and right shocks, mounts, and surrounding components.
Confirm the source of the noise
A sway bar link, exhaust hanger, wheel bearing, or loose spare tire can create sounds that resemble a suspension fault.
Tools and Parts Needed to Change Shock Absorbers
Gather the correct replacement parts, tools, and service specifications before lifting the vehicle. Having the right equipment helps prevent damage to the fasteners and reduces the chance of an unsafe installation.
The tools needed vary with the vehicle. A rear shock may use two accessible mounting bolts, while a front suspension unit may sit behind several components or form part of a strut assembly. Check the service procedure before assuming the repair is simple.
Source: www.stepbystep.com
Vehicle-specific replacement shocks
Choose parts that match the year, make, model, trim, engine, axle, and suspension option. Confirm left-right differences and any required mounting hardware.
Floor jack and jack stands
Use equipment rated for the vehicle’s load and place it only at manufacturer-approved lifting and support points.
Wheel chocks
Block the wheels that remain on the ground to help prevent movement.
Socket set and wrenches
Use the correct sizes to avoid rounding nuts and bolt heads.
Torque wrench
Tighten critical fasteners to the specified torque rather than relying on feel.
Penetrating oil and a wire brush
These may help with corroded hardware, provided the products are used in accordance with the service procedure.
Safety glasses and gloves
Protect your eyes and hands from rust, dirt, sharp edges, and debris.
Vehicle service information
Provides torque values, support locations, removal sequences, replacement requirements, and any model-specific precautions.
Should You Replace Shocks One at a Time or in Pairs?
Replacing shock absorbers in axle pairs is generally recommended because two similarly worn dampers can provide more consistent handling than one new damper paired with one worn unit. If one shock leaks or fails, inspect the shock on the opposite side and follow the vehicle manufacturer’s replacement guidance.
Replacing one shock alone may be appropriate in limited circumstances when the other unit is demonstrably serviceable and the manufacturer permits it. For a road vehicle, replacing both shocks on the same axle is often the more consistent repair.
Front axle
Replace the corresponding left and right shock units or struts as a pair when recommended for the vehicle.
Rear axle
Inspect and, where appropriate, replace both rear shocks to maintain similar damping.
Safety Precautions Before Starting
Never work under a vehicle supported only by a hydraulic jack. A jack can leak, shift, or fail, and a falling vehicle can cause fatal injuries. Use properly rated jack stands on firm, level ground and follow the vehicle manufacturer’s support instructions.
Apply the parking brake, place the transmission in Park or in the appropriate gear, and chock the wheels that remain on the ground. Keep people and pets away from the work area. Allow hot exhaust parts and other heated components to cool before working nearby.
Do not loosen a coil spring, central strut shaft nut, or other spring-retaining hardware unless the exact procedure and proper equipment are available. A compressed suspension spring stores substantial energy and can cause severe injury if it escapes its restraint.
Source: The DIY Workshop
Work on stable ground
Avoid soft soil, sloped driveways, loose gravel, or other surfaces that could let the jack stands sink or shift.
Use approved lifting points
Consult the owner’s manual or service information for the exact jack and stand locations.
Never rely on a wheel or improvised support
Do not substitute bricks, loose wood blocks, or other unsuitable objects for properly rated stands.
Stop when a part is under spring tension
If removal would release a loaded spring or you cannot identify the correct support method, use a qualified suspension shop.
When Is Professional Service the Better Choice?
Choose professional service if the vehicle has seized suspension hardware, severe corrosion, damaged mounting points, a complicated active suspension system, or a strut that requires spring compression. A shop is also the safer option if the vehicle cannot be supported securely or the correct torque specifications are unavailable.
Do not attempt to free a stuck fastener by applying uncontrolled force to a brake line, fuel line, wiring harness, or thin suspension bracket. If a mounting stud spins, a bolt breaks, or the body mounting area appears damaged, stop and assess the repair before continuing.
Spring-loaded struts
Use suitable professional equipment or a compatible complete strut assembly installed according to the service procedure.
Electronic suspension
Follow any required calibration, diagnostic, or system initialization steps.
How to Change Shock Absorbers Step by Step
The following procedure describes a common replacement of separate shock absorbers. Your vehicle’s service information takes priority whenever its instructions differ from this general guide. Some vehicles require additional steps, such as removing interior trim, supporting an axle, disconnecting a suspension link, or replacing specified fasteners.
If the shock is part of a structural strut assembly, do not assume that the steps for a separate shock apply. A strut replacement can require wheel alignment and special precautions for the spring and steering knuckle.
Source: storage.googleapis.com, Jason Weiss blog video thumbnail
Step 1: Confirm the Correct Replacement Parts
Use the vehicle identification number and vehicle-specific parts information to confirm the correct shock absorbers. Compare the mounting style, overall dimensions, bushing arrangement, connector locations, and any electronic features. A part that looks similar may still have the wrong stroke, damping characteristics, or mounting design.
Inspect the replacement parts for shipping damage and confirm that all required bushings, washers, sleeves, and nuts are present. Do not discard reusable hardware until the service instructions confirm which pieces must be replaced.
Match the suspension configuration
Check trim level, load rating, towing package, and any factory sport or heavy-duty suspension option.
Check the included hardware
Compare the supplied parts with the old unit and the manufacturer’s installation instructions.
Step 2: Park and Secure the Vehicle
Park on a level, firm surface. Turn off the engine, engage the parking brake, and place the transmission in Park or the appropriate gear. Chock the wheels that will remain on the ground.
Loosen the wheel lug nuts slightly before lifting the vehicle if wheel removal is required. Do not remove them completely while the tire is still carrying the vehicle’s weight.
Prepare the work area
Keep the floor clear and position the tools so they can be reached without moving around an unstable vehicle.
Step 3: Lift and Support the Vehicle
Raise the vehicle at the specified lifting point with a suitable floor jack. Position rated jack stands at the approved support points and lower the vehicle onto them. Check that the stands sit flat and that the vehicle is stable before removing a wheel or reaching into the suspension area.
Some procedures require the axle or control arm to be supported separately to prevent sudden movement when the shock is removed. Follow the service manual, especially when the suspension is under load or changes position as the fasteners are released.
Verify stability
Do not continue if the vehicle rocks, the stands shift, or the support points appear damaged.
Step 4: Remove the Wheel if Needed
Finish removing the lug nuts and take off the wheel. Place it away from the work area where it cannot roll into the vehicle or interfere with the jack stands.
Some rear shock absorbers can be accessed without removing a wheel, but access varies by vehicle. Removing the wheel can improve visibility and tool access when the service procedure allows it.
Inspect nearby components
Look at the brake hose, wiring, tire clearance, spring, and mounting brackets before loosening the shock.
Step 5: Locate and Inspect the Shock Mounts
Identify the upper and lower shock mounting points. On some vehicles, the upper mount is inside the trunk, behind an interior panel, or beneath an access cover. Remove trim only as instructed and keep track of clips and fasteners.
Check the mounts for corrosion, cracked rubber, distorted brackets, and signs of movement. Photograph the original orientation if the washers, spacers, sleeves, or brackets have a specific order.
Document the hardware order
Record the position and direction of each washer, bushing, sleeve, and spacer before removal.
Step 6: Remove the Old Shock Absorber
Support the suspension component as directed by the service manual. Apply penetrating oil to corroded fasteners if appropriate, keeping it away from brake friction surfaces and any area where contamination would be unsafe. Allow it to work according to its label.
Loosen the lower mounting fastener and then the upper mounting fastener in the sequence specified for the vehicle. Support the shock as the final fastener comes free, since the unit may drop or shift. Remove it carefully without pulling on brake hoses, electrical wires, or other nearby parts.
If the fastener will not move, the mounting stud spins, or the bracket begins to bend, stop. Excessive force can damage the suspension or vehicle body and turn a routine repair into a larger one.
Keep the old hardware organized
Separate reusable fasteners from any parts the manufacturer requires you to replace.
Inspect the removed shock
Check for leakage, a bent rod, damaged bushings, and other evidence that may explain the original symptoms.
Step 7: Compare the Old and New Shock Absorbers
Place the old and new shocks side by side and compare their mounting ends, lengths, bushings, sleeves, and part markings. Small differences may be intentional, but an obvious mismatch is a reason to verify the part number before installation.
Some gas-charged shocks extend on their own when removed from their packaging. That behavior alone does not establish whether a shock is suitable or defective. Follow the manufacturer’s preparation instructions rather than compressing or cycling a new shock unnecessarily.
Check mounting alignment
The bolts and studs should fit the intended mounts without forcing the shock into place.
Verify orientation
Install the unit in the direction and position specified by the manufacturer.
Step 8: Install the New Shock Absorber
Position the new shock in the original mounting location. Install the specified washers, sleeves, bushings, spacers, and fasteners in the correct order. Start threaded fasteners by hand where possible to reduce the risk of cross-threading.
Align the shock with the mounting points without using the bolts to pull a badly misaligned suspension component into place. If the holes do not line up, check the suspension support, component position, part compatibility, and installation sequence.
Tighten the fasteners in the specified sequence and to the vehicle manufacturer’s torque values. Some rubber-bushed suspension joints must be tightened at a defined suspension position to prevent the bushings from being twisted at normal ride height. Follow the exact service instructions rather than applying this rule to every shock design.
Use the specified torque
A torque wrench helps achieve the required clamping force without overtightening or leaving the joint loose.
Replace required fasteners
Use new locking nuts, one-time-use bolts, or other replacement hardware wherever the manufacturer specifies it.
Step 9: Replace the Other Shock on the Same Axle
Repeat the procedure for the opposite shock when replacing the axle pair. Compare the mounting condition on both sides and correct any damaged bushings, brackets, or hardware identified during the work.
If the second side reveals a different suspension design or unexpected damage, reassess the procedure before proceeding. Do not assume that both sides use identical parts or fasteners unless the parts information confirms it.
Maintain consistency
Use compatible shocks and follow the same specified installation procedure on both sides.
Step 10: Reinstall the Wheels and Lower the Vehicle
Reinstall each wheel and hand-start the lug nuts. Tighten them in the sequence specified by the vehicle manufacturer, usually using a crisscross pattern on a typical multi-lug wheel. Lower the vehicle according to the lifting procedure and finish tightening the lug nuts to the specified torque.
Remove tools, support equipment, and wheel chocks only at the appropriate stage. Reinstall any interior panels or covers removed for access, making sure that no wires or trim pieces are trapped.
Torque the lug nuts correctly
Use the specified wheel torque and tightening pattern. Do not rely on an impact wrench as the final torque-setting method.
Step 11: Perform a Final Inspection
Check that all mounting fasteners are installed, all required clips and covers are in place, and no brake hose, sensor wire, or other component is stretched or pinched. Confirm that the shock does not contact the tire or nearby parts through the normal range of suspension movement.
If the manufacturer specifies a post-installation scan, calibration, or alignment check, complete it before returning the vehicle to normal use. A separate rear shock replacement may not require a wheel alignment, but replacing a strut or disturbing alignment-related components often does.
Check for loose hardware
Review every fastener disturbed during the repair against the service procedure.
Check for leaks and damage
Inspect nearby fluid lines, wiring, boots, mounts, and suspension components.
How to Change Rear Shock Absorbers
Rear shock replacement is often simpler when the shocks are mounted separately from the springs. Many vehicles provide access to the upper and lower mounting bolts without removing major suspension components, although some require interior trim removal or special support procedures.
Start by identifying the upper mount and lower attachment. Support the suspension as directed, remove the mounting hardware, and take out the old shock. Install the replacement in the correct orientation and tighten all fasteners to the specified torque.
On trucks and SUVs, the suspension may use leaf springs, coil springs, or other arrangements. Heavy-duty and lifted vehicles can also have different shock lengths and travel requirements. Use parts designed for the actual suspension configuration rather than choosing a shock based only on the vehicle’s make and model.
Source: YouTube, crackover
Check the mounting bushings
Replace damaged or excessively worn bushings when required by the manufacturer’s procedure.
Watch for load-related differences
Towing packages, payload ratings, and suspension modifications can affect replacement-part compatibility.
Support the axle correctly
Removing a shock can change suspension movement, so follow the specified support procedure.
Can You Change Rear Shocks Without Removing the Wheels?
Yes, on some vehicles the rear shocks are accessible with the wheels installed. However, available space and the required support procedure vary. Removing the wheels may make it easier to inspect the mounts and work with the correct tools.
Do not choose the method solely to save time. Use the access method specified in the service information and make sure the vehicle is supported securely throughout the repair.
Wheel removal is optional only when permitted
If the mounting hardware is accessible and the procedure allows the wheel to remain installed, wheel removal may not be necessary.
How to Change Front Shock Absorbers
Front suspension repairs require extra care because the front wheels also steer and the suspension may support vehicle weight through a strut assembly. First determine whether the vehicle uses a separate front shock or a complete strut. The removal method, required tools, and alignment needs depend on that distinction.
If the front shock is separate from the coil spring, replacement may resemble the rear-shock procedure. If the damper is part of a strut, the service procedure may require removing steering or suspension attachments and controlling the spring’s stored energy.
Do not loosen the large central shaft nut on a spring-loaded strut unless the manufacturer’s procedure and appropriate spring-compression equipment are being used. The spring can release forcefully and cause severe injury.
Source: www.stepbystep.com
Confirm the suspension type
Use vehicle-specific service information to determine whether the shock is separate or integrated into a strut.
Protect steering and brake components
Avoid stretching brake hoses, ABS sensor wiring, and other connections when moving suspension parts.
Check alignment requirements
A strut replacement or movement of alignment-related fasteners may require a wheel alignment.
Should You Replace the Strut or Just the Shock?
If the vehicle uses a separate shock, replace that unit when it fails and inspect its mounts and surrounding components. If the vehicle uses a strut, the repair may involve replacing the damper within the existing assembly or fitting a complete strut assembly.
Replacing a complete assembly can reduce the amount of spring disassembly when a compatible, properly assembled unit is available. However, the replacement must match the vehicle, and associated components such as the spring, mount, bearing, and fasteners still need inspection.
Replace individual components when appropriate
This can be suitable when the remaining strut components are serviceable and the required spring-handling equipment is available.
Consider a complete assembly
This may simplify installation, but it does not remove the need for correct vehicle support, fastener torque, and post-repair checks.
Common Mistakes When Replacing Shock Absorbers
Most avoidable problems come from using the wrong parts, supporting the vehicle incorrectly, damaging fasteners, or tightening components without following the service procedure. A shock can appear to fit and still be unsuitable for the vehicle.
Take time to compare the old and new components, organize the hardware, and verify torque values before starting. If the repair does not proceed as expected, stopping to identify the cause is safer than forcing the parts together.
Using the wrong shock
Incorrect dimensions or mounting styles can cause poor fit, restricted suspension travel, or contact with nearby parts.
Working under a jack-supported vehicle
A hydraulic jack is a lifting device, not a substitute for rated jack stands.
Ignoring worn mounts
Damaged mounts or bushings can cause noise and allow unwanted movement even after a new shock is installed.
Guessing torque values
Under-tightened fasteners can loosen, while overtightened fasteners can damage threads, bushings, or mounting hardware.
Forcing misaligned bolts
Misalignment can indicate incorrect parts, a shifted suspension component, or a need for the specified support procedure.
Skipping the opposite-side inspection
The other shock may have similar wear and can affect how evenly the vehicle responds.
Assuming every noise is a bad shock
Other worn suspension or chassis parts can create similar symptoms and need separate diagnosis.
What If the Shock Absorber Will Not Line Up?
Do not use a mounting bolt to drag the shock into position when the holes are far out of alignment. Check that the correct part was supplied, the suspension is supported at the required point, and the mounting hardware is in the correct order.
If the shock is the correct part but the holes still will not align, review the manufacturer’s installation sequence. A suspension arm may need controlled repositioning with suitable equipment. Stop if the part appears bent, a mount has shifted, or alignment requires force you cannot safely control.
Recheck part numbers
Confirm the exact vehicle application and any left-right or package differences.
Recheck suspension position
Use the service procedure to establish the required position before attempting installation again.
How to Check the Vehicle After Replacement
A successful installation means more than fitting a new shock. All fasteners must be secure, the suspension must move without binding, and the vehicle must behave normally during a cautious road check.
Before driving, inspect the work area for missing hardware, loose tools, damaged wiring, or components touching the tire. Confirm that the wheels are installed correctly and that the lug nuts have been torqued to the manufacturer’s specification.
Begin with a slow check in a safe area. Listen for knocking or rubbing and pay attention to steering response, ride height, and unusual movement. Do not drive at highway speed to test a repair that makes noise, feels unstable, or has an unresolved warning light.
No loose or missing hardware
All disturbed fasteners and required clips are installed and tightened correctly.
No unusual noise
There is no new knocking, scraping, or rattling over small road imperfections.
Normal suspension response
The vehicle feels controlled and does not show obvious new instability or binding.
No warning lights or fault codes
Any suspension or chassis warning related to the repair is diagnosed rather than ignored.
Do New Shock Absorbers Need a Break-In Period?
Most conventional replacement shocks do not require a special break-in procedure unless the manufacturer specifies one. Follow the installation instructions for the exact part, including any required preparation before fitting.
A new shock should not produce persistent knocking, binding, or contact with nearby components. If the ride feels different, check the installation and consider whether the old shocks had masked other suspension problems.
Follow the part maker’s instructions
Preparation and handling requirements can vary by shock design.
Do You Need a Wheel Alignment After Changing Shocks?
Replacing separate shock absorbers often does not change wheel alignment when no alignment-related components or settings are disturbed. However, replacing a strut, moving the steering knuckle, or loosening specified alignment fasteners can affect alignment.
Check the service manual and obtain an alignment when required. If the steering wheel is off-center or the vehicle pulls after the repair, have the alignment and other possible causes inspected.
Separate shock replacement
Alignment may not be necessary if the repair does not alter alignment-related geometry.
Strut replacement
Alignment is commonly checked because related mounting points can affect wheel geometry.
How Much Does It Cost to Change Shock Absorbers?
The cost to replace shock absorbers depends on the vehicle, parts, labor time, suspension design, local labor rates, and the condition of the mounting hardware. A simple rear-shock replacement generally involves less work than replacing spring-loaded front struts or repairing corroded suspension mounts.
Because parts prices and labor rates vary across the United States, a single nationwide price would be misleading without a defined vehicle and service scope. Request an estimate that separates parts, labor, alignment, taxes, and any additional repairs.
A do-it-yourself repair may reduce labor expense when the job is straightforward and the necessary tools are already available. The savings can shrink if you need to buy lifting equipment, replace seized fasteners, rent specialized tools, or correct an installation problem.
Parts
The price depends on the shock design, vehicle application, quality, and whether mounts or hardware are included.
Labor
Accessibility, corrosion, trim removal, and suspension complexity affect the time required.
Alignment
This may be an additional expense when a strut or alignment-related component is replaced.
Related repairs
Worn mounts, broken springs, damaged brackets, and other faults can add to the total.
Is It Cheaper to Replace Shocks Yourself?
Doing the work yourself can save labor charges if you have the right equipment and the repair is within your skill level. However, safe vehicle lifting, a torque wrench, replacement hardware, and special tools may add to the initial cost.
For spring-loaded struts, advanced suspension systems, or heavily corroded vehicles, professional service may offer better value by reducing the risk of injury and installation errors. Compare the complete cost, not just the price of the replacement part.
DIY repair
Best suited to a well-documented procedure that can be completed with the available tools and safe working conditions.
Professional repair
Worth considering when specialized equipment, alignment, electronic calibration, or additional diagnosis is required.
How Long Does Shock Absorber Replacement Take?
Replacement time depends on the vehicle’s design, the accessibility of the mounts, and the condition of the hardware. A straightforward pair of separate rear shocks may take much less time than front struts that require spring handling or additional suspension disassembly.
A first-time DIY mechanic should allow extra time to read the service procedure, prepare the vehicle, verify the parts, and inspect the installation. Rusted bolts, damaged mounts, or missing hardware can extend the job substantially.
Do not rush the work to meet a time estimate. A secure vehicle, correct fastener torque, and a careful final inspection matter more than finishing quickly.
Simple separate shocks
May be a relatively short job when access is clear and the hardware is in good condition.
Strut replacement
Can require additional disassembly, spring-handling equipment, and an alignment check.
Severe corrosion
May require additional labor or replacement mounting hardware.
Research Scope and Reader Question Gap Map
This guide is organized around the main task of replacing vehicle shock absorbers, with separate coverage for preparation, removal, installation, safety, and post-repair checks. The added detail focuses on decisions that can change the procedure, especially the distinction between separate shocks and spring-loaded struts.
The following reader questions are inferred from the repair process rather than presented as verified search-volume findings. Their relevance comes from practical decisions a reader must make before, during, and after replacement. No live search demand, ranking position, or competitor coverage result is claimed here.
Question: Can I replace shocks without removing the wheels?
Stage: Before starting. Basis: Inferred next need. Coverage in this guide: Answered conditionally. Benefit: Helps the reader plan access without compromising safe support. Evidence needed for a specific vehicle: Factory service instructions.
Question: Should I replace both shocks at once?
Stage: Parts selection. Basis: Inferred next need. Coverage in this guide: Answered with a pair-replacement recommendation and qualifications. Benefit: Supports consistent damping across an axle. Evidence needed for exceptions: Vehicle manufacturer’s replacement guidance and inspection findings.
Question: Do I need an alignment after replacement?
Stage: After installation. Basis: Inferred next need. Coverage in this guide: Answered by distinguishing separate shocks from struts. Benefit: Helps avoid unnecessary service while identifying repairs that may change alignment. Evidence needed for a specific model: Factory alignment procedure.
Question: What if the shock mounting holes do not line up?
Stage: Installation. Basis: Inferred next need. Coverage in this guide: Answered with checks for fit, suspension position, and damage. Benefit: Prevents forcing fasteners into a misaligned joint. Evidence needed for the next step: The vehicle-specific installation sequence.
Question: Can I safely replace a spring-loaded strut at home?
Stage: Before starting. Basis: Inferred next need. Coverage in this guide: Answered with clear safety limits. Benefit: Helps readers identify when spring-compression equipment or professional service is needed. Evidence needed for a specific setup: The manufacturer’s spring-handling procedure and suitable equipment.
Frequently Asked Questions
Q
Can I change shock absorbers myself?
Yes, many separate shock absorbers can be replaced at home if you have suitable tools, a safe lifting setup, and the correct service information. The difficulty depends on access, corrosion, and the suspension design. Spring-loaded struts or complicated electronic suspension systems may require specialized equipment or professional service.
Q
Should I replace all four shock absorbers at once?
Not always. Replacing shocks in axle pairs is generally recommended to maintain consistent damping between the left and right wheels. If all four shocks are worn, replacing all four may be appropriate. Inspect the entire suspension and follow the manufacturer’s guidance before deciding.
Q
Can I drive with bad shock absorbers?
Driving with worn shocks can reduce ride control and affect tire contact, braking stability, and handling. If the vehicle is severely unstable, a shock is detached, a mount is damaged, a tire contacts another component, or a related suspension part is broken, do not continue driving. Arrange a professional inspection or towing when necessary.
Q
Do new shock absorbers make a car ride smoother?
Replacing worn shocks can improve control and reduce excessive bouncing. The ride may feel more settled, but the result depends on the replacement design, spring condition, tires, bushings, and other suspension components. A new shock will not correct every cause of a harsh ride.
Q
Do shock absorbers need to be compressed before installation?
Some replacement shocks extend when removed from their packaging, while others have specific preparation instructions. Follow the manufacturer’s guidance for the exact unit. Do not force, clamp, or repeatedly compress a shock unless the instructions allow it, and never treat shock preparation as the same task as safely compressing a loaded coil spring.
Q
Do I need to replace shock mounts with the shocks?
Inspect the mounts and bushings whenever a shock is removed. Replace parts that are damaged, excessively worn, corroded, or specified for replacement by the manufacturer. A serviceable mount does not always need replacement, but a worn mount can cause noise and reduce the benefit of a new shock.
Q
What happens if I overtighten shock absorber bolts?
Overtightening can damage threads, distort hardware, harm bushings, or create other installation problems. Under-tightening can allow fasteners to loosen. Use the exact torque values and tightening sequence provided for your vehicle, and replace one-time-use fasteners when required.
Q
Will changing shock absorbers stop uneven tire wear?
New shocks may help when poor damping contributes to irregular tire wear, but they cannot reverse wear that has already occurred. Tire pressure, balance, alignment, wheel condition, and worn suspension parts can also cause uneven wear. Inspect the tires and correct the underlying cause rather than assuming shocks are the only problem.
✦ Wrapping Up
Conclusion
Changing shock absorbers can restore suspension control when the old units are worn, leaking, or damaged. The key steps are to identify the correct parts, secure the vehicle, remove the old shocks without disturbing other components unnecessarily, install the replacements correctly, and verify every fastener before driving.
The most important decision comes before the first bolt is loosened: determine whether your vehicle uses separate shocks or spring-loaded struts. Separate shocks may be suitable for a careful DIY repair, while struts and complex suspension systems can require specialized equipment, additional alignment work, or professional service.
Use vehicle-specific torque specifications, replace required hardware, and inspect mounts, springs, tires, and nearby components. If the parts do not fit, the mounting holes will not align, or the vehicle feels unstable after installation, stop driving and have the repair checked.
💡 Key Takeaway
Before buying parts, identify your exact vehicle and suspension type, obtain the factory replacement procedure and torque specifications, and confirm that you have the tools and safe support equipment needed for the job.
Eric
Hi, I’m Eric Bennett, the person behind OffRoadTruckAccessories.com.
I created this blog to share my interest in trucks, off-road driving, automotive accessories, and DIY modifications. I enjoy learning how different truck accessories work, testing their usefulness, and understanding whether they are truly worth buying.
Shock absorbers are located near the wheels as part of the suspension system, usually between the vehicle’s body, frame, or subframe and a suspension component such as a control arm, axle, or wheel assembly. However, the exact answer to where are shock absorbers located on a car depends on the suspension design. Some vehicles have…
You should change shock absorbers when they are worn, leaking, damaged, or no longer controlling suspension movement properly. There is no single replacement interval that applies to every vehicle because shock absorber life depends on road conditions, vehicle weight, driving habits, suspension design, and component quality. If you are wondering when to change shock absorbers,…
A shock absorber is a suspension component that controls how quickly a vehicle’s suspension moves up and down after bumps, dips, braking, acceleration, and other road inputs. It works with the springs to prevent excessive bouncing and helps keep the tires in controlled contact with the road. So, what does a shock absorber do? It…
A gas shock absorber is a hydraulic shock absorber that uses pressurized gas, usually nitrogen, along with shock absorber oil to control suspension movement. The gas helps reduce oil foaming and keeps damping performance more consistent when the shock works repeatedly or under demanding conditions. If you are wondering what is a gas shock absorber,…