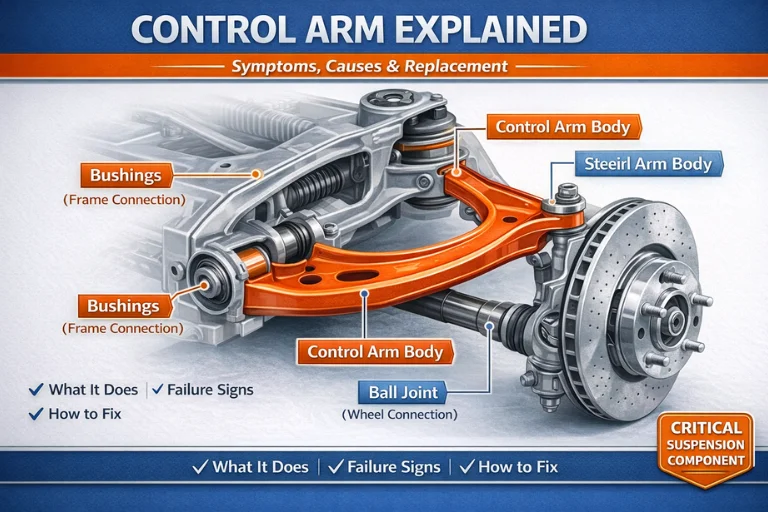
To change rear shock absorbers, park on level ground, secure the vehicle, raise and support the rear with properly rated jack stands, remove the wheels if needed, support the suspension as required, remove the old shocks, install compatible replacements, tighten all fasteners to the vehicle manufacturer’s specifications, and check the repair before driving.
Rear shock absorbers help control how a vehicle moves after bumps, dips, and turns. On American roads, worn shocks can make a car, SUV, or pickup feel loose on rough pavement, cause repeated bouncing, and reduce tire contact with the road. Replacing worn shocks can restore proper suspension control when the shocks are the source of the problem.
Many rear shock absorbers are easier to replace than complete strut assemblies. A typical shock bolts between the vehicle body or frame and a suspension component, often with one upper mount and one lower mount. However, the exact process varies by vehicle, suspension design, corrosion, and available access.
Before starting, confirm the correct replacement part and read the repair instructions for your exact year, make, model, and suspension package. Some vehicles use separate rear shocks and coil springs, while others use struts or different suspension arrangements. This guide covers conventional rear shock replacement and explains when a job needs additional tools or professional service.
Rear shock absorbers control suspension movement by resisting the rapid compression and extension of the suspension. When a tire rolls over a pothole, the spring compresses and then releases energy. The shock damps that motion so the vehicle does not continue bouncing.
Shock absorbers also help keep the tires in contact with the road. Proper tire contact supports steering stability, braking, and predictable handling. A worn shock may not directly cause every handling problem, but poor damping can make the vehicle harder to control on uneven surfaces.
A shock absorber is not always the part that holds up the vehicle’s weight. On many cars and trucks with separate rear shocks and coil springs, the springs carry most of the static load while the shocks control movement. Other designs combine spring and damping functions in a strut assembly, so identifying the suspension type matters before ordering parts.
Source: hitchesguide.com
Shock absorber
Controls suspension motion by converting movement energy into heat through internal damping mechanisms.
Suspension spring
Supports vehicle weight and compresses when the wheels move over bumps. It may be a coil spring, leaf spring, or another design.
Shock mount and bushing
Connect the shock to the body, frame, axle, or suspension. Worn or damaged mounts can cause noise and poor control even when the shock itself is functional.
Rear Shocks Versus Rear Struts
A conventional rear shock is usually a separate damping unit with mounting points at both ends. A rear strut is a structural suspension component and may incorporate a spring seat and other suspension functions. Replacing a strut can require different procedures and specialized spring-compression equipment.
Do not assume that every vehicle has separate rear shocks simply because a parts catalog lists a shock absorber. Check the service manual or a reliable parts catalog using the vehicle identification number when fitment is uncertain.
Separate shocks
Often suitable for a straightforward bolt-on replacement when the mounting hardware is accessible and the suspension design allows safe removal.
Strut assemblies
May require additional suspension work, alignment checks, and specialized tools. Follow the model-specific procedure.
Signs Your Rear Shock Absorbers Need Replacement
Look for a combination of symptoms rather than relying on one sign alone. Worn shocks may cause repeated bouncing after a bump, increased body movement in turns, a loose or unsettled ride, or uneven tire wear. These symptoms can also come from other suspension, tire, or alignment problems.
Inspect the shocks for signs of damage. A bent shock body, damaged mounting eye, torn mounting bushing, or substantial oil leakage can indicate a problem. A light film of fluid on some shock bodies may not mean the shock has failed, so compare the condition with the manufacturer’s inspection guidance.
Clunking from the rear suspension may come from a loose shock mount, worn bushing, broken spring, exhaust contact, or another component. Diagnose the noise before ordering parts. Replacing shocks without checking the surrounding suspension can leave the original problem unresolved.
Source: storage.googleapis.com
Repeated bouncing
The rear of the vehicle continues moving after a bump instead of settling promptly.
Oil leakage or physical damage
A damaged shock body, clear leakage, or a broken mounting point may indicate that replacement is needed.
Poor stability
The vehicle may feel unsettled over dips or rough roads, although tires, springs, and other parts must also be checked.
Abnormal tire wear
Cupping or scalloped wear can be associated with poor damping, but tire balance, alignment, and other suspension faults can produce similar patterns.
Can You Drive With Bad Rear Shocks?
A vehicle with worn shocks may still move, but its handling and tire contact can be compromised. The risk can become more serious during emergency braking, quick lane changes, or travel over rough roads, especially when the vehicle is heavily loaded.
Do not continue driving if a shock has detached, a mounting point has broken, a spring is displaced, a tire is contacting the body, or the vehicle feels unstable. Arrange professional inspection or towing as appropriate.
Minor suspected wear
Arrange an inspection soon and avoid aggressive driving until the condition is understood.
Broken mount or severe instability
Stop driving and arrange safe recovery rather than risking further suspension damage.
Tools and Materials Needed to Change Rear Shocks
Gather the correct tools before raising the vehicle. The fastener sizes, required extensions, access points, and lifting procedure depend on the vehicle. A repair manual can identify the correct jack points, torque values, and any parts that must be removed for access.
Use equipment rated for the vehicle’s weight and the lifting points specified by the manufacturer. A floor jack is for lifting, not for supporting a vehicle while you work underneath it. Use properly rated jack stands on a firm, level surface, and chock the wheels that remain on the ground.
Penetrating oil may help with corroded hardware, but it does not make a damaged fastener safe to reuse. A torque wrench is needed for final tightening, and replacement mounting hardware may be required if the manufacturer specifies one-time-use fasteners.
Source: www.stepbystep.com
Lifting and safety equipment
A suitable floor jack, correctly rated jack stands, wheel chocks, safety glasses, and gloves.
Hand tools
Metric or SAE sockets and wrenches that fit the vehicle’s fasteners, ratchet, suitable extensions, and breaker bar.
Installation tools
A calibrated torque wrench, suitable replacement hardware, and any manufacturer-specified tools.
Replacement parts
A compatible pair of rear shocks and any required upper mounts, bushings, sleeves, washers, or nuts.
Optional supplies
Penetrating oil, a work light, a wire brush for suitable external fasteners, and a parts tray.
How to Choose the Correct Replacement Shocks
Use the year, make, model, engine, drivetrain, body style, and suspension package to identify compatible parts. Some vehicles have different shocks for standard suspension, towing packages, off-road packages, or heavy-duty configurations.
Compare the mounting design, extended and compressed lengths where specified, and the manufacturer’s fitment information. Do not choose a shock based only on appearance or an approximate length. A wrong part may not fit correctly or may limit suspension travel.
For ordinary road use, select a replacement that matches the vehicle’s intended suspension setup. Modified ride height, larger tires, added cargo weight, or towing use can change the requirements and may call for specialist advice.
Check fitment
Verify the part number against a trusted catalog or the vehicle identification number.
Inspect included hardware
Confirm whether the replacement includes new bushings, sleeves, washers, nuts, or mounting brackets.
Plan for axle pairs
Replace both rear shocks with compatible units so damping remains consistent from side to side.
Safety Precautions Before Starting
Park on firm, level ground away from traffic. Set the parking brake if appropriate for the lifting procedure, switch off the engine, remove the key, and chock the wheels that remain on the ground. If the vehicle has an electronic parking brake or a special service mode, follow the owner’s manual.
Before loosening suspension hardware, consult the service procedure to determine whether the axle or suspension arm needs separate support. Removing a shock can allow the suspension to move, particularly on some solid-axle vehicles. Never place your hands or body where a moving suspension part could trap them.
Do not work under a vehicle supported only by a hydraulic jack. Confirm that the jack stands sit at approved support points and that the vehicle is stable before going underneath. If the ground is soft, sloped, or uneven, move the job to a suitable location or have a shop perform it.
Source: club.autodoc.co.uk
Never work beneath an unsupported vehicle
Use the manufacturer’s approved lifting and support points, and verify stability before removing fasteners.
Avoid spring hazards
Do not loosen spring seats or disassemble a strut unless you have the correct procedure and suitable equipment.
Control suspension movement
Support the axle or suspension arm when the service procedure requires it, without lifting the vehicle off its stands.
Treat corroded hardware carefully
Stop if a bolt is badly seized, a bracket begins to bend, or a mounting point appears cracked.
When to Stop and Use a Professional Mechanic
Seek professional help if the vehicle has a damaged frame or suspension mount, a severely rusted mounting area, a broken spring, or a shock integrated into a strut assembly that you cannot safely service. The same applies if the required fasteners cannot be removed without damaging the mounting points.
A shop is also a sensible choice when the vehicle has adaptive dampers, electronic suspension controls, modified suspension geometry, or unusual lifting requirements. The cost of a correct repair is often lower than the consequences of a failed mount or incorrect installation.
Structural corrosion
Do not install a new shock onto a mount that is cracked, perforated, or too corroded to hold the specified load.
Special suspension systems
Use model-specific service information for electronic, self-leveling, or other specialized suspension systems.
How to Change Rear Shock Absorbers Step by Step
The general process below applies to many vehicles with separate rear shock absorbers. The exact bolt locations, access method, lifting procedure, and tightening specifications can differ. Follow the service manual whenever it differs from this general guide.
Some vehicles allow shock replacement without removing the rear wheels. Others need wheel removal to reach the lower mounting bolt or upper mount. Use the method that provides safe access without putting strain on brake hoses, wiring, or other suspension components.
Source: www.youtube.com > TRQ
Step 1: Park and Prepare the Vehicle
Park the vehicle on level, solid ground and follow the manufacturer’s instructions for parking-brake use. Switch off the engine, remove the key, and place wheel chocks securely at the wheels that will remain on the ground.
Review the replacement shock instructions and the vehicle repair manual. Identify the upper and lower mounting points, locate the approved lifting points, and check whether any interior trim, cargo panels, or wheelhouse liners must be removed to reach the upper fastener.
Confirm the parts
Compare each replacement shock with the original design and verify left-right compatibility where relevant.
Locate the specifications
Record the required torque values, fastener replacement rules, and any specified tightening position.
Step 2: Loosen the Wheel Fasteners if Needed
If the rear wheels must be removed, slightly loosen the wheel fasteners while the tires remain on the ground. Do not remove them completely at this stage. Use the correct socket and avoid tools that can damage the fastener heads.
If the shocks are accessible with the wheels installed, do not remove the wheels without a reason. Keeping them installed may reduce work, but only if you can reach the mounting points safely and follow the correct procedure.
Avoid excessive force
If a wheel fastener is stuck or damaged, stop and use the correct removal method rather than rounding it.
Step 3: Raise and Secure the Rear of the Vehicle
Use a suitable floor jack at the approved lifting point. Raise the vehicle only high enough to position the jack stands correctly. Lower the vehicle onto the stands and verify that the support is stable before approaching the underside.
If wheel removal is required, remove the wheel after the vehicle is safely supported. Keep the removed wheel and tools out of the work area. Never rely on a jack alone, and do not place a jack stand under a component that the manufacturer does not approve as a support point.
If the service procedure calls for supporting the rear axle or a suspension arm, position the additional support as directed. The support should control movement rather than lift the vehicle away from its main stands.
Check stability
Confirm that the stands are properly seated and the vehicle cannot roll or shift before removing suspension parts.
Keep a clear work area
Keep your body out from under any component that could drop or move unexpectedly.
Step 4: Locate the Upper and Lower Shock Mounts
Trace the shock from its upper attachment to its lower attachment. The upper mount may be on the frame, body, or a bracket and may be reached from beneath the vehicle, through the cargo area, or behind interior trim.
Look for corrosion, cracked brackets, worn rubber bushings, missing hardware, and signs that the shock has been leaking. Take a photo of the original arrangement if washers, spacers, sleeves, or bushings are installed in a particular order.
If the upper mount is hidden behind interior trim, remove only the required panels using the proper procedure. Avoid pulling trim sharply or damaging clips, wiring, or nearby components.
Document the arrangement
Note the orientation and order of washers, bushings, sleeves, and brackets before removing the old shock.
Inspect nearby parts
Check the brake hoses, ABS wiring, springs, and suspension arms for damage or interference.
Step 5: Apply Penetrating Oil to Corroded Fasteners
If the mounting nuts or bolts are corroded, apply a suitable penetrating oil to the exposed threads and allow it to work according to the product directions. Keep sprays away from brake friction surfaces, tires, and other parts that must remain free of contamination.
Use the correct socket or wrench to loosen the hardware. Hold the opposite side with a second wrench when the design requires it. If a fastener spins, bends, or begins damaging its bracket, stop and reassess the removal method.
Do not force damaged hardware
A rounded bolt, broken stud, or seized mounting sleeve may require specialist tools or replacement of related components.
Step 6: Remove the Old Rear Shock Absorber
Follow the manufacturer’s specified removal order. On some vehicles, it is practical to loosen the upper mount first and then remove the lower fastener while supporting the shock. Other designs require a different sequence or support arrangement.
Keep the shock supported as the final fastener comes free. It may move suddenly or drop, even if it is relatively light. Do not allow the shock to hang from wiring, brake hoses, or other parts.
Remove the shock from its mounting position without levering against a brake line or damaging the bracket. If the shock is trapped because the suspension is loaded, stop and adjust the support according to the repair procedure rather than forcing it out.
Keep track of the hardware
Set reusable fasteners aside only if the manufacturer permits reuse, and retain the original arrangement as a reference.
Avoid unrelated disassembly
Do not remove springs, control arms, or structural suspension parts unless the documented procedure requires it.
Step 7: Inspect the Mounts and Compare the Replacement
With the old shock removed, inspect the upper and lower mounts for cracks, distortion, corrosion, and worn bushings. Check the mounting bolts and threads for damage. A new shock cannot correct a weak bracket or a badly worn mount.
Compare the old and new units side by side. Check the mounting style, overall dimensions, mounting-eye width, stud design, bushing arrangement, and any part-specific orientation marks. Small differences can be normal, but the part must match the verified application.
If the replacement uses separate bushings, sleeves, or washers, install them in the order specified by the shock manufacturer. Do not add extra washers or omit supplied components to make the part fit.
Replace damaged mounts
Repair or replace a damaged mounting bracket or specified mount before completing shock installation.
Check the suspension spring
Look for a broken coil, displaced spring, damaged leaf spring, or other visible fault that may need separate repair.
Step 8: Install the New Rear Shock
Position the new shock in the correct orientation and guide its mounting points into place. Some shocks need slight compression by hand to align the holes, while others require a particular position or procedure. Never use an unsafe improvised method to compress a shock or force its mounting points into alignment.
Start the mounting fasteners by hand where possible. This helps prevent cross-threading. Fit the correct bushings, sleeves, washers, and nuts in the specified order, and ensure the shock sits squarely in the mounts.
Do not fully tighten every fastener immediately unless the service procedure calls for it. Some suspension bushings must be tightened with the suspension at a specified ride-height position to avoid unwanted preload. Follow the exact instructions for the vehicle and mounting design.
Match the original orientation
Follow any arrows, labels, or mounting directions provided by the manufacturer.
Start threads carefully
If a fastener will not thread smoothly, stop and check alignment, thread condition, and hardware compatibility.
Use specified hardware
Replace single-use nuts, bolts, or locking hardware whenever the service information requires it.
Step 9: Tighten the Mounting Fasteners to Specification
Use a calibrated torque wrench to tighten the upper and lower mounting fasteners to the specifications for the exact vehicle and shock assembly. Torque values vary by model, fastener size, mount design, and whether the threads or mating surfaces have special requirements.
Do not use a generic torque figure from another vehicle. Excessive torque can damage threads, crush bushings, or distort a bracket, while insufficient torque can allow movement or loosening. Follow the specified tightening sequence and ride-height condition where applicable.
If a fastener is specified for replacement, do not reuse it merely because it looks undamaged. If the manufacturer calls for a torque-plus-angle procedure or special hardware, use that procedure rather than a standard torque value alone.
Verify each fastener
Check the upper and lower mounts separately and confirm that all required hardware is installed.
Do not guess
If the torque value or tightening condition cannot be confirmed, pause the repair until reliable service information is available.
Step 10: Replace the Other Rear Shock
Repeat the process on the other side of the rear axle. Replacing both shocks as a pair helps maintain balanced damping when one shock has worn significantly more than the other.
The second side may have different access restrictions or mounting hardware. Do not assume that every detail is identical, especially on vehicles with different brackets, separate electronic components, or modified suspension systems.
Inspect both sides before lowering the vehicle. Compare the mounting arrangement, confirm that the shocks are correctly seated, and make sure no tool or loose component remains near the suspension.
Replace shocks in pairs
Use a matched, compatible pair for the same axle unless model-specific instructions or a documented repair circumstance indicate otherwise.
Step 11: Reinstall the Wheels and Lower the Vehicle
If you removed the wheels, reinstall them and start the wheel fasteners by hand. Tighten them in the correct sequence to the vehicle manufacturer’s specified wheel-fastener torque. Do not use the shock mounting torque specification for the wheels.
Raise the vehicle enough to remove the jack stands safely, then lower it using the correct lifting point and procedure. Remove the wheel chocks only when the vehicle is safely on the ground and no further lifting is required.
If interior trim was removed to reach an upper mount, reinstall the panels and clips carefully. Check that the cargo area, wheelhouse liners, and any removed protective covers are secured.
Follow the wheel tightening pattern
Use the specified pattern and torque for the wheel and fastener type.
Check for interference
Confirm that hoses, wires, liners, and nearby components are not trapped or rubbing against the new shocks.
How to Check the Repair Before Driving
Before driving, inspect both sides of the rear suspension with the vehicle safely on the ground. Confirm that the upper and lower mounts are secure, all required hardware is present, and no tools remain in the work area. Check the wheel fasteners and make sure all removed trim or protective panels have been reinstalled.
Look for signs of incorrect fitment. The shocks should not contact tires, brake lines, wiring, exhaust components, or body panels throughout the suspension’s normal movement. Do not crawl beneath an unsupported vehicle to perform this inspection.
A cautious road test can help reveal installation problems, but it does not replace a visual inspection or correct torque procedure. Start at low speed in a safe area, listen for unusual noises, and check whether the rear suspension settles normally after small road irregularities.
Source: www.youtube.com > TRQ
No new clunks or knocks
New noises can point to loose fasteners, incorrect bushing placement, damaged mounts, or another suspension problem.
Stable rear suspension
The vehicle should not show obvious uncontrolled bouncing or new instability. Remaining symptoms may have another cause.
No interference
Check for rubbing, pinched wiring, stretched brake hoses, or components contacting the shock.
No warning lights
If the vehicle has electronically controlled suspension, follow the manufacturer’s diagnostic and calibration requirements.
What If the Vehicle Still Bounces After Replacing the Shocks?
If excessive bouncing remains, first verify that the replacement shocks are correct and installed properly. Then inspect the springs, mounts, bushings, tires, and other suspension components. A broken spring or damaged mount can continue to cause poor ride quality even with new shocks.
Check whether the symptoms were present before the repair and whether they have changed. A shock replacement will not fix an alignment problem, tire defect, worn suspension joint, or incorrect tire pressure. Persistent instability deserves a full suspension inspection.
If the new shocks leak, make noise, or behave differently from what the manufacturer describes, verify the installation and contact the parts supplier or vehicle service professional. Do not assume that every new shock is defective or that every remaining symptom is normal.
Check fitment and installation
Verify part numbers, mount orientation, bushing placement, and the specified tightening procedure.
Inspect related suspension parts
Look for broken springs, damaged mounts, worn joints, loose hardware, and tire problems.
Stop if handling is unsafe
Avoid further driving when the vehicle remains unstable, a mount is loose, or a component is contacting a tire.
Common Rear Shock Replacement Mistakes to Avoid
Most avoidable problems come from incorrect fitment, poor support, rushed fastener removal, or tightening parts without checking the service procedure. A careful inspection before disassembly can prevent extra work and reduce the chance of damaging suspension components.
Treat every mounting point as part of a load-bearing system. A bolt that appears tight may still be incorrect, and a new shock cannot compensate for a cracked bracket or a worn bushing. The goal is to restore the intended suspension function, not merely to fit a new part.
Source: club.autodoc.co.uk
Supporting the vehicle with a jack alone
A hydraulic jack can shift or fail. Always use suitable jack stands at approved support points before working underneath the vehicle.
Replacing only one shock without a reason
A mismatched pair can produce uneven damping. Replace both rear shocks together in ordinary circumstances.
Using the wrong replacement part
A shock with the wrong mounting design, length, or damping specification can fit poorly or limit suspension movement.
Guessing torque values
Incorrect tightening can damage hardware or allow a mount to loosen. Use the exact service specification.
Overlooking damaged mounts
A cracked bracket or worn bushing can cause noise and poor control even after the shock is replaced.
Tightening bushings in the wrong position
Some bonded rubber bushings require tightening at a specified suspension position to prevent unwanted preload.
Ignoring the other side
Inspect both rear corners and check springs, tires, hoses, wiring, and mounting points for related faults.
Driving before the final inspection
Loose fasteners, missing washers, and trapped wiring should be corrected before the vehicle returns to the road.
Do New Rear Shocks Need an Alignment?
Replacing separate rear shock absorbers alone does not usually change wheel alignment because the shocks generally do not set the wheel’s alignment angles. However, the answer depends on the suspension design and the parts removed during the repair.
An alignment check may be needed if the job involved adjustable suspension links, eccentric bolts, a strut or other structural component, or if tire wear and handling problems were already present. Follow the vehicle manufacturer’s service guidance rather than assuming every shock replacement requires an alignment.
Separate bolt-on shocks
An alignment is often unnecessary if no alignment-setting components were disturbed and the vehicle has no related symptoms.
Structural or adjustable components
Check alignment requirements whenever the repair changes or disturbs components that locate the wheel.
How Long Does Rear Shock Replacement Take?
The time required depends on the vehicle design, access to the mounts, corrosion, and the tools available. A straightforward replacement with accessible bolts may take a home mechanic a few hours for both sides, while a rusted or complicated installation can take much longer.
Published labor times can differ from the time a DIY repair takes. Professional estimates may assume a particular vehicle configuration, standard workshop equipment, and normal fastener conditions. A repair involving broken bolts, seized sleeves, damaged mounts, or interior trim can exceed that estimate.
Set aside enough time to complete the work without rushing. If you cannot safely finish the job, keep the vehicle supported according to the lifting equipment instructions and arrange suitable assistance rather than leaving it in an unstable condition.
Source: hitchesguide.com
Straightforward installation
Accessible mounting points and clean hardware can make the job relatively simple.
Moderate difficulty
Restricted upper mounts, wheel removal, and additional trim work increase the time required.
Difficult installation
Severe corrosion, broken fasteners, structural damage, or specialized suspension systems may require professional equipment.
What Affects the Cost of Replacing Rear Shocks?
The total cost includes the replacement shocks, any required mounts or hardware, labor, and repairs to related components. Prices vary by vehicle, part quality, suspension package, region, and shop labor rate, so a single universal estimate would be misleading.
DIY work may reduce labor expense, but it still requires suitable lifting equipment, tools, and correct replacement parts. If those tools must be purchased for one repair, the savings may be smaller than expected.
Ask a repair shop for an estimate that identifies the parts being replaced, whether both rear shocks are included, whether mounts or fasteners are extra, and whether any additional suspension work is recommended. A written estimate helps distinguish required repairs from optional upgrades.
Parts
The price depends on vehicle fitment, shock design, damping technology, and whether mounting hardware is included.
Labor
Access, corrosion, and vehicle-specific disassembly affect the amount of shop time required.
Related repairs
Damaged mounts, broken springs, worn bushings, or seized fasteners can add to the total.
How Often Should Rear Shock Absorbers Be Replaced?
There is no single replacement interval that applies to every vehicle. Shock life depends on road conditions, vehicle load, driving habits, weather exposure, component design, and the manufacturer’s recommendations. Rough roads, frequent heavy loads, and severe corrosion may increase wear.
Use the maintenance schedule and inspection guidance for the exact vehicle, but do not rely on mileage alone. A shock can be damaged before a scheduled inspection, while another may remain serviceable for much longer. Visible damage, confirmed leakage, and poor damping deserve attention regardless of mileage.
Inspect the surrounding suspension when the vehicle is serviced, especially if you notice new bouncing, unusual tire wear, or rear-end noises. Early diagnosis can help identify a damaged mount or spring before it causes additional problems.
Source: YouTube > O’Reilly Auto Parts
Follow the vehicle maintenance schedule
Use the manufacturer’s guidance as the starting point for inspection and service.
Consider driving conditions
Frequent rough-road use, heavy loads, and corrosion can affect shock condition.
Respond to symptoms
Investigate poor handling, leakage, or abnormal suspension noises rather than waiting for a fixed mileage.
Should Rear Shocks Be Replaced in Pairs?
In most ordinary repairs, replace both rear shock absorbers at the same time. The two shocks work together to control movement across the rear axle, and a new shock paired with a substantially worn unit can create uneven damping.
Use a compatible pair intended for the same vehicle and suspension setup. If only one shock was recently replaced because of a documented failure, ask a qualified technician whether the existing shock is suitable to retain. The condition, age, and specification of both units matter.
Match the axle pair
Choose shocks with compatible specifications and replace both sides in normal circumstances.
Check both mounts
Inspect mounting hardware and bushings on both sides, even if only one shock shows visible damage.
Frequently Asked Questions
Q
Can I replace rear shock absorbers myself?
Yes, many rear shocks can be replaced by a capable DIY mechanic with suitable tools, the correct parts, and the vehicle-specific repair instructions. The job is often simpler when the shocks are separate from the springs and the mounting hardware is accessible.
Do not attempt the repair without proper vehicle supports or when a broken spring, damaged mount, severe corrosion, or specialized suspension system creates a safety concern.
Q
Do I need to remove the rear wheels to replace the shocks?
Not always. Some vehicles provide enough access to the upper and lower mounting points with the wheels installed. Other vehicles require wheel removal to reach the hardware safely.
Check the repair procedure for your exact vehicle and remove the wheels only when needed. If you remove them, support the vehicle with properly rated jack stands and tighten the wheel fasteners to the specified torque during reassembly.
Q
Can I replace only one rear shock absorber?
Replacing both rear shocks as a pair is the usual recommendation because the units should provide consistent damping across the axle. If one shock fails, the other may have similar wear even if it does not show the same visible symptoms.
A special circumstance, such as a recently replaced matching shock, may affect the decision. Compare the condition and specifications of both units before deciding.
Q
Do new rear shock absorbers come with mounting hardware?
Some replacement shocks include bushings, sleeves, washers, or nuts, while others reuse certain vehicle mounting components. The contents depend on the part and application.
Check the package and installation instructions before disassembly. Obtain any required replacement fasteners in advance, especially when the manufacturer specifies single-use hardware.
Q
Do I need an alignment after replacing rear shocks?
Replacing separate rear shocks alone usually does not require an alignment if the repair does not disturb components that set wheel alignment. The shock generally controls suspension movement rather than setting alignment angles.
An alignment check may be needed if adjustable links, eccentric bolts, struts, or other alignment-related components were removed or adjusted. Follow the vehicle-specific service guidance.
Q
Why do my new rear shocks make noise?
Noise after replacement may come from loose mounting hardware, incorrect bushing placement, damaged mounts, incorrect fitment, or contact with a nearby component. A spring, exhaust part, or suspension joint can also cause a similar sound.
Inspect the installation and verify the specified torque values before driving further. If the noise is accompanied by instability, a loose mount, or tire contact, stop driving and arrange a professional inspection.
Q
Will changing rear shocks improve ride quality?
Replacing worn or damaged shocks with compatible parts can improve suspension control and reduce excessive bouncing. The result depends on the condition of the original shocks and the health of the springs, mounts, tires, and other suspension components.
New shocks will not correct every ride problem. If the vehicle still feels harsh, unstable, or uneven, inspect the tires, springs, bushings, and suspension geometry.
✦ Wrapping Up
Conclusion
Learning how to change rear shock absorbers can help you maintain suspension control and identify related problems before they lead to more extensive repairs. The general process is to confirm the fault, choose compatible parts, support the vehicle safely, remove the old shocks, inspect the mounts, install the replacements, and tighten every fastener according to the correct service specifications.
The details matter as much as the basic steps. Vehicle-specific torque values, suspension support requirements, bushing tightening positions, and fastener replacement rules can vary. Never guess these details or work under a vehicle that is supported only by a jack.
After installing both rear shocks, inspect the mounting points, wheels, brake hoses, wiring, and nearby components. Complete a cautious road test only when the installation is secure. If the vehicle still bounces, makes unusual noises, or feels unstable, investigate the remaining suspension issues before returning to normal driving.
💡 Key Takeaway
Before starting, obtain the correct rear shock pair and the repair instructions for your exact vehicle. Confirm the lifting points, mounting torque specifications, and hardware requirements, then complete the repair with proper supports and a thorough final inspection.
Eric
Hi, I’m Eric Bennett, the person behind OffRoadTruckAccessories.com.
I created this blog to share my interest in trucks, off-road driving, automotive accessories, and DIY modifications. I enjoy learning how different truck accessories work, testing their usefulness, and understanding whether they are truly worth buying.
Shock absorbers are located near the wheels as part of the suspension system, usually between the vehicle’s body, frame, or subframe and a suspension component such as a control arm, axle, or wheel assembly. However, the exact answer to where are shock absorbers located on a car depends on the suspension design. Some vehicles have…
You should change shock absorbers when they are worn, leaking, damaged, or no longer controlling suspension movement properly. There is no single replacement interval that applies to every vehicle because shock absorber life depends on road conditions, vehicle weight, driving habits, suspension design, and component quality. If you are wondering when to change shock absorbers,…
A shock absorber is a suspension component that controls how quickly a vehicle’s suspension moves up and down after bumps, dips, braking, acceleration, and other road inputs. It works with the springs to prevent excessive bouncing and helps keep the tires in controlled contact with the road. So, what does a shock absorber do? It…
A gas shock absorber is a hydraulic shock absorber that uses pressurized gas, usually nitrogen, along with shock absorber oil to control suspension movement. The gas helps reduce oil foaming and keeps damping performance more consistent when the shock works repeatedly or under demanding conditions. If you are wondering what is a gas shock absorber,…