How to Change Upper Control Arm 2008 Silverado: Step Guide
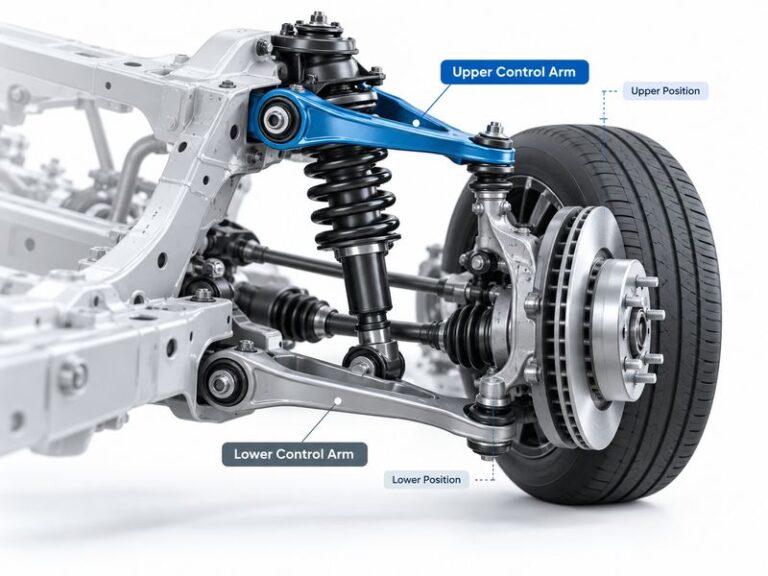
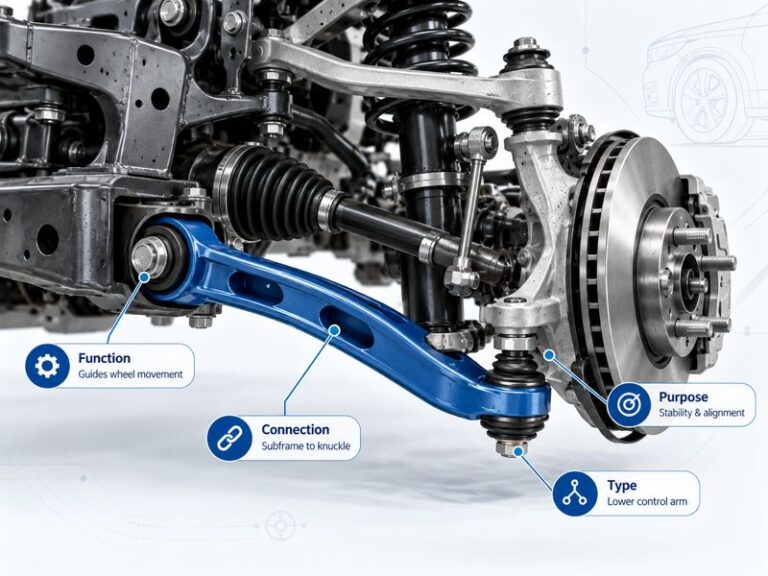
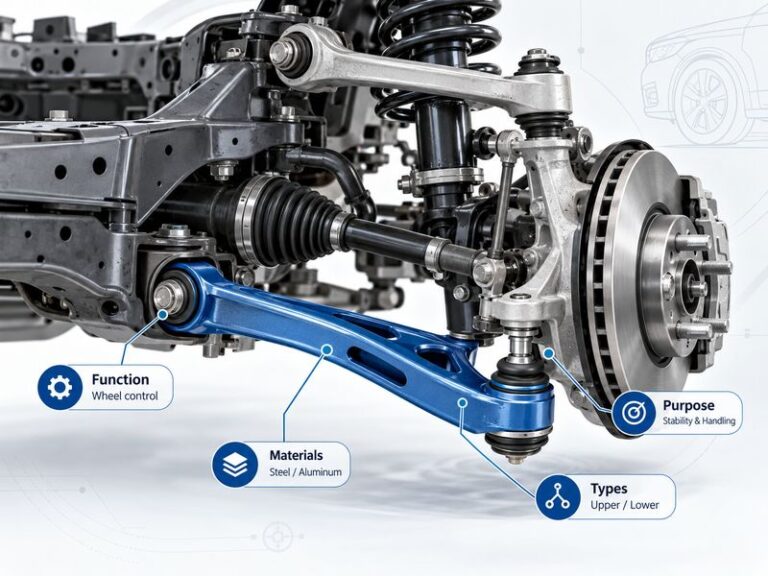
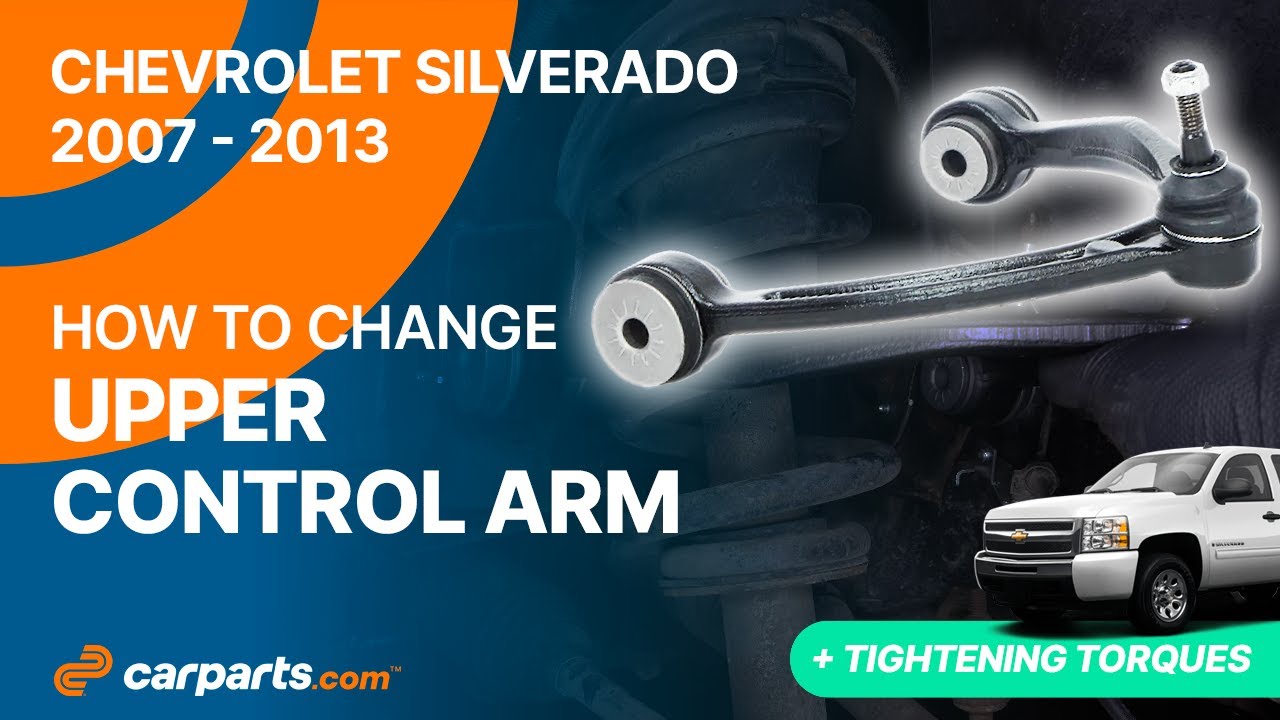
If you want to know how to change upper control arm 2008 Silverado, the job is very manageable for an experienced DIY owner with the right tools. The upper control arm connects the frame to the upper part of the steering knuckle. It also helps control wheel movement as the suspension moves up and down.
On a 2008 Chevrolet Silverado, the exact layout can vary with 1500, 2500HD, 3500HD, two-wheel-drive, four-wheel-drive, and suspension options. This guide focuses on the common 2008 Silverado front upper control arm replacement process. Always compare the new part with the old arm before installation.
The biggest issues are usually rust, tight ball joint connections, and alignment cam hardware that has been in place for many years. A practical repair lesson is to mark the cam positions before taking anything apart. Those marks do not replace an alignment, but they can help keep the truck closer to its old setting until you reach an alignment shop.
What the Upper Control Arm Does on a 2008 Silverado
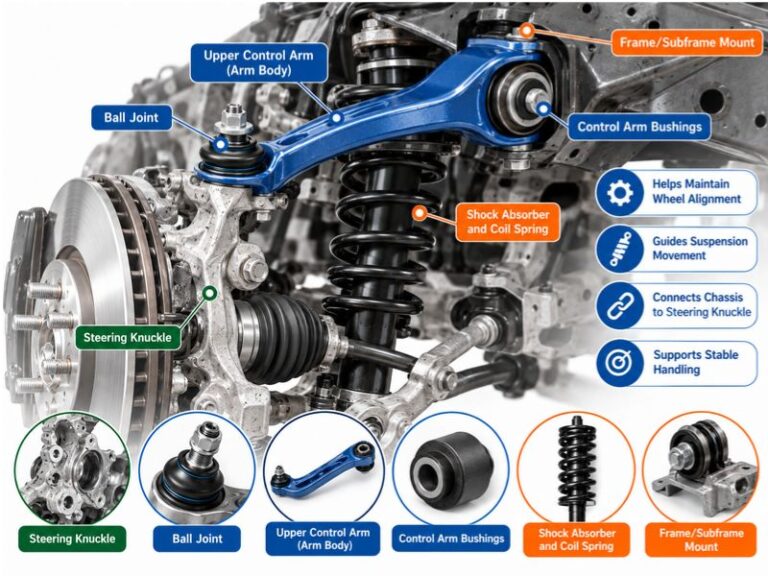
Before learning how to change upper control arm 2008 Silverado, it helps to know what the part does. The upper control arm is part of the front suspension. It attaches to the truck frame at two inner mounting points and connects to the steering knuckle through an upper ball joint.
As the wheel moves over bumps, the control arm guides that movement. Its bushings allow controlled motion while helping keep the wheel in the correct position. The upper ball joint lets the steering knuckle move while you steer and while the suspension travels.
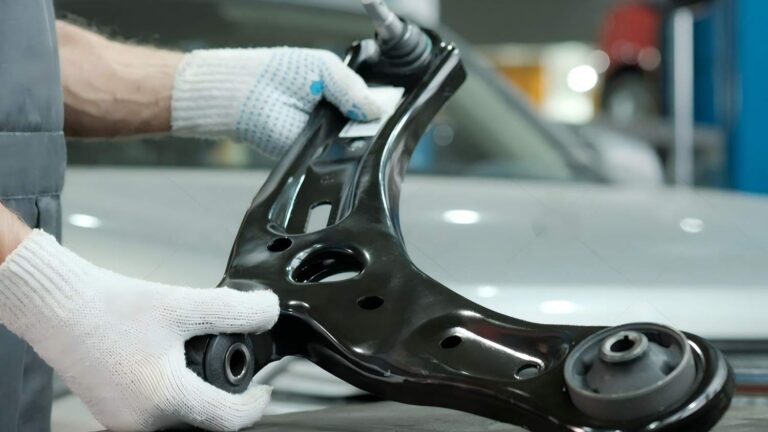
A worn control arm can affect steering feel, tire wear, alignment, and ride quality. Many replacement arms come as a complete assembly with new bushings and a new ball joint. This often makes the repair easier than replacing each worn part on the original arm.

- ✦ Controls suspension movement
The arm guides the upper part of the steering knuckle as the wheel moves.
- ✦ Supports alignment geometry
Its mounting points affect camber and caster settings.
- ✦ Holds the upper ball joint
Most complete replacement arms include a ball joint already installed.
- ✦ Uses rubber bushings
The inner bushings reduce harsh movement and allow controlled suspension travel.
Signs Your 2008 Silverado Upper Control Arm May Need Replacement
You should confirm the problem before replacing parts. A bad upper control arm may have worn bushings, a loose ball joint, physical damage, or heavy rust. Some symptoms can also come from tie rods, wheel bearings, shocks, lower control arms, or other suspension parts.
Raise the front of the truck safely and inspect the control arm. Look for torn bushings, cracked rubber, unusual movement, or a damaged ball joint boot. Any serious looseness should be checked before the truck is driven again.
- ✦ Clunking noise
You may hear a clunk over bumps or during steering changes.
- ✦ Uneven tire wear
A worn arm or ball joint can allow the wheel angle to change.
- ✦ Loose steering feel
Excess movement in the ball joint or bushings can reduce steering precision.
- ✦ Cracked bushings
Split or separated rubber can allow unwanted control arm movement.
- ✦ Ball joint play
Movement at the upper ball joint may mean the joint or complete arm needs replacement.
Should You Replace the Whole Arm or Only the Ball Joint?
If the bushings and ball joint are both worn, a complete control arm assembly is often the simpler repair. It gives you new bushings and usually a new ball joint in one part.
Replacing only the ball joint may make sense when the original arm and bushings are still in very good shape. Check the replacement part design first because some aftermarket arms are sold only as complete assemblies.
Tools and Parts You Need
Having the right tools makes this job much easier. Rust can make older Silverado suspension bolts hard to remove, so penetrating oil and a breaker bar can be very useful. An impact wrench may save time, but it is not required.
Buy the correct control arm for your exact truck. Check whether you have a Silverado 1500, 2500HD, or 3500HD and confirm drivetrain and suspension details. The left and right upper control arms may also have different part numbers.
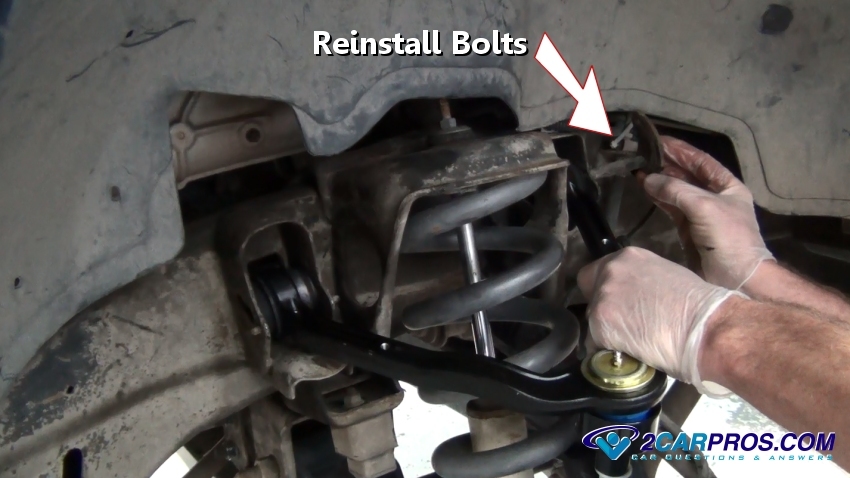
- ✦ Floor jack
Use a jack rated for the weight of your truck.
- ✦ Jack stands
Use strong stands on firm and level ground.
- ✦ Wheel chocks
Block the wheels that stay on the ground.
- ✦ Socket and wrench set
You will need sizes that fit the wheel, ball joint, and control arm hardware.
- ✦ Breaker bar
It helps loosen old suspension bolts.
- ✦ Torque wrench
Use it for final tightening to the correct specification.
- ✦ Ball joint separator
A separator or suitable puller can free the ball joint stud from the steering knuckle.
- ✦ Penetrating oil
Apply it to rusty fasteners before removal.
- ✦ Paint marker
Mark the alignment cam positions before loosening the inner bolts.
- ✦ Replacement control arm
Verify fitment and check whether the ball joint and hardware are included.
Check the New Control Arm Before Starting
Place the new arm next to the original part before installation. Check the shape, mounting holes, bushing width, ball joint location, and left or right orientation.
If the replacement ball joint has a grease fitting, confirm that you can reach it after installation. Install any fitting that the part maker tells you to install before mounting the arm.
Safety Steps Before You Start
Suspension work places you close to heavy parts and a raised truck. Work on a flat, solid surface. Set the parking brake and place wheel chocks behind the wheels that remain on the ground.
Loosen the front wheel lug nuts slightly before lifting the truck. Raise the front corner with a proper floor jack and place the frame securely on a jack stand. Lower the truck onto the stand and make sure it is stable before removing the wheel.
Never work under a Silverado that is supported only by a hydraulic jack. A jack can move, leak, or fail. Keep your hands clear of pinch points while supporting the steering knuckle.
- ✦ Use level ground
Do not perform this job on a steep driveway or soft soil.
- ✦ Support the frame
Place the jack stand at a strong factory-approved support point.
- ✦ Keep the brake hose safe
Do not allow the steering knuckle or other parts to pull on the brake hose.
- ✦ Wear eye protection
Rust and dirt can fall while you loosen suspension hardware.
How to Change Upper Control Arm 2008 Silverado Step by Step
The main process for how to change upper control arm 2008 Silverado is straightforward. You remove the wheel, free the upper ball joint from the steering knuckle, remove the inner control arm bolts, and install the new arm.
Take photos before you start if this is your first suspension repair. They can help you confirm wire, hose, bracket, and cam positions during reassembly.

Step 1: Loosen the Lug Nuts and Raise the Truck
Park on level ground and set the parking brake. Break the front wheel lug nuts loose while the tire is still touching the ground.
Raise the front of the Silverado with a floor jack. Place a jack stand under a safe frame support point. Lower the truck onto the stand and remove the wheel.
Step 2: Inspect the Control Arm Area
Find the upper control arm above the steering knuckle. Follow it inward to the two frame mounting points. Check for brake hoses, ABS wires, or brackets that may limit movement.
Clean heavy dirt from the mounting hardware. Spray penetrating oil on rusty fasteners and give it time to work.
Step 3: Mark the Alignment Cam Positions
The inner upper control arm bolts may use eccentric alignment cams or washers. These parts help set wheel alignment. Mark their positions against the frame with a paint marker before loosening them.
Make clear marks on both front and rear mounting points. You can use them as a reference when the new arm goes in. The marks are only a starting point, so the truck should still receive a proper alignment.
Step 4: Support the Steering Knuckle
Place a jack under the lower control arm or support the steering knuckle in a safe way. Use only enough pressure to control movement. Do not lift the truck away from the jack stand.
This support helps keep the knuckle from dropping or pulling on the brake hose when the upper ball joint is separated.
Step 5: Remove the Upper Ball Joint Nut
Remove any cotter pin if your ball joint uses one. Loosen the upper ball joint nut with the correct socket or wrench.
On many jobs, it is useful to leave the nut threaded on by a few turns while breaking the taper loose. This can help control the parts when the stud separates from the steering knuckle.
Step 6: Separate the Ball Joint From the Steering Knuckle
Use a ball joint separator or suitable puller to release the tapered stud. Place the tool carefully so you do not damage nearby parts.
Once the taper releases, support the knuckle and remove the remaining ball joint nut. Move the upper control arm stud out of the steering knuckle.
Step 7: Remove the Inner Control Arm Bolts
Loosen and remove the front and rear inner mounting bolts. Pay close attention to the position and direction of the cam washers, bolts, and any other hardware.
Space can be tight on some Silverado configurations. Move nearby hoses or brackets only when needed, and do not force or sharply bend them.
Step 8: Remove the Old Upper Control Arm
With the ball joint and inner mounting hardware disconnected, work the old arm out of the frame brackets. You may need to change the arm angle to clear nearby parts.
Inspect the old arm after removal. Torn bushings, a loose ball joint, bent metal, or uneven wear can help confirm the cause of the problem.
How to Install the New Upper Control Arm
Installation is mostly the reverse of removal, but bolt position and final tightening matter. Do not rush this part of how to change upper control arm 2008 Silverado. A control arm that is fitted or tightened incorrectly can affect alignment and bushing life.
Move the new arm into the frame mounts and install the inner bolts. Keep the alignment cams close to the marks made earlier. Leave the hardware loose enough to allow small adjustments until the arm is positioned correctly.

Install the Inner Mounting Hardware
Slide the control arm into the frame brackets. Install the bolts, cams, washers, and nuts in the same direction and order used before removal.
Line up your paint marks as closely as practical. Do not assume these marks create a final alignment. They only help return the adjustment to a similar starting point.
Connect the Upper Ball Joint
Guide the ball joint stud into the steering knuckle. Install the nut and tighten it using the correct procedure for your replacement part and Silverado configuration.
If the joint uses a castellated nut and cotter pin, align the nut properly and install a new cotter pin. Never loosen a properly torqued nut just to line up the cotter pin unless the service procedure specifically allows it.
Tighten the Control Arm Hardware Correctly
Use a torque wrench for final tightening. Torque values can vary by Silverado model, suspension package, fastener location, and replacement part design.
Use the factory service information for your exact 2008 Silverado or the instructions supplied by the control arm maker. Do not guess at suspension torque values.
Consider Bushing Position During Final Tightening
Rubber suspension bushings can twist if their bolts are locked down while the suspension hangs far below normal ride height. The correct tightening method depends on the bushing design and service procedure.
When the part maker or factory procedure calls for tightening at normal ride position, support the suspension safely to approximate ride height before final torque. This can reduce unwanted preload in the rubber bushings.
Torque Specifications and Why You Should Verify Them
Correct torque is critical when learning how to change upper control arm 2008 Silverado. The inner mounting bolts hold a major suspension part to the frame. The ball joint nut also has to secure the steering knuckle correctly.
There is no single torque number that should be used for every 2008 Silverado. A 1500 can use different suspension hardware than a 2500HD or 3500HD. Two-wheel-drive and four-wheel-drive configurations may also differ.
Check a factory service manual, trusted service database, or instructions from the control arm manufacturer before final tightening. This is safer than using a generic torque number from an unrelated Silverado model or year.
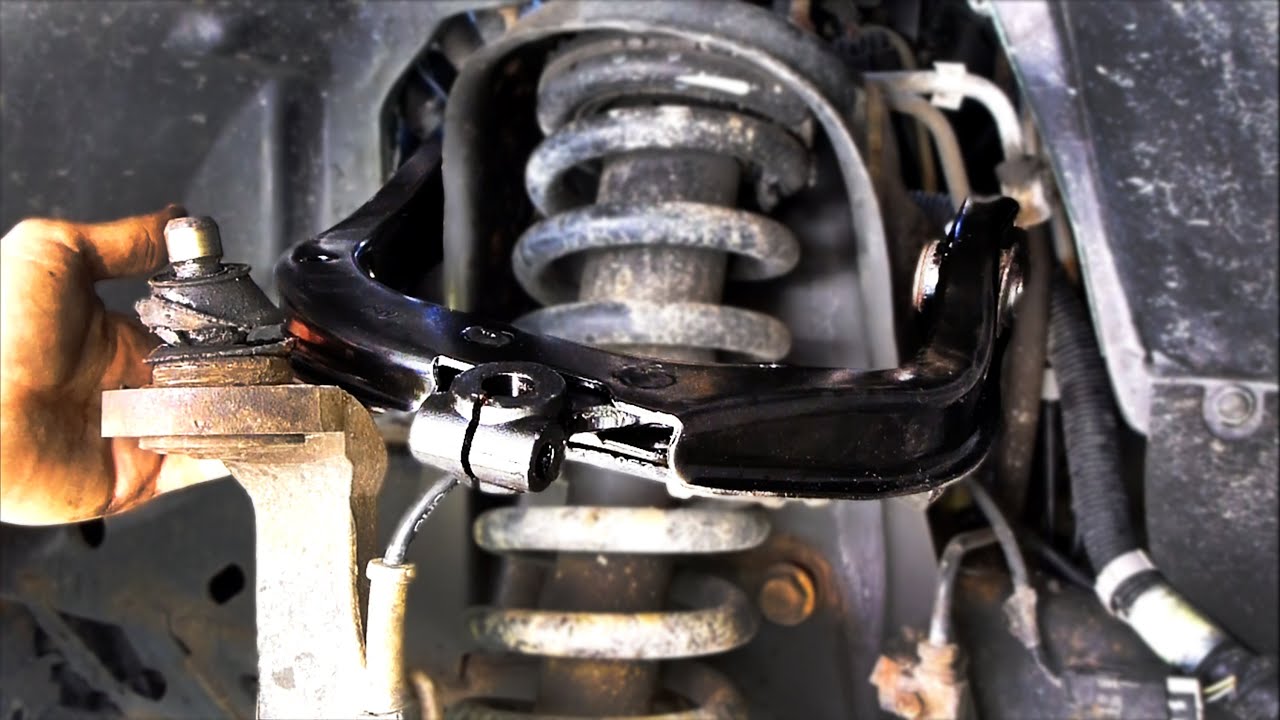
- ✦ Verify your exact model
Confirm whether the truck is a 1500, 2500HD, or 3500HD.
- ✦ Check the drivetrain
Confirm whether the truck uses two-wheel drive or four-wheel drive.
- ✦ Check replacement instructions
Aftermarket hardware may have its own torque procedure.
- ✦ Use a torque wrench
Do not rely only on an impact wrench for final tightening.
Reinstall the Wheel and Lower the Silverado
Once all control arm hardware is installed and checked, reinstall the front wheel. Thread the lug nuts by hand first so you do not cross-thread them.
Raise the truck enough to remove the jack stand. Lower the Silverado carefully. Tighten the wheel lug nuts in the proper pattern and to the specification for your exact wheel and truck.
Turn the steering wheel slowly from side to side before driving. Check that no hose, ABS wire, or other part is stretched, pinched, or touching the tire.
- ✦ Check all fasteners
Make sure nothing was left loose before installing the wheel.
- ✦ Check hose routing
Brake hoses and ABS wires must have safe clearance.
- ✦ Torque the wheel
Use the correct wheel lug torque for your Silverado and wheel type.
Why You Need a Wheel Alignment After Replacement
A wheel alignment is one of the most important steps after you change an upper control arm. The inner mounting cams help control camber and caster. Removing those bolts can change the wheel position even if you carefully marked them.
The truck may appear to drive normally after the repair, but the alignment can still be slightly wrong. That may cause uneven tire wear, a pull to one side, or poor steering feel over time.
After completing how to change upper control arm 2008 Silverado, schedule a professional alignment as soon as practical. Tell the technician that the upper control arm was replaced so the front suspension can be checked before adjustment.

- ✦ Protects tire life
Correct alignment helps prevent rapid or uneven tread wear.
- ✦ Improves steering
Proper caster and camber help the truck track and steer correctly.
- ✦ Confirms the repair
An alignment inspection can reveal other worn suspension parts.
Common Mistakes to Avoid
Most problems during this repair come from skipped safety steps, damaged hardware, or incorrect reassembly. A few extra minutes of preparation can prevent hours of trouble later.
One common mistake is removing the alignment cam bolts without marking their positions. Another is allowing the steering knuckle to hang from the brake hose after the ball joint is disconnected.
- ✦ Working under a jack
Always use rated jack stands. Never trust the floor jack by itself.
- ✦ Forgetting cam positions
Mark the alignment cams before moving them.
- ✦ Damaging the brake hose
Support the knuckle so its weight does not pull on the hose.
- ✦ Using the wrong control arm
Confirm model, side, drivetrain, and suspension fitment before installation.
- ✦ Guessing torque values
Verify specifications for your exact truck and replacement parts.
- ✦ Skipping alignment
Cam marks cannot replace a proper wheel alignment.
- ✦ Reusing damaged hardware
Replace stripped, badly rusted, stretched, or otherwise unsafe fasteners.
How Long Does It Take to Change an Upper Control Arm?
The time needed depends on your experience, tool access, and the condition of the truck. A clean Silverado with easy-to-remove bolts can be much faster than a truck that has spent years in a road-salt state.
For a home mechanic, it is smart to allow extra time instead of planning a rushed repair. Rusted cam bolts, seized ball joint tapers, or tight access can slow the job.
If a mounting bolt is seized inside a bushing sleeve, the repair can become much more difficult. In severe cases, cutting tools or additional replacement hardware may be needed.
- ✦ Rust level
Corrosion can greatly increase removal time.
- ✦ Tool access
An impact wrench and proper separator may speed up the job.
- ✦ Experience
A first-time DIY repair usually takes longer than professional shop work.
- ✦ Part fit
Correct parts make installation much easier.
Should You Replace Both Upper Control Arms at the Same Time?
You do not always have to replace both upper control arms at the same time. If one arm was damaged by an impact and the other side is still in excellent condition, replacing only the damaged side may be reasonable.
However, both sides have usually seen the same age, mileage, road conditions, and suspension movement. If one side has failed because of normal wear, inspect the opposite arm closely. Worn bushings or ball joint play on the other side may justify replacing both.
Replacing both sides can also make sense when you want fresh bushings and ball joints across the front axle before an alignment. The decision should be based on inspection rather than a fixed rule.
- ✦ Replace one side
This can make sense when only one arm is damaged and the other is confirmed good.
- ✦ Replace both sides
This can be useful when both arms show similar age-related wear.
- ✦ Inspect first
Check the opposite ball joint and bushings before making the decision.
What to Check After the Repair
After learning how to change upper control arm 2008 Silverado and finishing the installation, inspect your work before normal driving. Check all mounting points and confirm that the ball joint is fully seated.
Start with a slow test drive in a safe area. Listen for new clunks, rubbing, or unusual steering noise. The steering should move freely without binding.
After the alignment, keep an eye on tire wear and steering feel. If the truck pulls, wanders, clunks, or feels loose, have the suspension inspected again rather than assuming the new control arm caused the issue.
- ✦ Ball joint seating
Confirm the stud and nut are installed correctly.
- ✦ Mounting bolts
Verify all fasteners were tightened to the required specification.
- ✦ Brake hose clearance
Turn the steering through its range and check for stretching or rubbing.
- ✦ ABS wire clearance
Make sure the wire is clipped and routed safely.
- ✦ Tire clearance
Check that the tire does not touch the new arm or nearby parts.
- ✦ Alignment
Have the front suspension aligned after the repair.