
How to Remove Lower Control Arm Chevy Silverado: Step-by-Step Guide
Learning how to remove lower control arm Chevy Silverado parts is not hard in principle, but the job can become demanding once rust, large suspension bolts, torsion-bar tension, and tight working space enter the picture. The lower control arm is a major suspension part. It connects the steering knuckle area to the truck’s frame and helps control wheel movement.
The most important point is that there is no single removal process for every Silverado. Chevrolet has used different front suspension layouts through the years. A 1999-2006 Silverado 1500 may not come apart the same way as a 2007-2013 truck, a newer model, or a 2500HD. Two-wheel-drive and four-wheel-drive trucks can also differ.
When I approach this type of suspension job, I first identify the suspension design before loosening anything. I also mark adjustment hardware when present and confirm where spring or torsion-bar force is stored. Those small steps can save a lot of trouble during installation.
This guide explains how to remove lower control arm Chevy Silverado components in a practical order. You will learn what tools to gather, how to prepare the truck, how to deal with the ball joint and torsion bar, how to remove seized hardware, and what to inspect before installing the new arm.
Know Your Silverado Suspension Before Removing the Control Arm
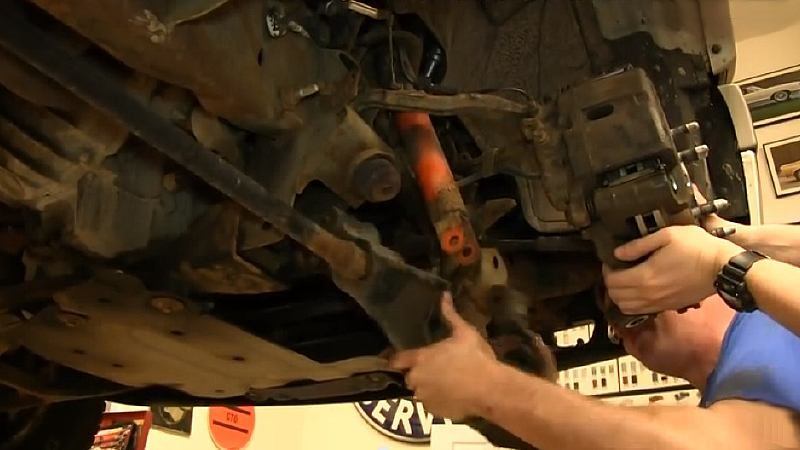
Before you learn how to remove lower control arm Chevy Silverado hardware, identify the truck’s year, drive type, and suspension design. This matters because Silverado front suspensions have changed over time. Some use torsion bars, while others use coil-over struts or other spring layouts.
A torsion-bar truck stores spring force in a long steel bar connected to the lower control arm. That force must be handled correctly. A coil-spring or strut-style suspension has different load points and may require a different sequence.
You should also check whether the replacement lower control arm includes a ball joint and bushings. Many complete replacement arms come with these parts already installed. That can make the repair much easier than pressing old bushings or ball joints out of the original arm.

- ✦ Model year
Confirm the exact Silverado year before following any bolt locations or torque values.
- ✦ Drive system
Check whether the truck is 2WD or 4WD because front suspension parts and access may differ.
- ✦ Suspension type
Look for a torsion bar, coil spring, or coil-over strut before you start.
- ✦ Control arm design
Check whether the ball joint is built into the replacement arm or installed as a separate part.
Why Model Year Matters
Silverado generations may look similar from underneath, but mounting points and suspension parts can change. Always match your repair information to the VIN, model year, suspension package, and drivetrain.
- ✦ Avoid assumptions
Do not copy a procedure from a different Silverado generation unless the suspension layout matches your truck.
Tools You Need to Remove a Chevy Silverado Lower Control Arm
The right tools make this repair much safer. Silverado suspension bolts can be large and very tight. Rust can make them even harder to remove, especially on trucks driven in areas that use road salt.
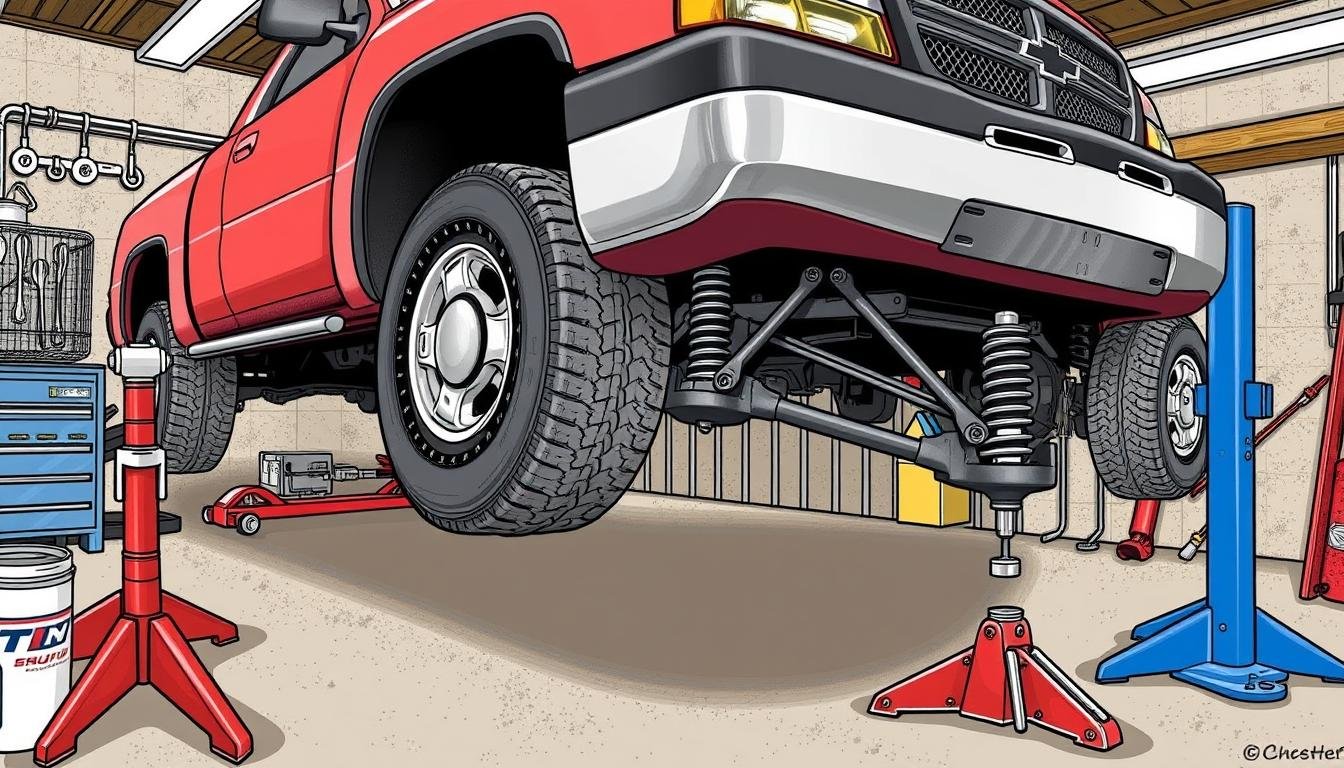
A strong floor jack and rated jack stands are essential. Never work under a Silverado supported only by a hydraulic jack. Place the stands on solid frame points and keep the truck on firm, level ground.
You may also need special tools based on the suspension. Torsion-bar trucks can require a proper torsion-bar unloading tool. A ball joint separator or suitable puller can help release the steering knuckle without damaging nearby parts.
- ✦ Floor jack
Use a jack with enough capacity to lift your Silverado safely.
- ✦ Jack stands
Support the frame with stands rated for the truck’s weight.
- ✦ Socket and wrench set
Large metric sockets and combination wrenches are commonly needed.
- ✦ Breaker bar
A long breaker bar helps loosen tight control arm and suspension bolts.
- ✦ Torque wrench
Use it during reassembly to tighten fasteners to the correct specification.
- ✦ Ball joint separator
This helps separate the ball joint stud from the steering knuckle.
- ✦ Penetrating oil
Apply it to rusty suspension hardware before attempting removal.
- ✦ Torsion-bar unloading tool
Use the correct tool if your Silverado suspension requires torsion-bar unloading.
Tools That Make Rusty Trucks Easier
For an older truck, an impact wrench can save time. A wire brush also helps clean exposed bolt threads before removal. Keep a hammer and pry bar nearby, but use them with care so you do not damage the steering knuckle, brake parts, or CV axle.
- ✦ Plan for corrosion
If the truck has spent years in the Rust Belt, expect seized bolts and allow for extra removal work.
Prepare the Silverado Safely
Good preparation is one of the most important parts of how to remove lower control arm Chevy Silverado suspension parts. Park on a flat, hard surface. Put the transmission in Park, set the parking brake, and block the rear wheels.
Loosen the front wheel lug nuts slightly before lifting the truck. Raise the front end, then place jack stands under secure frame locations. Lower the truck onto the stands and confirm that it is stable before removing the wheel.
Keep the floor jack nearby. You may need it under the lower control arm or steering knuckle to control suspension movement. Do not place your hands between loaded suspension parts.

- ✦ Block the rear wheels
Wheel chocks help prevent the truck from moving while the front is raised.
- ✦ Support the frame
The frame should rest firmly on rated jack stands.
- ✦ Remove the wheel
Take off the front wheel on the side where the control arm will be removed.
- ✦ Inspect the work area
Look for brake hoses, ABS wires, CV axles, and other parts that could be stretched.
Mark Alignment Hardware Before Loosening It
If your lower control arm mounting points use cams or other adjustment hardware, mark their positions with paint before removal. The marks do not replace a professional alignment, but they can help keep the suspension close to its prior position during assembly.
- ✦ Take photos
A few phone photos can help you remember washer, cam, bolt, and bracket orientation.
Unload the Torsion Bar If Your Silverado Uses One
This is a critical step on many older Silverado trucks. If the lower control arm is connected to a loaded torsion bar, you should not simply remove the arm bolts and hope the tension releases safely. The torsion bar stores enough force to cause serious injury.
Use the correct torsion-bar unloading tool for the truck. Support and unload the adjuster according to the repair procedure for your exact model. Once spring force is safely removed, the adjuster key and related hardware can be removed as required.
Mark the torsion bar and its orientation before separating it. This helps prevent confusion during installation. Do not use a light-duty puller or improvised clamp in place of a proper unloading tool.

- ✦ Confirm torsion-bar tension
Do not remove loaded suspension hardware until you know how the spring force is being controlled.
- ✦ Use the proper unloading tool
A purpose-made tool gives you better control over the torsion key and stored energy.
- ✦ Mark the parts
Mark the torsion bar position and left or right side before taking components apart.
What If the Torsion Bar Is Stuck in the Control Arm?
Rust can seize the torsion bar inside the lower control arm. Apply penetrating oil and clean exposed areas first. Controlled tapping may help, but avoid striking the bar in a way that damages its surface or end.
- ✦ Do not force it blindly
If the bar will not move, stop and confirm that all load has been removed before applying more force.
Disconnect Parts That Block Lower Control Arm Removal
The next stage of how to remove lower control arm Chevy Silverado components is to create enough space for the arm to move. Depending on the model, the shock absorber, sway bar link, steering parts, or other nearby components may limit movement.
You often need to disconnect the lower shock mount from the control arm. Some trucks may also require the sway bar link to be removed. Keep all hardware organized so it returns to its original location.
Watch the brake hose and ABS sensor wire while moving the steering knuckle. Never let the knuckle hang in a way that pulls on a brake hose or electrical wire.
- ✦ Shock mount
Remove the lower shock hardware when it prevents the control arm from dropping.
- ✦ Sway bar link
Disconnect it if it limits lower control arm movement.
- ✦ ABS wiring
Keep sensor wiring clear of tools and moving suspension parts.
- ✦ Brake hose
Do not stretch, pinch, twist, or support the knuckle by the brake hose.
Do You Need to Remove the Brake Caliper?
Not every Silverado requires caliper removal for a lower control arm job. If removing it gives you safer access, support the caliper with a hanger or wire. Never allow its weight to hang from the flexible brake hose.
- ✦ Keep the brake system protected
Move brake parts only when needed and keep dirt away from open hydraulic connections.
Separate the Lower Ball Joint From the Steering Knuckle
Separating the lower ball joint is often the point where the lower control arm becomes free from the steering knuckle. Support the lower control arm or knuckle with a jack before removing the ball joint fastener. This helps prevent an uncontrolled drop.
Remove the cotter pin if the joint uses one, then loosen or remove the retaining nut as required. A ball joint separator can then release the tapered stud from the steering knuckle. Do not hammer directly on threaded parts unless the service procedure allows it.
Once the taper releases, move the steering knuckle away from the lower control arm carefully. Check that the CV axle, brake hose, tie rod, and ABS wire are not being pulled.

- ✦ Support the suspension
Keep a jack under the control arm or knuckle before releasing the joint.
- ✦ Remove the retaining hardware
Take out the cotter pin and nut where the design uses them.
- ✦ Separate the taper
Use a suitable ball joint separator to free the stud from the knuckle.
- ✦ Control knuckle movement
Move the knuckle only as far as needed to avoid stressing nearby parts.
What If the Ball Joint Will Not Separate?
A ball joint taper can become very tight after years of service. Apply penetrating oil around the joint and use a proper separator. Controlled force works better than random heavy blows that can damage the knuckle or threads.
- ✦ Protect reusable parts
If you plan to reuse the ball joint, avoid separator tools that tear the dust boot.
Remove the Lower Control Arm Pivot Bolts
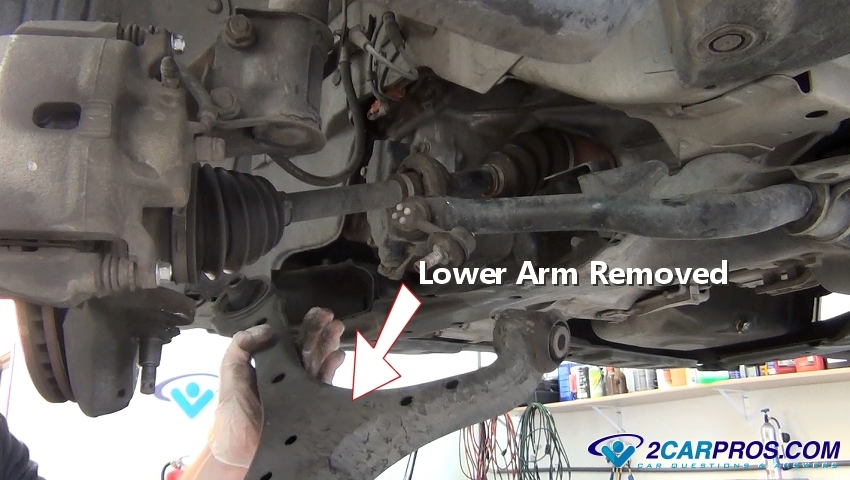
After the ball joint is separated and spring force is safely controlled, you can focus on the frame-side mounting bolts. These large bolts pass through the lower control arm bushings and hold the arm to the frame brackets.
Before loosening them, note the direction of the bolts, washers, cams, and spacers. Take photos if needed. If alignment cams are present, preserve your marks so you have a useful reference during installation.
Use a breaker bar or impact wrench to loosen the hardware. On an older Silverado, penetrating oil may be needed. If a bolt turns but will not slide out, corrosion may have bonded it to the inner bushing sleeve.
- ✦ Note bolt orientation
Record which direction each pivot bolt faces before removing it.
- ✦ Save adjustment positions
Keep alignment cams and washers in their correct locations and orientations.
- ✦ Remove both pivot bolts
Once the suspension is unloaded, remove the front and rear control arm mounting hardware.
- ✦ Support the arm
The control arm is heavy, so keep one hand or a jack ready to control it as the last bolt comes out.
How to Handle a Seized Lower Control Arm Bolt
A seized pivot bolt is common on high-mileage trucks. Start with penetrating oil, a wire brush, and controlled movement. If the bolt is rusted solid to the bushing sleeve, cutting the bolt may become necessary.
Do not cut near fuel lines, brake lines, wiring, or rubber parts without protecting them. If corrosion is severe, replacing the mounting hardware along with the control arm is often the safer choice.
- ✦ Inspect the frame bracket
Heavy rust around the control arm mount should be checked before installing new suspension parts.
Lower and Remove the Control Arm From the Truck
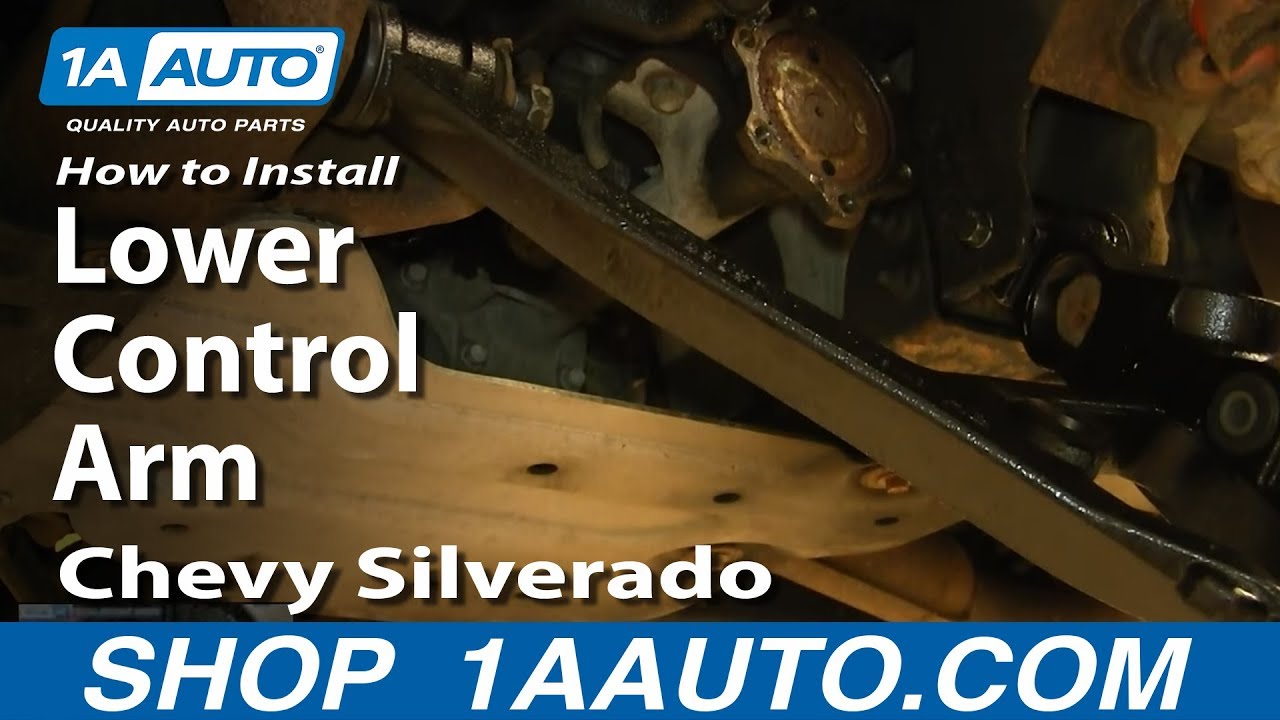
Once the ball joint, pivot bolts, and any required torsion-bar connection are free, the lower control arm can come out. Lower it slowly and rotate it as needed to clear the frame brackets and steering knuckle.
This stage of how to remove lower control arm Chevy Silverado parts should not require uncontrolled force. If the arm refuses to move, stop and look for a missed bolt, torsion-bar connection, shock mount, sway bar link, or another part still attached.
Be ready for the arm’s weight. A complete lower control arm with the ball joint and bushings installed can be awkward to hold while lying under a truck.
- ✦ Lower it slowly
Keep control of the arm as it clears the frame brackets.
- ✦ Check for missed parts
Do not pry hard until you confirm that every required attachment is disconnected.
- ✦ Keep hardware organized
Separate left-side and right-side bolts if you are replacing both control arms.
Why the Arm May Still Feel Stuck
Old bushings can bind against the frame brackets. Rust and dirt may also make the fit tight. A pry bar can help move the arm, but use controlled pressure and avoid bending the frame tabs.
- ✦ Work from both sides
Gentle movement at the front and rear bushing mounts often works better than forcing one end.
Inspect the Parts After the Lower Control Arm Is Removed
Knowing how to remove lower control arm Chevy Silverado parts is only half of the job. Once the arm is out, inspect the surrounding suspension before installing the replacement. This is the best time to spot wear that was hidden by the old arm.
Check the lower control arm mounting brackets for cracks, heavy rust, elongated holes, or impact damage. Inspect the steering knuckle and ball joint mounting area. Also look at the shock, sway bar link, tie rod, CV boot, and wheel bearing area.
If the original control arm failed because its bushings were worn, look at the opposite side too. Suspension parts on both sides often see similar mileage and road conditions, though replacement should still be based on actual condition.
- ✦ Frame brackets
Look for cracks, corrosion, bent tabs, or damaged mounting holes.
- ✦ Ball joint area
Check the steering knuckle taper and surrounding metal for damage.
- ✦ CV axle
Inspect the boots for tears, grease leaks, or signs of contact.
- ✦ Sway bar parts
Check the link and bushings while access is easy.
- ✦ Shock absorber
Look for fluid leaks, damaged bushings, or a bent shaft.
Should You Replace Both Lower Control Arms?
You do not always have to replace lower control arms in pairs. If one arm is damaged and the other side is still in good condition, replacing only the failed side can be reasonable.
Still, inspect both sides closely on a high-mileage Silverado. If both arms have cracked bushings, loose ball joints, severe corrosion, or similar wear, replacing them together can reduce repeat labor.
- ✦ Base the choice on condition
Mileage alone does not tell you whether the opposite control arm must be replaced.
Common Problems During Chevy Silverado Lower Control Arm Removal
The basic steps for how to remove lower control arm Chevy Silverado components are simple, but old hardware can turn the job into a challenge. Rust is one of the most common problems. Bolts can seize inside bushing sleeves, torsion bars can stick, and ball joint tapers can resist separation.
Another common mistake is removing parts before controlling stored suspension energy. This is especially important with torsion-bar systems. Always understand where the spring load is before loosening major suspension fasteners.
A third problem is losing track of alignment hardware. Marking cams, washers, and bolt positions takes only a few minutes and can make reassembly much easier.
- ✦ Seized pivot bolt
Rust may lock the bolt to the control arm bushing sleeve.
- ✦ Stuck torsion bar
Corrosion can make the torsion bar difficult to slide out of the arm.
- ✦ Stuck ball joint taper
Use a separator rather than uncontrolled hammering.
- ✦ Damaged alignment cams
Replace badly corroded or bent adjustment hardware.
- ✦ Incorrect suspension support
A poorly supported arm or knuckle can move suddenly when a joint separates.
When to Stop the DIY Repair
Stop if the frame mount is badly rusted, the torsion-bar load cannot be safely controlled, or you do not have the right support equipment. A suspension repair is not a good place to improvise when heavy parts and stored spring force are involved.
- ✦ Safety comes first
A professional shop is the better option when structural rust or specialty suspension work is beyond your equipment.
What to Know Before Installing the New Lower Control Arm
After you understand how to remove lower control arm Chevy Silverado parts, installation is generally the reverse of removal, but a few details matter. Compare the new arm with the old one before installing it. Make sure the shape, bushing positions, ball joint, and mounting holes match.
Start the pivot bolts by hand and make sure the arm sits correctly in the frame brackets. Reconnect the ball joint, shock, sway bar link, torsion-bar parts, and any other components removed for access.
Do not guess at torque specifications. Fastener torque can vary by model year, suspension package, bolt size, and drivetrain. Use the service information for your exact Silverado.
Control arm bushing bolts are often best given their final tightening with the suspension near normal ride height when the design uses bonded rubber bushings. This helps keep the bushings from sitting twisted at normal ride height.
- ✦ Compare old and new arms
Confirm the replacement part matches before putting it into the frame.
- ✦ Use correct torque values
Follow service information for your exact year and suspension.
- ✦ Install new locking hardware
Replace cotter pins and any one-time-use fasteners when required.
- ✦ Set bushing position correctly
Avoid locking bonded rubber bushings in a heavily twisted position.
- ✦ Get an alignment
Have the front wheel alignment checked after the suspension is assembled.
Why an Alignment Matters After Control Arm Work
The lower control arm helps locate the wheel in relation to the frame. Small changes at its mounting points can affect camber, caster, and toe. A proper alignment helps protect tire life and steering feel after the repair.
- ✦ Do not rely only on paint marks
Marks can help during assembly, but they are not a substitute for measuring wheel alignment.
How Long Does It Take to Remove a Silverado Lower Control Arm?
The time needed depends more on the truck’s condition than on the number of bolts. A clean truck with cooperative hardware may come apart in a straightforward way. A rusty truck can take much longer because one seized pivot bolt can become the hardest part of the entire repair.
Your experience and tools also matter. A lift, impact wrench, ball joint separator, and proper torsion-bar tool can make the process much easier. Working on the ground with hand tools usually takes more effort.
When planning how to remove lower control arm Chevy Silverado suspension parts at home, leave enough time to deal with unexpected rust. Do not rush reassembly just because removal took longer than expected.
- ✦ Rust level
Corrosion is often the biggest factor in how difficult the repair becomes.
- ✦ Tool access
Correct specialty tools can prevent hours of unnecessary work.
- ✦ Suspension design
Torsion-bar systems may add steps that are not present on other Silverado setups.
- ✦ Previous repairs
Bent hardware or incorrect prior installation can make disassembly harder.
Can a Beginner Remove a Lower Control Arm?
A careful DIYer with good mechanical skills can remove a lower control arm, but this is more involved than a basic oil or brake service. You need to understand vehicle support, suspension load, ball joints, and large fasteners before starting.
- ✦ Know your limits
If you are unsure how to control stored spring or torsion-bar energy, get professional help.
Mistakes to Avoid When Removing a Silverado Lower Control Arm
The safest way to learn how to remove lower control arm Chevy Silverado parts is to understand what not to do. One major mistake is working under a truck supported only by a floor jack. Another is loosening loaded suspension parts without knowing where the spring force will go.
Avoid damaging parts that you plan to reuse. Hammering directly on threads, pulling on brake hoses, or tearing ball joint boots can create extra repairs. Also avoid mixing up alignment cams and mounting hardware.
Finally, do not reinstall questionable fasteners just to save a small amount of money. A heavily rusted, stretched, damaged, or rounded suspension bolt should be replaced with the correct hardware.
- ✦ Do not rely on a jack alone
Always place the truck securely on rated jack stands.
- ✦ Do not release stored force blindly
Identify the spring or torsion-bar load before removing major bolts.
- ✦ Do not hang the knuckle from a hose
Support heavy suspension and brake parts independently.
- ✦ Do not mix up hardware
Keep bolts, cams, washers, and spacers organized by location.
- ✦ Do not skip the alignment
Alignment should be checked after control arm replacement.
A Practical Tip Before Starting
Spray rusty hardware with penetrating oil before the repair when possible. Clean exposed threads with a wire brush. These simple steps can make stubborn suspension bolts much easier to handle.
- ✦ Prepare before applying force
Cleaning and soaking hardware is usually better than immediately reaching for a larger breaker bar.






