
How to Get Upper Control Arm Bolts Out: Step-by-Step Guide
Learning how to get upper control arm bolts out can turn a frustrating suspension job into a manageable repair. The nut may come off with no trouble, yet the bolt can stay locked inside the control arm bushing. Rust, road salt, dirt, bent hardware, and a seized inner sleeve are common causes.
This problem is especially common on trucks and SUVs that spend years on U.S. roads where winter salt is used. A bolt that looks fine from the outside may be heavily corroded inside the bushing sleeve. That is why simply using a longer breaker bar does not always solve the problem.
The best approach is to start gently and increase force in stages. Use penetrating oil first. Then try rotation, tapping, heat, vibration, and mechanical pressure. Cutting should be the final option when the bolt has rusted solid to the sleeve.
A useful shop rule is simple: **do not confuse a tight bolt with a seized bolt**. If the bolt rotates after the nut is removed but refuses to move sideways, the problem is usually inside the bushing. This guide explains how to get upper control arm bolts out without damaging nearby parts when possible.

Why Upper Control Arm Bolts Get Stuck
Before learning how to get upper control arm bolts out, it helps to know what is holding them in place. Upper control arm bolts pass through brackets, bushings, and metal sleeves. Moisture can enter these areas and stay trapped for years.
Rust can form between the bolt and the inner bushing sleeve. Over time, the two parts can almost become one piece. The nut may come off, and the bolt may even turn, but it still may not slide out.
Alignment bolts can also become difficult to remove. Some vehicles use cam bolts or eccentric washers at the upper control arm. Corrosion around these parts can lock the assembly into the mounting bracket.

- ✦ Rust
Water and road salt can corrode the bolt shaft and suspension bracket.
- ✦ Seized Bushing Sleeve
The bolt can rust directly to the metal sleeve inside the control arm bushing.
- ✦ Bent Bolt
Impact damage or heavy suspension loads can bend a bolt and prevent it from sliding out.
- ✦ Damaged Threads
Mushroomed or damaged threads can catch on the bracket during removal.
- ✦ Limited Space
The engine bay, exhaust, steering parts, or body structure may restrict bolt movement.
How to Tell Whether the Bolt Is Seized to the Bushing
Remove or loosen the nut and try to rotate the bolt. If the bolt turns but the bushing twists with it, the inner sleeve may be seized to the bolt. If the bolt will not turn at all, corrosion may be locking both the threads and the shaft.
Watch the rubber bushing while turning the bolt. If the rubber winds up and springs back, stop forcing it. That is a strong sign that the sleeve and bolt are moving together.
- ✦ Bolt Turns Freely
The shaft may only need tapping or pressure to slide out.
- ✦ Bushing Twists
The bolt is likely rusted to the inner sleeve.
- ✦ Bolt Will Not Turn
Heavy corrosion or a damaged fastener may require stronger methods.
Tools You May Need to Remove Upper Control Arm Bolts
You do not need every tool listed below for every repair. Start with basic hand tools. Add stronger tools only when the bolt refuses to move.
Using the correct six-point socket is important. A worn or loose socket can round the bolt head or nut. That can make a simple repair much harder.
- ✦ Penetrating Oil
Helps work into rusted joints around the bolt, sleeve, nut, and mounting bracket.
- ✦ Six-Point Socket
Provides a strong grip and reduces the chance of rounding the fastener.
- ✦ Breaker Bar
Provides controlled leverage for heavily tightened or rusted fasteners.
- ✦ Impact Wrench
Rapid impacts can help break corrosion between threaded parts.
- ✦ Hammer and Punch
Useful for driving a loose bolt through the bracket after the nut is removed.
- ✦ Air Hammer
Adds strong vibration and pushing force to stubborn bolts.
- ✦ Pry Bar
Can help control the arm position and remove pressure from the bolt.
- ✦ Reciprocating Saw
Used to cut through a seized bolt when normal removal methods fail.
- ✦ Replacement Hardware
Have new bolts, nuts, or alignment hardware ready if the old parts are damaged.
How to Get Upper Control Arm Bolts Out Step by Step
The safest way to learn how to get upper control arm bolts out is to use a staged process. Do not start with maximum force. Give each method time to work before moving to the next one.
Vehicle designs differ, so check the repair information for your specific year, make, and model. Some upper control arm bolts also control wheel alignment.
- ✦ Step 1: Park on Solid Ground
Park on a flat surface, set the parking brake, and secure the wheels that stay on the ground.
- ✦ Step 2: Lift and Support the Vehicle
Use a proper lifting point and support the vehicle with rated jack stands. Never rely on the floor jack alone.
- ✦ Step 3: Remove the Wheel
Removing the wheel gives you better access to the upper control arm and mounting bolts.
- ✦ Step 4: Support the Suspension
Use a jack as needed to support the lower control arm or steering knuckle and reduce stress on the upper arm.
- ✦ Step 5: Clean Exposed Threads
Use a wire brush to remove loose rust and dirt from the exposed bolt and nut.
- ✦ Step 6: Apply Penetrating Oil
Spray the nut, bolt ends, washers, and areas where the bolt passes through the bracket.
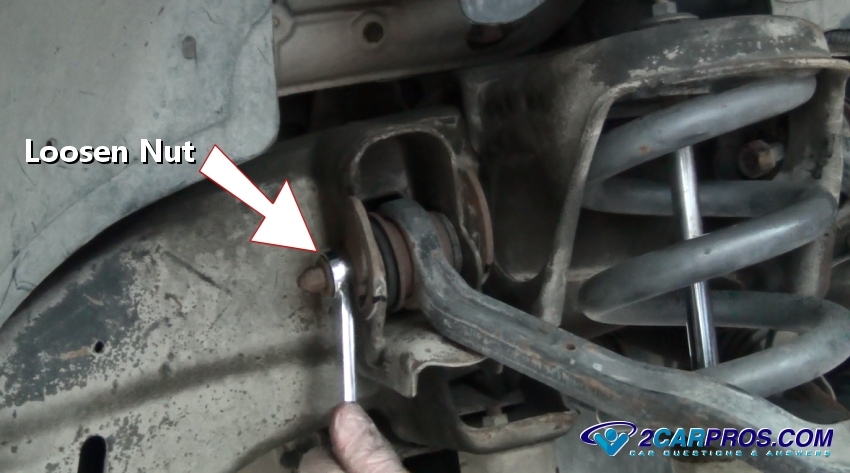
- ✦ Step 7: Remove the Nut
Use a six-point socket and breaker bar or impact wrench while keeping the tool straight.
- ✦ Step 8: Rotate the Bolt
Turn the bolt back and forth to help break rust between the shaft and inner sleeve.
- ✦ Step 9: Drive the Bolt Out
Thread the nut back on a few turns to protect the threads, then tap the bolt with a hammer and punch.
- ✦ Step 10: Escalate Only if Needed
Use vibration, heat, an air hammer, or cutting methods only when the basic steps fail.
Use the Nut to Protect the Bolt Threads
If you plan to reuse the bolt, do not strike bare threads with a steel hammer. Thread the nut onto the bolt until it is almost flush with the end. This spreads the impact and reduces thread damage.
Once the bolt starts moving, remove the nut and finish driving the bolt with a punch. Replace the bolt if its threads, head, or shaft become damaged.
Relieve Pressure on the Bolt Before Hammering
A control arm can place sideways pressure on its mounting bolt. That pressure can make a free bolt feel seized. Raise or lower the suspension slightly with a jack while testing the bolt.
Small changes in control arm position can line up the mounting holes. When the load comes off the bolt, it may slide out with much less force.
How to Remove a Rusted Upper Control Arm Bolt
Rust changes the job. If you are trying to learn how to get upper control arm bolts out on an older truck or SUV, corrosion may be the main challenge. In that case, patience is often more useful than extreme force.
Spray penetrating oil around both ends of the bolt. Apply it where the bolt passes through the bracket and bushing sleeve. Let it soak, then rotate the bolt back and forth.
Repeated motion helps pull penetrating oil deeper into the joint. If the bolt begins to turn more easily, keep working it instead of immediately trying to drive it out.
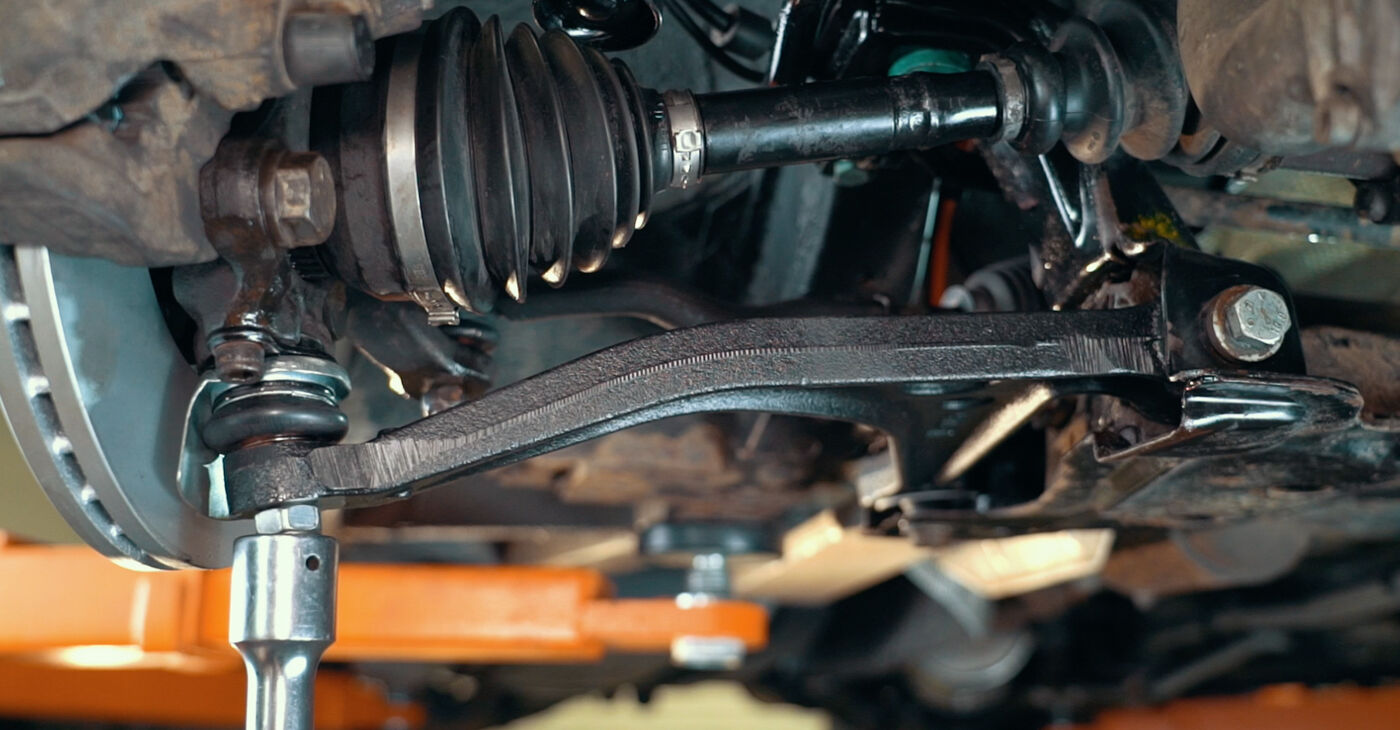
- ✦ Clean First
Remove surface rust so the penetrating oil can reach the joint.
- ✦ Soak the Joint
Give penetrating oil time to work rather than spraying and immediately applying maximum force.
- ✦ Turn Both Ways
Small back-and-forth movement can break rust more effectively than force in one direction.
- ✦ Add Vibration
Light hammer taps around the bracket can help break the corrosion bond.
Should You Use an Impact Wrench?
An impact wrench can help remove a rusted nut and can sometimes free a stuck bolt. Its repeated impacts can break corrosion that steady pressure cannot.
Do not keep hammering with the impact if the bolt simply spins inside a seized bushing sleeve. At that point, the problem is no longer the threaded connection.
What to Do When the Bolt Spins but Will Not Come Out
This is one of the most common problems when figuring out how to get upper control arm bolts out. The nut is gone. The bolt turns. Yet the bolt will not move sideways.
The most likely cause is corrosion between the bolt shaft and the bushing’s inner metal sleeve. Turning the bolt can make the entire sleeve rotate inside the rubber instead of freeing the shaft.
Do not keep spinning it for a long time. That can tear the rubber bushing and generate heat. At that stage, try pushing force, vibration, or cutting.

- ✦ Apply Side Pressure
Use a punch or air hammer on the bolt end while someone slowly rotates the bolt.
- ✦ Change Suspension Position
Raise or lower the control arm slightly to remove binding from the bolt.
- ✦ Use an Air Hammer
Rapid impacts can push the bolt while breaking the corrosion bond.
- ✦ Prepare to Cut
If the bolt is fused to the sleeve, cutting may be faster and safer than excessive hammering.
Why the Inner Sleeve Causes So Much Trouble
A suspension bushing often has a steel sleeve through its center. The mounting bolt passes through that sleeve. When rust bonds the sleeve to the bolt, both pieces act like one solid part.
This is why replacing only the bolt may not be enough. Once the bushing sleeve is badly corroded or damaged, the control arm or bushing may also need replacement.
Using Heat on a Seized Control Arm Bolt
Heat can help when rust has locked metal parts together. Heating the bracket can make it expand slightly. That may reduce its grip on the bolt or sleeve.
Heat also adds risk. Suspension bushings contain rubber. Brake hoses, wiring, fuel lines, undercoating, grease, and other materials may be close to the work area.
If you do not have safe experience using a torch around vehicles, use another method or take the vehicle to a repair shop. Fire damage can turn a stuck bolt into a much bigger problem.
- ✦ Inspect the Area
Check for brake hoses, wiring, fuel lines, rubber parts, and flammable coatings.
- ✦ Heat the Correct Part
The goal is usually to expand the surrounding metal, not melt the bushing.
- ✦ Keep Fire Protection Nearby
Have a suitable fire extinguisher ready whenever open flame is used around a vehicle.
- ✦ Replace Damaged Parts
Replace any bushing, boot, hose, or wiring that suffers heat damage.
How to Cut Out a Seized Upper Control Arm Bolt
Sometimes the answer to how to get upper control arm bolts out is to stop trying to save the old hardware. If the bolt has rusted solid to the bushing sleeve, cutting through it may be the only practical option.
A reciprocating saw with a quality metal-cutting blade is commonly used. The usual goal is to cut the bolt between the control arm bushing and the mounting bracket. Depending on the design, you may need to cut both sides.
This method destroys the bolt and often the bushing. That is acceptable if you are installing a complete new upper control arm.

- ✦ Confirm Replacement Parts
Make sure you have the correct new bolt, nut, washers, cam hardware, and control arm before cutting.
- ✦ Protect Nearby Parts
Keep the saw blade away from brake hoses, wiring, frame surfaces, and the suspension bracket.
- ✦ Cut the Bolt Shaft
Work through the gap beside the bushing sleeve where access allows.
- ✦ Remove the Arm
Once both sides of a seized bolt are cut, the control arm can usually be removed from the bracket.
- ✦ Inspect the Bracket
Check the mounting ears for saw damage, cracks, spreading, or severe corrosion before installing new parts.
When Cutting Is Better Than More Hammering
Heavy hammering can bend mounting ears or damage nearby parts. If several removal methods have failed and the bushing is already being replaced, cutting can be the cleaner choice.
Stop if the bracket begins to deform. A damaged suspension mounting point can affect safety and wheel alignment.
How to Remove an Upper Control Arm Bolt With Limited Clearance
Some bolts are not seized at all. They simply cannot slide out because another vehicle part blocks the path. This is common on tightly packaged trucks, SUVs, and cars.
Before cutting anything, check the direction of bolt removal. Look for interference from the body, steering shaft, exhaust, engine components, brake lines, or wiring.
Manufacturer procedures sometimes call for moving another part first. In other cases, replacement hardware may be installed from a different direction if the service instructions allow it.

- ✦ Check Both Directions
A bolt may have more clearance when pushed out from the opposite side.
- ✦ Move Small Obstructions
Brackets, wire retainers, or hose clips may only need to be temporarily moved.
- ✦ Follow Vehicle-Specific Procedures
Some models require removal or movement of nearby parts before the control arm bolt can come out.
- ✦ Do Not Bend Important Lines
Avoid forcing brake lines, fuel lines, or hard hydraulic lines out of the way.
What Not to Do With a Stuck Upper Control Arm Bolt
Aggressive methods can work, but careless force can damage the suspension. Knowing what not to do is part of learning how to get upper control arm bolts out safely.
If the mounting bracket bends, cracks, or spreads, stop the repair. Suspension attachment points carry major loads while braking, turning, and driving over bumps.
- ✦ Do Not Work Under a Jack Alone
Always use properly rated jack stands on stable ground.
- ✦ Do Not Strike Exposed Threads Directly
Direct hammer blows can mushroom the bolt and make removal harder.
- ✦ Do Not Overheat Rubber Parts
Excessive heat can destroy bushings and damage nearby components.
- ✦ Do Not Bend the Mounting Bracket
Too much pry-bar or hammer force can damage the suspension mounting point.
- ✦ Do Not Reuse Bad Hardware
Replace bolts that are deeply rusted, bent, stretched, cut, or badly damaged.
Installing the New Upper Control Arm Bolt Correctly
Once you know how to get upper control arm bolts out, proper installation matters just as much. Clean the mounting surfaces and inspect the bracket before installing the new arm.
Use the correct bolt type and grade for the vehicle. Alignment bolts, cam washers, and special nuts should match the original design or the approved replacement kit.
Do not guess at torque. Upper control arm fastener torque can vary a lot by vehicle. Use the correct service specification for your year, make, model, and suspension setup.
- ✦ Clean the Mounting Area
Remove loose rust, dirt, and debris from the control arm bracket.
- ✦ Use Correct Hardware
Install bolts, nuts, and alignment cams designed for the vehicle.
- ✦ Check Bushing Position
Make sure the control arm sits correctly in the bracket before tightening.
- ✦ Torque to Specification
Use a torque wrench and the service specification for your vehicle.
- ✦ Get a Wheel Alignment
An alignment is usually wise after upper control arm replacement, especially when cam bolts were disturbed.
Should Control Arm Bushings Be Tightened at Ride Height?
Many bonded rubber suspension bushings should receive their final torque near normal ride height. Tightening them while the suspension hangs can preload the rubber.
The correct method depends on the suspension design. Follow the repair procedure for the vehicle instead of using one rule for every control arm.
When You Should Let a Repair Shop Handle the Bolt
A stuck upper control arm bolt can move from a basic repair to a heavy suspension job very quickly. Professional help makes sense when the mounting bracket is badly rusted, the bolt must be cut in a tight space, or heat must be used near sensitive parts.
A shop may have an air hammer, powerful induction heater, lift, cutting tools, and vehicle-specific repair data. Those tools can reduce the chance of damaging the frame or suspension bracket.
If you are unsure how to get upper control arm bolts out without damaging a structural mounting point, stopping early can save money. Replacing a bolt is simple. Repairing damaged suspension structure is not.
- ✦ Severe Frame Rust
Heavy corrosion around the mounting point may require professional inspection.
- ✦ Bent Mounting Bracket
Do not continue forcing the bolt if the bracket has started to deform.
- ✦ No Safe Cutting Access
A shop may be able to remove the bolt without damaging nearby lines or structural parts.
- ✦ Uncertain Alignment Hardware
Professional service can help when cam bolts or other alignment parts are difficult to identify or position.






