
How to Remove Stuck Control Arm Bolt: Step-by-Step Guide
Learning **how to remove stuck control arm bolt** hardware can save a suspension repair from turning into an all-day fight. These bolts live under the vehicle, where they see water, road salt, dirt, and years of heat cycles. On vehicles driven in the U.S. Rust Belt, corrosion can lock a bolt into the bushing sleeve so tightly that the nut may come off while the bolt still refuses to move.
The key is to find out what is actually stuck before adding more force. Sometimes the threads are rusty. In other cases, the bolt has bonded to the metal sleeve inside the control arm bushing. From years of dealing with seized automotive fasteners, I have found that working in stages is far safer than immediately reaching for the biggest breaker bar available.
This guide explains **how to remove stuck control arm bolt** fasteners using penetrating oil, impact tools, heat, hammering, and cutting methods. It also covers what to do when the bolt spins, when it is frozen inside the bushing sleeve, and how to avoid damaging the control arm mounting points.

Why Does a Control Arm Bolt Get Stuck?
Before learning **how to remove stuck control arm bolt** hardware, it helps to know why the bolt will not move. Control arm bolts pass through metal brackets and rubber bushings. Many bushings contain an inner steel sleeve that sits directly around the bolt.
Moisture can work its way between the bolt and that sleeve. Over time, corrosion expands and effectively bonds the two pieces together. The nut may come off with little trouble, yet the bolt can remain locked inside the bushing.
Suspension load can also trap the bolt. If the control arm, spring, steering knuckle, or sway bar is pushing sideways on the fastener, the bolt may feel seized even when rust is not the main problem.

- ✦ Rust on the threads
Corrosion between the nut and bolt threads makes the fastener hard to turn.
- ✦ Bolt seized to the bushing sleeve
Rust can bond the bolt shaft to the steel sleeve inside the rubber control arm bushing.
- ✦ Suspension tension
The weight or angle of suspension parts can push against the bolt and prevent it from sliding out.
- ✦ Damaged threads
Bent, stretched, cross-threaded, or mushroomed threads may stop the bolt from moving normally.
- ✦ Corrosion inside the mounting bracket
Heavy rust around the mounting ears can reduce clearance and trap the bolt.
How to Tell Whether the Threads or Bushing Sleeve Are Seized
Remove or loosen the nut first. If the bolt rotates but will not slide out, the shaft may be rusted to the inner sleeve or the suspension may be loading the bolt. If the bolt will not rotate at all, corrosion may affect the threads, bolt shank, sleeve, or all three.
- ✦ Bolt turns but will not pull out
Suspect a seized bushing sleeve or side load on the bolt.
- ✦ Nut and bolt will not turn
Suspect severe thread corrosion or a damaged fastener.
- ✦ Bolt moves slightly and then stops
Rust buildup, damaged threads, or a misaligned control arm may be blocking removal.
Tools You May Need to Remove a Stuck Control Arm Bolt
You may not need every tool below. Start with the least aggressive option and move up only when needed. Using the right size six-point socket is especially important because suspension bolts can require high force.
Avoid using a loose-fitting adjustable wrench on a badly rusted fastener. It can round the bolt head or nut and turn a difficult repair into a much harder one.
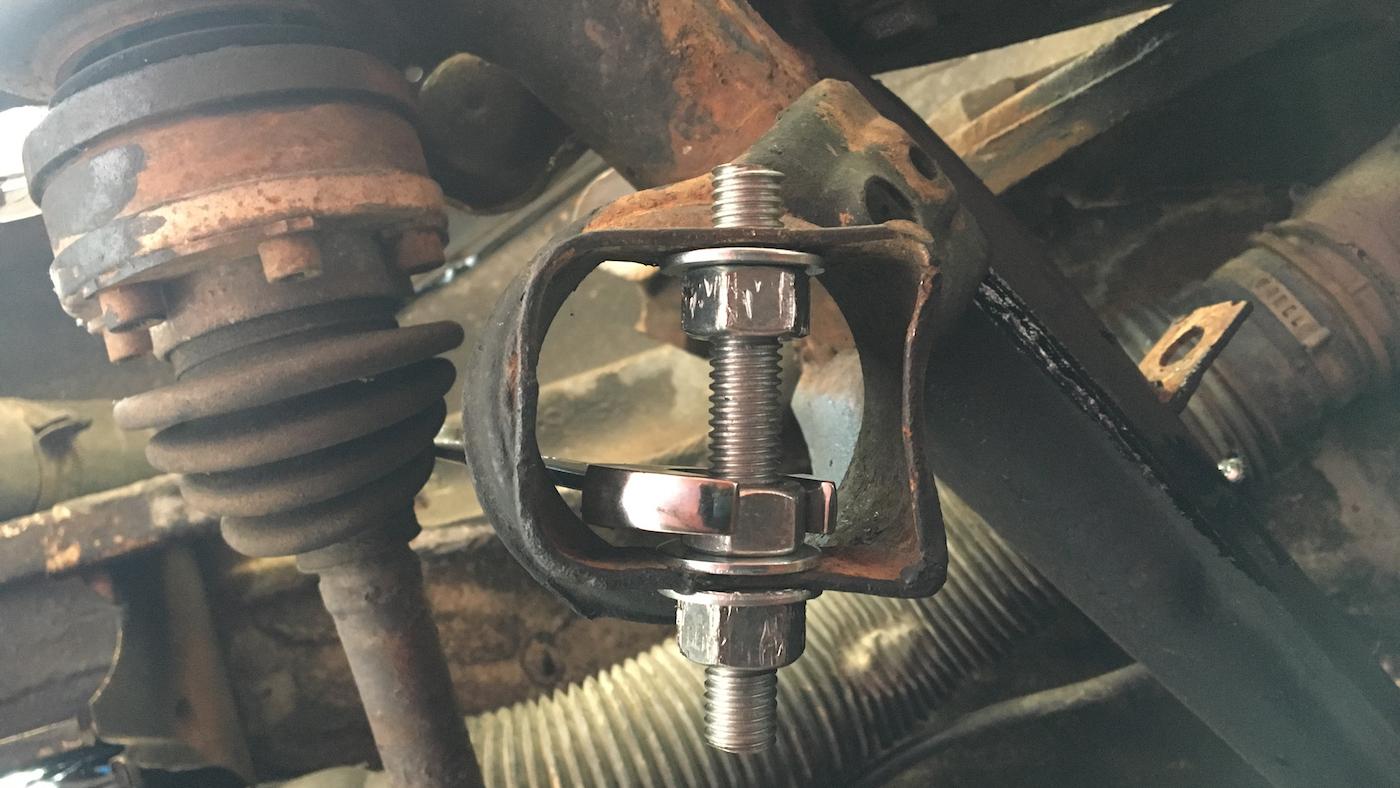
- ✦ Penetrating oil
Helps work into rust around the threads and bolt shaft.
- ✦ Six-point sockets
Provide a firm grip and reduce the chance of rounding the bolt.
- ✦ Breaker bar
Adds leverage when a normal ratchet cannot loosen the fastener.
- ✦ Impact wrench
Uses repeated impacts that can help break rust loose.
- ✦ Dead-blow or heavy hammer
Can help drive a loose bolt from the mounting bracket.
- ✦ Punch or drift
Transfers hammer force to the bolt without striking surrounding parts.
- ✦ Floor jack or support jack
Helps change control arm position and remove load from the bolt.
- ✦ Heat source
Useful for severe corrosion when it can be applied without harming nearby parts.
- ✦ Reciprocating saw
Often the final option when the bolt is permanently seized inside the bushing sleeve.
How to Remove Stuck Control Arm Bolt Step by Step
The safest way to learn **how to remove stuck control arm bolt** hardware is to use a gradual process. Do not jump straight to cutting unless the bolt is clearly seized to the bushing sleeve or the fastener is already damaged.
Make sure the vehicle rests securely on quality jack stands placed at approved lift points. Never work under a vehicle supported only by a floor jack. Also check whether the control arm is connected to a coil spring, torsion bar, or other loaded component before removing mounting hardware.

- ✦ Step 1: Clean exposed rust
Use a wire brush to remove loose rust and dirt from the visible threads, nut, and bolt head.
- ✦ Step 2: Apply penetrating oil
Spray the nut, threads, bolt head area, and both sides of the bushing sleeve when access allows.
- ✦ Step 3: Relieve suspension load
Support the control arm with a jack and raise or lower it slightly until pressure on the bolt decreases.
- ✦ Step 4: Try tightening slightly
A tiny tightening movement can sometimes crack rust before you attempt to loosen the nut.
- ✦ Step 5: Use a breaker bar
Apply steady force with a correct-size six-point socket. Keep the tool straight on the fastener.
- ✦ Step 6: Try an impact wrench
Short bursts from an impact wrench can break corrosion more effectively than constant force.
- ✦ Step 7: Drive the bolt outward
Once the nut is removed and the bolt rotates, use a punch and hammer to tap the bolt through the mount.
- ✦ Step 8: Escalate only if needed
Use heat, an air hammer, or cutting methods only after simpler methods fail.
Use the Jack to Find the Bolt’s Neutral Position
This small step solves more stuck suspension bolts than many people expect. Place a jack under the control arm and move it only a small amount at a time. Watch the bolt while changing the arm height.
When the holes in the bracket, bushing, and control arm line up, pressure on the bolt drops. You may suddenly be able to turn or tap the bolt out with much less force.
- ✦ Move slowly
Small changes in arm height can make a large difference in bolt pressure.
- ✦ Watch for spring load
Do not remove suspension parts until you understand how the spring is retained on your vehicle.
Work the Bolt Back and Forth
If the bolt begins to turn, do not force it continuously in one direction. Rotate it back and forth while adding penetrating oil. This helps break loose rust around the shaft and may draw lubricant deeper into the sleeve.
- ✦ Use controlled movement
Small repeated turns often work better than one extreme pull.
How to Remove a Control Arm Bolt Seized Inside the Bushing Sleeve
A bolt seized to the inner bushing sleeve is one of the hardest versions of this repair. The nut may come off, and the bolt head may even turn, but the shaft remains bonded to the sleeve. At this point, simply adding more penetrating oil to the threads will not solve the main problem.
If you are researching **how to remove stuck control arm bolt** hardware because the bolt spins with the bushing, this is likely what you are dealing with. The rust bond is hidden inside the bushing where normal tools cannot reach it easily.

- ✦ Rotate while pulling
Use an impact wrench or ratchet to spin the bolt while applying outward pressure.
- ✦ Strike the bolt end
Use a punch and hammer while the bolt is rotated to help break the rust bond.
- ✦ Use an air hammer
An air hammer can provide repeated axial force when there is enough room to use it safely.
- ✦ Cut through both sides
If the bolt is permanently fused to the sleeve, cutting between the bushing and mounting bracket may be the only practical solution.
When Cutting Becomes the Best Option
If the control arm or bushing is already being replaced, saving the old bolt may not be worth hours of work. A thin metal-cutting blade can be inserted between the bushing sleeve and the mounting bracket on each side.
Cutting must be controlled. Protect brake hoses, fuel lines, wiring, CV boots, and the mounting bracket. After the cuts are complete, the control arm can often be removed with the seized section of bolt still trapped inside the old bushing.
- ✦ Use new hardware
Never reuse a bolt that has been cut, deeply corroded, stretched, or heavily damaged.
- ✦ Protect the bracket
Do not cut into the suspension mounting ears or vehicle structure.
Can You Use Heat on a Stuck Control Arm Bolt?
Heat can help when corrosion is severe, but it should not be the first method. Heating the surrounding metal can expand it enough to help break the rust bond. The risk is that control arm mounts are often close to rubber bushings, brake hoses, fuel lines, CV boots, wiring, undercoating, and other heat-sensitive parts.
When using heat to learn **how to remove stuck control arm bolt** hardware, focus on the metal around the seized area rather than trying to melt or burn the bolt free. Keep a fire extinguisher nearby and never use an open flame near fuel vapors or leaking fluids.

- ✦ Inspect the area first
Look for rubber, fuel lines, brake hoses, wiring, undercoating, and other materials that can burn or melt.
- ✦ Use controlled heat
Heat the surrounding metal gradually rather than overheating one small point.
- ✦ Try movement after heating
Use a breaker bar or impact tool after expansion has had a chance to weaken the corrosion bond.
- ✦ Stop if safety is uncertain
A professional shop may be the safer choice when fuel or brake components are close to the work area.
When Heat Should Be Avoided
Do not use a torch when you cannot clearly see what is behind the mounting area. Heat can travel through metal and damage parts that are not directly in the flame path. It is also a poor choice if flammable fluid, heavy undercoating, or fuel system parts are nearby.
- ✦ Limited access
Avoid open flame when you cannot inspect the full work area.
- ✦ Fuel system nearby
Do not use open flame around fuel leaks, fuel lines, or fuel vapors.
What to Do If the Control Arm Bolt Spins but Will Not Come Out
A bolt that spins freely but will not slide out usually points to side load, sleeve corrosion, or damaged threads. Start by supporting the control arm and changing its height a few millimeters at a time. Try pulling or tapping the bolt during each adjustment.
If the entire inner sleeve turns with the bolt, the bolt may be rusted inside the sleeve. In that case, turning alone will not remove it. You need outward force, vibration, or eventually a cutting method.

- ✦ Relieve side pressure
Raise or lower the control arm slightly until the bolt holes line up.
- ✦ Pull while rotating
Use locking pliers only on a section of the bolt that will not be reused, while another tool rotates the bolt.
- ✦ Drive from the opposite side
Use a punch and controlled hammer blows when access allows.
- ✦ Check the threads
A damaged thread near the end of the bolt can catch on the sleeve or bracket.
What to Do If the Bolt Head or Nut Is Rounded
Rounded hardware adds another layer to the repair. Stop using the tool that caused the slipping. Continuing with the same loose socket will usually remove even more metal.
Use a high-quality bolt extractor socket or a smaller impact socket designed to grip damaged fasteners. If the nut is accessible, splitting or cutting the nut may be safer than destroying the bolt head and surrounding bracket.
- ✦ Switch to a six-point socket
Six-point sockets grip the flats better than common twelve-point sockets.
- ✦ Use an extractor socket
Spiral-style extractor sockets can grip rounded bolt heads and nuts.
- ✦ Cut the nut if needed
A nut splitter or careful cutting can remove a badly damaged nut without requiring the bolt to turn.
- ✦ Plan to replace the fastener
Do not reuse suspension hardware with badly rounded or damaged heads.
When You Should Cut the Stuck Control Arm Bolt
Cutting should usually be treated as the last practical step in **how to remove stuck control arm bolt** repairs. It makes sense when the bolt has fused to the inner bushing sleeve and the control arm or bushing is already scheduled for replacement.
A reciprocating saw with a quality metal-cutting blade is often effective. The blade normally needs to pass between the control arm bushing and the mounting bracket. In many cases, you must cut both sides of the bolt.
Take your time. The suspension bracket is part of the vehicle and should not be damaged. A few extra minutes spent protecting nearby parts is better than cutting into a mount that may require welding or structural repair.

- ✦ Cut only the old hardware
Keep the blade centered on the bolt and away from the mounting bracket.
- ✦ Use proper eye protection
Cutting suspension hardware can throw rust, metal chips, and broken blade pieces.
- ✦ Expect to replace the bushing or arm
A bolt seized inside the sleeve often makes saving the old bushing impractical.
- ✦ Buy replacement hardware first
Confirm that the correct bolt, nut, and any required washers are available before cutting the old fastener.
How to Install the New Control Arm Bolt Correctly
Removing the old fastener is only part of the repair. Clean the mounting holes and inspect the brackets before installing the replacement bolt. Heavy rust, stretched holes, bent mounting ears, or cracks should be addressed before the vehicle goes back on the road.
Use the correct replacement hardware for the vehicle. Suspension bolts may have specific grades, coatings, dimensions, or locking nuts. Do not replace them with random hardware-store bolts just because the diameter looks similar.
Many bonded-rubber control arm bushings should receive final torque at normal ride height. Tightening them while the suspension hangs can preload the rubber. Always follow the repair procedure for your exact make, model, and year.

- ✦ Clean the mount
Remove loose corrosion and debris from the bracket and bolt holes.
- ✦ Inspect the bracket
Look for cracks, bent ears, enlarged holes, or severe metal loss.
- ✦ Use the correct bolt
Match the original fastener specification or use the manufacturer-approved replacement.
- ✦ Set ride height when required
Support the suspension at normal ride position before final tightening when the service procedure calls for it.
- ✦ Torque to specification
Use the exact torque value listed for your vehicle rather than guessing.
Should You Put Anti-Seize on the New Bolt?
This depends on the vehicle and the fastener specification. Lubricants such as anti-seize can change the relationship between torque and clamping force. If the manufacturer calls for a clean, dry fastener, adding lubricant can lead to too much bolt tension at the stated torque.
Use anti-seize only when the service information or replacement hardware instructions allow it. For many suspension repairs, following the specified installation condition is more important than trying to prevent every future rust problem.
- ✦ Follow service data
Use lubricant only when the installation procedure allows it.
Common Mistakes to Avoid When Removing a Stuck Control Arm Bolt
Knowing **how to remove stuck control arm bolt** hardware also means knowing when not to use more force. Suspension mounts can bend, tools can slip, and bolts can snap if the repair is rushed.
The most common problem I see in stubborn fastener work is escalating too fast. A mechanic may reach for heat or a long pipe before checking whether the control arm is simply pushing sideways on the bolt. Removing that tension can turn a seemingly frozen bolt into an easy removal.
- ✦ Using a loose socket
An incorrect socket size can round the bolt head or nut.
- ✦ Adding extreme leverage too early
Too much force can snap the bolt or damage the mounting bracket.
- ✦ Ignoring suspension tension
A loaded control arm can pinch the bolt even when corrosion is minor.
- ✦ Heating without checking nearby parts
Heat can damage rubber, wiring, brake hoses, undercoating, and fuel system parts.
- ✦ Reusing damaged hardware
Cut, stretched, deeply rusted, or rounded suspension bolts should be replaced.
- ✦ Guessing final torque
Control arm fasteners are structural suspension parts and should be tightened to the correct specification.
When to Take the Vehicle to a Professional
Some stuck control arm bolts are reasonable DIY jobs. Others need a lift, air tools, induction heating equipment, or cutting access that is hard to get in a home garage.
Professional help is especially useful if the bolt is close to a fuel line, if the suspension bracket is badly rusted, or if removing the control arm could release a loaded spring. A shop can also inspect whether corrosion has weakened the mounting structure itself.
- ✦ Severe structural rust
A heavily corroded control arm mount may require inspection before new parts are installed.
- ✦ Spring tension is unclear
Do not remove suspension hardware if you are unsure how the spring or torsion system is loaded.
- ✦ Fuel or brake parts are nearby
Heat and cutting become much riskier when important lines are close to the bolt.
- ✦ The bracket is bending
Stop if force begins to deform the suspension mount instead of moving the bolt.






