To remove a spring from a shock absorber, first identify the suspension design, remove the complete assembly according to the vehicle service manual, and release the spring’s stored energy with a compatible spring compressor before removing any retaining hardware. Never loosen a loaded spring assembly without proper equipment.
In the United States, shock absorbers, struts, and coil springs are common parts of cars, pickup trucks, SUVs, motorcycles, and off-road vehicles. A worn spring or leaking shock may lead an owner to consider suspension repair at home. However, removing the spring is not the same as removing the shock absorber from the vehicle.
A conventional shock absorber often works with a separate coil spring. A MacPherson strut, by contrast, combines a damper and a spring in one assembly that also helps locate the wheel. Many adjustable coilovers use threaded spring seats and locking collars. Each design needs a different removal method, so identify the exact assembly before starting.
The main danger is stored spring energy. A compressed coil spring can release with enough force to cause severe injury or damage nearby parts. The safest approach is to use the correct vehicle-specific procedure and a rated compressor that fits the spring. If the assembly requires specialized equipment, has a damaged spring, or cannot be secured correctly, have a qualified suspension shop perform the work.
Understand Which Type of Shock and Spring You Have
The first step is to identify the suspension assembly. The right method depends on how the spring is held in place, where the spring’s load travels, and whether the shock can be separated from the spring without dismantling a structural component.
Find the vehicle identification number, suspension type, and relevant service information. The factory service manual or a trusted vehicle-specific repair procedure should show the correct removal sequence, required tools, lifting points, and fastener torque values.
Source: liveabout.com
Separate shock absorber and coil spring
Many rear suspensions use a shock mounted beside a separate coil spring. The shock may be removable without compressing the spring, but the spring still needs its own safe removal procedure if it is being replaced.
MacPherson strut assembly
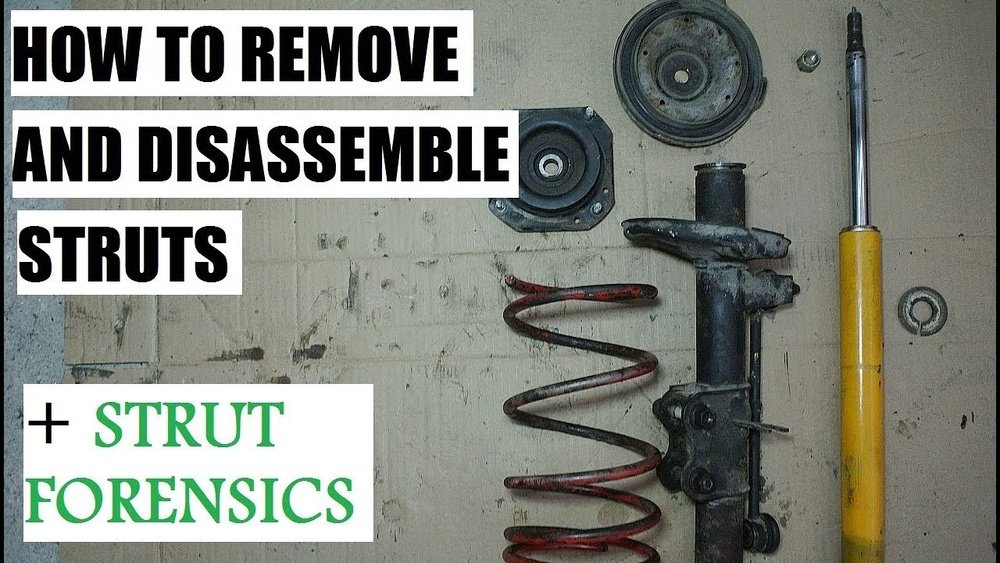
The coil spring wraps around the strut body. The spring is usually compressed and retained between spring seats, with an upper mount and central retaining nut. Use a compressor specifically suited to the assembly.
Adjustable coilover
A coilover combines the damper and spring and often has threaded collars that adjust spring preload or ride height. Some designs permit spring removal through a specified adjustment procedure, while others need a compressor or dedicated fixture.
Motorcycle or ATV shock
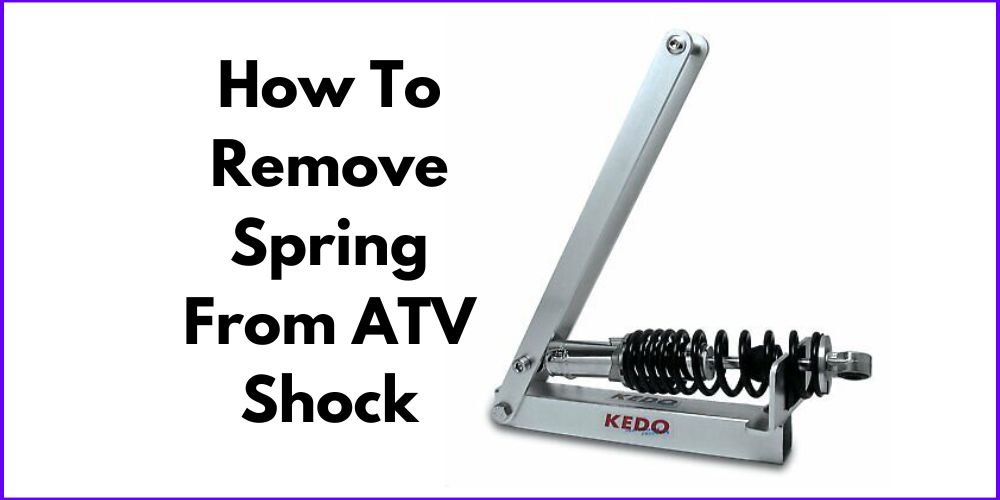
These units can use narrow springs, high preload, unusual retaining rings, or compact adjusters. A purpose-built shock spring compressor may be required, and some dampers need professional rebuilding equipment.
How to Tell Whether the Spring Is Still Loaded
A spring may remain compressed even when the assembly is off the vehicle. Look for a gap between the spring coils, pressure against the upper and lower seats, or a retaining collar that holds the spring under preload. These signs do not tell you how much force is stored, so never judge safety by appearance alone.
If you cannot confirm how the spring is retained, stop and check the service procedure. A spring that looks loose can still move suddenly when a mount, collar, or retainer is released.
Check the design first
Identify the spring seats, upper mount, retaining nut, locking collar, and any snap ring or circlip before touching the assembly.
Do not test the load by loosening hardware
Never loosen a central strut nut or remove a spring retainer to find out whether the spring is under tension.
Tools and Safety Equipment Needed for Spring Removal
Gather the correct tools before dismantling the suspension. A suitable compressor must match the spring diameter, coil spacing, assembly shape, and expected load. A tool that fits one vehicle may not fit another, even if the springs look similar.
Read the compressor instructions and inspect the tool for wear, cracks, damaged threads, bent hooks, or missing safety parts. Do not use a damaged compressor or one with an unknown load rating. If the tool cannot engage the spring securely, use a different approved method or seek professional service.
Source: pmmonline.co.uk
Vehicle support equipment
Use a floor jack with an adequate rating, correctly rated jack stands, and wheel chocks. Work on a firm, level surface and use the vehicle manufacturer’s approved lifting points.
Compatible spring compressor
Use a purpose-built, rated compressor approved for the specific spring and assembly. Follow its instructions for hook placement, engagement, and compression limits.
Hand tools
Prepare the correct sockets, wrenches, breaker bar, and any specified counter-hold tools. Use a calibrated torque wrench for reassembly.
Personal protective equipment
Wear safety glasses, suitable gloves, and protective footwear. Keep your face and body out of the spring’s potential path of movement.
Service information
Keep the vehicle service manual and compressor instructions available. Check for one-time-use nuts, special retainers, electronic suspension requirements, and model-specific warnings.
Why the Correct Spring Compressor Matters
A spring compressor holds the coil in a shortened position so the spring’s force is controlled during disassembly. Its hooks, threaded shafts, clamps, or hydraulic fixture must remain aligned as the load changes.
Some external compressors are unsuitable for tightly spaced coils, unusual spring shapes, or certain strut housings. A professional wall-mounted or bench-mounted fixture may be required. Never assume a universal tool is safe simply because it can be attached to the spring.
Use only approved contact points
Position the compressor exactly as its manufacturer specifies. Do not place hooks on damaged coils, unstable spring ends, or areas where they can slide off.
Avoid improvised methods
Do not restrain a spring with ratchet straps, rope, chains not approved for this purpose, welded clamps, or other improvised devices.
How to Remove a Spring From a Shock Absorber Safely
The general process is to identify the assembly, remove it from the vehicle using the correct service procedure, secure it in an approved compressor, and release the spring only after its stored energy is controlled. Exact steps vary by vehicle and suspension design.
The following sequence is a general planning guide, not a substitute for the model-specific instructions. Do not proceed to spring release if you cannot confirm the correct compressor setup or retaining method.
Source: i.ytimg.com
Step 1: Park and prepare the vehicle
Park on firm, level ground, apply the parking brake, and chock the wheels that will remain on the ground. Follow the service manual for any battery disconnection or electronic suspension preparation.
Step 2: Raise and support the vehicle
Use approved lifting points and support the vehicle with rated jack stands. Never work under a vehicle supported only by a jack. If the vehicle has air suspension, follow the specified depressurization and support procedure.
Step 3: Remove the assembly as directed
Disconnect the required links, brackets, or fasteners in the order stated in the service manual. Support heavy components so they do not drop or pull on brake hoses, wiring, or other connected parts.
Step 4: Inspect the assembly
Place the removed unit in a stable work area. Check for a bent strut, cracked spring, damaged seat, corrosion, or a retaining part that is not fully understood. Do not compress a visibly damaged spring with a general-purpose tool.
Step 5: Fit the approved compressor
Follow the compressor maker’s instructions for the exact spring and assembly. Ensure every hook or clamp is fully engaged at the specified contact points, and check alignment before applying load.
Step 6: Compress the spring as specified
Operate the tool slowly and evenly within its rated limits. Keep the assembly stable and watch for slipping hooks, bending parts, uneven movement, or other signs of failure. Stop immediately if anything shifts or behaves unexpectedly.
Step 7: Confirm the spring is safely restrained
Use the manufacturer’s prescribed method to confirm that the spring is retained by the compressor and no longer loading the parts that must be removed. Do not rely on an assumed gap or visual guess.
Step 8: Remove the specified retaining hardware
Only after the spring is safely restrained, remove the designated mount or retainer using the vehicle-specific procedure and any required counter-hold tool. Do not loosen a loaded central nut or an unidentified fastener.
Step 9: Lift away the spring
When the retainer and seats are released according to the service procedure, remove the restrained spring without putting your hands in pinch points. Keep control of the compressor and spring throughout the movement.
Step 10: Release the compressor safely
If the spring is being removed from the compressor, follow the tool maker’s release sequence. Reduce the load slowly and evenly, keep clear of the spring’s path, and place the relaxed spring on a stable surface.
What Successful Spring Removal Looks Like
The spring should be removed without sudden movement, tool slippage, or damage to the coils and seats. The retaining hardware should remain identifiable, and the compressor should be unloaded only by its approved procedure.
Inspect the spring ends, isolators, seats, and mount after removal. Rust damage, a broken coil, distorted seats, or worn rubber isolators may affect fit and suspension operation. Replace parts only according to the vehicle’s specifications.
Keep parts organized
Record the order and orientation of the upper mount, washers, isolators, spacers, and retainers so they can be reinstalled correctly.
Stop if the spring binds
If the spring catches on a seat or the compressor prevents controlled movement, do not pry or strike the loaded assembly. Reassess the setup or use a qualified shop.
How to Remove a Spring From Different Suspension Designs
Although the main safety rule stays the same, the correct spring-removal method changes with the suspension design. A separate rear spring, a front strut spring, and a threaded coilover spring should not be treated as interchangeable assemblies.
Check the service manual for the exact design before removing any retaining part. The following differences help you decide which procedure and equipment are relevant.
Source: shockabsorberpro.com
MacPherson strut
The spring is commonly held between upper and lower seats around the strut. A compatible strut spring compressor is generally needed before the upper mount retaining hardware can be removed. Some designs require a dedicated shop fixture.
Separate rear coil spring
The spring may sit between the body and a suspension arm rather than around the shock. The service procedure may call for controlled suspension-arm movement or a dedicated spring tool. Removing the shock alone does not necessarily release the spring safely.
Threaded coilover
The spring may be held by an adjustable collar, a locking collar, a preload mechanism, or a separate retainer. Do not assume that loosening a collar will make a loaded spring safe. Follow the manufacturer’s instructions for reducing preload and removing the spring.
Motorcycle or ATV shock
Many units use high spring preload in a compact body. A dedicated shock spring compressor may be required to release the retaining collar or circlip. If the tool or retaining method is unfamiliar, leave the assembly to a suspension specialist.
Removing a Spring From a Front Strut
Front struts may connect to the steering knuckle and upper body mount, and their removal can affect wheel alignment. Follow the exact sequence for disconnecting brake hose brackets, ABS wiring, sway-bar links, and other connected parts without stretching or twisting them.
Once the complete strut is removed, secure it with the approved compressor before releasing its retaining hardware. Some central nuts require a special counter-hold tool, and certain mounts or nuts must be replaced after removal. Use the service manual to confirm these requirements.
Protect steering and brake components
Support the steering knuckle and nearby components as required. Never let the assembly hang from a brake hose or electrical wire.
Plan for alignment
If strut removal disturbs alignment-related joints or fasteners, check the manufacturer’s requirements and arrange a wheel alignment when specified.
Removing a Spring From a Separate Rear Suspension
A rear coil spring may be mounted away from the shock absorber. In some vehicles, the spring can be removed after the suspension arm is lowered in a controlled manner; in others, a dedicated compressor is required because the spring remains under load.
Never remove an arm bolt or lower the suspension based on appearance alone. The spring may push the arm down or move the vehicle body as the load changes. Use the specified support points and follow the exact spring-release procedure.
Support the suspension arm
Use the specified method to control arm movement before releasing any joint or fastener that affects spring retention.
Keep the shock and spring separate in your plan
Determine whether the shock is merely a damper or also limits suspension movement during removal. The correct procedure may require a different order for removing each part.
Can You Remove a Shock Spring Without a Spring Compressor?
For a conventional loaded strut or shock spring, do not attempt removal without an approved way to control the stored spring energy. A spring that is held under preload can move suddenly when its retainer is released, even if the assembly is no longer attached to the vehicle.
Some coilovers have a manufacturer-defined method for reducing preload and removing the spring without an external compressor. That does not make every threaded collar safe to loosen. Confirm the exact procedure for the specific model before attempting it.
Source: i.ytimg.com
Never use an impact wrench to release an unknown loaded retainer
Rapid tool action can cause the assembly to rotate, shift, or lose control. Use only the tools and method specified by the vehicle or suspension manufacturer.
Do not use makeshift restraints
Ratchet straps, rope, wire, improvised clamps, and ordinary bench vises are not safe substitutes for a correctly rated spring compressor.
Do not strike the spring or retaining parts
Hammering or prying a loaded assembly can cause the spring or retainer to move unexpectedly and damage the components.
Choose a professional service when required
If the spring is heavily preloaded, corroded, cracked, or incompatible with available tools, a suspension shop is the safer option.
When a Professional Spring Compressor Is the Better Choice
A repair shop may have a guarded strut compressor, a dedicated shock spring fixture, or a tool designed for a particular motorcycle or performance suspension. Such equipment can provide better control when a general-purpose compressor cannot securely engage the spring.
Professional service is especially appropriate when the retainer uses a circlip under load, the assembly contains pressurized or specialized damper components, or the spring is damaged. Do not open a sealed or pressurized shock absorber unless the manufacturer specifically permits the work and the required training and equipment are available.
Unusual spring shape
Use a shop with equipment designed for the exact spring geometry if standard compressor hooks cannot engage securely.
Damaged or corroded components
Have a qualified technician assess a cracked coil, severe corrosion, bent shaft, damaged retainer, or distorted spring seat before disassembly.
Common Spring Removal Problems and How to Respond
If the spring will not release, the compressor slips, or the retaining nut will not turn, stop before applying more force. These problems can indicate the wrong tool, an incorrect setup, corrosion, or a retaining method that differs from the one you expected.
Do not try to overcome a problem by placing your body closer to the spring or using a longer lever. Identify the cause through the service instructions and compressor documentation, and unload the assembly only by the approved method.
Source: i.ytimg.com
The compressor hooks keep slipping
Stop operating the tool. Do not continue tightening it or try to catch a moving hook by hand. If the tool can be unloaded safely under its instructions, do so; otherwise keep clear and get professional assistance.
The spring remains loaded after compression
The spring may not be compressed enough, the compressor may be incorrectly positioned, or the assembly may require a different fixture. Do not remove the retainer until the prescribed release condition is met.
The retaining nut will not turn
Check the service procedure for a counter-hold tool, a left-hand thread, a locking feature, or a specified removal method. Do not use uncontrolled force on a loaded assembly.
The spring is stuck on the seat
Check for a retaining ring, isolator, corrosion, or a design feature that still holds the spring. Do not pry the spring off while it is under load.
The compressor becomes bent or damaged
Stop immediately and keep clear. Do not reuse a damaged tool. If the spring is still loaded and the assembly cannot be unloaded safely, leave it undisturbed and seek qualified assistance.
What to Inspect After Removing the Spring
Check the entire spring for broken ends, deep rust, chipped coating, distortion, and wear where the coil touches the seat. A damaged spring can affect ride height and suspension control, and cleaning alone will not restore its strength.
Inspect the shock or strut for oil leakage, shaft damage, bent parts, worn mounts, and damaged threads. Also check rubber isolators, bump stops, dust boots, and spring seats. Replace components according to the vehicle manufacturer’s instructions rather than assuming that a new spring alone will solve every suspension problem.
Spring condition
Look for cracks, broken coils, severe pitting, and distorted ends.
Shock or strut condition
Check for leakage, shaft damage, unusual looseness, and damaged mounting points.
Mounts and seats
Inspect bearings, rubber isolators, bump stops, dust covers, and retaining hardware for wear or damage.
How to Reinstall the Spring After Removal
Reinstallation requires the spring to sit in the correct position and the retaining hardware to be secured according to the service manual. A spring installed with its end outside the intended seat can make noise, alter ride height, or move incorrectly as the suspension travels.
Use replacement parts that match the exact vehicle and suspension assembly. Do not assume that springs with similar lengths or coil diameters have the same load rating, rate, or fit.
Source: slickmotorz.com
Step 1: Check all components
Confirm that the spring, isolators, mounts, seats, and retainers are serviceable and compatible. Replace one-time-use hardware where the manufacturer requires it.
Step 2: Position the spring correctly
Align the spring ends with the marked stops or shaped recesses in the upper and lower seats. Follow any specified orientation marks.
Step 3: Secure the retaining hardware
Use the required counter-hold method and torque specification. Do not guess torque values or use an impact wrench as a substitute for the specified final tightening procedure.
Step 4: Release the compressor gradually
Follow the compressor manufacturer’s instructions and release tension evenly. Watch that the spring stays seated as the load transfers to the mounts.
Step 5: Reinstall the assembly
Reconnect the suspension components in the specified order. Route brake hoses and sensor wires correctly and tighten all fasteners to the required specifications.
Step 6: Complete required checks
Follow the service manual for final checks, ride-height inspection, electronic suspension calibration, and wheel alignment if applicable. Confirm that no tools or loose parts remain near moving components.
Why Spring Orientation and Torque Matter
Many springs have shaped ends that must rest against a stop in the spring seat. Incorrect alignment can cause poor seating, rubbing, or noise. Some assemblies also require a particular orientation for the mount or isolator.
Torque specifications vary by vehicle, fastener size, material, and assembly design. Use the exact service information for your vehicle instead of a generic torque chart. If the manufacturer specifies tightening a joint at normal ride height, follow that instruction.
Do not guess specifications
Use vehicle-specific torque values and tightening sequences for all affected suspension fasteners.
Check the final fit
Verify that the spring sits against its stops and that the mount, boot, and isolators are correctly positioned.
Research Notes and Useful Follow-Up Questions
This guide addresses the main task of removing a spring from a shock or strut while explaining the equipment, suspension differences, failure signs, and reinstallation checks that affect the job. The procedure remains general because the exact vehicle, spring design, and compressor model were not specified.
The most useful evidence for a particular repair is the vehicle manufacturer’s service procedure and the instructions supplied with the exact compressor. General suspension articles and repair videos can help identify components, but they do not establish that the same removal sequence or tool is safe for every vehicle.
Source: i.ytimg.com
Primary reader task
Understand how spring removal works and determine the safe, vehicle-specific path before releasing retaining hardware.
Observed evidence status
The provided image list includes material described as spring-removal demonstrations and shock replacement guides. The images themselves are not proof of a verified repair procedure, and no hands-on testing is claimed.
Inferred next need
Readers may next need to identify the correct compressor, learn whether their specific coilover allows preload adjustment, or find the correct service manual. These are logical follow-up needs, not verified search-volume findings.
Research limitation
A live comparison of three to five competing webpages and their complete procedures was not completed for this draft. Therefore, it does not claim that any topic is missing from competing pages or that any search result position has been checked.
Next-Question Gap Map
The following map separates likely follow-up needs from verified demand. The questions are inferred from the repair process rather than presented as observed search queries.
Which spring compressor fits my vehicle?
Reader stage: preparation. Basis: inferred next need. Competitor coverage: not checked. Benefit: reduces the risk of tool mismatch. Evidence needed: vehicle-specific service instructions and compressor fit and load specifications. Priority: high. Placement: tools and safety section.
Can I remove a coilover spring by loosening its collar?
Reader stage: disassembly. Basis: inferred next need. Competitor coverage: not checked. Benefit: prevents release of a preloaded spring through an unsuitable method. Evidence needed: exact suspension manufacturer’s procedure. Priority: high. Placement: suspension-design and compressor sections.
What should I inspect before reinstalling the spring?
Reader stage: after removal. Basis: inferred next need. Competitor coverage: not checked. Benefit: helps identify damaged springs, mounts, and seats before assembly. Evidence needed: vehicle-specific inspection and replacement criteria. Priority: medium to high. Placement: inspection and reinstallation sections.
Does removing a front strut require a wheel alignment?
Reader stage: after installation. Basis: inferred next need. Competitor coverage: not checked. Benefit: clarifies when alignment checks are needed. Evidence needed: the vehicle manufacturer’s suspension service procedure. Priority: medium. Placement: reinstallation section.
Frequently Asked Questions
Q
Can I remove a shock absorber spring at home?
It depends on the suspension design, the available equipment, and your experience. A spring may be removable at home if the service manual permits the work and you have a compatible, properly rated compressor and suitable vehicle support equipment.
Do not attempt a loaded spring removal with improvised tools. If the compressor cannot hold the spring securely or the retaining method is unclear, have a qualified suspension shop perform the work.
Q
Can I remove a spring without taking the shock absorber off the vehicle?
Some suspension designs allow the spring to be removed separately, while others require the complete strut or shock assembly to be removed first. The answer depends on the location of the spring, the way it is retained, and the manufacturer’s service procedure.
Do not remove a spring retainer or lower a suspension arm based on a general procedure for another vehicle. Check the exact service instructions before releasing any load-bearing component.
Q
Is a coil spring dangerous when the shock absorber is removed?
Yes, it can be dangerous if the spring is compressed or preloaded. Removing the shock from the vehicle does not automatically release the spring’s stored energy. A spring may remain loaded between its seats or against a retaining collar.
Use the approved release method and compatible compressor, and keep your body out of the spring’s potential path. Never loosen an unknown retainer to test whether the spring is under tension.
Q
Can I use a regular coil spring compressor on a motorcycle shock?
Not unless the compressor manufacturer specifically approves it for that spring and shock assembly. Motorcycle and ATV shocks can have compact springs, high preload, narrow coil spacing, and retainers that need a dedicated fixture.
Check the exact tool specifications and shock manufacturer’s instructions. If the spring cannot be engaged and controlled as directed, use a suspension specialist.
Q
Do I need to replace the shock absorber when replacing its spring?
Not always. A serviceable shock may be retained if the manufacturer’s inspection criteria permit it and the unit has no faults that require replacement. A leaking damper, damaged shaft, worn mount, or other defect may justify additional repairs.
Inspect the shock, spring seats, mounts, isolators, and dust protection during the job. Use the manufacturer’s replacement criteria rather than assuming that every spring replacement requires a new shock.
Q
What should I do if the spring compressor slips?
Stop immediately and do not try to catch or reposition the slipping compressor by hand. Keep clear of the spring’s path and follow the tool manufacturer’s emergency instructions.
Do not continue tightening the tool or remove the retaining hardware. If the loaded assembly cannot be unloaded safely under the approved procedure, leave it undisturbed and contact a qualified suspension shop.
✦ Wrapping Up
Conclusion
Learning how to remove a spring from a shock absorber starts with identifying the suspension design and understanding how the spring is retained. A separate rear coil spring, a MacPherson strut, and an adjustable coilover may look similar at first, but their removal procedures can differ significantly.
Use the correct service manual, a compatible spring compressor, rated vehicle supports, and the specified removal and reinstallation methods. Stop if the compressor slips, a retaining part is unclear, or the spring is damaged. A qualified suspension shop is the safer option whenever the assembly cannot be controlled with the approved equipment.
💡 Key Takeaway
Before loosening any spring retainer, identify the exact suspension assembly and confirm the approved release method. If you cannot safely restrain the spring with the correct tool, do not proceed.
Eric
Hi, I’m Eric Bennett, the person behind OffRoadTruckAccessories.com.
I created this blog to share my interest in trucks, off-road driving, automotive accessories, and DIY modifications. I enjoy learning how different truck accessories work, testing their usefulness, and understanding whether they are truly worth buying.
Shock absorbers are located near the wheels as part of the suspension system, usually between the vehicle’s body, frame, or subframe and a suspension component such as a control arm, axle, or wheel assembly. However, the exact answer to where are shock absorbers located on a car depends on the suspension design. Some vehicles have…
You should change shock absorbers when they are worn, leaking, damaged, or no longer controlling suspension movement properly. There is no single replacement interval that applies to every vehicle because shock absorber life depends on road conditions, vehicle weight, driving habits, suspension design, and component quality. If you are wondering when to change shock absorbers,…
A shock absorber is a suspension component that controls how quickly a vehicle’s suspension moves up and down after bumps, dips, braking, acceleration, and other road inputs. It works with the springs to prevent excessive bouncing and helps keep the tires in controlled contact with the road. So, what does a shock absorber do? It…
A gas shock absorber is a hydraulic shock absorber that uses pressurized gas, usually nitrogen, along with shock absorber oil to control suspension movement. The gas helps reduce oil foaming and keeps damping performance more consistent when the shock works repeatedly or under demanding conditions. If you are wondering what is a gas shock absorber,…