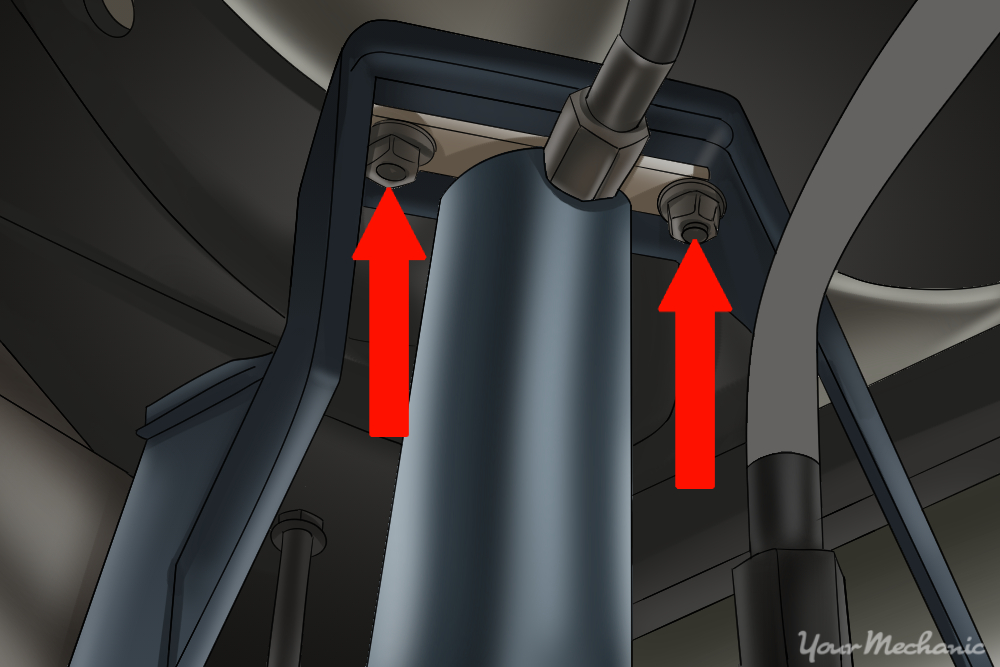
To remove a stuck shock absorber, support the vehicle securely, identify what is holding the shock in place, apply penetrating oil to seized fasteners, and loosen the hardware with the correct tools. If rust, damaged threads, a seized sleeve, or suspension spring tension prevents removal, stop before using excessive force and seek professional help when needed.
If you are repairing a car, truck, or SUV in the United States, a stuck shock absorber can turn a routine suspension job into a frustrating task. Road salt in states such as Michigan, Ohio, and New York can cause severe rust on suspension hardware. Coastal moisture, mud, and years of heat can also leave bolts and bushings difficult to remove.
The key is to find out whether the shock is stuck because of a seized bolt, a rusted mounting sleeve, a damaged nut, or tension in the suspension. Each problem calls for a different method. Pulling harder is not always the answer, and excessive force can damage mounting brackets, break fasteners, or create a safety hazard.
This guide explains how to diagnose the problem, prepare your vehicle, remove a shock absorber that will not come loose, and decide when a repair has reached its limits. The procedures apply broadly to conventional shock absorbers, but exact mounting points and removal steps vary by vehicle. Always check the service manual for your specific year, make, model, and suspension design.
A shock absorber may refuse to come out for several reasons. In many cases, the shock itself is not seized internally. Instead, corrosion, a tight mounting sleeve, or a fastener under load prevents the assembly from moving.
Knowing which part is stuck helps you avoid unnecessary force. Inspect the upper and lower mounts before deciding whether to use penetrating oil, a breaker bar, a controlled tapping method, or professional extraction equipment.
Source: d3vl3jxeh4ou3u.cloudfront.net
Rust and corrosion
Moisture and road salt can cause a bolt to bond to its mounting sleeve or bracket. The bolt may turn slightly and then stop, or it may refuse to rotate at all.
A seized bushing sleeve
Some shock bushings contain an inner metal sleeve. Corrosion can lock the sleeve to the mounting bolt, making it difficult to separate the shock from the mount even after the nut has been removed.
Suspension load or misalignment
A suspension component under tension or compression can bind the mounting bolt. The shock may also be wedged against a bracket because the suspension is hanging at an angle.
Damaged threads or hardware
Cross-threading, rounded bolt heads, damaged nuts, or a bent mounting bolt can prevent normal removal. More torque can make the damage worse.
Restricted access
Exhaust parts, body panels, control arms, and wheel-well liners can limit tool movement. Using a poorly aligned wrench in a tight space can round the fastener.
Is the Shock Absorber Stuck or Is the Bolt Seized?
Start by checking the hardware rather than pulling on the shock body. If the nut is removed but the bolt will not slide out, corrosion or binding is a likely cause. If the bolt comes out but the shock remains attached, inspect the rubber bushing, metal sleeve, and mounting bracket.
If the shock is detached at both ends but will not fit through the available opening, consult the vehicle service procedure. The manufacturer may specify a particular removal angle or require the temporary removal of another component.
Bolt will not rotate
Suspect corrosion, damaged threads, or a fastener that remains under load.
Bolt rotates but will not slide out
Suspect a seized sleeve, corrosion along the bolt shank, or bracket misalignment.
Shock moves but remains attached
Check whether the bushing sleeve or the opposite mounting point is still holding it.
Tools and Supplies Needed to Remove a Stuck Shock
Gather the correct tools before starting. A suitable socket or wrench often works better than an adjustable wrench because it fits the fastener more closely. A breaker bar can provide controlled leverage, while penetrating oil may help loosen rusted metal-to-metal joints.
Use tools that fit the vehicle and the fastener. Some shock mounts use special nuts, internal hex fittings, or a shaft-holding tool. An impact wrench may help with certain fasteners, but it should not replace the service manual or careful inspection.
Source: cdn.club.autodoc.de
Vehicle support equipment
Use a floor jack with an adequate load rating, properly rated jack stands, wheel chocks, and a level, solid work surface. Never rely on a hydraulic jack alone.
Hand tools
Prepare correctly sized metric or SAE sockets, combination wrenches, a breaker bar, extensions, and suitable hex or Torx tools where required.
Penetrating oil
Choose a product intended for corroded fasteners. Follow its label, protect nearby components, and keep it away from hot exhaust parts, flames, and other ignition sources.
Impact and tapping tools
A dead-blow mallet or suitable hammer may help with light, controlled tapping when the service procedure permits it. A correctly sized drift can help move a bolt without striking exposed threads.
Personal protective equipment
Wear safety glasses, suitable gloves, and sturdy footwear. Use hearing protection when working with loud powered tools.
Replacement hardware
Have the correct replacement nuts, bolts, washers, and bushings available if the old parts are corroded, damaged, or designated for one-time use.
Choose the Right Penetrating Oil
Penetrating oil is designed to work into narrow gaps between corroded metal surfaces. Spray the exposed area where the bolt enters the bracket or sleeve rather than coating the entire shock absorber.
Allow the product to dwell according to its instructions. Heavy corrosion may require repeated applications and more time. Penetrating oil cannot repair stripped threads, remove a bent bolt, or guarantee that a completely seized sleeve will release.
Protect rubber and plastic
Check product compatibility before applying it near bushings, wiring, painted surfaces, or plastic components.
Avoid contamination
Keep oil away from brake pads, brake discs, tires, and other surfaces where reduced friction could create a safety risk.
Safety Checks Before Removing the Shock Absorber
Secure the vehicle before loosening any suspension hardware. Park on firm, level ground, select Park for an automatic transmission or a suitable gear for a manual transmission, apply the parking brake as appropriate, and chock the wheels that remain on the ground.
Consult the owner’s manual or service information for approved lifting points. Raise the vehicle and place jack stands at the specified support locations. Gently confirm stability before working underneath it, and never place any part of your body beneath an unsupported vehicle.
Identify whether the component is a conventional shock absorber or a strut assembly. A conventional shock generally controls suspension movement without supporting the coil spring directly. A strut may form part of the structural suspension and contain a highly loaded spring. Do not dismantle a strut spring assembly without the specified spring-compression equipment and procedure.
Source: storage.googleapis.com
Disconnect power only when required
Follow the vehicle manufacturer’s instructions for battery disconnection, electronic suspension systems, or other electrical components. Do not disconnect systems unnecessarily.
Inspect nearby components
Check brake hoses, ABS wiring, fuel lines, exhaust parts, and suspension links before selecting a tool or considering any forceful method.
Support moving suspension parts
If the service procedure requires control-arm support or a change in suspension position, use an appropriate jack at the specified point. Never place fingers between moving suspension parts.
Know when to stop
Stop if a bracket bends, a fastener begins to twist, a spring shifts unexpectedly, or the vehicle becomes unstable.
Why You Should Not Heat a Stuck Shock Absorber
Do not apply a torch directly to a shock absorber or strut. These parts may contain pressurized gas and hydraulic fluid, and heating can create serious hazards. Heat can also damage rubber bushings, nearby wiring, brake hoses, coatings, and other components.
Heating a fastener may be considered in some professional repair procedures, but it is not a universal solution. It requires knowledge of nearby materials, fire risks, and manufacturer restrictions. If corrosion is severe enough to make heat seem necessary, professional removal is often the safer choice.
Never cut into a pressurized shock
Do not drill, cut, puncture, or intentionally open the shock body to make removal easier.
Keep flames away from fluids
Penetrating oil, fuel, grease, and some vehicle coatings can ignite. Never use an open flame near them.
How to Remove a Stuck Shock Absorber Step by Step
Follow a gradual removal process. Begin with inspection and penetrating oil, then loosen the fasteners, correct any suspension binding, and use controlled force only where appropriate. The exact order depends on the vehicle’s suspension layout and the service manual.
For many conventional shock absorbers, the upper mount is released before the lower mount or vice versa, depending on access and manufacturer instructions. Do not assume that every vehicle uses the same sequence.
Source: i.ytimg.com
Step 1: Confirm the correct service procedure
Find the instructions for the exact vehicle and shock location. Check for special tools, one-time-use hardware, electronic suspension precautions, and requirements for supporting the suspension.
Step 2: Expose the shock mounts
Remove the wheel and any covers or liners required by the service procedure. Keep the removed hardware organized and note the position of washers, spacers, and bushings.
Step 3: Clean the exposed fasteners
Use a suitable brush to remove loose dirt and flaky rust from the bolt head, nut, and surrounding bracket. Avoid damaging brake hoses, wiring, or protective coatings.
Step 4: Apply penetrating oil
Apply the product to the points where the bolt enters the bracket or sleeve. Allow the recommended dwell time, and repeat the application if necessary.
Step 5: Fit the correct tool
Seat the socket fully on the fastener. Use a breaker bar for controlled force when permitted. Keep the tool aligned so it does not slip or round the bolt head.
Step 6: Loosen the fastener gradually
Apply steady force instead of sudden, uncontrolled jerks. If the fastener begins to twist, the bracket moves, or the tool starts to slip, stop and reassess the problem.
Step 7: Relieve binding if needed
If the fastener appears loaded by suspension position, support the relevant component according to the service manual and adjust it carefully. Do not place a jack under an arbitrary point or force a loaded spring.
Step 8: Remove the mounting bolt
Once the nut is removed, try to slide the bolt out using controlled pressure. If it will not move, determine whether the sleeve is seized before attempting any tapping method.
Step 9: Free the shock from its mount
After the fasteners are removed, support the shock body and move it through the approved removal path. Avoid prying against brake lines, aluminum housings, or thin mounting brackets.
Step 10: Inspect the mounting area
Look for damaged threads, elongated bolt holes, cracks, corrosion, worn bushings, and bent hardware. Repair or replace defective parts before installing the replacement shock.
What If the Bolt Turns but Will Not Come Out?
A bolt that rotates without sliding out may be rusted to an inner sleeve. The sleeve can rotate with the bolt while remaining tightly held inside the rubber bushing. This is different from a nut that simply will not loosen.
Apply penetrating oil to accessible gaps and allow time for it to work. If the service procedure allows, use a correctly sized drift against the bolt end while supporting the mount and avoiding exposed threads. Apply light, controlled taps rather than heavy blows.
If the bolt remains firmly seized, professional extraction may be necessary. In some cases, the bolt and bushing sleeve must be cut out using a controlled method, followed by replacement of the damaged hardware or mounting component. This work should not be attempted near a pressurized shock, loaded spring, brake hose, fuel line, or other vulnerable component without the correct equipment.
Do not strike the threads directly
A damaged bolt end can prevent the nut from starting correctly and make extraction more difficult.
Avoid uncontrolled prying
Levering against a thin bracket can bend the mount and create a suspension alignment or strength problem.
What If the Shock Absorber Will Not Fit Through the Opening?
Some shocks must be tilted or rotated through a particular opening. Others require removal of a wheel-well liner, a mounting cover, or another component listed in the service procedure. Do not force the shock past a brake hose or wiring harness.
Compare the position of the old shock with the available clearance. If the shock remains trapped even after both mounting points are released, check the manufacturer’s removal instructions rather than dismantling nearby suspension parts at random.
Check the specified removal angle
The shock may need to be moved in a particular direction to clear the body or suspension.
Protect nearby parts
Never stretch a brake hose, pull on ABS wiring, or bend a structural bracket to create clearance.
How to Handle Common Stuck Shock Absorber Problems
The best removal method depends on the symptom. Use the table below to identify the likely cause and the safest next step. These are diagnostic starting points, not proof that a particular component has failed.
Source: i.ebayimg.com
Problem: The nut will not loosen
Clean the exposed threads, apply suitable penetrating oil, and use the correct socket or wrench. If the nut rounds off or the stud spins, stop before causing further damage.
Problem: The bolt is rusted to the bracket
Allow penetrating oil to work and try controlled movement with the correct tool. A heavily seized bolt may need professional extraction.
Problem: The shock bushing will not separate
Check whether the inner sleeve remains attached to the mounting bolt. Replace worn or damaged bushings as required by the design.
Problem: The shock shaft spins while loosening the upper nut
Use the specified shaft-holding tool or the manufacturer’s removal procedure. Avoid gripping a polished shaft with locking pliers because scratches can damage the shaft seal.
Problem: The mounting bracket moves or bends
Stop applying force. Inspect the mount for corrosion, cracking, or incorrect tool placement. A damaged bracket may require replacement.
Problem: The shock remains trapped after the bolts are removed
Check for a hidden fastener, restricted clearance, or a removal path specified in the service manual. Do not assume the shock must be cut.
How Long Should Penetrating Oil Take to Work?
The required time depends on the product, corrosion level, and condition of the joint. Follow the label rather than assuming that a single spray will release a heavily rusted fastener. Several applications may be needed, and severe corrosion may not respond at all.
Use the waiting period to inspect the fastener, clean accessible rust, and confirm that the socket fits correctly. If the bolt remains immovable or begins to deform, additional force may cause more damage than it solves.
Light surface rust
Cleaning and an application of penetrating oil may be enough when the threads remain intact.
Heavy corrosion
Allow more time as directed by the product and inspect for damaged threads or a seized sleeve.
Severe structural corrosion
Seek professional assessment if the bracket, bolt, or mounting point appears weakened or distorted.
Mistakes to Avoid When Removing a Seized Shock
Many difficult suspension repairs become more expensive because force is applied before the actual cause is identified. A few careful checks can prevent damage to the shock mount, surrounding parts, and replacement hardware.
Source: i.ebayimg.com
Using the wrong socket size
A loose or poorly seated socket can round the fastener. Clean the bolt head and use the correct six-point socket where appropriate.
Relying on a jack alone
A hydraulic jack can lower or shift unexpectedly. Use properly positioned jack stands and follow the vehicle’s approved support procedure.
Using excessive impact force
High impact can damage threads, break a bolt, or harm nearby components. Use powered tools only where the service procedure permits them.
Heating the shock body
A shock may contain pressurized gas and fluid. Never use a torch on the shock or strut body.
Cutting without checking nearby components
A cutting tool can damage a brake hose, fuel line, electrical wire, or mounting bracket. Severe seizure should be handled with appropriate extraction equipment.
Reusing damaged fasteners
Corroded, stretched, bent, or stripped hardware may not clamp the suspension correctly. Follow manufacturer replacement requirements.
Ignoring suspension spring tension
A strut assembly can contain a heavily loaded coil spring. Do not loosen spring-retaining hardware without the specified equipment and procedure.
When Should You Stop and Call a Mechanic?
Stop the repair if you cannot keep the vehicle stable, a spring shifts, the mounting bracket begins to deform, or the fastener starts to break. Professional help is also appropriate when the bolt is seized inside a sleeve that cannot be reached safely with ordinary tools.
A shop may have vehicle-specific extraction tools, suitable cutting equipment, and replacement mounting components. Ask for an inspection of the mounting points as well as the shock, especially if the vehicle has extensive rust.
Structural corrosion
A weakened frame, body mount, or suspension bracket needs proper assessment before the vehicle returns to the road.
Special suspension design
Electronic dampers, air suspension, and strut assemblies may require additional procedures or diagnostic equipment.
Damaged or broken hardware
A broken bolt in a difficult-to-access mount may require specialist extraction and thread repair.
What to Do After Removing the Stuck Shock Absorber
Removing the old shock is only part of the job. Inspect the mounting points and hardware before installing a replacement. A new shock cannot correct a cracked bracket, an elongated mounting hole, or a worn suspension joint.
Compare the replacement shock with the old unit for mounting style, length, connector position, and any included bushings or spacers. Confirm fitment for the exact vehicle and axle position. Do not assume that similar-looking parts are interchangeable.
Source: img-va.myshopline.com
Inspect the mounting holes
Look for cracks, distortion, severe rust, and damage caused by extraction. Replace or repair defective mounting components according to the manufacturer’s instructions.
Check the bushing and sleeve
Replace worn, split, swollen, or damaged bushings as required. Confirm that the sleeve fits correctly and that the hardware passes through without improper force.
Use the specified hardware
Install the correct bolt, nut, washer, and spacer combination. Follow the manufacturer’s rules for one-time-use fasteners and locking nuts.
Torque the fasteners correctly
Use a calibrated torque wrench and the vehicle-specific specification. Some suspension fasteners must be tightened at a specified suspension position to avoid bushing preload.
Reconnect removed components
Restore all clips, liners, wiring retainers, and other parts removed for access. Verify that brake hoses and ABS wiring are routed correctly.
Inspect the opposite side
Check the shock and mounting hardware on the other side of the same axle. If one shock is worn or damaged, follow the vehicle or shock manufacturer’s replacement recommendations.
Do Shock Absorbers Need to Be Replaced in Pairs?
Replacing shocks in pairs on the same axle is often recommended because uneven damping can affect vehicle balance and handling. However, the correct decision depends on the vehicle manufacturer’s guidance, the condition of the remaining shock, and the replacement part’s instructions.
If one shock has failed, inspect the other side for leakage, damage, and reduced damping. Do not assume that replacing one side is always sufficient or that every vehicle requires replacement of all four shocks.
Check both sides
Inspect the opposite shock for leaks, corrosion, damaged mounts, and other signs of wear.
Follow fitment guidance
Confirm whether the manufacturer recommends axle-pair replacement for the specific vehicle and shock type.
How to Confirm the Repair Is Complete
Before lowering the vehicle, check that every required fastener is installed and tightened to specification. Confirm that no tool, loose hardware, or disconnected wire remains near the suspension.
After lowering the vehicle, follow the manufacturer’s final inspection procedure. If a road test is appropriate, begin at low speed in a safe area and listen for unusual noises. Stop if the vehicle pulls, feels unstable, or makes a sharp clunk.
Check for noise
Listen for knocking, rattling, or movement around the repaired mount.
Check handling
Pay attention to unexpected bouncing, poor stability, or a change in steering behavior.
Reinspect the work
Follow any specified follow-up inspection or fastener check in the service instructions.
How Much Does It Cost to Remove a Stuck Shock Absorber?
The cost depends on whether the shock can be removed with routine hand tools or whether the repair requires extraction, replacement hardware, or mounting work. A straightforward removal is usually part of the overall shock replacement labor, while a seized bolt can add time and complexity.
There is no reliable single price for every US vehicle. Labor rates vary by region, vehicle design, rust severity, and shop equipment. Request an estimate that separates shock replacement, seized-fastener extraction, damaged mount repair, and any required alignment or related work.
Source: cdn.club.autodoc.de
Routine removal
The existing hardware comes out normally and the replacement fits without additional repair.
Seized fastener extraction
Extra labor may be needed to release a corroded bolt or remove a seized bushing sleeve.
Mount or hardware replacement
A damaged bracket, bolt, nut, or bushing may need replacement before the vehicle is safe to use.
Special suspension work
Some vehicles require special tools, electronic suspension procedures, or additional component removal.
Is DIY Removal Worth It?
DIY removal can be practical when the vehicle is safely supported, the mounting hardware is accessible, and the service procedure is within your skill level. The main challenge is not always the shock itself; severe corrosion can turn a simple repair into a job that requires specialist tools.
Compare the cost of tools and replacement hardware with a shop estimate. If removal threatens a structural mount or a brake line, professional service is generally a better option than risking additional damage.
DIY may suit the job
The vehicle uses conventional shocks, the mounting points are sound, and the correct service information and tools are available.
Professional help may be better
The fastener is badly seized, the mount is corroded, or the procedure involves a loaded spring or complex suspension system.
Next-Question Gap Map for Readers
The following map identifies practical follow-up questions inferred from the removal task. These are not presented as verified search-volume findings or confirmed gaps across all competing pages. No live competitor-page audit is claimed in this article.
Source: d3vl3jxeh4ou3u.cloudfront.net
How do you remove a shock bolt that spins?
Reader stage: troubleshooting during removal. Basis: inferred next need because a spinning fastener can prevent progress. Coverage: addressed in the stuck-fastener sections. Priority: high because incorrect force can damage the mount.
Can you remove a shock absorber without removing the spring?
Reader stage: planning the repair. Basis: inferred next need because shocks and struts are often confused. Coverage: partially addressed through the safety distinction between conventional shocks and struts. Priority: high because spring tension can cause severe injury.
What should you replace after cutting out a seized bolt?
Reader stage: completing the repair. Basis: inferred next need because severe corrosion may require extraction. Coverage: addressed through hardware, bushing, and mount inspection. Priority: high because damaged fasteners or mounts can compromise suspension security.
Does replacing a shock require a wheel alignment?
Reader stage: after installation. Basis: inferred next need because suspension work can involve components that affect alignment. Coverage: not fully resolved here because requirements depend on the vehicle and the parts removed. Priority: medium. Consult the service manual or alignment technician.
How can you tell whether a shock mount is damaged?
Reader stage: inspection after removal. Basis: inferred next need because a stuck shock can conceal corrosion or distortion. Coverage: addressed through inspection guidance but not a vehicle-specific diagnosis. Priority: high when cracks, elongated holes, or severe corrosion are present.
Recommended Next Step
Before applying more force, identify the exact vehicle, the shock location, and the point that is stuck. A vehicle-specific service procedure can clarify the mounting sequence, support points, required tools, and correct torque values.
Gather vehicle details
Record the model year, make, model, trim if relevant, and whether the stuck shock is at the front or rear.
Describe the symptom
State whether the nut will not turn, the bolt turns but will not slide out, or the detached shock will not fit through the opening.
Frequently Asked Questions
Q
How do you remove a shock absorber that will not budge?
First, determine what is holding it in place. Clean the exposed mounting hardware, apply penetrating oil, and use the correct-size socket or wrench after the recommended dwell time. If the fastener is loaded by suspension position, follow the service manual to support the relevant component safely.
If the bolt is seized in a bushing sleeve or the bracket begins to bend, stop applying force. Professional extraction may be required.
Q
Can you use WD-40 to remove a stuck shock absorber?
Some general-purpose products can help with moisture displacement or light corrosion, but a dedicated penetrating oil is usually the more suitable choice for a heavily seized fastener. Follow the product label and confirm compatibility with nearby rubber, plastic, paint, and other materials.
No penetrating product can guarantee that a severely corroded bolt will come free. Keep all oils away from brake friction surfaces and ignition sources.
Q
Can you hammer out a stuck shock absorber bolt?
Light, controlled tapping with a suitable drift may help when the service procedure permits it and the bolt is not under harmful load. Protect the threads and avoid striking the surrounding bracket or nearby suspension parts.
Do not use heavy, uncontrolled blows. If the bolt is seized to an inner sleeve, repeated hammering may damage the mount without releasing the bolt.
Q
Should you replace a shock absorber if it is stuck?
A shock that must be removed for service is not necessarily defective simply because its mounting bolt is seized. The cause may be corrosion in the hardware rather than a failure inside the shock.
Inspect the shock for fluid leakage, damage, and other signs of wear, then follow the vehicle manufacturer’s replacement guidance. Replace damaged or worn parts and any hardware that is no longer safe to reuse.
Q
Can you remove a shock absorber without removing the coil spring?
Many conventional shock absorbers can be removed without dismantling a coil spring, but the answer depends on the suspension design. A strut assembly often supports the coil spring and may require a special procedure.
Never loosen a spring-retaining nut or dismantle a loaded strut without the correct equipment and instructions. Check the service manual before removing any spring-related hardware.
Q
What should you do if a shock absorber bolt breaks during removal?
Stop and assess the location of the broken bolt. Do not damage the mounting hole by drilling without knowing the fastener position, material, and access limitations.
Depending on the design, removal may require a specialist extractor, controlled drilling, thread repair, or replacement of the mounting component. If the bolt is in a structural suspension mount or the surrounding metal is corroded, have the repair assessed by a qualified mechanic.
Q
Do you need an alignment after replacing shock absorbers?
Not every conventional shock replacement changes wheel alignment, but the answer depends on the vehicle and which suspension components are disturbed. Removing a strut or loosening alignment-related fasteners can affect alignment settings.
Check the vehicle service procedure and have the alignment inspected when required, especially if the repair changes suspension geometry, steering parts, or handling.
✦ Wrapping Up
Conclusion
Learning how to remove a stuck shock absorber starts with identifying the source of the problem. Rusted bolts, seized bushing sleeves, damaged threads, and suspension binding require different approaches. Begin with a secure vehicle setup, careful inspection, suitable penetrating oil, and correctly fitted tools.
Use gradual force and stop if the fastener deforms, the mounting bracket moves, or the suspension becomes unstable. Never heat, puncture, or cut into a pressurized shock absorber, and do not dismantle a loaded strut spring without the specified equipment. If ordinary methods fail, professional extraction can prevent damage to expensive suspension parts.
Once the shock is out, inspect the mounts, bushings, and hardware before fitting the replacement. Use the correct parts and torque specifications, restore all removed components, and verify that the suspension operates as intended.
💡 Key Takeaway
Identify the stuck component before applying more force. Secure the vehicle, use the correct tools and penetrating oil, follow vehicle-specific service instructions, and stop if the mount or fastener begins to deform.
Eric
Hi, I’m Eric Bennett, the person behind OffRoadTruckAccessories.com.
I created this blog to share my interest in trucks, off-road driving, automotive accessories, and DIY modifications. I enjoy learning how different truck accessories work, testing their usefulness, and understanding whether they are truly worth buying.
Shock absorbers are located near the wheels as part of the suspension system, usually between the vehicle’s body, frame, or subframe and a suspension component such as a control arm, axle, or wheel assembly. However, the exact answer to where are shock absorbers located on a car depends on the suspension design. Some vehicles have…
You should change shock absorbers when they are worn, leaking, damaged, or no longer controlling suspension movement properly. There is no single replacement interval that applies to every vehicle because shock absorber life depends on road conditions, vehicle weight, driving habits, suspension design, and component quality. If you are wondering when to change shock absorbers,…
A shock absorber is a suspension component that controls how quickly a vehicle’s suspension moves up and down after bumps, dips, braking, acceleration, and other road inputs. It works with the springs to prevent excessive bouncing and helps keep the tires in controlled contact with the road. So, what does a shock absorber do? It…
A gas shock absorber is a hydraulic shock absorber that uses pressurized gas, usually nitrogen, along with shock absorber oil to control suspension movement. The gas helps reduce oil foaming and keeps damping performance more consistent when the shock works repeatedly or under demanding conditions. If you are wondering what is a gas shock absorber,…