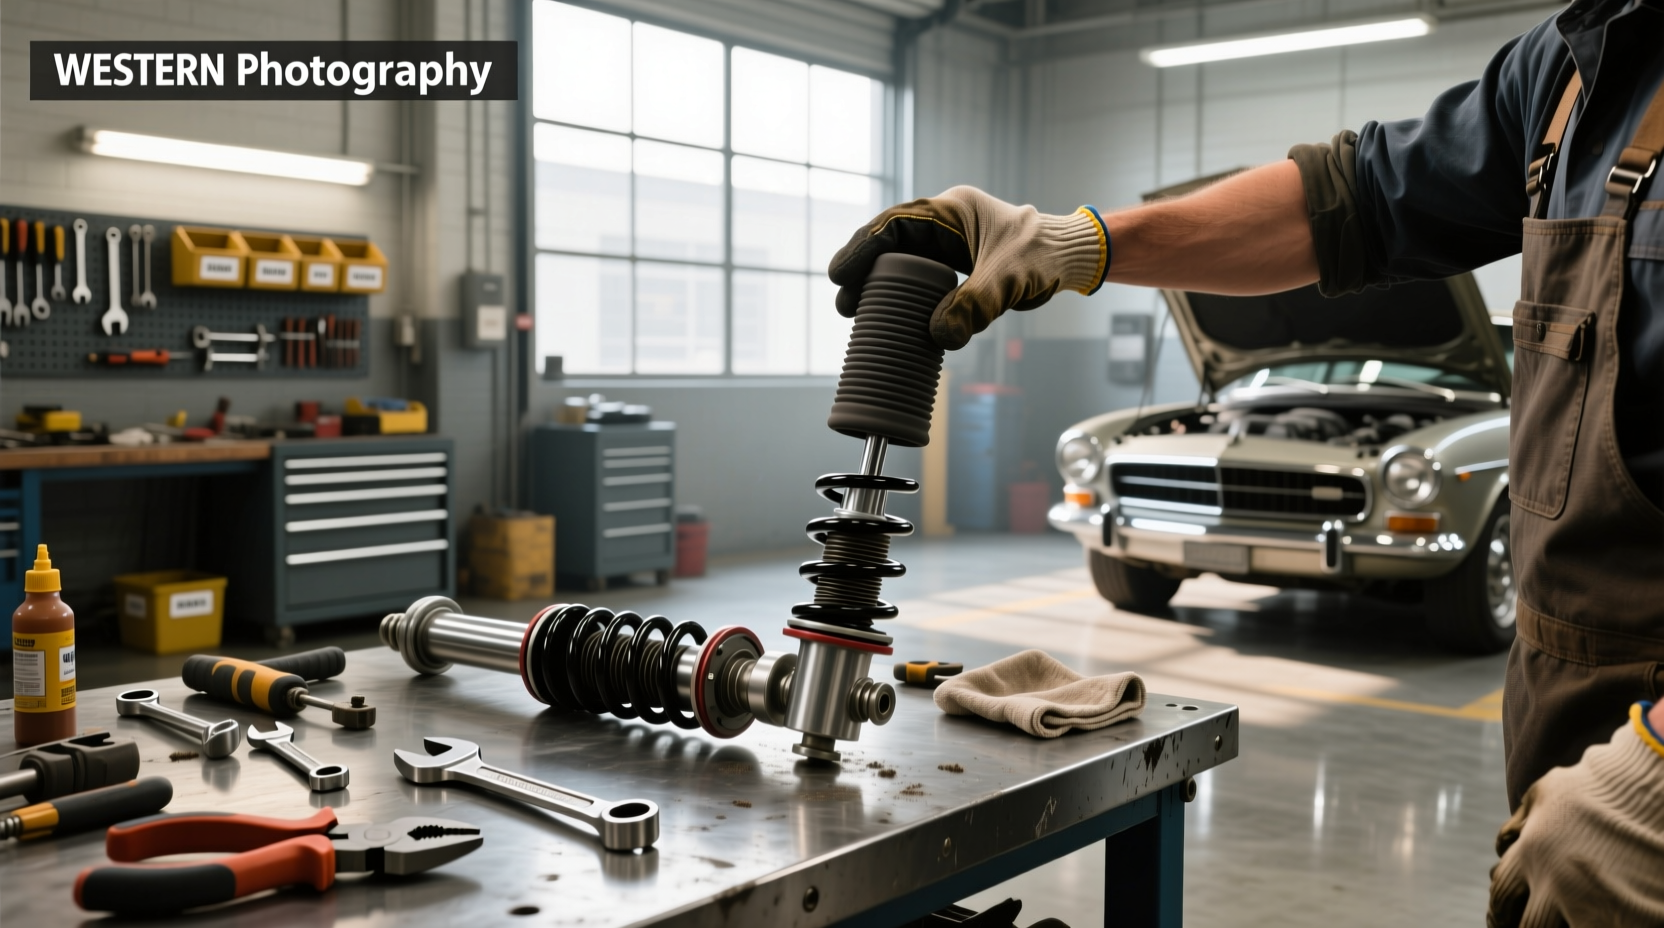
To replace a shock absorber dust cover, safely lift and support the vehicle, remove the shock or strut assembly as required, take off the damaged cover, inspect the bump stop and other parts, fit the correct replacement, and reinstall everything according to the vehicle manufacturer’s service instructions. Many conventional rear shocks allow easier access than front struts, which may require spring compression.
Across the United States, cars and trucks face a wide range of road conditions. Potholes, road salt, gravel, heat, and winter weather can wear suspension parts over time. A shock absorber dust cover helps protect the shock’s exposed shaft from dirt, water, and road debris. When the cover cracks, splits, or falls out of place, replacing it can help limit further contamination.
A shock absorber dust cover is also called a dust boot or protective boot. Some designs use a separate rubber or plastic cover, while others combine the cover with a bump stop. The bump stop cushions suspension movement near the end of its travel. These parts may look simple, but the correct replacement depends on the vehicle, suspension design, and shock type.
The repair can be straightforward on some vehicles. On others, the cover sits inside a strut assembly that contains a compressed coil spring. That spring stores substantial energy and can cause serious injury if released without proper equipment. Before starting, check the service procedure for your exact year, make, model, and suspension configuration. If the job requires spring removal and you lack the correct tools or experience, have a qualified technician perform that part of the repair.
A shock absorber dust cover is a protective sleeve fitted over the exposed shaft or other vulnerable section of a shock absorber. It helps keep abrasive dirt, grit, water, and road debris away from the moving parts. This matters because the shaft moves through a seal as the suspension responds to bumps and changes in road height.
The cover does not control the vehicle’s bounce by itself. The shock absorber performs that job by controlling suspension movement. The cover serves as a protective barrier that can help reduce contamination and wear around the shaft and seal.
The shape and material vary by design. Some covers are flexible rubber boots. Others use molded plastic or a bellows-style sleeve. A strut may have a dust boot and a separate bump stop, or a combined assembly that performs both functions.
Source: cdn.club.autodoc.de
Dust boot
Covers the exposed shaft and helps keep road dirt and moisture away from the shaft seal.
Bump stop
Provides a cushion near the limit of suspension travel and helps reduce harsh metal-to-metal contact.
Shock absorber
Controls spring and suspension movement to help maintain tire contact and vehicle stability.
Strut assembly
A structural suspension unit that may include the shock absorber, coil spring, upper mount, and related components.
Why the Dust Cover Matters
The exposed shock shaft must move smoothly through its seal. Dirt on the shaft can act like an abrasive and contribute to wear. A sound dust cover helps reduce the amount of contamination that reaches this area.
A damaged cover does not prove that the shock is leaking or worn out. It does, however, remove part of the protection designed into the suspension. Replacing a torn cover is a sensible maintenance step when the shock itself remains serviceable and the repair can be completed correctly.
Protection
Helps limit the amount of dirt, grit, and moisture reaching exposed shock components.
Inspection
Makes it easier to identify whether a torn cover has allowed contamination to collect around the shaft.
Signs That a Shock Absorber Dust Cover Needs Replacement
The clearest sign of a damaged dust cover is visible physical damage. Inspect the cover when the vehicle is safely raised or when the suspension is accessible during routine maintenance. Look for cracks, splits, missing sections, loose edges, and signs that the cover has slipped away from its intended position.
A torn cover may not cause an immediate change in ride quality. The driver might notice no symptoms at all until the shock or another suspension component develops a problem. This is why a visual inspection can reveal a maintenance need before the suspension shows obvious signs of trouble.
Do not diagnose a failed shock absorber based on the dust cover alone. Oil leaking from the shock body, a bent shaft, damaged mounts, or abnormal suspension behavior calls for a broader inspection. Dirt or moisture around a cover can also come from other nearby sources, so check the area carefully.
Source: i.ytimg.com
Cracked or split material
Aged rubber or plastic may become brittle and develop openings that let dirt reach the shaft.
Loose or displaced cover
A boot that has slipped from its seat may leave part of the shaft exposed or interfere with nearby components.
Damaged bump stop
A crumbling, split, or missing bump stop may need replacement along with the cover.
Contamination on the shaft
Grit, corrosion, or heavy deposits may indicate that the protective cover is no longer doing its job.
Shock leakage or damage
Oil leakage, a bent shaft, or a damaged shock body requires assessment beyond a dust cover replacement.
Can You Drive With a Torn Shock Dust Boot?
A torn dust boot alone does not always make a vehicle unsafe to drive immediately. The risk depends on the condition of the shock absorber, the amount of shaft exposure, and whether any loose material can contact moving parts. A damaged boot should be repaired promptly rather than ignored.
If the shock is leaking heavily, the suspension is unstable, the vehicle has severe knocking, or a component is loose, stop driving and arrange a professional inspection. A dust cover cannot restore damping to a worn shock or repair a damaged mount.
Limited boot damage
Arrange inspection and replacement soon if the shock remains secure and functions normally.
Severe suspension symptoms
Avoid driving when the vehicle shows instability, severe clunks, loose suspension parts, or other signs of a potentially unsafe failure.
Tools and Parts Needed for Dust Cover Replacement
Gather the correct parts and tools before lifting the vehicle. The required equipment depends on whether the cover can be reached with the shock in place, whether the shock must be removed, and whether the design includes a coil spring around the strut.
Check the vehicle service manual and the replacement part instructions first. Some covers are supplied with bump stops or mounting pieces, while others are sold separately. The new part must match the suspension design and fit without stretching, pinching, or rubbing against nearby components.
Source: cdn.club.autodoc.de
Replacement dust cover
Choose the part listed for the exact vehicle and suspension configuration.
Bump stop, if needed
Replace a damaged bump stop or use a combined boot-and-stop assembly when the original design calls for it.
Vehicle jack and rated jack stands
Lift the vehicle at approved points and support it securely before working underneath.
Wheel chocks
Prevent the wheels that remain on the ground from rolling.
Hand tools
Use the correct sockets, wrenches, extensions, and any specified specialty tools for the fasteners.
Torque wrench
Tighten fasteners to the manufacturer’s specified torque rather than guessing.
Safety equipment
Wear safety glasses and suitable gloves, and use a stable work area with adequate lighting.
Spring compressor, only when required
Use a suitable, correctly rated tool and the exact service procedure if the coil spring must be compressed. Do not improvise with straps or makeshift clamps.
How to Choose the Correct Replacement Cover
Use the vehicle identification number, model year, engine and trim details, and suspension configuration to confirm fitment when ordering parts. Vehicles sold under the same model name may use different shock or strut designs depending on trim level, drivetrain, load rating, or suspension package.
Compare the replacement with the original part where possible. Check the overall length, diameter, mounting points, material, and whether the bump stop is integrated. A boot that is too short may leave the shaft exposed, while one that is too long or wide may fold incorrectly or contact nearby components.
Confirm fitment
Use a reliable vehicle-specific parts catalog or service information instead of relying on appearance alone.
Check the included parts
Verify whether the package contains the dust boot, bump stop, clips, or any required retainers.
How to Replace a Shock Absorber Dust Cover Step by Step
The exact procedure varies by vehicle, but the general sequence is to inspect the suspension, lift and support the vehicle, remove the parts needed for access, replace the cover, and reinstall the assembly. Use the service manual for the exact fastener locations, torque values, and removal order.
The instructions below describe the general process. They do not replace vehicle-specific procedures, particularly for struts with compressed coil springs. If the dust cover cannot be removed without opening a spring-loaded assembly, have a qualified technician complete that work unless you have the correct tools and training.
Source: gdstauto.com
Step 1: Park and Prepare the Vehicle
Park on a firm, level surface away from traffic. Select Park for an automatic transmission or the appropriate gear for a manual transmission, apply the parking brake, and chock the wheels that will remain on the ground. Let hot suspension and exhaust components cool before beginning work.
Consult the service manual to identify the approved lifting points and the parts that must be removed. Loosen wheel fasteners slightly before raising the vehicle if the wheel must come off and the manufacturer’s procedure allows it. Never rely on a hydraulic jack alone to support a vehicle.
Secure the work area
Keep people away from the vehicle and remove loose tools from the lifting area.
Use rated support equipment
Position jack stands at approved support points and confirm that the vehicle is stable before working.
Step 2: Inspect the Shock and Dust Cover
With the suspension accessible, examine the full visible length of the cover. Look for splits, missing pieces, deformation, loose retainers, or rubbing marks. Check whether the boot has moved out of place or whether the original material has become brittle.
Inspect the shock body, shaft, seals, mounting bushings, and bump stop. If the shaft is deeply corroded or bent, or the shock shows clear signs of leakage or mechanical damage, replacing only the dust cover may not be enough. Decide whether the shock needs separate repair or replacement before reassembly.
Document the original arrangement
Take a photo of the cover’s position and the orientation of retainers before removing anything.
Check both sides
Inspect the opposite shock or strut for similar wear, while replacing parts according to their condition and the manufacturer’s guidance.
Step 3: Remove the Wheel and Gain Access
If the wheel blocks access, remove it after the vehicle is securely supported. Place the wheel and fasteners where they cannot roll or become contaminated. Depending on the suspension design, you may also need to move a liner or release a bracket or other component.
Do not remove unrelated suspension fasteners simply to create space. Some bolts affect alignment or hold spring-loaded components in place. Follow the specified removal sequence and mark component positions only when the service procedure permits it.
Keep fasteners organized
Store bolts, nuts, washers, and clips by location so they return to the correct positions.
Avoid damaging nearby parts
Move brake hoses, wiring, and sensor leads only as directed, and never allow the suspension assembly to hang from them.
Step 4: Determine Whether the Shock Must Be Removed
Some conventional shock absorbers allow the dust boot to slide off once the shock is safely detached at the mounting points. Other designs require the complete shock to be removed, and some boots cannot be replaced correctly without dismantling part of the suspension assembly.
Check the service instructions before loosening the upper or lower mounts. Support the shock as the last fastener is removed so it cannot fall. If the assembly is connected to a coil spring, determine whether the spring is independently retained or whether a specified spring compressor is necessary.
Conventional separate shock
Removal may be limited to the shock mounting fasteners, depending on the vehicle design.
Strut with coil spring
Removal or disassembly may involve a loaded spring and must follow the vehicle-specific procedure.
Step 5: Remove the Old Dust Cover
Once the required assembly is removed and safely supported, release the dust cover from its retainers or mounting seats. Slide it away from the shaft as the design allows. Avoid cutting the cover near the polished shaft or using sharp tools against the shaft seal.
If the cover is stuck, inspect for hidden clips, corrosion, or a molded connection with the bump stop. Do not force parts apart when they appear to be one integrated unit. Follow the manufacturer’s instructions for separating or replacing the combined assembly.
Protect the shaft
Do not scratch, gouge, or bend the exposed shaft during removal.
Clean the mounting area
Remove loose dirt with a suitable clean cloth and keep debris out of the seal area.
Step 6: Inspect the Bump Stop and Related Components
Inspect the bump stop for crumbling foam, deep cracks, missing sections, or deformation. A bump stop that has broken apart may no longer cushion the suspension as intended. Replace it when required by its condition or the vehicle’s service procedure.
Check the dust boot seat, upper mount, rubber bushings, washers, and retainers for wear. Do not apply grease, oil, or solvent to the shaft or boot unless the service instructions specifically permit that product. Some chemicals can damage rubber or plastic, and extra lubricant may attract dirt.
Replace damaged related parts
Use compatible components and follow the specified assembly order.
Keep the shaft clean
Avoid abrasive materials and do not polish away corrosion with a method that could damage the shaft surface.
Step 7: Install the New Shock Absorber Dust Cover
Compare the new cover with the old one before installation. Confirm the shape, length, diameter, and mounting arrangement. If the replacement includes a bump stop, verify its orientation against the service instructions and the original configuration.
Slide the new cover into position without stretching it beyond its intended range. Seat the upper and lower ends in their proper locations and refit the specified clips or retainers. Check that the boot covers the intended shaft area and does not fold, twist, or bind as the suspension moves.
If the design uses a combined boot and bump stop, install the assembly as directed. Do not trim the cover or drill extra holes to make an incorrect part fit. Obtain the correct replacement if the dimensions or attachment points do not match.
Match the original orientation
Follow the service diagram and confirm that the cover sits squarely on its mounting seats.
Check free movement
Ensure the cover does not rub against the tire, spring, brake hose, wiring, or another suspension component.
Step 8: Reinstall the Shock or Strut Assembly
Position the assembly in its original mounting locations and install the fasteners in the sequence specified by the service manual. Some suspension fasteners must be tightened with the vehicle at normal ride height to avoid twisting bonded rubber bushings. Others have a different specified procedure, so do not assume every fastener uses the same method.
Tighten all required fasteners to the vehicle manufacturer’s torque specifications. Replace one-time-use fasteners where the manufacturer requires it. If the job involved a coil spring, verify that the spring ends, upper mount, and retainers are correctly seated before releasing any spring-compression tool.
Never loosen a strut shaft nut simply to reach the dust cover unless the spring is secured by the specified equipment and the procedure requires that step. A compressed coil spring can release enough energy to cause severe injury.
Use specified torque values
Obtain the values for the exact vehicle and fastener location from reliable service information.
Restore all connections
Reconnect any brackets, sensor leads, hoses, and retainers that were removed or moved during access.
Step 9: Reinstall the Wheel and Lower the Vehicle
Reinstall the wheel and hand-start the wheel fasteners to avoid cross-threading. Lower the vehicle according to the correct lifting procedure, then tighten the wheel fasteners in the specified sequence and to the manufacturer’s torque value. Do not use a generic torque figure when the exact specification is available.
Before moving the vehicle, confirm that no tools remain near the suspension and that all removed components have been reinstalled. Check that the dust boot is seated and that brake hoses and wiring are routed correctly.
Check wheel security
Use the specified torque procedure for the vehicle’s wheels and fasteners.
Confirm the work area is clear
Remove the jack stands and tools only after the vehicle is safely lowered according to the correct procedure.
Step 10: Check the Repair
Inspect the new cover once more. It should be secure, correctly aligned, and free of twists or trapped edges. Look for anything that could contact the tire, coil spring, brake hose, wiring, or nearby bodywork during suspension movement.
If all components are secure and the shock itself is serviceable, begin with a cautious drive in a safe area. Listen for new knocks or rubbing noises and check for unusual handling. Stop if the vehicle feels unstable or if you hear a sharp or persistent noise, and inspect the work before driving farther.
Successful installation
The boot stays in place, no parts rub, and the suspension operates without new abnormal sounds.
Unexpected noise or movement
Recheck the installation and fasteners. Seek professional help if the cause is unclear.
Replacing Dust Covers on Front Struts Versus Rear Shocks
The most important difference is access and spring design. Many rear shock absorbers are separate from the coil springs, which may make dust boot replacement less involved. Many front struts support the vehicle’s weight through a coil spring and may require a more complex removal procedure.
The layout varies across cars, SUVs, and pickup trucks. Some vehicles use struts at both ends, while others use separate shocks and springs. Identify the actual suspension design before estimating the work or buying parts.
Source: i.ytimg.com
How Much Does Shock Absorber Dust Cover Replacement Cost?
The cost depends on the vehicle, the replacement part, the number of components that need attention, and the labor required to access the cover. A separate boot for an easily accessed shock can cost much less to install than a cover that requires removal and disassembly of a strut assembly.
There is no single reliable price for every U.S. vehicle. Local labor rates, parts availability, suspension design, corrosion, and the condition of the shock can change the estimate. Ask for a quote that separates the cover, any bump stop or mounting parts, labor, and any additional work that inspection identifies.
Source: cdn.club.autodoc.de
Part cost
Depends on whether the boot is sold alone or as part of a combined assembly.
Labor cost
Depends on access, removal time, corrosion, and whether spring compression or additional disassembly is required.
Related repairs
A worn shock, damaged mount, broken bump stop, or corroded fastener can add work beyond the original dust cover replacement.
Is It Better to Replace the Cover or the Entire Shock?
Replace the cover alone when the shock is otherwise serviceable, the shaft and seal are in acceptable condition, and the cover is available as a separate part. This avoids replacing a functioning shock solely because its protective boot has split.
Consider shock replacement when the unit leaks, has a damaged shaft, shows clear mechanical failure, or no longer controls suspension movement as intended. If the shock and cover are integrated or the manufacturer specifies replacement of a larger assembly, follow that requirement. Replacing shocks in axle pairs may be appropriate to maintain balanced damping, depending on the vehicle and the manufacturer’s guidance.
Cover-only repair
Best suited to a damaged boot with an otherwise sound, serviceable shock and an approved separate replacement part.
Shock or strut replacement
Appropriate when the shock has failed or when the correct service procedure requires replacement of the larger assembly.
Common Mistakes to Avoid During Replacement
Most avoidable problems come from choosing the wrong part, skipping an inspection, or using an unsafe disassembly method. A dust cover is a small component, but the suspension around it may carry vehicle weight or contain stored spring energy.
Work slowly and verify each step against the service instructions. If the design is unclear, pause before removing additional fasteners. Correcting a wrong assumption before disassembly is safer and often less costly than repairing damage afterward.
Source: s.alicdn.com
Using the wrong boot
A cover that does not match the shaft or mounting design may slip, tear, or interfere with suspension movement.
Ignoring a damaged shock
Replacing the cover will not fix a leaking seal, bent shaft, worn internal parts, or a loose mount.
Skipping bump stop inspection
A damaged bump stop may remain a problem even after a new dust boot is installed.
Working under a jack-supported vehicle
A jack can shift or fail. Use suitable jack stands on a firm surface and approved support points.
Improvising spring compression
Makeshift tools may slip or fail to contain the spring’s stored energy. Use the specified equipment or professional service.
Guessing torque specifications
Incorrect tightening can damage threads, affect clamping force, or allow components to loosen.
Using unapproved chemicals
Solvents and lubricants may damage the boot or attract abrasive dirt. Follow the part and vehicle instructions.
What If the New Dust Cover Does Not Fit?
Stop and compare the new part with the original. Check the part number, vehicle fitment, overall dimensions, and whether the original cover was integrated with a bump stop or another component. A similar appearance does not guarantee correct fitment.
Do not stretch, cut, heat, or modify the cover unless the manufacturer explicitly directs that procedure. Return an incorrect part and obtain the specified replacement. If the original assembly differs from the parts catalog, confirm the vehicle’s suspension configuration before continuing.
Recheck vehicle details
Confirm the model year, trim, drivetrain, and suspension package.
Compare the mounting arrangement
Check the seating points, clips, length, and bump stop design before installing the replacement.
How to Maintain Shock Absorber Dust Covers
Regular visual inspections can help identify damage before it allows heavy contamination to collect around the shock shaft. Check the covers during tire rotations, brake service, suspension inspections, or other maintenance when the components are visible and accessible.
Drivers in areas that use road salt, as well as those who travel on gravel roads or frequently encounter rough pavement, may benefit from paying close attention to visible corrosion and damaged rubber. These conditions do not establish a fixed replacement interval, however. Replace a cover based on its condition and the vehicle’s service guidance.
Source: i.ytimg.com
Inspect for damage
Look for cracks, splits, displaced edges, missing sections, and damage to the bump stop.
Keep the area reasonably clean
Remove loose dirt when accessible, without forcing water or cleaning chemicals into seals or electrical parts.
Check nearby components
Look for damaged mounts, worn bushings, loose fasteners, and signs of shock leakage.
Investigate new symptoms
Have unexplained knocking, excessive bounce, uneven tire wear, or unstable handling inspected rather than blaming the dust cover alone.
Safety Checks Before and After the Repair
Suspension work requires a stable vehicle and a clear understanding of the components being removed. A conventional shock absorber may be manageable for a skilled DIY mechanic, but a strut containing a compressed coil spring presents a more serious hazard. Never proceed beyond your tools, training, or the available service instructions.
Before driving, check that the wheel, suspension fasteners, brake hose brackets, wiring retainers, and any removed shields are back in their specified positions. The dust cover should not contact the tire, brake parts, spring, or another moving component. If the repair involved removing a strut or disturbing alignment-related fasteners, check the service manual for any required alignment inspection.
Source: i.ytimg.com
Before starting
Read the service procedure, confirm the part number, inspect the tools, and identify the approved lifting points.
During the repair
Keep the vehicle securely supported, protect the shock shaft, and never release a loaded spring without the correct equipment.
Before driving
Verify fastener torque, wheel security, correct hose and wire routing, and proper boot clearance.
After driving
Stop and investigate new noises, loose-feeling handling, rubbing, or visible movement of the boot.
When to Hire a Professional
Use a qualified repair shop if the cover requires strut disassembly and you do not have the specified spring compressor, if the spring or mount appears damaged, or if corrosion makes fastener removal difficult. Professional help is also appropriate when the suspension layout is unfamiliar or the required torque specifications cannot be verified.
Seek inspection if the shock shaft is bent or deeply corroded, the unit leaks, or the vehicle has severe suspension symptoms. A correct dust cover protects a serviceable component; it does not restore a failed shock or make damaged suspension parts safe.
Spring-loaded strut
Do not disassemble it without the correct equipment and a proven procedure.
Structural corrosion
Have badly corroded mounts or fasteners assessed before attempting removal.
Uncertain repair result
Get professional inspection if the assembly will not seat correctly or the suspension behaves differently after the repair.
Frequently Asked Questions
Q
Can I replace a shock absorber dust cover without removing the shock?
Sometimes. The answer depends on the shock design and how the cover attaches. Some covers are accessible after releasing a simple retainer, while others require the shock to be removed. Strut designs may require more extensive disassembly. Follow the service instructions rather than forcing the boot into place.
Q
Should I replace the bump stop when replacing the dust cover?
Replace the bump stop if it is cracked, crumbling, badly deformed, or missing sections, or if the manufacturer specifies replacement with the boot. If the two parts form one integrated assembly, replace the assembly as directed. A sound, separate bump stop may not need replacement solely because the dust cover is torn.
Q
Can a damaged dust cover cause suspension noise?
A loose or broken cover can sometimes rub against nearby parts or make noise. However, knocking, clunking, and rattling can also come from worn mounts, bushings, sway bar links, loose fasteners, or a damaged shock. Inspect the complete suspension before identifying the dust cover as the cause.
Q
How long does a shock absorber dust cover last?
There is no universal service life for a dust cover. Material quality, vehicle use, road debris, temperature, moisture, road salt, and exposure to chemicals can affect its condition. Inspect it periodically and replace it when it becomes damaged or no longer fits correctly, following any vehicle-specific maintenance guidance.
Q
Do I need a wheel alignment after replacing a dust cover?
A dust cover replacement alone does not automatically require a wheel alignment. An alignment check may be needed if the repair involved removing or disturbing alignment-related fasteners, replacing a strut or other suspension component, or if the vehicle shows symptoms such as pulling or a crooked steering wheel. Follow the manufacturer’s service procedure.
Q
Can I use a universal shock absorber dust boot?
A universal boot may work when its dimensions, material, attachment method, and range of movement match the application. However, a vehicle-specific part is preferable when the suspension requires a particular shape or an integrated bump stop. Never use a boot that stretches incorrectly, leaves the shaft exposed, or contacts nearby components.
Q
Do front and rear shock absorber dust covers use the same parts?
Not necessarily. Front struts and rear shocks can differ in shaft diameter, boot length, mounting style, and bump stop arrangement. Even vehicles of the same model may use different components across trim levels or suspension packages. Confirm the exact application before ordering a replacement.
✦ Wrapping Up
Conclusion
Replacing a shock absorber dust cover helps protect the exposed shaft from dirt, moisture, and road debris. The basic process involves confirming the correct part, securing the vehicle, gaining access to the shock or strut, removing the damaged cover, checking the bump stop and shaft, and installing the new cover in the correct position.
The level of difficulty depends on the suspension design. A separate rear shock may offer straightforward access, while a front strut can require specialized spring-compression equipment and a strict service procedure. Do not risk a spring-loaded assembly to save time or labor. If the shock is leaking, the shaft is damaged, or the suspension has serious symptoms, arrange a full inspection rather than replacing the cover alone.
💡 Key Takeaway
Before buying parts, identify your vehicle’s exact suspension configuration and check whether the dust boot is separate from the bump stop. Obtain the correct replacement and service instructions, use approved lifting equipment, and seek professional help if the repair requires handling a compressed coil spring.
Eric
Hi, I’m Eric Bennett, the person behind OffRoadTruckAccessories.com.
I created this blog to share my interest in trucks, off-road driving, automotive accessories, and DIY modifications. I enjoy learning how different truck accessories work, testing their usefulness, and understanding whether they are truly worth buying.
Shock absorbers are located near the wheels as part of the suspension system, usually between the vehicle’s body, frame, or subframe and a suspension component such as a control arm, axle, or wheel assembly. However, the exact answer to where are shock absorbers located on a car depends on the suspension design. Some vehicles have…
You should change shock absorbers when they are worn, leaking, damaged, or no longer controlling suspension movement properly. There is no single replacement interval that applies to every vehicle because shock absorber life depends on road conditions, vehicle weight, driving habits, suspension design, and component quality. If you are wondering when to change shock absorbers,…
A shock absorber is a suspension component that controls how quickly a vehicle’s suspension moves up and down after bumps, dips, braking, acceleration, and other road inputs. It works with the springs to prevent excessive bouncing and helps keep the tires in controlled contact with the road. So, what does a shock absorber do? It…
A gas shock absorber is a hydraulic shock absorber that uses pressurized gas, usually nitrogen, along with shock absorber oil to control suspension movement. The gas helps reduce oil foaming and keeps damping performance more consistent when the shock works repeatedly or under demanding conditions. If you are wondering what is a gas shock absorber,…