
How to Adjust Tein Flex Coilovers: A Practical Step-by-Step Guide
Adjustable coilovers can solve a specific problem—too much body roll, an uneven stance, or a ride that feels harsher than expected—but the adjustment method is easy to get wrong. On TEIN Flex coilovers, changing the wrong collar can alter spring preload or reduce useful suspension travel instead of simply changing the vehicle’s height. A few careless turns can also leave the car uneven, unsafe, or in need of an alignment.
The good news is that how to adjust tein flex coilovers is a manageable job for a beginner when the vehicle-specific instructions are treated as the authority. The basic process is to measure the current ride height, support the car safely, adjust height through the lower mount, set damping with the top adjuster, and then verify clearance, travel, and alignment.
This guide explains that process without assuming that every FLEX kit is identical. You will learn what the collars do, how to make small repeatable changes, when damping adjustment is appropriate, and which results mean you should stop and get professional help. Always confirm thread direction, torque values, adjustment range, and rear-shock access in the manual for your exact TEIN kit and vehicle.
At a glance
- Use the lower mount for ride-height changes when your TEIN instructions specify that design; do not casually change spring preload.
- Count damping clicks from the specified reference position and adjust both sides of an axle equally.
- Recheck clearances, ride height, fasteners, and wheel alignment after changing height.
How to adjust tein flex coilovers safely for street use
TEIN FLEX and FLEX Z kits commonly separate height adjustment from spring preload through a threaded lower mount. That means the shock-body length changes while the spring’s intended seating and preload remain close to the manufacturer’s setting. Some applications, especially rear suspensions with separate springs and dampers, use a different arrangement, so identify every component before turning a collar.
Tools you will need
- Vehicle-specific TEIN installation and adjustment instructions, including torque specifications
- Floor jack and appropriately rated jack stands for lifting and supporting the vehicle
- Wheel chocks and a lug wrench or socket set
- TEIN adjustment wrenches or correctly sized hook spanners for the lock collars
- Tape measure and a marker or notebook for recording ride-height changes
- Torque wrench for reinstalling wheels and checking specified fasteners
- Optional: digital angle gauge or corner-weight scales for advanced setup
Step 1 Confirm the coilover design and baseline settings
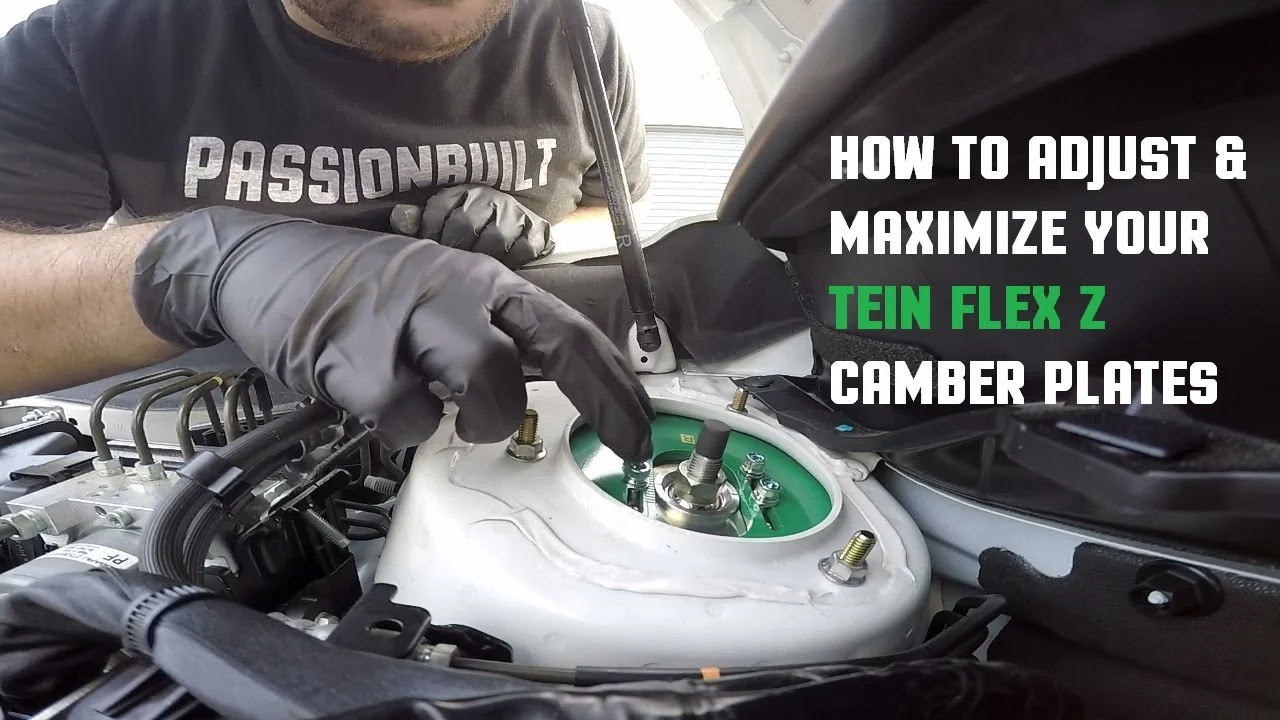
Before lifting the vehicle, find the exact TEIN model and application number. “FLEX,” “FLEX Z,” and other TEIN products can look similar while using different mounts, adjustment ranges, or rear-suspension layouts. The manual may also specify a minimum ride height, a maximum exposed thread length, a starting damping position, and a required clearance around the spring and tire.
Park on a level surface with the tires inflated to the pressure you normally use. Remove heavy cargo, keep the fuel level reasonably consistent, and let the suspension settle by rolling the car a short distance rather than measuring immediately after jacking it down.
Measure from the center of each wheel hub vertically to the fender edge. This hub-to-fender measurement is more useful than measuring from the ground because it is less affected by tire size and pressure. Record all four measurements, the vehicle mileage if useful, the current damping clicks, and the number of visible threads or the current lower-mount position.
Helpful tip
Make one change at a time. If you alter height, damping, tire pressure, and alignment together, you will not know which change caused the new handling or ride behavior.
Step 2 Loosen only the necessary lock collars
Chock the wheels that remain on the ground, loosen the wheel nuts slightly, and lift the vehicle at the manufacturer-approved jack point. Support it securely on jack stands before removing a wheel. Never place any part of your body under a car supported only by a floor jack.
With the wheel removed, identify the collar that locks the lower mount or threaded body, then identify the spring perch and its lock ring. Do not assume that every ring visible on the coilover is intended to move during a height adjustment. Clean dirt from the threads with a soft brush, avoiding damage to the threads and seals.
Use the supplied adjustment wrenches to loosen the appropriate lock collar. If the collar will not move, penetrating fluid and careful cleaning may help, but do not hammer directly on the aluminum ring or force a wrench that does not fit. Damaged collars and threads can prevent secure locking.
On a typical height-adjustable TEIN lower mount, the lower mount is rotated on the threaded shock body to change the assembly length. The lock collar is then tightened against the mount. The spring perch normally remains at the prescribed position unless the manual specifically directs otherwise.
Step 3 Set the ride height in small, equal changes
Support the suspension as needed so the coilover is not carrying a misleading load while you adjust it. Follow the TEIN manual’s direction for raising or lowering the mount; thread direction and access vary by application. Mark the starting position with a marker or count visible thread turns so you can return to it.
Make a small change on one corner, then make the same change on the matching corner of that axle. Measuring turns is only a rough guide because thread pitch and the motion ratio of the suspension determine the actual wheel-height change. The reliable result is the hub-to-fender measurement after the car is back on the ground.
Keep the mount within the manufacturer’s adjustment range. Do not use height adjustment to create an extreme drop that leaves little bump travel, causes the tire to contact the fender, or places the suspension arm at an unhealthy angle. A lower-looking car is not automatically a better-handling car.
Once the mount is positioned, tighten its lock collar against the specified surface. Use the torque value in the TEIN instructions if one is provided. If the manual gives a particular order for locking the collars, follow that order rather than relying on a general coilover technique.
A useful way to approach how to adjust tein flex coilovers is to check your progress after each stage.
Step 4 Reassemble the wheels and settle the suspension
Inspect the spring, body, brake hose, ABS wire, sway-bar link, and nearby suspension parts before reinstalling the wheel. Nothing should be stretched, trapped, rubbing, or contacting a moving component. Check that the coilover’s threaded body and lock collars are not touching the tire or wheel.
Install the wheel and hand-start every lug nut. Lower the vehicle until the tire just contacts the ground, then torque the lug nuts in the vehicle manufacturer’s specified pattern and value. Remove the chocks only when the vehicle is fully supported by the ground.
Roll the car forward and backward several feet, or drive slowly around the driveway, to let the bushings and springs settle. Do not judge the final height while the suspension is hanging or immediately after lowering it from the jack stands.
Step 5 Set the damping adjusters from a known reference
Damping controls how quickly the shock absorber resists suspension movement; it does not directly set ride height. Many TEIN FLEX applications use a 16-level adjustment, but the exact range and direction can vary. The top adjuster may be on the shock tower, while a rear adjuster may require access through the trunk, interior trim, or a dedicated extension.
Turn the adjuster gently to the specified full-soft or full-hard reference only if TEIN’s instructions identify that reference and direction. Never force the knob against its stop. Count each detent or click as you move to the desired setting, and write down the setting for every corner.
Set both dampers on the same axle equally for the initial road test. A sensible starting point is the manufacturer’s recommended street setting, not an assumption that maximum stiffness is best. If the car feels too firm, move a small number of clicks toward the softer direction; if it feels under-controlled after a change, move a small number toward firmer.
Make the same change on both sides unless you are diagnosing a specific fault.
Step 6 Perform the first safety inspection and road check
Before driving normally, turn the steering from lock to lock with the car stationary and inspect for tire, spring, brake-line, and inner-fender contact. Check the front and rear of the vehicle at different ride heights if the steering or suspension geometry changes during travel.
Drive slowly over a smooth, familiar route first. Listen for knocking, scraping, spring movement, or a loose-wheel sound. The steering should return normally, the car should track without a sudden pull, and the suspension should not repeatedly bounce after a bump.
Stop and inspect again after the short test. Look for shiny rub marks, shifted lock collars, loose hardware, damaged wires, or a ride height that has changed unexpectedly. If anything is unclear, do not continue at road speed; return to the manual or have a qualified suspension technician inspect the installation.
Step 7 Record the final settings and arrange an alignment
After the vehicle settles, repeat the hub-to-fender measurements on level ground. Compare left and right sides rather than chasing a perfectly identical number at every corner; vehicle weight, fuel level, and factory tolerances can create small differences. Correct a meaningful side-to-side difference only after confirming that the suspension is assembled correctly and the measurements are repeatable.
Write down ride height, damping clicks, tire pressure, and any unusual observations. This record makes future troubleshooting much easier and lets you reverse a change without guessing.
Any ride-height change alters suspension geometry, including toe and camber on many vehicles. Schedule a four-wheel alignment after the final height is chosen, especially if the vehicle pulls, the steering wheel is off-center, or the tires show uneven wear. Ask the alignment shop to check that the coilovers remain within their safe operating range.
Understanding how to adjust tein flex coilovers also means recognizing the limits of the method.
What the TEIN collars and adjusters actually change
Understanding the parts prevents the most common adjustment mistake: using the spring perch as though it were a simple height knob. The names can differ slightly between manuals, but the functions below describe the usual arrangement on height-adjustable TEIN systems.

Lower mount and threaded shock body
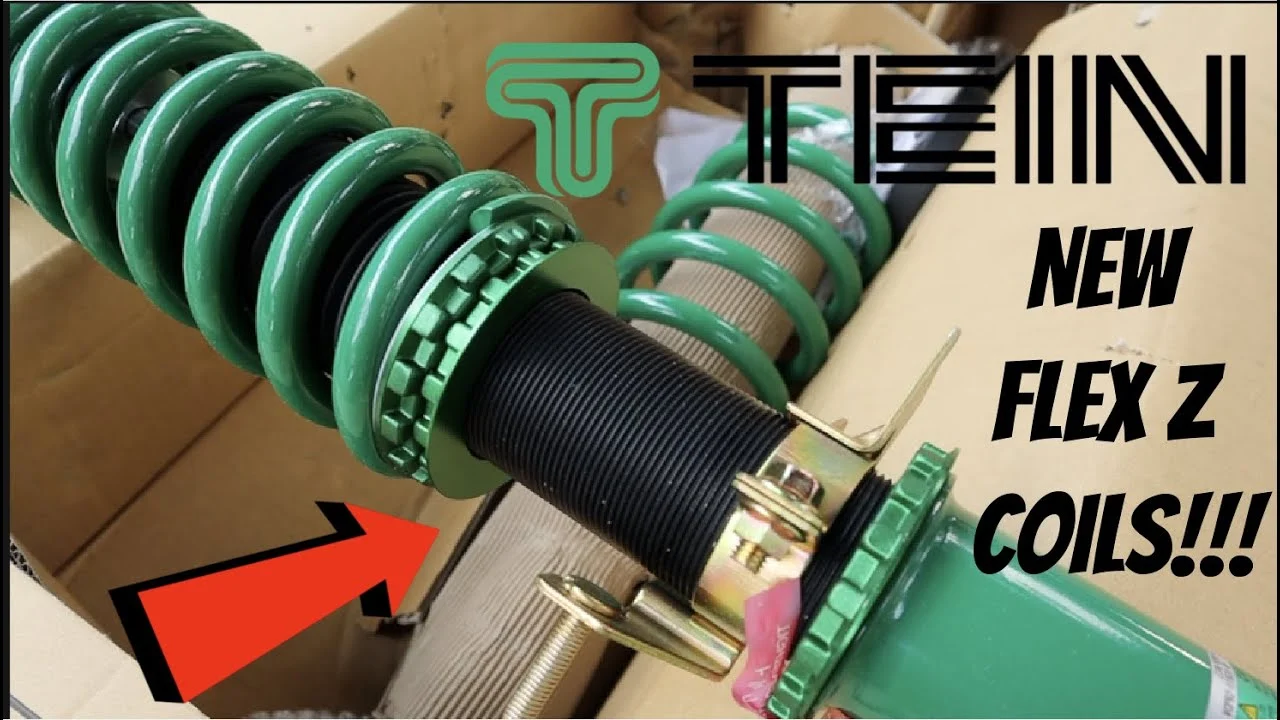
The lower mount attaches the coilover to the vehicle’s suspension. On a separately height-adjustable design, rotating this mount changes the effective length of the coilover without intentionally compressing or relaxing the spring. This is the preferred height-adjustment method when the TEIN manual specifies it.
The threaded shock body must retain enough engagement in the lower mount. Never exceed the minimum engagement or maximum exposed-thread limit listed for the kit. If you cannot achieve the desired height within those limits, the answer is not to keep unthreading the mount.
Spring perch and lock ring
The spring perch supports the coil spring. Moving it changes spring compression, commonly called preload, and may change the spring’s installed position or available travel. Preload adjustment is sometimes necessary for a specific setup, but it is not a substitute for the lower-mount height procedure.
A spring must remain seated when the suspension is at full droop unless the manufacturer explicitly allows another condition. If the spring becomes loose, rattles, or can be moved by hand, stop and consult the manual or a qualified installer.
Damping knob
The damping knob changes the shock absorber’s resistance to suspension movement. It can influence body control and how quickly the car settles, but it cannot correct incorrect ride height, worn parts, poor alignment, or a tire rubbing the body.
“Harder” is not automatically safer or faster. Excessive damping can make the tires skip over rough pavement, while too little damping can produce float and repeated bouncing. Use small changes and evaluate the car on the same type of road.
How to check the result before regular driving
A successful adjustment is more than a new measurement at the fender. The vehicle must retain safe suspension travel, adequate clearance, secure fasteners, and predictable alignment. Perform these checks in daylight before using the car on a long trip or at high speed.
- Compare hub-to-fender measurements on level ground after the suspension has settled.
- Confirm that the left and right damping settings match on each axle unless a documented diagnostic reason requires otherwise.
- Inspect tire clearance at steering lock and around the spring, lower mount, brake hose, and inner fender.
- Check that no coilover lock collar, spring, or threaded section has moved from its recorded position.
- Look for fluid leaking from the damper body, damaged adjuster hardware, or unusual marks on the shaft.
- Confirm that wheel lug nuts and any disturbed suspension fasteners are tightened to the correct specifications.
- Arrange an alignment after the final ride height and recheck tire wear periodically.
Check your result
After a short, slow test drive, the car should track predictably, settle after bumps without repeated oscillation, and show no rubbing or new noises. These observations do not replace an alignment or a professional inspection when a problem remains.
Common problems after an adjustment
Most problems come from changing spring preload unintentionally, measuring on an unsettled suspension, or setting damping by feel without recording the reference position. The table below helps separate adjustment errors from issues that require inspection.
| What you notice | What to check first |
|---|---|
| One corner sits higher | Repeat measurements on level ground, confirm the matching lock-collar positions, and inspect for a seized or incorrectly seated spring. |
| Clunking or rattling | Check loose hardware, spring seating, sway-bar links, top mounts, and contact marks. Do not assume the damping setting caused a mechanical noise. |
| Harsh ride after lowering | Check for reduced bump travel, tire pressure, bottoming, and overly firm damping. Restore height if the suspension is contacting its stops. |
| Car pulls or steering wheel is crooked | Have the alignment checked and inspect for bent, loose, or damaged suspension components. |
| Tire rubs during turns or bumps | Stop driving normally and inspect clearance at full steering lock and suspension compression. Raise the vehicle or correct the interference within the kit’s limits. |
| Adjuster will not turn | Do not force it. Confirm the correct access method, clean the area, and seek help if the mechanism is seized or damaged. |
When to stop and seek qualified help
Stop the job if a jack stand is unstable, a mounting bolt spins without tightening, the coilover has damaged threads, the spring is loose at full droop, or the manual’s limits are missing or unclear. Also stop if you find damper oil, a cracked mount, a bent suspension arm, or a brake hose that is stretched.
Suspension work is safety-critical. A qualified technician can verify fastener torque, suspension travel, alignment, and the condition of parts that are difficult to evaluate at home. Do not compensate for an unknown mechanical fault by turning the damping knob.
Beginner questions about TEIN Flex adjustments
How much should I lower my car on TEIN Flex coilovers?
Use the ride height range in the instructions for your exact kit and vehicle. Choose the height that preserves useful suspension travel and tire clearance rather than lowering the car as far as the threads allow. Street driving usually benefits from a moderate, functional height.
Should I adjust the spring perch when changing ride height?
Usually not when the kit uses a separately adjustable lower mount and the manual directs you to use it. Moving the spring perch changes preload and can affect spring seating. Follow the application-specific TEIN procedure instead of treating every collar as interchangeable.
Do I need an alignment after adjusting coilover height?
Yes, an alignment is strongly recommended after the final ride height is set because height changes can alter toe and camber. Even a small change can affect tire wear and steering behavior on some suspension designs.
What does a higher damping number mean?
It depends on the adjuster’s documented direction, so confirm the meaning in the TEIN instructions. In general, a firmer setting increases resistance to suspension movement and a softer setting reduces it. Count from the reference position rather than guessing from the number alone.
Can I adjust the damping while the coilovers are installed?
Often yes, if the adjuster is accessible and the manufacturer permits it. Some rear installations require removing interior trim or using an extension. Do not force an inaccessible knob or remove safety-critical parts just to make a quick adjustment.
Why did lowering the car make the ride worse?
Lowering may reduce bump travel, cause the suspension to contact its stops, change alignment, or create tire and body interference. Check those conditions before changing damping. Restoring some height and obtaining an alignment may solve the problem more effectively than making the shocks firmer.
Confirm the setup before calling the job finished
Learning how to adjust tein flex coilovers safely comes down to controlled changes and careful verification. Measure before turning anything, use the lower mount for height when the kit is designed for that method, leave spring preload alone unless instructed, and adjust damping from a known reference in equal axle-side settings.
Once the ride height is settled, inspect every clearance, torque disturbed hardware, record the settings, and get a proper alignment. If a collar is seized, a spring is loose, a damper leaks, or the vehicle develops a clunk or unstable handling, stop driving and have the suspension inspected rather than trying another adjustment.


