
How to Raise Tein Coilovers Safely and Properly Set Ride Height
Lowered suspension can look sharp, but an overly low car may scrape on driveways, leave too little suspension travel, or create clearance problems around the tires. Raising the car a small, controlled amount is usually possible with Tein coilovers, provided the kit is adjusted using its intended height-adjustment method rather than simply loosening random collars.
For most height-adjustable Tein kits, the safer general approach is to adjust the lower mount or threaded shock body while leaving the spring preload close to its existing setting. The exact collar arrangement differs among Tein models, so the product manual remains the final authority for thread engagement, minimum and maximum height, and any required torque values.
This guide explains how to raise tein coilovers on a typical vehicle, from recording the original height to checking clearances and arranging an alignment. You will also learn how to tell the difference between a true ride-height adjustment and a spring-preload change, when to stop, and what to inspect if the car does not sit evenly afterward.
At a glance
- Measure from the wheel center to the fender before changing anything.
- Use the lower mount or threaded body for height adjustment when your Tein model specifies that method.
- Recheck clearances, suspension movement, and wheel alignment after raising the vehicle.
How to raise tein coilovers safely and set ride height
Raising a coilover-equipped car is a suspension adjustment, not merely a cosmetic change. Work one axle at a time, make small equal adjustments on both sides, and keep the spring seat near its existing position unless the Tein instructions specifically call for a different procedure.
Tools you will need
- Vehicle jack and four appropriately rated jack stands, used to support the vehicle securely
- Tein spanner wrenches for loosening and tightening the adjustment collars
- Tape measure or steel ruler for recording wheel-center-to-fender measurements
- Paint marker or chalk for marking collar positions
- Wire brush and penetrating lubricant for dirty or seized threads
- Torque wrench, if the vehicle or Tein manual specifies torque values for related fasteners
Step 1 Confirm the coilover model and adjustment method
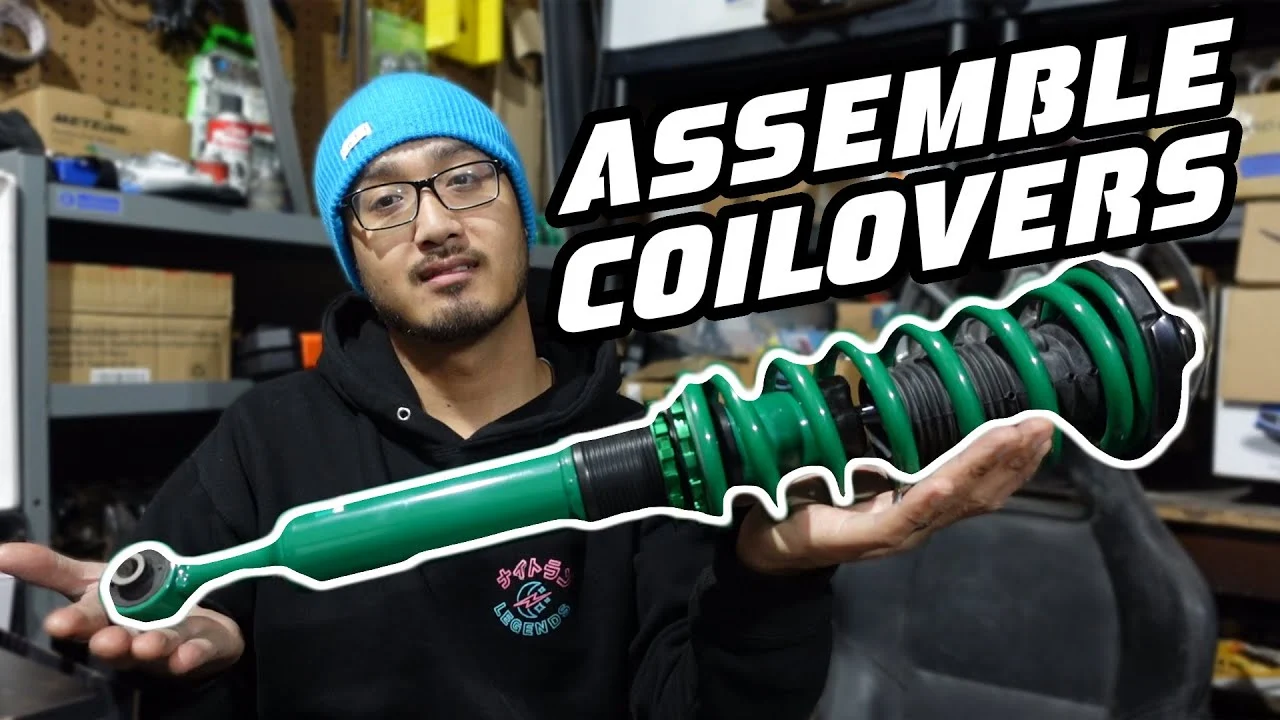
Find the exact Tein model installed on the vehicle, such as a Street Basis, Flex Z, Mono Sport, or another application-specific kit. Look for the model name on the paperwork, damper body, adjustment hardware, or previous installation records, then consult the instructions for that model before turning a collar.
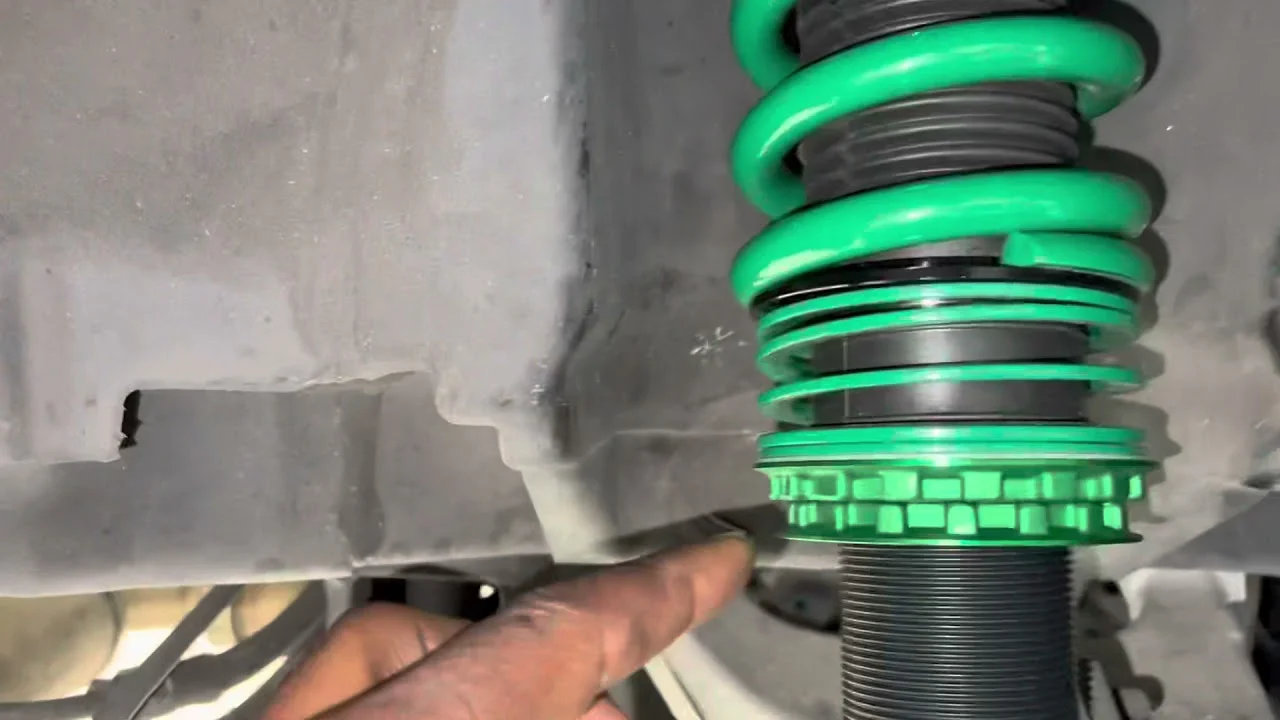
Tein coilovers may use a full-length adjustment system, in which ride height changes through the lower mount or threaded shock body without substantially changing spring preload. Other kits, especially simpler designs, may rely more directly on moving the spring perch. These methods are not interchangeable.
Do not assume that a collar is safe to turn just because it is threaded. A spring seat supports the spring, while a lower lock collar secures the lower mount or body. Confusing the two can alter preload, reduce available travel, or leave the spring insufficiently retained when the suspension unloads.
Step 2 Record the current ride height and visible settings
Park on a level, hard surface with the tires inflated correctly and the vehicle carrying its normal equipment. Roll the car forward or backward a short distance to settle the suspension, then measure from the center of each wheel hub straight upward to a consistent point on the fender opening.
Write down all four measurements, even if you are raising only one axle. The wheel-center method is more reliable than measuring from the ground because tire pressure and tire size can affect ground-to-fender measurements. Also record the amount of exposed thread, the position of each collar, and any visible reference marks.
If one side is already higher, do not immediately compensate by making a large adjustment. The difference may come from uneven ground, vehicle load, worn suspension components, or a previous adjustment. A baseline lets you determine whether the change actually produced the intended result.
Helpful tip
Make a small paint mark across each relevant collar and the adjacent threaded section. The marks give you a simple visual reference if dirt makes it difficult to count turns or recognize the original position.
Step 3 Lift the vehicle and support it securely
Use the vehicle manufacturer’s approved lifting points and place jack stands under suitable structural support points. Keep the jack in contact only as a lifting tool unless its use as a secondary support is specifically appropriate; never work beneath a vehicle supported solely by a jack.
For adjustments that require the suspension to hang, raise the vehicle enough for the relevant wheels to leave the ground and confirm that the car is stable before removing a wheel. Chock wheels that remain on the ground, set the parking brake when appropriate, and keep people clear while lifting.
Remove the wheel only if it blocks access to the collars. If you can reach the adjustment hardware safely with the wheel installed, removing it is not automatically necessary. The suspension should be unloaded for most collar adjustments, but follow the Tein instructions if your particular kit specifies another position.
Step 4 Clean the threads and identify the correct collars
Brush dirt and rust from the exposed threads so the collars can turn without dragging debris through the thread path. Apply a small amount of suitable penetrating lubricant only if needed, and avoid contaminating the brake rotor, pads, tire, or rubber components.
Identify the lower lock collar and the lower mount or threaded body it secures. On a full-length Tein design, the spring perch and its lock collar are higher on the assembly, while the lower mount and its locking collar are closer to the hub. The exact appearance varies, so compare what you see with the model-specific diagram.
Before loosening anything, check that the brake hose, ABS wire, sway-bar link, and other nearby parts are not trapped against the coilover. Do not force a collar against a component or use a hammer on the adjustment hardware. A seized or damaged thread is a reason to stop and seek suspension assistance.
Step 5 Loosen the lock collar without changing spring preload unnecessarily
Fit the Tein spanner wrench fully into the collar’s notches. Hold the adjacent mount or collar as directed by the manual, then loosen the lock collar enough to allow the intended height adjustment. You should feel the collar release rather than suddenly bind or deform.
A useful way to approach how to raise tein coilovers is to check your progress after each stage.
On a full-length system, leave the spring perch alone at this stage. The goal is to lengthen the coilover assembly or move the lower mount relative to the body, not to compress or relax the spring just to make the car sit higher.
If the collar will not move with reasonable hand force, stop. Excessive force can bend a spanner wrench, damage the collar, or twist the damper body. Clean the threads more thoroughly, confirm that you are turning the correct collar, and obtain help if corrosion or damage remains.
Step 6 Increase the coilover length in small, equal adjustments
Adjust the lower mount or threaded body in the direction that increases the installed length of the coilover, using the method shown in the Tein instructions. Because thread orientation and viewing angle can make “clockwise” descriptions confusing, verify the result by measuring the assembly or observing whether the lower mount is moving farther from the upper mount.
Make a small change on one side, then duplicate the same number of turns or the same measured thread movement on the opposite side of that axle. Counting turns is useful, but measuring the exposed thread or the distance between reference marks is better when the threads are dirty or the collar pitch is unfamiliar.
Do not exceed the model’s permitted adjustment range or minimum thread engagement. The lower mount must remain securely engaged with the threaded section, and the lock collar must have enough usable thread to clamp the assembly. If you cannot identify the safe range, stop and use the correct Tein manual before continuing.
Step 7 Tighten the collars and reinstall the wheels
Once both sides of the axle have been adjusted equally, hold the lower mount in position and tighten the lock collars against their mating surfaces. Use the specified torque if Tein or the vehicle manufacturer provides one; otherwise, follow the kit’s instructions rather than guessing with an impact tool.
Inspect the complete coilover on each side. The spring should be seated correctly, the collars should be square to their threaded surfaces, and no tool, wire, hose, or lubricant should remain near the brake assembly. Reinstall the wheels and tighten the wheel fasteners in a star pattern to the vehicle manufacturer’s specification.
Repeat the adjustment on the other axle only if needed. Raising all four corners by the same nominal amount does not always produce exactly the same final measurement because of corner weights, worn parts, or an uneven starting setup.
Step 8 Lower the vehicle, settle the suspension, and measure again
Lower the vehicle carefully, remove the stands, and roll it a short distance so the suspension settles naturally. Do not judge the final height while the car is still supported or immediately after the wheels have been hanging.
Measure from each wheel center to the same fender reference points used at the beginning. Compare the new numbers with your baseline and with the opposite side. A small side-to-side difference may be normal, but a sudden large difference suggests an unequal adjustment, a spring that has not seated, or another suspension problem.
Turn the steering from lock to lock while watching the front tires, brake hoses, and ABS wires. Look for rubbing, stretched lines, or contact between the tire and the coilover. At the rear, inspect the tire, spring, damper, and nearby bodywork through the suspension’s usable movement.
Step 9 Perform a slow clearance and handling check
Before driving normally, move the vehicle slowly in a safe area and listen for clunks, scraping, or spring noise. Test gentle braking and steering, then inspect the wheel wells again. A raised ride height can change suspension geometry, but it should not create new contact or looseness.
Confirm that the car has reasonable clearance over ordinary driveways and speed bumps without relying on a hard impact to test the suspension. If the vehicle pulls, the steering wheel is no longer centered, or the tires rub, stop driving it at speed until the cause is identified.
After a ride-height change, arrange a four-wheel alignment when practical, especially if the adjustment was substantial or the vehicle has adjustable camber. Changing height alters alignment angles and can cause uneven tire wear even when the car feels acceptable for a short drive. Understanding how to raise tein coilovers also means recognizing the limits of the method.
What changes when you raise a coilover?
Raising the vehicle increases ground clearance and may improve approach, departure, or underbody clearance. It can also restore some usable suspension travel if the previous ride height left the car close to its bump stops, but the result depends on the coilover design and the amount of adjustment.
With a full-length system, changing the lower mount position can raise the chassis while preserving a more appropriate relationship between spring preload and damper travel. Moving only the spring perch may raise the body too, but it also changes spring preload and can affect how firmly the spring remains seated when the suspension is fully extended.

Ride height is not the same as spring preload
Ride height is the vehicle’s settled position relative to the ground or wheel center. Spring preload is the initial compression placed on the spring when the suspension is assembled. They can influence each other on some coilovers, but they are not identical adjustments.
A spring perch that is moved upward usually compresses the spring more. That may increase preload without providing the controlled full-length adjustment intended by a particular Tein kit. Excessive preload can reduce droop travel, while too little preload may allow the spring to become loose when the suspension unloads.
Compatibility and model-specific limits matter
Tein coilovers are application-specific, and two kits can use different collar layouts or adjustment procedures. Some vehicles also have suspension designs that require checking driveshaft angles, sway-bar clearance, brake-hose routing, or electronic damper wiring after a height change.
Do not mix collars, lower mounts, springs, or adjustment parts from different Tein models unless the manufacturer explicitly identifies them as compatible. If the model label is missing or the assembly has been modified, a suspension shop can identify the parts and confirm whether the remaining thread engagement is safe.
How to verify the result after raising Tein coilovers
The final measurement is only one part of a successful adjustment. The vehicle should sit at the intended height, retain safe mechanical clearance, and drive without symptoms that point to altered alignment or a loose component.
- Measure all four corners on level ground after the suspension has settled.
- Compare left and right measurements on the same axle.
- Confirm that each lock collar is tight and each spring is properly seated.
- Check tire clearance at steering lock and through available suspension movement.
- Inspect brake hoses, ABS wires, sway-bar links, and damper wiring for tension or contact.
- Listen for new clunks, scraping, knocking, or spring movement during a slow test.
- Schedule an alignment and monitor the tires for unusual wear.
Check your result
A good immediate result is a stable car with repeatable wheel-center measurements, no contact at full steering lock, no loose spring when the suspension unloads, and no new noise during a cautious test drive.
Troubleshoot uneven height, seized collars, and new noises
Small differences can come from measurement technique, fuel level, cargo, or normal corner-weight variation. Recheck the surface, tire pressures, measuring points, and collar settings before making another adjustment.
| Symptom | Likely areas to inspect |
|---|---|
| One side sits noticeably higher | Unequal turns, a spring not seated, different preload, worn suspension parts, or uneven loading |
| Clunking or knocking | Loose lock collar, loose wheel hardware, disturbed sway-bar link, top mount, or another suspension fastener |
| Tire or hose rubbing | Wheel offset, tire size, steering-lock clearance, brake-line routing, or insufficient suspension clearance |
| Collar will not move | Dirt, corrosion, incorrect collar identification, cross-threading, or damaged adjustment hardware |
When a collar is stuck
Do not use an impact wrench, pipe extension, torch, or hammer as a first response. Clean the threads, apply an appropriate penetrant away from friction and rubber parts, allow it to work, and use the correct spanner with the vehicle safely supported.
If the collar remains stuck, the thread looks crossed, or the lower mount begins turning in an unexpected way, stop the adjustment. Damaged coilover threads can compromise the assembly, so replacement or professional repair is safer than forcing the part.
When the vehicle sits higher but rides poorly
A harsh ride after raising may indicate reduced travel, excessive spring preload, a damper setting that is too firm, or contact with a bump stop. A soft or unstable feel can point to insufficient damping, incorrect spring seating, or a component that was loosened during the work.
Do not compensate by turning every adjustment knob at random. Verify the mechanical installation first, then use the Tein damper-adjustment instructions if your kit includes damping control. Ride quality cannot be diagnosed accurately until the ride height, spring seating, and alignment are correct.
Frequently asked questions about raising Tein coilovers
Can I raise Tein coilovers without removing the wheels?
Sometimes. If the collars are accessible and the suspension can be safely unloaded, a wheel may not need to come off. Remove it when access is restricted or when you cannot clearly see the threads, spring seat, and lower mount.
Should I turn the spring perch to raise the car?
Not necessarily. On Tein kits designed for full-length adjustment, use the lower mount or threaded shock-body method described by Tein and leave spring preload essentially unchanged. Turning the spring perch is appropriate only when the model’s instructions specify that method.
How much can I raise my Tein coilovers?
The safe range is model- and vehicle-specific. Stay within the manufacturer’s stated height range, preserve the required thread engagement, and do not rely on a general number of turns that may not apply to your kit.
Do I need an alignment after raising coilovers?
An alignment is strongly recommended because changing ride height changes suspension geometry. It is especially important after a large adjustment, when the steering wheel is off-center, or when the vehicle has adjustable camber or toe.
Why did the car not rise by the amount I adjusted?
The suspension may not have settled, the measurement points may differ, or the adjustment may have changed the coilover’s internal position without producing a one-to-one change at the fender. Roll the vehicle to settle it, repeat the measurements, and confirm that both sides were adjusted equally.
When should I have a shop do the adjustment?
Seek qualified suspension help if the model is unknown, collars are seized, threads are damaged, the spring becomes loose, the vehicle has unusual clunks, or you cannot confirm safe thread engagement and clearance. Those conditions are more important than completing the adjustment at home.
Finish the adjustment with measurements and an alignment
Learning how to raise tein coilovers is mainly about using the correct adjustment point and verifying the result rather than chasing a particular number of turns. Record the original height, adjust both sides carefully, preserve spring seating and thread engagement, then settle and remeasure the vehicle.
Once the car clears the obstacles that prompted the change, inspect every nearby suspension and brake component and arrange an alignment. If any collar, spring, mount, or clearance point is uncertain, stop before driving normally and have the installation checked by a qualified suspension professional.


