
How to Adjust Tein Flex Z Coilovers: A Safe, Clear Setup Guide
Adjusting coilovers can seem like a small job until a ride-height change affects suspension travel, alignment, tire clearance, and the way the car behaves in a corner. TEIN FLEX Z coilovers make the process manageable because ride height is changed through the lower bracket rather than by simply compressing the spring. The important part is making one controlled adjustment at a time and checking the result instead of chasing a visual stance.
This guide explains how to adjust tein flex z coilovers safely for ride height and damping. It covers the tools you need, how to measure the car before changing anything, how to use the lower bracket and locking collars, and how to set the 16-level damping adjustment. The exact allowable height range and torque values still come from the installation manual for your vehicle-specific kit.
You can complete basic adjustments at home if the car is safely supported and the hardware is accessible. Stop if a collar is seized, a thread is damaged, a brake line is under tension, or you cannot safely support the vehicle. After a meaningful height change, an alignment and a careful road check are not optional finishing touches; they are how you confirm the adjustment did not create a new problem.
At a glance
- Measure from repeatable points before changing ride height.
- Use the lower bracket for height and the top adjustment knob for damping.
- Recheck clearance, fasteners, alignment, and handling after the adjustment.
How to adjust tein flex z coilovers safely and precisely
FLEX Z adjustments are easiest when you separate the two jobs. Ride height is adjusted mechanically at the coilover body, while damping force is changed with the adjustment knob. Do not use the damping knob to compensate for an incorrect spring or ride-height setup, and do not treat the spring seat as the primary way to lower the car.
Before lifting the car, identify which measurements you will compare. Measuring from the wheel opening to the ground can be misleading because tire pressure and floor slope affect the number. A repeatable measurement from the wheel center to the fender edge is usually more useful for comparing left and right sides, while a measurement from the same chassis point to the ground can help document overall clearance.
Tools you will need
- Vehicle jack and appropriately rated jack stands for safely lifting and supporting the car
- Wheel chocks to prevent movement on the ground
- TEIN spanner wrenches for the locking collars
- Steel tape measure or ruler for recording ride height
- Paint marker or chalk for marking collar positions
- Torque wrench and the vehicle or TEIN installation manual for final fastener checks
- Optional: penetrating fluid and a nylon or brass brush for lightly soiled threads
Step 1 Confirm the correct adjustment points and vehicle limits
Read the installation instructions for your exact FLEX Z application before touching a collar. TEIN kits differ by vehicle, and the manual may specify a recommended adjustment range, initial setup, minimum thread engagement, spring-seat position, or a particular tightening procedure.
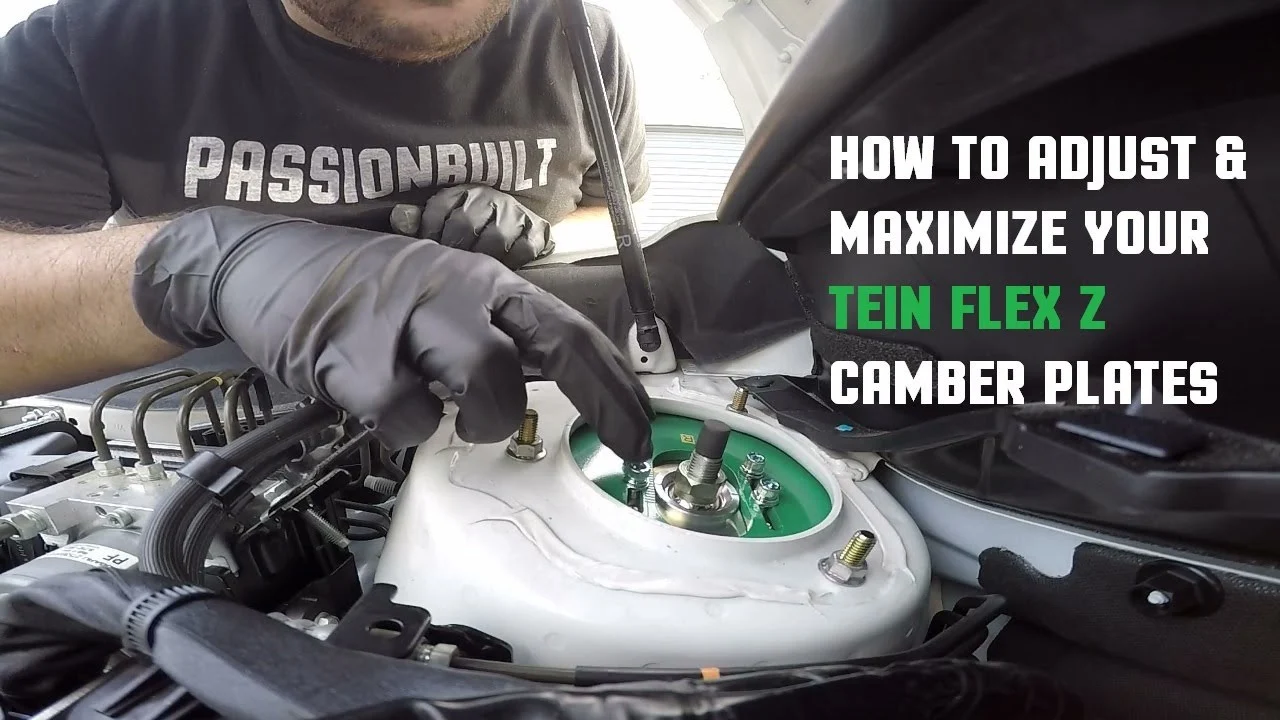
Locate the two main components on each coilover: the threaded lower bracket or body section used for ride height, and the locking collars that secure the adjustment. Also locate the damping knob, usually at the top of the shock absorber. Do not assume every nearby nut is an adjustment collar; some fasteners secure the suspension assembly and must not be loosened casually.
Record the current setup. Write down the ride-height measurements, the visible thread length, the position of each collar, and the current damping click setting. A paint mark across a collar and the adjacent threaded section gives you a simple reference if you need to return to the original position.
Step 2 Park, measure, and prepare the car
Park on a level, hard surface with the steering straight. Set the parking brake, place the transmission in park or in gear, and chock the wheels that will remain on the ground. Check tire pressures and remove unusually heavy cargo so the measurements represent the way the car is normally used.
Measure each corner before lifting the vehicle. Measure from the center of the wheel hub straight upward to a consistent point on the fender arch, or use another repeatable method recommended for your car. Record all four results rather than relying on how the car looks; a difference in appearance may come from the fender shape rather than the suspension.
If you are adjusting the front, measure the front axle; if you are adjusting the rear, measure the rear axle. Adjusting one axle at a time makes cause and effect easier to track. Do not change both height and damping at the same time if you are trying to diagnose handling or ride-quality concerns.
Step 3 Lift the vehicle and remove access obstructions
Use the vehicle manufacturer’s approved lifting points and support the car on jack stands placed at suitable support points. Never work under a vehicle held only by a jack. Remove the wheel if it blocks access to the collars, and keep the wheel and hardware organized so they return to their original locations.
With the suspension unloaded, inspect the coilover before adjusting it. Look for leaking shock fluid, bent threads, damaged locking collars, loose mounting hardware, torn boots, and brake hoses or ABS wires that are stretched or rubbing. If you find a damaged component, stop and repair the cause before changing the setup.
Important
Do not force a seized collar with excessive impact force or heat near rubber parts, brake components, or flammable fluids. Clean the threads and use the approved service method; if the collar still will not move, have a suspension shop handle it.
Step 4 Clean and unlock the ride-height adjustment
Brush loose dirt from the exposed threads with a soft brush. Avoid grinding or aggressively scraping the threads, since damaged threads can prevent the collar from seating correctly. If the threads are heavily corroded, follow TEIN’s service guidance rather than flooding the assembly with an unsuitable lubricant.
Use the TEIN spanner wrench to loosen the locking collar that secures the lower-bracket adjustment. Keep the wrench fully engaged in the collar holes or notches. Do not loosen the spring seat simply because it is easier to reach; changing spring preload can alter the working position of the spring and is not the normal method for setting FLEX Z ride height.
Before rotating anything, identify whether your intended change requires the coilover body to move into or out of the lower bracket. The direction can vary with the orientation of the assembly, so follow the manual’s diagram and watch the result rather than relying on a generic clockwise rule.
Step 5 Change ride height through the lower bracket
Rotate the coilover body or lower bracket adjustment in small, equal increments on both sides of the same axle. Keep the spring seat and spring relationship consistent unless the vehicle-specific instructions tell you otherwise. The goal is to move the suspension assembly while preserving the intended spring setup and adequate suspension travel.
After a small adjustment, count or measure the change and repeat it on the opposite side. Matching the number of turns is helpful, but the final measurement matters more because manufacturing tolerances, existing preload, and the car’s weight distribution can leave the two sides slightly different. A useful way to approach how to adjust tein flex z coilovers is to check your progress after each stage.
Do not exceed the manufacturer’s recommended range. Maintain the required thread engagement and make sure the lower bracket remains securely supported by the threaded section. If you cannot tell which portion is moving, stop and compare the assembly with the FLEX Z instructions rather than guessing.
Step 6 Lock the collars and reinstall the wheels
When the height is close to your target, hold the adjusted section so it does not rotate and tighten the locking collar against the specified surface. Use the torque value and procedure in the relevant TEIN or vehicle manual; do not substitute a guessed torque value from another coilover brand.
Check that the collar is seated squarely and that no dirt is trapped between the mating surfaces. Reinstall the wheels and tighten the lug nuts in a crisscross pattern by hand first. The final lug-nut torque should come from the vehicle manufacturer’s specification, not from the coilover instructions.
Step 7 Set the damping adjustment from a known baseline
Damping controls how readily the shock absorber resists suspension movement. On FLEX Z coilovers, the adjustment is commonly a 16-level setting operated from the top of the shock, but the exact access point can vary by application. Confirm that the adjuster is installed and accessible before trying to turn it.
Turn the knob gently to one end only if the instructions allow that method, without forcing it against the stop. Then count the specified number of clicks back to your chosen baseline. TEIN’s adjustment convention generally uses clockwise movement toward firmer damping and counterclockwise movement toward softer damping, but verify the direction and starting position in your manual.
For a beginner, the safest baseline is the manufacturer’s recommended setting or the setting documented before adjustment. Change damping one or two clicks at a time and test the car between changes. A firmer setting is not automatically better: excessive firmness can reduce grip over rough pavement, while excessive softness can allow more body motion.
Step 8 Settle the suspension and measure again
Lower the car carefully until the tires contact the ground, then roll the vehicle a short distance or gently move it forward and backward to let the suspension settle. Do not take final measurements while the suspension is hanging or immediately after lowering it from the stands.
Measure the same points used at the beginning. Compare left to right on each axle and compare the final numbers with your target. If one corner is unexpectedly different, inspect for a collar that moved, a spring that is not seated correctly, a measurement error, or a mechanical issue before making another adjustment.
Check your result
A successful initial check shows the intended ride-height change, similar left-to-right measurements, seated springs, secure collars, no stretched lines, and enough clearance for the tire and suspension to move normally.
Step 9 Complete the clearance and road checks
Turn the steering from lock to lock and inspect the front tires, wheels, brake hoses, and ABS wires. Look for contact with the spring, lower bracket, sway-bar end link, inner fender, or other suspension components. At the rear, check clearance with the suspension loaded and pay attention to the inner wheelhouse and exhaust components.
Before driving normally, perform a slow test in a safe area. Listen for clunks, scraping, spring movement, or tire contact. The steering wheel should return normally, braking should feel predictable, and the vehicle should not pull sharply or feel unstable.
After any ride-height change, arrange a four-wheel alignment when practical, especially if the change is substantial. Altering height can change camber, toe, and steering geometry. Uneven toe can wear tires quickly and make the car feel nervous even when the coilovers themselves are functioning correctly.
What each FLEX Z adjustment changes
Understanding the separate functions of the hardware prevents many setup errors. Ride height, spring preload, and damping interact, but they are not interchangeable adjustments. The best setting is the one that preserves usable suspension travel and predictable tire contact, not simply the lowest visible stance.

Ride height and suspension travel
Ride height is the car’s position at rest relative to the road. Lowering it can reduce body roll and lower the center of gravity, but too much lowering can leave insufficient bump travel, increase bottoming, and place suspension arms at unfavorable angles.
FLEX Z coilovers are designed for height adjustment through the lower mount or bracket. This approach can let you change the car’s height without needlessly changing the spring’s intended setup. Still, the vehicle-specific adjustment range is a hard limit, not a suggestion to be ignored for appearance.
Understanding how to adjust tein flex z coilovers also means recognizing the limits of the method.
Spring preload is not a height shortcut
Spring preload is the amount a spring is compressed when the suspension is assembled and unloaded. On a properly configured coilover, the spring should remain correctly seated through the suspension’s usable movement. Moving the spring seat to force a height change can affect preload and available travel.
If the spring is loose when the suspension is fully extended, the spring seat position may need attention, but that is a setup or inspection issue rather than a reason to randomly tighten the seat. Follow the TEIN instructions for your application or ask a qualified suspension technician.
Damping force and click settings
Damping force controls the speed of suspension movement, not the static height of the car. Changing it affects compression and rebound behavior together according to the design of the adjuster, so the same click setting can feel different depending on tire pressure, spring setup, road surface, and vehicle load.
Keep a written record of every setting. A simple note such as “front: 8 clicks from soft, rear: 10 clicks from soft” is useful only if the counting convention is also recorded. Do not turn the adjuster beyond its stop or use pliers on a knob.
How to verify the adjustment before regular driving
A coilover adjustment is complete only after the hardware and the vehicle’s behavior agree with your measurements. Static height alone does not prove that the suspension is safe. The following checks catch problems that may not be visible while the car is parked.
- Confirm every adjusted locking collar is tight according to the applicable instructions.
- Confirm wheel lug nuts are tightened to the vehicle manufacturer’s specification.
- Check that springs are seated and that no coil is damaged or rubbing unexpectedly.
- Inspect brake hoses, ABS wires, sway-bar links, and other nearby parts for tension or contact.
- Check tire clearance with steering fully left and right.
- Look underneath for contact points and adequate ground clearance.
- Repeat the ride-height measurements after the first short drive.
- Schedule an alignment after a meaningful ride-height change.
Take the first drive gently on a familiar road. Test braking, turning, bumps, and moderate acceleration separately. If a noise appears, do not assume it is normal coilover noise; identify whether it changes with steering angle, suspension movement, or vehicle speed.
Common adjustment problems and sensible fixes
Most problems come from confusing the adjustment points, measuring inconsistently, or trying to correct several variables at once. Use the symptom as a clue, but do not continue driving if there is tire contact, a loose mounting point, or a serious handling change.
| Symptom | First checks | Likely next action |
|---|---|---|
| One side is higher | Repeat measurements, inspect collar position, confirm the spring is seated | Correct the mechanical setup before changing damping |
| Clunk after adjustment | Check collars, mounting hardware, sway-bar links, and brake-line brackets | Stop driving if anything is loose or contacting |
| Harsh ride | Review damping setting, tire pressure, and available travel | Try a small damping change only after mechanical checks |
| Car pulls or feels nervous | Inspect tire pressures and steering clearance | Have the alignment checked, especially toe |
What if the collar will not move?
Unload the suspension, clean the threads, and make sure you are using the correct TEIN spanner wrench on the correct collar. Do not hammer directly on the threaded body or clamp it with ordinary locking pliers, since either action can damage the adjustment surface.
If corrosion has bonded the collar, the threads are visibly damaged, or the wrench keeps slipping, stop and seek qualified help. A damaged lower bracket can compromise the adjustment and may require replacement rather than more force.
What if the car rides much harsher after lowering?
First check whether the car is contacting bump stops, tires, inner fenders, or another suspension component. Then verify that the spring remains correctly seated and that the height is within the TEIN range. Only after those checks should you test a softer damping setting in small increments.
Lowering beyond a practical range can reduce bump travel enough that no damping adjustment will make the ride comfortable. Restoring some height may be the correct solution.
What if there is a clunk after installation or adjustment?
A clunk can come from loose upper mounts, lower mounting bolts, sway-bar end links, brake-line brackets, or an incorrectly seated spring. It can also come from a collar that was not properly locked. Inspect all related hardware with the car safely supported and use the proper torque specifications.
Do not diagnose a persistent clunk by repeatedly changing damping. The adjuster changes shock resistance; it does not tighten loose suspension hardware.
Frequently asked questions
These answers address common beginner uncertainties, but the exact FLEX Z configuration for a particular vehicle remains the controlling reference.
Can I adjust ride height with the wheels on the car?
Usually, access is better and safer with the vehicle supported and the wheel removed. The suspension should be unloaded so the collar can be adjusted without fighting spring or vehicle load. Never reach beneath an unsupported vehicle.
Do I need to adjust all four coilovers equally?
Not automatically. Start with equal adjustments across the same axle when you want an even height change, then measure all four corners after the suspension settles. Vehicle weight distribution and alignment requirements can make final measurements differ slightly.
How many clicks should I use on the damping adjuster?
Use the vehicle-specific TEIN recommendation or your recorded baseline as the starting point. There is no universal best click setting because tires, roads, spring configuration, vehicle weight, and driving preferences all affect the result.
Does lowering the car require an alignment?
A ride-height change can alter camber and toe, so an alignment is strongly recommended. It is especially important when the steering wheel is no longer centered, the car pulls, the tires show uneven wear, or the height change is substantial.
Can I use ordinary penetrating oil on the coilover threads?
Use only a product and cleaning method compatible with the coilover’s materials, seals, and service instructions. Avoid spraying indiscriminately near brake components, rubber parts, or the damping adjuster. If corrosion is severe, have the assembly serviced.
Finish the setup with measurements, not appearance
Learning how to adjust tein flex z coilovers is mainly a matter of using the correct adjustment point, making small measured changes, and checking the complete suspension afterward. Set ride height through the lower bracket within TEIN’s stated range, preserve correct spring seating and thread engagement, and treat damping as a separate fine-tuning adjustment.
Before regular driving, confirm the collars and wheel hardware, inspect tire and brake-line clearance, take a cautious test drive, and arrange an alignment after changing height. If a collar is seized, a component is damaged, or the car develops a serious noise or handling problem, stop and get qualified suspension help rather than forcing the adjustment.


