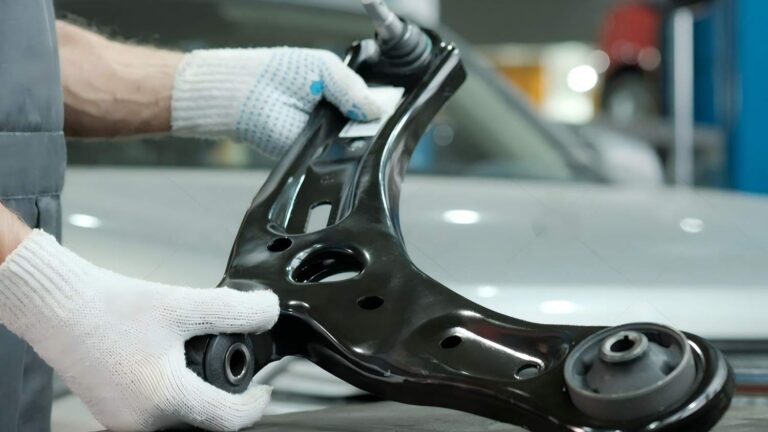
How to Replace Rear Shock Absorbers: A Step-by-Step DIY Guide
Learning how to replace rear shock absorbers can save time and repair costs on many cars, trucks, and SUVs. Rear shocks often use a simple upper and lower mounting system. Still, rust, tight bolts, limited access, and different suspension designs can make the job harder than it first looks.
The key is not to rush. A safe repair starts with the correct replacement part, a stable work area, and the service information for your exact vehicle. This guide explains the common method, but your vehicle’s repair manual should always control bolt locations, torque values, and any special steps.
A useful shop habit is to study the new shock before removing the old one. Compare the length, mounts, bushings, sleeves, and hardware. This simple check can catch a wrong part before the vehicle is apart.

What Rear Shock Absorbers Do
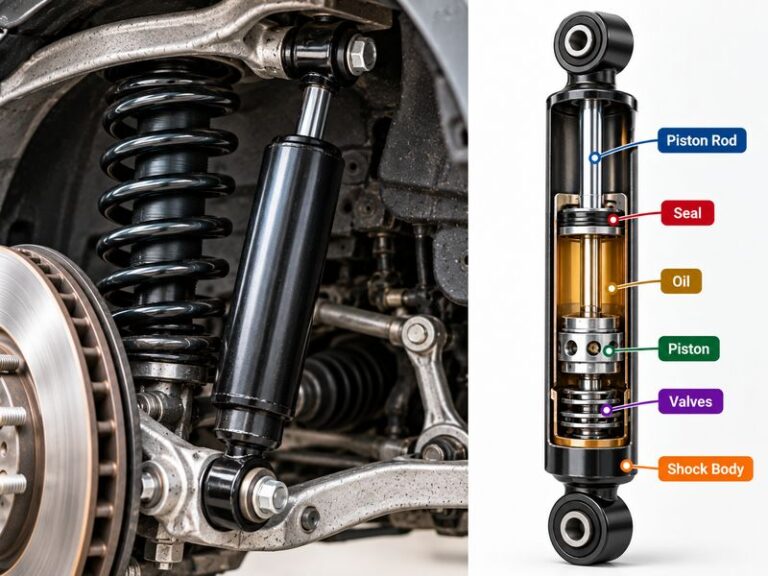
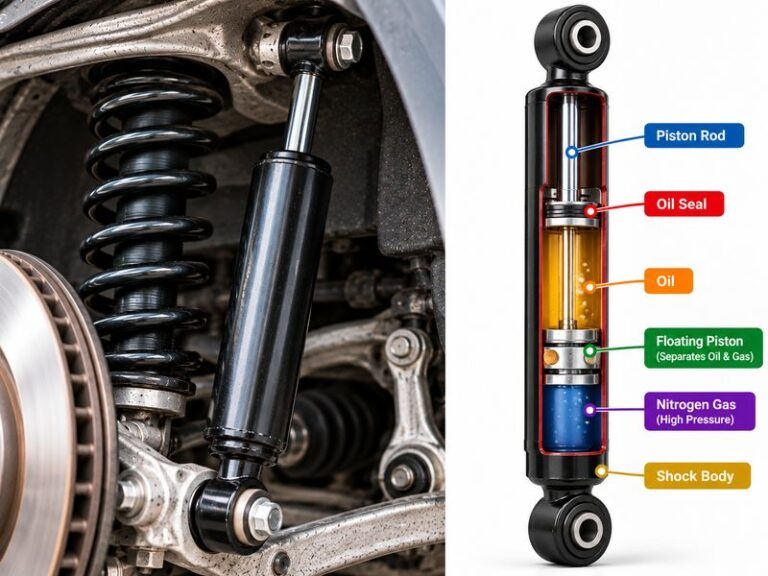
A shock absorber controls how fast the suspension moves. It does not hold the vehicle up by itself. Springs carry the vehicle’s weight, while shocks help control spring movement after bumps, dips, braking, and other changes in road surface.
Good rear shocks help the tires stay in contact with the road. Worn shocks can let the rear of a vehicle bounce too much. They can also make the vehicle feel loose or less settled on rough roads.
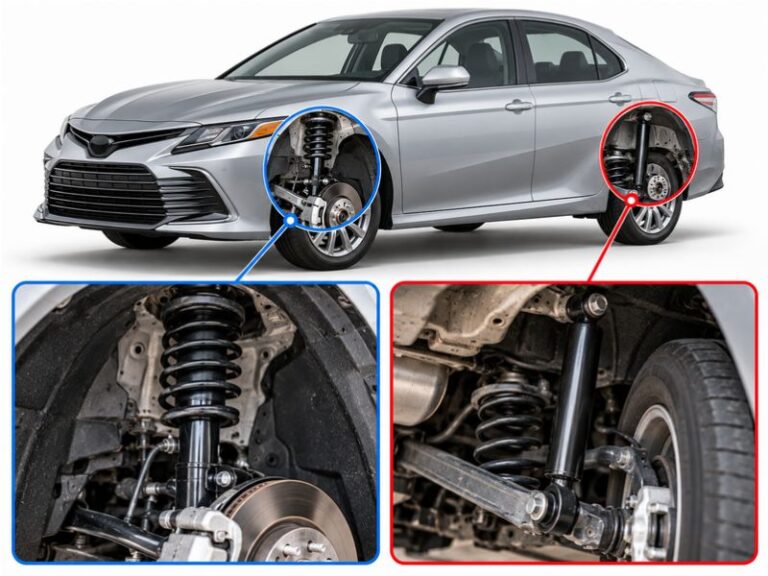
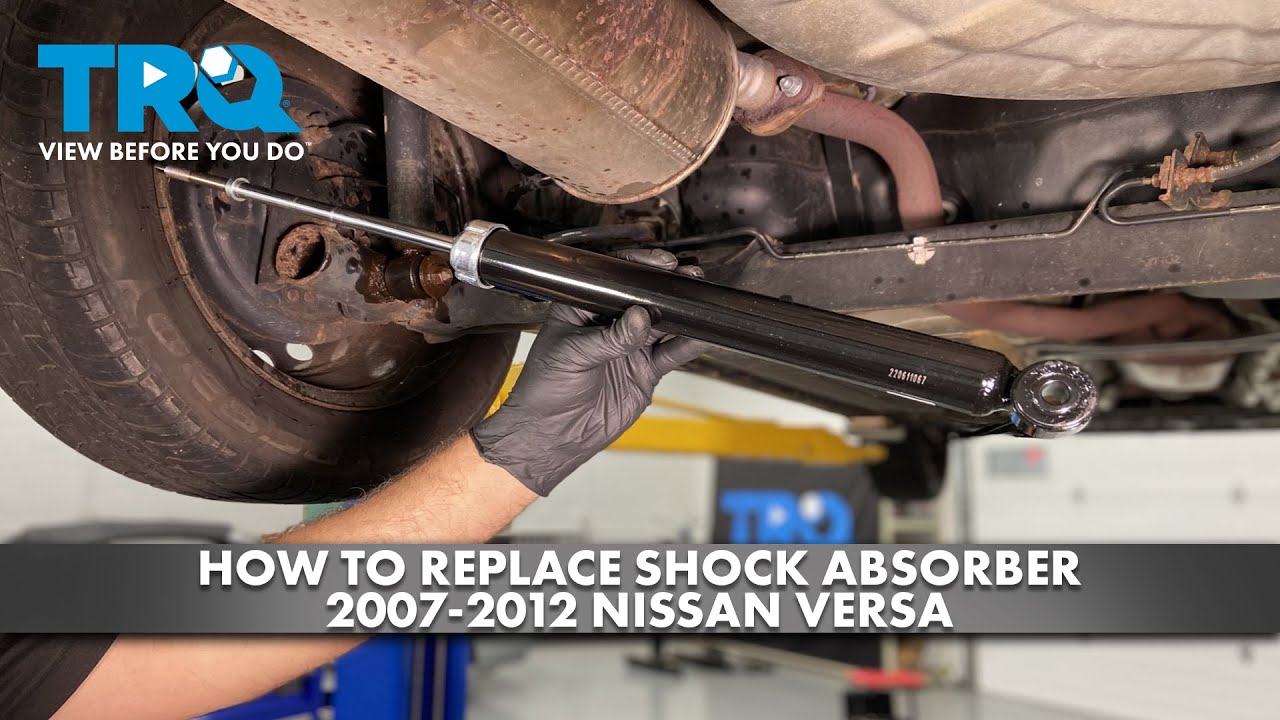
Before you learn how to replace rear shock absorbers, it helps to know that a rear shock is not always part of a complete strut. Many vehicles use a separate rear spring and shock. That design can make the repair fairly direct.
- ✦ Controls bounce
The shock slows spring movement so the vehicle settles sooner after a bump.
- ✦ Supports tire contact
Controlled suspension movement helps the tire stay planted on uneven roads.
- ✦ Improves ride control
Healthy shocks can make the vehicle feel more stable during turns, braking, and lane changes.
When Should You Replace Rear Shock Absorbers?
There is no single replacement time that fits every vehicle. Shock life depends on road quality, load, weather, driving style, towing, and the shock design. A vehicle that spends years on rough roads may need suspension work sooner than one that sees smooth highway use.
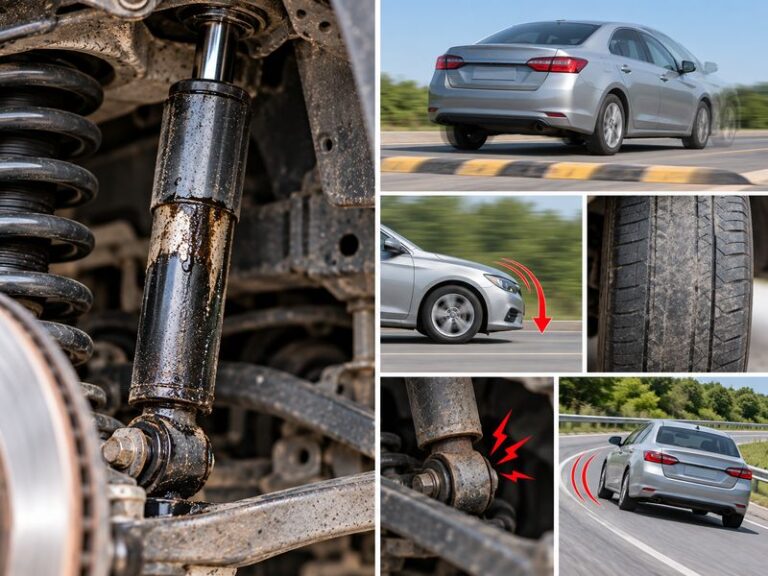
Look for signs that match a worn shock. One symptom alone does not prove the shock is bad. Tires, springs, bushings, wheel alignment, and other suspension parts can cause similar problems.
If a shock leaks fluid, is damaged, or no longer controls suspension movement well, replacement may be needed. If you are unsure, have the suspension checked before buying parts.

- ✦ Oil leakage
A light film can sometimes be normal, but heavy fluid leakage down the shock body is a warning sign.
- ✦ Excessive bouncing
The rear may continue to move several times after a bump instead of settling quickly.
- ✦ Poor ride control
The vehicle may feel loose, floaty, or unsettled on uneven roads.
- ✦ Visible damage
Bent parts, damaged mounts, broken bushings, or a badly rusted shock can require replacement.
- ✦ Uneven tire wear
Poor suspension control can contribute to irregular tire wear, although many other faults can cause it too.
Should You Replace Shocks in Pairs?
Replacing rear shocks as a pair is usually a sound practice. It gives both sides of the axle a similar damping level. If one rear shock has failed, the other may also have similar age and wear.
You can replace only one shock when circumstances require it, but matching parts on the same axle helps keep suspension behavior more consistent. Follow the vehicle maker’s guidance when it specifies a particular replacement method.
Tools and Parts You Need
Before starting, gather every tool you expect to use. A typical rear shock job needs basic hand tools, a floor jack, and jack stands. The exact socket sizes depend on the vehicle.
Use a torque wrench for final tightening. Guessing torque by feel is not a good substitute for the manufacturer’s specification. Some vehicles also need a special tool to hold the shock shaft while you remove the upper nut.
Buy shocks that match your vehicle’s year, model, engine, drivetrain, and suspension package. Towing and heavy-duty versions may use different parts.
- ✦ Replacement shocks
Use the correct shock for your exact vehicle and suspension setup.
- ✦ Floor jack
Use a properly rated jack to raise the vehicle.
- ✦ Jack stands
Support the vehicle with sturdy stands placed at approved support points.
- ✦ Socket and wrench set
Choose sizes that fit the shock mounting nuts and bolts.
- ✦ Torque wrench
Use it to tighten fasteners to the vehicle maker’s stated torque.
- ✦ Penetrating oil
It can help loosen rusty fasteners, but it does not replace safe tool use.
- ✦ Safety gear
Wear eye protection and suitable work gloves, and keep loose clothing away from moving parts.
How to Prepare the Vehicle Safely
Safety comes first when learning how to replace rear shock absorbers. Park on a firm, level surface. Set the parking brake, place the transmission in Park or in the correct gear, and use wheel chocks where appropriate.
Read the vehicle service information before lifting it. Find the approved lift points and support points. Never rely on a floor jack alone while working under a vehicle.
The rear suspension may change position when you raise the vehicle. Keep your hands clear of pinch points. If the shock is under unusual load, stop and check the repair procedure for that vehicle.
- ✦ Use a level surface
A flat, firm surface helps keep the jack and stands stable.
- ✦ Chock the wheels
Chocks help prevent unwanted vehicle movement.
- ✦ Use approved support points
Place jack stands only where the vehicle maker allows.
- ✦ Keep the jack as a lifting tool
Do not work under a vehicle supported only by a floor jack.
Do You Need to Remove the Rear Wheels?
It depends on the vehicle. Some rear shocks are easy to reach with the wheels installed. Others have limited access, so removing the rear wheels makes the job much easier.
If you remove a wheel, support the vehicle first and follow the proper wheel removal and installation procedure. Keep the wheel and its fasteners in a safe place while you work.
How to Replace Rear Shock Absorbers Step by Step
The basic process for how to replace rear shock absorbers is similar across many vehicles. The mounting layout can still vary, so use these steps as a general guide rather than a vehicle-specific repair manual.
Work on one side at a time when that makes sense for your vehicle. Keeping the other side assembled can help you compare the mounting order and hardware. Take a photo before removal if the hardware stack is not clear.

- ✦ 1. Raise and support the vehicle
Lift the vehicle at the approved points and place it securely on jack stands.
- ✦ 2. Remove the wheel if needed
Take off the rear wheel when it blocks access to the shock.
- ✦ 3. Find both shock mounts
Identify the upper and lower shock mounting points before removing anything.
- ✦ 4. Support the suspension if needed
Use a suitable jack to control suspension movement when the service procedure calls for it.
- ✦ 5. Remove the lower fastener
Loosen and remove the lower shock bolt or nut using the correct tools.
- ✦ 6. Remove the upper fastener
Remove the upper mounting nut, bolt, or hardware as specified for the vehicle.
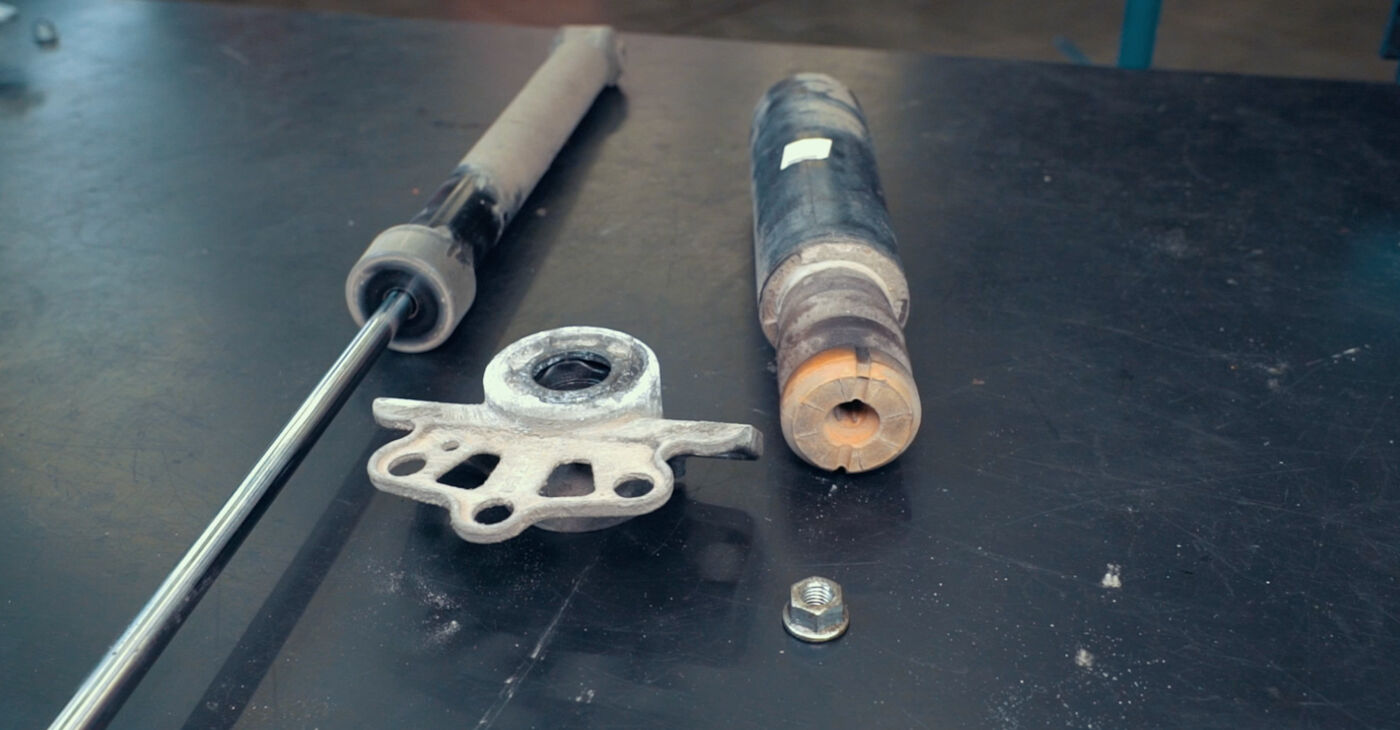
- ✦ 7. Compare the old and new shocks
Check length, mounts, bushings, sleeves, and included hardware before installation.
- ✦ 8. Install the new shock
Position the shock and install the upper and lower hardware in the correct order.
- ✦ 9. Tighten to specification
Use the correct factory torque values and follow any ride-height instructions.
- ✦ 10. Repeat on the other side
Install the matching shock on the other side of the rear axle.
- ✦ 11. Reinstall the wheel
Install the wheel and tighten its fasteners using the proper sequence and torque.
- ✦ 12. Lower the vehicle and inspect
Remove the stands safely, lower the vehicle, and inspect the work before driving.
Removing the Old Rear Shock
Start by checking the mounting hardware for rust or damage. Apply penetrating oil when appropriate and give it time to work. Use a breaker bar when needed, but keep the socket fully seated on the fastener.
Remove the shock mounts in the order recommended by the service procedure. Do not force a bolt if the suspension is putting side load on it. A small change in suspension position can sometimes remove that load.
- ✦ Watch for seized hardware
Rust can make old bolts hard to remove. Use safe methods and avoid damaging nearby brake lines, wiring, or suspension parts.
- ✦ Do not twist the shock shaft
Some shock designs require a tool to hold the shaft while the nut is removed.
Installing the New Shock
Fit the new shock in the same position as the old one unless the manufacturer’s instructions say otherwise. Make sure bushings, washers, sleeves, and spacers sit in the correct order.
Start the fasteners by hand. This helps prevent cross-threading. Do not fully tighten a fastener until the shock is seated correctly and the service procedure allows final tightening.
Torque each mounting fastener to the exact specification for your vehicle. Some suspension bushings need final tightening at normal ride height to avoid putting the bushing in an unwanted twist.
Why Correct Torque Matters
Torque is the twisting force used to tighten a fastener. Suspension bolts need the correct clamping force to hold parts securely without damaging the bolt, nut, bushing, or mounting point.
Too little torque can let a fastener loosen or allow unwanted movement. Too much torque can stretch a bolt, crush a bushing, damage threads, or create another failure. This is why the correct service specification matters more than a general torque number.
Do not copy a torque value from another vehicle. Even similar models can use different hardware. Check the repair manual or reliable service data for your exact vehicle.
- ✦ Use a torque wrench
A torque wrench gives a controlled final tightening force.
- ✦ Use the correct specification
Follow the torque value and procedure listed for the exact vehicle.
- ✦ Check special instructions
Some fasteners are torque-to-yield or have special replacement rules.
- ✦ Do not guess
Hand feel is not a reliable way to set suspension fastener torque.
Common Problems During Rear Shock Replacement
Rear shock replacement is often straightforward, but old suspension hardware can create problems. Rust is common on vehicles that have seen winter road salt or wet conditions. Heat, penetrating oil, the right socket, and patience may help, but badly damaged hardware may need professional service.
Another common issue is installing washers or bushings in the wrong order. Compare the old setup with the new parts and the service instructions before tightening anything.
If the new shock will not line up with the mounting holes, do not force it with a large pry tool. The suspension may need to move slightly to align the parts. Follow the vehicle-specific procedure for controlling that movement.

- ✦ A bolt will not move
Check for corrosion, use the correct socket, and make sure the vehicle is safely supported before applying more force.
- ✦ The new shock seems too long
Compare the new and old parts and confirm that the replacement matches the vehicle.
- ✦ The mounting holes do not line up
Check suspension position and follow the service procedure instead of forcing the shock into place.
- ✦ The shock keeps spinning
Some designs need a tool to hold the shock shaft while the mounting nut is loosened or tightened.
- ✦ A bushing looks different
Verify the correct part and hardware order before continuing.
When to Stop the DIY Repair
Stop if you cannot support the vehicle safely, cannot identify the correct mounting points, or find serious rust or structural damage. A damaged suspension mount is more than a routine shock replacement.
Professional help also makes sense when the shock is part of a complex suspension system or when special tools are required. Saving money on labor is not worth taking a risk under a vehicle.
How to Check Your Work After Installation
After learning how to replace rear shock absorbers, do a careful inspection before driving. Check both shock mounts and make sure all hardware is installed. Look around the work area for loose tools, damaged wires, or parts that may rub.
If you removed the wheels, verify the wheel fasteners are tightened to the correct specification. Make sure the vehicle sits normally and that the shocks do not contact nearby components through normal suspension movement.
Take a short, slow test drive on a familiar road. Listen for knocks or rattles. The vehicle should feel controlled and stable, not loose or unusual. Stop and inspect the repair if anything sounds or feels wrong.
- ✦ Check mounting hardware
Confirm that the upper and lower fasteners are installed and torqued correctly.
- ✦ Check for contact
Make sure the shock does not rub against tires, brake parts, wiring, or other suspension components.
- ✦ Check wheel fasteners
If the wheels were removed, verify their torque before driving.
- ✦ Listen during the test drive
Clunks, knocks, or rubbing sounds can point to a loose fastener or another suspension problem.
Do Rear Shocks Need an Alignment?
Replacing a simple rear shock does not normally change wheel alignment by itself. However, suspension work can vary by vehicle, and some designs use mounting points that can affect suspension geometry.
If the vehicle pulls, the steering wheel is off center, or tire wear changes after the repair, have the suspension and alignment checked. Always follow the manufacturer’s procedure for your model.
Tips for a Cleaner and Safer Repair
A few simple habits can make how to replace rear shock absorbers much easier. Take photos before disassembly, keep hardware organized, and compare every new part with the old one before installation.
Do not work in a hurry. Suspension parts can hold force, and a slipping jack or poorly supported vehicle can cause serious injury. Set up the work area first, then begin the repair.
If you live in an area where road salt is common, inspect nearby brake lines, suspension arms, and mounting points while the vehicle is lifted. A shock replacement gives you a useful view of parts that are normally hidden.
- ✦ Photograph the old setup
A quick photo can help you remember the position of washers, bushings, and brackets.
- ✦ Work in pairs
Replacing both rear shocks at the same time can provide more even damping across the axle.
- ✦ Clean mounting areas
Remove loose dirt and rust from mounting surfaces without damaging the parts.
- ✦ Inspect nearby parts
Look at springs, bushings, brake lines, tires, and mounting points while access is easy.
- ✦ Keep records
Note the shock brand, part number, and installation date for future maintenance.
Rear Shock Absorbers vs. Rear Struts
The terms shock and strut are often mixed together, but they are not the same thing. A traditional shock mainly controls suspension movement. A strut can also form a key part of the suspension structure and wheel-location system.
This difference matters when planning a repair. A separate rear shock may come off with a few mounting bolts. A rear strut assembly can involve a spring and other parts that need special tools and a different procedure.
If your vehicle uses a rear strut with a coil spring under significant tension, do not treat the job like a simple shock replacement. Spring compression can be dangerous when handled without the right equipment and training.
- ✦ Separate shock
The shock is mounted apart from the spring on many rear suspension designs.
- ✦ Strut assembly
A strut can support suspension structure and may include a spring and upper mount.
- ✦ Check before starting
Identify the suspension design on your exact vehicle before choosing a repair method.