
How to Test Shock Absorbers: A Simple Step-by-Step Guide
Learning how to test shock absorbers can help you spot suspension trouble before it turns into a larger repair. Shocks and struts help control spring movement after the car hits a bump. They also help keep the tires in contact with the road during braking, turning, and rough-road driving.
In real-world car care, the best check does not rely on one trick. A bounce test is useful, but it is only a screening test. A good inspection looks at the shock body, mounts, tires, ride behavior, and other suspension parts together.
This guide explains how to test shock absorbers step by step. It also explains what each test can tell you, what it cannot tell you, and when it is safer to have a qualified technician inspect the vehicle.

What Do Shock Absorbers Do?
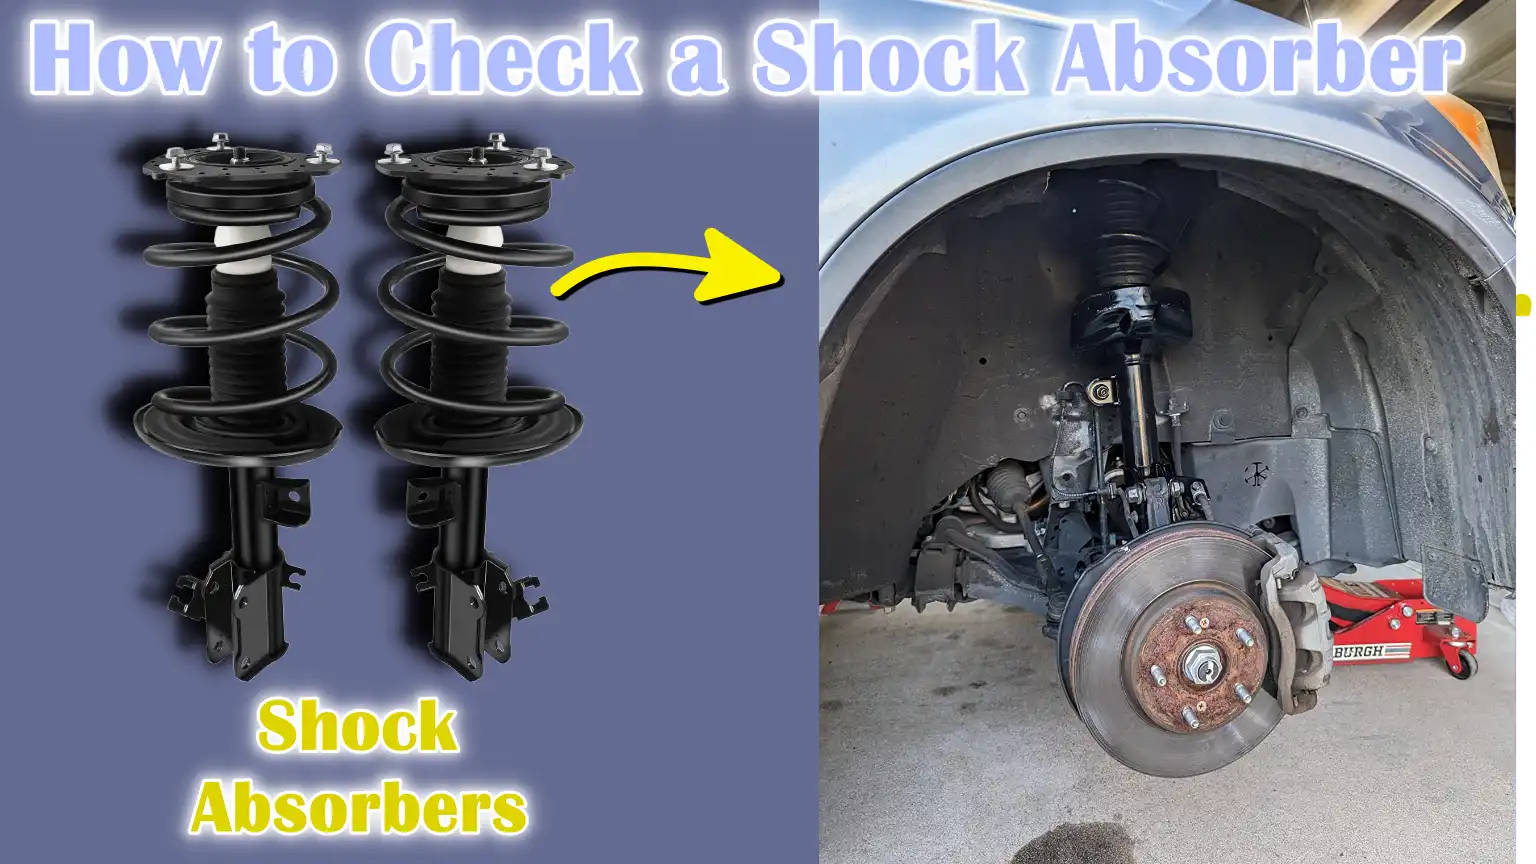
Shock absorbers are part of the suspension system. Their main job is to control the movement of the springs and suspension. Without good damping, a car can keep bouncing after a bump instead of settling quickly.
Shocks do not hold up the car by themselves. The springs carry the vehicle’s weight. The shocks control how fast the springs move. Struts can also be a structural part of the suspension and may combine several suspension functions in one unit.
This is why knowing how to test shock absorbers matters. A worn unit can change how the vehicle feels and handles, even when the car still seems to drive normally.
- ✦ Controls bounce
The shock slows spring movement after bumps, dips, and other road changes.
- ✦ Helps tire contact
Good damping helps the tire stay planted on the road instead of losing contact during suspension movement.
- ✦ Supports stable handling
Proper damping can reduce excess body movement during braking, acceleration, and turns.
- ✦ Works with other parts
Shocks work with springs, tires, mounts, bushings, and other suspension parts, so one worn part can affect the feel of the whole system.
Shock Absorbers vs. Struts
People often use the words shocks and struts as if they mean the same thing. They both control suspension movement, but their designs and roles can differ. A strut may also support the steering and wheel assembly, depending on the vehicle.
The exact inspection method depends on the vehicle. Always check the owner’s manual or service information before removing or loosening suspension parts.
Signs That Your Shock Absorbers May Be Worn
Before learning how to test shock absorbers, it helps to know what a worn unit can look and feel like. Some signs show up during normal driving. Others are easier to see during a close inspection.
No single symptom proves that a shock has failed. A tire, spring, bushing, wheel alignment, brake part, or other suspension component can cause similar symptoms. Use several clues together.
- ✦ Excess bouncing
The vehicle keeps moving up and down after a bump instead of settling in a controlled way.
- ✦ Nose diving
The front of the vehicle drops sharply during firm braking.
- ✦ Body roll
The vehicle leans more than expected during turns or quick lane changes.
- ✦ Uneven tire wear
Cupping or scalloped wear can be linked to poor damping, although alignment and tire problems can also cause uneven wear.
- ✦ Fluid leakage
Wet oil around the shock body can indicate a seal or shock problem. A small damp area is not always proof of failure, so the condition should be assessed carefully.
- ✦ Extra suspension noise
Clunks or knocks can occur with worn mounts, bushings, links, or other parts as well as shocks.
How to Test Shock Absorbers at Home
The easiest home method combines a visual inspection with a bounce test. Park on a flat surface, set the parking brake, and make sure the vehicle is stable before you begin.
Do not crawl under a vehicle that is supported only by a jack. If you need to inspect the underside, use properly rated jack stands on a suitable surface and follow safe lifting procedures. Keep hands and clothing away from moving parts.
When you learn how to test shock absorbers at home, think of the process as a screening check. It can reveal clear warning signs, but it cannot replace a full suspension inspection.

- ✦ Step 1: Park safely
Park on level ground, place the transmission in Park or in gear, set the parking brake, and keep people away from the vehicle.
- ✦ Step 2: Look at the shock
Look for heavy oil leakage, dents, corrosion, broken mounts, damaged bushings, or other obvious problems.
- ✦ Step 3: Check the tire
Look for uneven wear, especially repeated dips or scalloped patches across the tread.
- ✦ Step 4: Perform a bounce check
Press down firmly on a suitable corner of the vehicle, release it, and watch how the body settles. Do not use this test on a vehicle where the body or suspension is unsafe to load.
- ✦ Step 5: Compare sides
Compare the behavior of the left and right sides. A clear difference can be a useful clue, but it does not identify the exact failed part.
How to Perform the Bounce Test
Stand beside the vehicle and choose a firm area near the wheel. Push down with controlled force, then release. Watch the body as it returns to its normal height.
A healthy suspension should settle in a controlled manner. If the vehicle continues to bounce several times or feels very loose, the shocks or another suspension part may need attention.
The bounce test has limits. Modern suspension systems can make this test less useful than it was on older vehicles. A vehicle can also pass a bounce test while still having a worn shock.
How to Test Shock Absorbers by Visual Inspection
A close visual inspection is one of the most useful parts of how to test shock absorbers. You are looking for signs of physical damage, fluid loss, and worn mounting parts.
Start with the outside of the shock or strut. Use a flashlight if needed. Do not mistake normal road dirt for a leak. Fresh or heavy oil that returns after cleaning deserves closer attention.
Inspect both sides of the axle. One side may look much worse than the other. Also inspect nearby parts because a suspension problem may not come from the shock itself.
- ✦ Oil residue
Heavy wetness or fresh fluid around the shock can point to a leaking unit. A light film may need further inspection before a decision is made.
- ✦ Bent housing
A dented or bent shock body can affect operation and may indicate impact damage.
- ✦ Damaged mounts
Loose, cracked, or worn mounts can cause noise and poor suspension control even when the shock itself is sound.
- ✦ Damaged dust boot
A torn boot can allow dirt and moisture to reach parts that need protection.
- ✦ Broken hardware
Missing or damaged fasteners and mounting parts need attention before the vehicle is driven normally.
What a Shock Leak Looks Like
A shock absorber contains fluid that helps control suspension movement. A damaged seal can allow fluid to escape. Heavy leakage is a stronger warning sign than a thin, old-looking film of residue.
If you see a clear leak, do not assume the entire problem is limited to the shock. Have the mount and nearby suspension parts checked as well.
How to Test Shocks During a Road Test
A road test can reveal suspension behavior that a parked inspection cannot. Choose a familiar road with safe traffic conditions. Keep your focus on driving, and do not perform aggressive maneuvers just to test the suspension.
Listen for unusual sounds over small bumps. Notice whether the car settles quickly after a bump, feels loose in a turn, or dips more than expected during braking. These clues can help point to a suspension issue.
A road test is not a substitute for a physical inspection. Tire pressure, alignment, worn bushings, springs, steering parts, and tire condition can all change how the vehicle feels.

- ✦ Over bumps
Notice whether the vehicle settles after a bump or keeps moving for too long.
- ✦ During braking
Watch for unusual front-end dive or a feeling that the vehicle takes too long to settle.
- ✦ During turns
Notice excessive body movement or a floaty feeling, while keeping all driving within safe limits.
- ✦ After a dip
The vehicle should regain control without repeated large suspension movements.
- ✦ Listen for noise
Clunks and rattles can signal suspension trouble, but they do not prove that a shock is the source.
How to Test Shock Absorbers Without Removing Them
In many cases, you can inspect and test shocks without removing them from the vehicle. This is often the safest first step for a home mechanic. You can check for leaks, damage, loose mounts, tire wear, and changes in ride behavior.
Knowing how to test shock absorbers without removal can save time when the symptoms are clear. However, a shock may look fine from the outside and still have weak damping. Internal wear cannot always be seen or felt with a basic home test.
If the result is unclear, a professional inspection can provide more information. The technician may inspect the suspension on a lift and compare the condition of related parts.

- ✦ Inspect in place
Look at the shock, mounting points, boots, bushings, and nearby parts without removing the unit.
- ✦ Check ride behavior
Use a safe road test to look for excess bounce, body movement, or unusual settling.
- ✦ Compare sides
Compare the condition and behavior of matching suspension components on the same axle.
- ✦ Know the limit
A basic test cannot measure internal damping force or confirm every type of shock failure.
Can You Push the Shock Rod by Hand?
Some removed shock absorbers can be checked by hand, but this is not a reliable universal test for a shock that is still installed. Shock designs differ, and the force needed to move a unit can vary.
Do not judge a shock only by how hard it is to move. Correct testing may require the vehicle maker’s specifications or dedicated equipment.
Professional Shock Absorber Testing Methods
When a home check does not give a clear answer, a professional suspension inspection can help. A technician can inspect the vehicle while it is safely raised and can check parts that are hard to see from the ground.
Some shops use dedicated suspension or shock testing equipment. These systems can assess suspension response under controlled conditions. The exact test and interpretation depend on the vehicle, equipment, and service procedure.
This is especially useful when the vehicle has several symptoms at once. A professional can also check for worn bushings, springs, mounts, ball joints, tie rods, wheel bearings, tire problems, and alignment issues.

- ✦ Lift inspection
A raised vehicle gives the technician better access to shock bodies, mounts, springs, bushings, and related suspension parts.
- ✦ Suspension tester
Dedicated equipment can apply controlled movement and measure suspension response.
- ✦ Component checks
The technician can check other parts that may create symptoms similar to worn shocks.
- ✦ Vehicle specifications
Professional diagnosis can be compared with the vehicle maker’s service information when applicable.
When a Shop Test Makes Sense
Consider a professional inspection when the car handles poorly, a shock is leaking, a suspension part is damaged, or the home tests give mixed results. A shop visit also makes sense when you are planning a suspension repair and want to confirm the cause first.
Do not replace shocks based only on a single bounce test. Confirm the problem when possible. This can help prevent replacing a good part while a different suspension component is causing the symptom.
Common Mistakes When Testing Shock Absorbers
A few common mistakes can lead to a wrong diagnosis. The biggest mistake is treating one symptom as proof of a bad shock. Suspension systems have many connected parts, and several faults can feel alike.
Another mistake is using a home test as a precise measurement. A bounce test can show that something may be wrong, but it does not measure damping force or identify every internal fault.

- ✦ Relying only on the bounce test
A vehicle can pass a bounce test and still have a worn shock. Use several inspection methods.
- ✦ Calling every leak a failure
Heavy leakage is a concern, but a small amount of residue needs context and inspection.
- ✦ Ignoring tires
Tire pressure, tread condition, alignment, and tire wear can change ride and handling symptoms.
- ✦ Ignoring mounts
A worn mount can create noise or movement that may be blamed on the shock.
- ✦ Testing on unsafe ground
Never place yourself under an unsupported vehicle or perform a test that could make the vehicle move unexpectedly.
- ✦ Replacing only one shock
Shock replacement strategy depends on the vehicle and the condition of the axle. Many applications call for replacing shocks in pairs on the same axle so damping stays balanced.
How to Tell If the Problem Is a Shock or Something Else
Learning how to test shock absorbers also means learning what can mimic a bad shock. A worn suspension mount can cause a clunk. A weak spring can change ride height. A bad alignment can cause uneven tire wear.
Start with the simplest checks. Confirm tire pressure, look at tire condition, inspect visible suspension parts, and note when the symptom occurs. A clear pattern can help narrow the problem.
For example, repeated bouncing points toward poor damping, but a clunk over bumps may come from a mount, bushing, link, or other loose part. This is why a full suspension inspection often gives a better answer than one test.
- ✦ Tire pressure
Incorrect pressure can make the ride feel harsh, soft, or unstable.
- ✦ Springs
A broken or sagging spring can change ride height and suspension behavior.
- ✦ Bushings
Worn rubber bushings can cause movement, vibration, or clunks.
- ✦ Mounts
Worn upper or lower mounts can create noise and affect suspension movement.
- ✦ Alignment
Incorrect wheel alignment can cause uneven tire wear and handling changes.
- ✦ Steering parts
Loose or worn steering components can cause handling symptoms that should not be blamed on shocks.
A Simple Diagnosis Pattern
Think in terms of symptoms rather than parts. Ask what the vehicle does, when it does it, and whether the problem affects one corner, one axle, or the whole vehicle.
Then compare those clues with what you see during inspection. This approach reduces the chance of replacing parts without confirming the cause.
When Should You Replace Shock Absorbers?
There is no single mileage number that proves a shock needs replacement. Service life varies with vehicle design, road quality, load, driving habits, climate, and the condition of other suspension parts.
Replace or repair a shock when inspection shows a clear fault or when a qualified technician confirms poor performance. If one shock on an axle is worn, the condition of its matching shock should also be checked.
Do not wait for severe handling problems if you find a major leak, damaged mounting hardware, or another obvious suspension fault. Suspension parts affect vehicle control, so serious damage deserves prompt attention.
- ✦ Visible failure
A badly leaking, bent, broken, or otherwise damaged unit should be evaluated for replacement.
- ✦ Poor damping
Confirmed loss of damping is a reason to replace the affected shock according to the vehicle’s service procedure.
- ✦ Repeated symptoms
Persistent bouncing, unstable handling, or abnormal suspension movement deserves further inspection.
- ✦ Pair consideration
When replacing shocks, check the matching unit on the same axle and follow the vehicle or part maker’s guidance.
Safety Tips Before You Test Shock Absorbers
Suspension work can be dangerous because springs store a large amount of energy. A simple visual check is very different from removing a strut or compressing a coil spring.
If the test requires lifting the vehicle, use the correct lifting points and properly rated supports. Never rely on a floor jack alone while working underneath the vehicle.
Stop the test if you find a broken spring, loose suspension hardware, severe corrosion, a badly damaged mount, or another condition that could make the vehicle unsafe. A qualified technician should handle repairs that require specialized tools or suspension knowledge.
- ✦ Use level ground
Perform basic checks on a stable, level surface whenever possible.
- ✦ Keep clear of moving parts
Keep hands, tools, and clothing away from wheels and suspension parts during movement.
- ✦ Use proper supports
Use correctly rated jack stands if the vehicle must be raised for inspection.
- ✦ Do not open a strut
Do not disassemble a strut or handle a compressed coil spring without the right equipment and training.
- ✦ Take severe symptoms seriously
Poor control, major suspension damage, or a broken component should be checked before normal driving continues.





