
How to Adjust Damping on Tein Coilovers: Detailed Guide and Facts
Changing the damping setting on a TEIN coilover can make a car feel calmer over rough pavement, more controlled during cornering, or unnecessarily harsh if the adjustment is made too aggressively. The useful part is that the change is usually small and reversible: you turn the damper adjuster by a click, drive the same route, and compare what the car does. You do not need to disassemble the coilover or change ride height to begin.
Before touching the adjuster, confirm that your particular TEIN model has adjustable damping and find out where its adjuster is located. Many TEIN dampers use a small adjuster at the top of the shock, but access can differ at the front and rear, and some vehicles require an extension or an EDFC electronic controller. The model instructions take priority over any general direction in this guide.
This article explains how to adjust damping on TEIN coilovers from a known baseline, make safe one-click changes, and check the result on the road. You will also learn how to tell a damping problem from a tire, alignment, spring, or installation problem, so you do not try to solve every suspension symptom with the clicker.
At a glance
- Record the current setting before making any change.
- Use small, equal adjustments and test the same route after each change.
- Stop if an adjuster binds, a damper leaks, or the car behaves unpredictably.
How to adjust damping on tein coilovers
Damping controls how quickly a shock absorber allows the suspension to move. A softer setting generally allows more movement and can improve compliance over small bumps, while a harder setting provides more resistance and may improve body control on smooth roads. The correct setting depends on the TEIN model, spring rate, tires, alignment, road surface, and the driver’s preference.
Use the procedure below with the vehicle parked on level ground. Make adjustments with the car at rest and, unless the specific TEIN instructions say otherwise, with the suspension loaded at normal ride height. Do not use damping adjustment to compensate for an unsafe installation, incorrect ride height, damaged parts, or a worn-out damper.
Tools you will need
- TEIN damping adjuster or the model-specific adjustment tool, used to turn the clicker without damaging it
- Vehicle owner’s manual or TEIN model instructions, used to confirm adjuster location and click range
- Phone or notebook, used to record settings and test observations
- Flashlight, optional, for locating rear or recessed adjusters
Step 1 Confirm that the coilover has adjustable damping
Read the label, paperwork, or model information for the suspension kit and confirm that it includes damping adjustment. TEIN sells several coilover families and configurations, and not every damper has the same adjustment range or access method. A kit may also have an aftermarket EDFC motor or controller that changes the adjustment procedure.
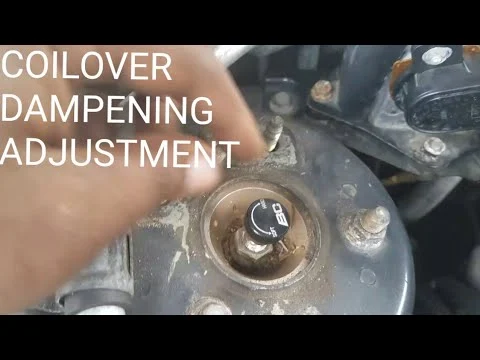
Look for a small rotary adjuster, often called a damping clicker, at the top of the damper shaft or upper mount. Some rear dampers place the adjuster behind interior trim, while a few applications use a remote or extension. If you cannot identify the adjuster confidently, do not turn a nearby nut or threaded component.
Also check whether the adjuster is described as a 16-position, 32-position, or another range. “Clicks” are not universal between TEIN models, so a setting such as 8 out of 16 cannot be assumed to equal the same damping force on a different kit.
Step 2 Park safely and inspect the suspension
Park on a flat surface, select Park or first gear, set the parking brake, and switch off the engine. Let hot brakes and suspension components cool before reaching near them. Keep your hands away from springs, rotating parts, and any area that could move if the vehicle is disturbed.
Inspect each damper for obvious oil leakage, a bent shaft, a damaged adjuster, a broken spring, or loose hardware. Check the tires for suitable pressure and look for signs of uneven wear. Damping changes should be postponed if the car has a clunk, a visibly loose component, or a fluid leak.
Important
Never place any part of your body under a vehicle supported only by a jack. If access requires lifting the car, use properly rated jack stands on approved support points and follow the vehicle service manual.
Step 3 Find the adjusters and establish the current setting
Locate the adjuster on each damper before changing anything. On many TEIN coilovers, the front adjuster is accessible from the engine bay or near the top mount, while the rear adjuster may be inside the trunk, behind a panel, or near the upper suspension mount. Do not remove trim or loosen suspension hardware merely to reach a clicker unless the instructions specifically require it.
Turn an adjuster slowly in one direction while counting the distinct clicks. Stop as soon as you reach the end of the range; do not force it past the stop. Then return it to the original position by counting back, or compare the position with your notes if you already know the setting.
Write down the setting for every corner, including the direction used for counting. For example, note “front: 6 clicks from soft, rear: 8 clicks from soft” only if you have verified which direction represents the soft end on that model. A photo of each adjuster can help preserve the baseline.
Step 4 Identify the soft and hard ends without forcing the clicker
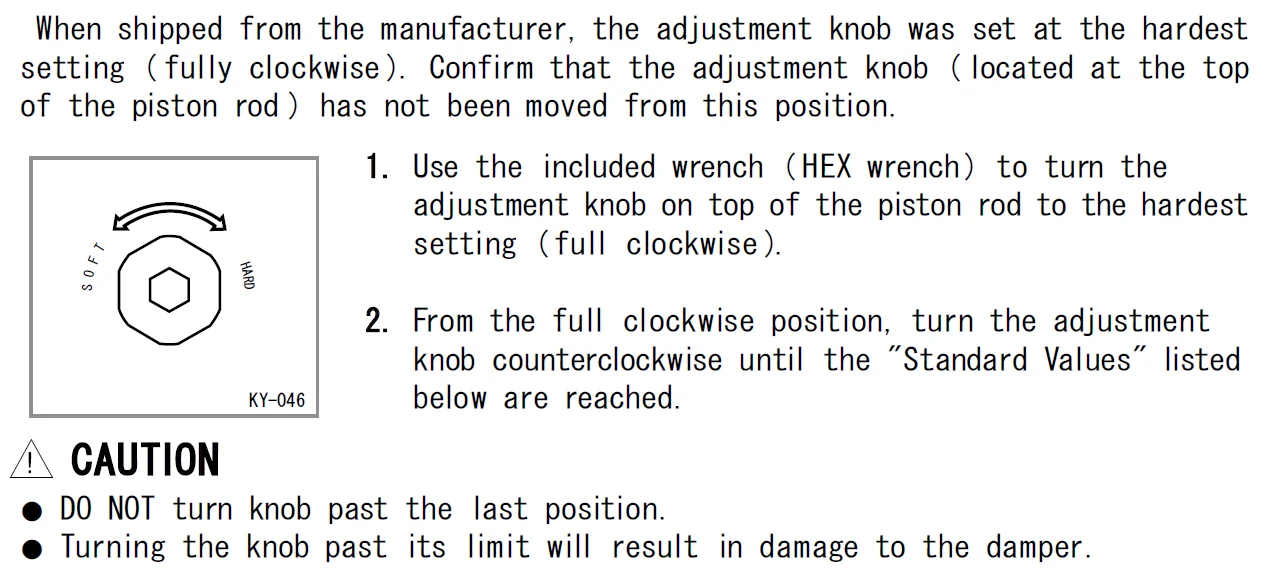
TEIN instructions commonly describe the adjustment as moving toward a softer or harder setting, but the exact terminology and click count should come from the instructions for your kit. On many manually adjusted TEIN dampers, turning clockwise increases damping and turning counterclockwise decreases it, but do not rely on direction alone if the adjuster has been modified or an electronic system is installed.
Use light finger pressure or the supplied tool. You should feel clear, evenly spaced detents. If the knob feels gritty, suddenly becomes tight, turns without clicks, or stops before the expected range, stop and investigate.
A damaged clicker can be made worse by pliers, a screwdriver, or excessive force.
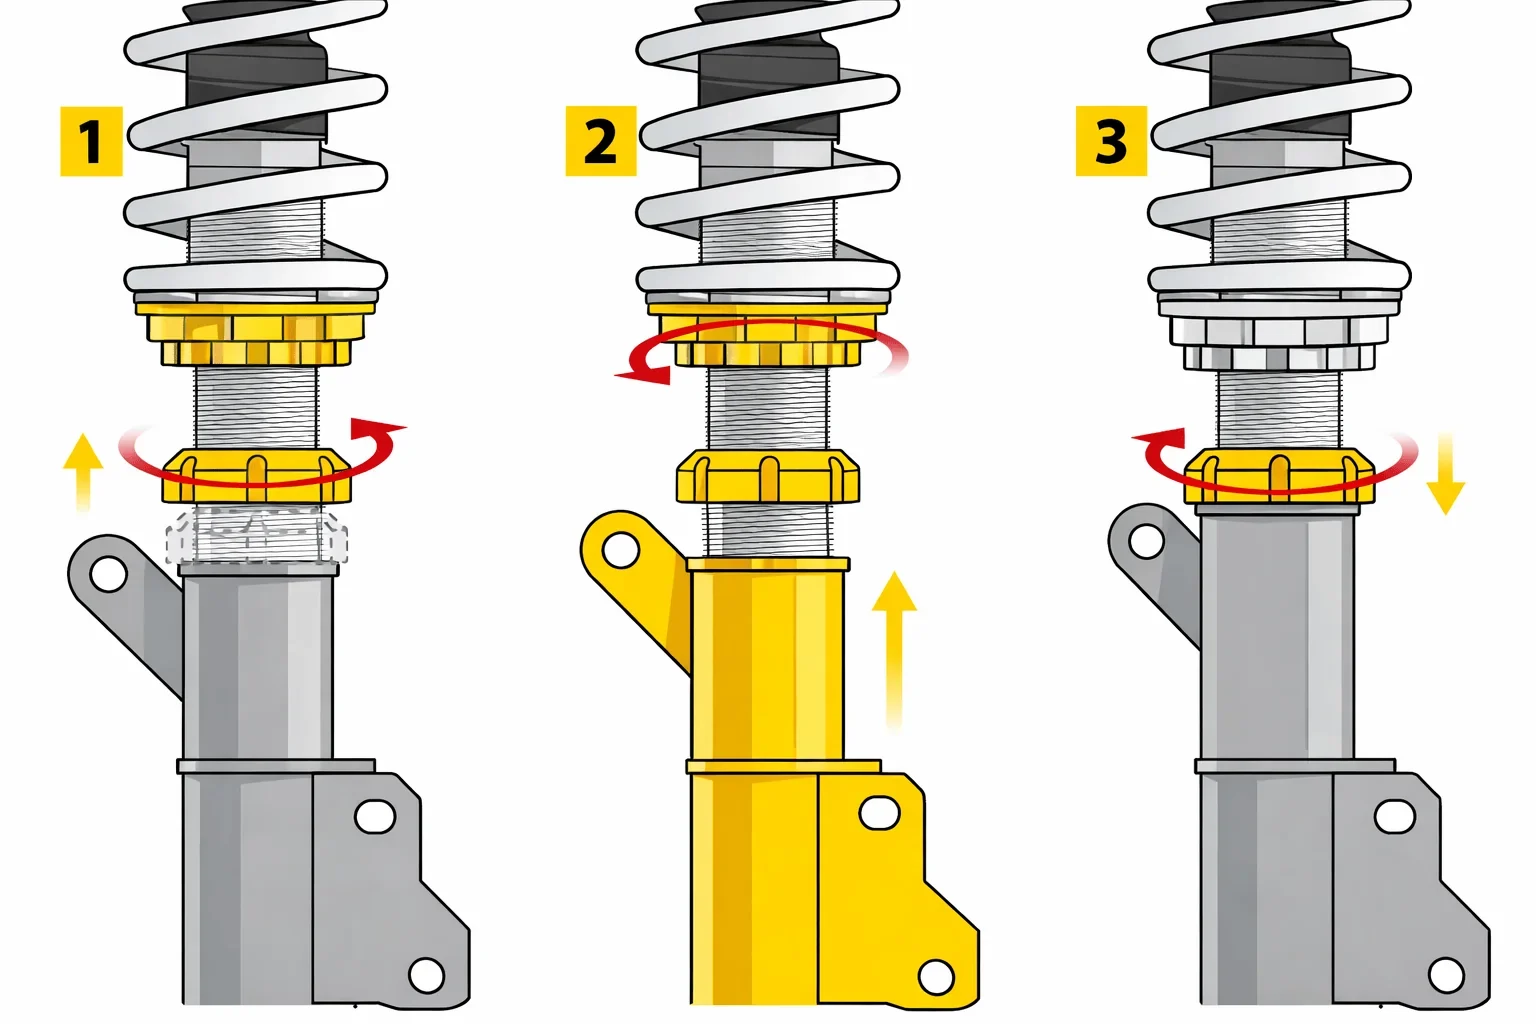
Do not confuse the damping adjuster with the spring seat, lock ring, height-adjustment collar, or top-mount fastener. Turning the wrong component can alter ride height or preload and may create a safety issue.
Step 5 Choose a small change for the symptom you are testing
Start with one or two clicks from the baseline, not the full adjustment range. If the car feels too sharp over ordinary bumps, try less damping. If it feels under-controlled, floats after a bump, or takes too long to settle after a steering input, try more damping.
These are starting observations, not proof that the clicker is the only cause.
For a first test, adjust all dampers on the same axle equally. If the complaint is clearly at the front, change the front pair by the same amount; if it is clearly at the rear, change the rear pair. Equal left-to-right settings are usually the sensible baseline unless a qualified suspension specialist has a specific reason to use a staggered setup.
Make one change at a time. Changing front damping, rear damping, tire pressure, alignment, and ride height together makes the result impossible to interpret. Record the direction, number of clicks, weather, road, load in the vehicle, and your short impression.
Step 6 Turn each adjuster carefully and keep the axle settings matched
With the supplied tool seated correctly, turn the left and right adjusters by the same number of clicks in the same direction. Count each detent rather than estimating the angle. Keep the tool aligned with the adjuster so it does not slip and round off the small knob.
After adjusting, compare both sides. If one side has a different number of clicks, return it to the intended setting before driving. Do not attempt to create a side-to-side correction for a pulling problem with damping; a tire, alignment, ride-height, bushing, or mechanical issue is more likely.
If an EDFC controller is installed, make the change through the controller according to its instructions instead of fighting the motor or manually turning the adjuster. Confirm that the displayed position and the physical setting agree if the system provides that function.
Step 7 Drive a controlled test route and observe the car
Begin at low speed in a safe area away from traffic. Listen for new noises and notice whether the suspension settles after a bump, whether the steering feels more consistent, and whether the tires remain in contact with uneven pavement. Avoid using a public road for aggressive testing.
Then drive the same familiar route at normal, legal speeds. Include the type of surface that caused the original complaint, such as patched pavement, a series of small bumps, or a smooth corner. Keep the vehicle load, tire pressures, and driving line as consistent as practical.
A useful way to approach how to adjust damping on tein coilovers is to check your progress after each stage.
A softer setting may reduce sharp impact harshness but can allow more body motion. A harder setting may reduce float and roll but can make the car skip across rough pavement, lose grip over bumps, or feel tiring. The best result is not necessarily the hardest setting; it is the setting that gives suitable control without upsetting the tires.
Step 8 Keep the setting only after comparing the result
Return to the baseline if the change makes the car worse, then try the opposite direction by one click if the original symptom still needs attention. If the change is helpful, repeat the same route later to confirm that the improvement was not caused by traffic, temperature, tire pressure, or a different road surface.
Save the final setting in your notes for each corner. Include whether the setting is counted from soft or hard, because “10 clicks” is incomplete without a reference point. Keep the original baseline as well; it gives you a reliable starting place for future testing.
Check your result
A useful result is repeatable: after the same small adjustment, the car shows the expected change on the same type of road without new noises, pulling, bouncing, tire slip, or unusual tire wear.
What the TEIN damping adjustment changes
The clicker changes the resistance inside the damper. It does not change the coilover’s spring rate, ride height, wheel alignment, tire compound, or the physical condition of the suspension. This distinction matters because a damping adjustment can refine how the suspension moves, but it cannot correct every handling problem.
Rebound and compression are not always separately adjustable
Rebound damping controls suspension movement as the wheel and spring extend after compression. Compression damping controls resistance as the wheel moves upward into the body. Many adjustable TEIN dampers use a combined adjustment that influences both behaviors rather than providing separate rebound and compression knobs.
Because the circuits may be linked, increasing damping can improve one behavior while making another less comfortable. A car that feels controlled on smooth corners may become harsh or lose grip on a rough road. This is why a road test is more useful than choosing a setting from a number alone.
Why “harder” is not automatically better
More damping can reduce bouncing, nose movement, and body roll, but excessive damping can prevent the wheel from following uneven pavement. When the tire cannot stay planted, grip and braking confidence may decrease even though the body feels firm.
Likewise, a very soft setting is not automatically more comfortable. If the damper cannot control the spring well, the vehicle may continue to oscillate after a bump, dive under braking, or feel vague during a lane change. The appropriate setting balances tire contact with acceptable body movement.
Model instructions take priority
TEIN product families such as Flex Z and Street Advance may differ in click count, adjuster position, and compatible accessories. A vehicle-specific installation guide may also specify whether the adjuster should be set with the wheels on the ground, whether an interior panel must be removed, or whether an extension is required.
That is why the safest answer to how to adjust damping on TEIN coilovers is always model-specific at the final detail level. Use the general process here for controlled testing, but use the instructions for your exact damper to identify the range and direction.
How to tell whether the change worked
Verification should combine the car’s behavior with a basic mechanical check. A single comfortable pass over one bump is not enough to prove that a setting is correct. Look for a consistent response across the road conditions that matter to you.
Use repeatable handling observations
After a softer adjustment, check whether the car absorbs small imperfections with less sharpness and whether the tires remain settled. After a harder adjustment, check whether the vehicle settles sooner after a bump or steering input without skipping across rough sections.
Notice the difference between one controlled movement and repeated oscillation. If the car rises or falls once and settles, the damping may be reasonably controlled. If it continues to bounce, feels loose, or reacts abruptly, the setting may be unsuitable—or there may be a problem outside the adjuster.
Check the tires and steering response
Confirm tire pressures are equal to the intended cold settings before comparing tests. Excessive pressure, a damaged tire, uneven wear, or different tires from side to side can overwhelm the subtle change made by a damping click.
The car should not pull because damping was adjusted equally on both sides. A pull, steering-wheel change, or new vibration deserves inspection of alignment, tire condition, wheel balance, and suspension hardware rather than another clicker adjustment.
Confirm that ride height and hardware did not change
Measure or visually compare ride height if you suspect that a collar or spring seat was disturbed. Damping adjustment alone should not alter ride height. Check that no tool, trim panel, or loose fastener remains near the adjuster, and listen for a new clunk during a slow drive.
Common problems and sensible next checks
Many frustrating adjustment sessions happen because the clicker is being asked to solve a different problem. The symptoms below help separate an ordinary tuning issue from a condition that needs inspection.
| Observation | More useful next check |
|---|---|
| Car remains bouncy after several clicks | Inspect for a worn or leaking damper, incorrect spring installation, loose hardware, or a spring rate mismatch. |
| Ride is harsh in every setting | Check tire pressure, bump stops, ride height, suspension travel, and whether the damper is binding. |
| One corner behaves differently | Compare click counts, tire condition, ride height, leaks, mounts, and suspension hardware on that corner. |
| New clunk or knock after adjustment | Stop testing and inspect the upper mount, lock rings, brackets, sway-bar links, and nearby hardware. |
| Car pulls or steering changes | Check alignment and tires; do not use unequal damping as a shortcut. |
The adjuster has no clicks
Stop turning it if the adjuster rotates freely, skips, or does not reach a clear stop. The knob may be damaged, disconnected, contaminated, or incorrectly engaged with an EDFC motor. Further force can turn a minor service issue into a replacement problem.
The adjuster is inaccessible
Use only the access method approved for the vehicle and kit. Some installations require removal of a trim panel, while others need a TEIN extension or compatible EDFC component. Do not drill bodywork, bend interior panels, or remove a top mount just to experiment with damping.
The setting change makes the vehicle less stable
Return to the known baseline and drive conservatively. If the instability remains, stop testing and have the suspension, tires, alignment, and installation inspected. A damper setting should not produce dangerous wandering, severe skipping, uncontrolled bouncing, or a sudden loss of steering confidence.
Beginner questions about TEIN damping settings
These answers cover the questions that commonly arise during a first adjustment. The exact click range and access details still belong to the instructions for the installed TEIN model.
Should I adjust damping with the car raised?
Usually, make the adjustment with the vehicle safely parked at normal ride height unless the TEIN instructions specify another method. Raising the car may improve access, but it introduces lifting and support risks and is often unnecessary for a top-mounted adjuster.
Which way makes TEIN coilovers softer?
Many TEIN manual adjusters become softer when turned counterclockwise and harder when turned clockwise, but confirm this in the instructions for your model. Count from a verified soft or hard endpoint instead of assuming direction from another coilover brand.
How many clicks should I use on the street?
There is no universal street setting. Start from the documented baseline or the manufacturer’s recommended position, change one or two clicks, and evaluate the same route. Tire choice, spring rate, road quality, and vehicle weight all affect the result.
Should the front and rear damping settings match?
They do not have to match numerically, because the front and rear suspension may use different springs, loads, and damper characteristics. For a beginner, equal left-to-right settings and small axle-by-axle changes are a safer starting point than arbitrary front-to-rear differences.
Can damping adjustment fix a low or uneven ride height?
No. Damping adjustment changes resistance to suspension movement; it does not set ride height. An uneven height requires inspection of spring seating, threaded collars, measurements, installation, and possibly alignment after correction.
Use small, recorded changes to finish the setup
Learning how to adjust damping on TEIN coilovers is mainly a controlled comparison exercise. Confirm the model and adjuster, record the baseline, make a small equal change on the appropriate axle, and test the same road under similar conditions. Keep the setting only when the improvement is repeatable and the car remains predictable.
If the clicker binds, the damper leaks, one corner behaves differently, or the vehicle develops a clunk, pull, or unstable response, stop adjusting and arrange a proper suspension inspection. A careful baseline and clear notes will make that inspection—and any later tuning—far more useful.


