
How to Install Ground Control Coilovers: A Careful DIY Guide
Installing Ground Control coilovers can change a car’s ride height, handling, and spring rates, but the job is more involved than replacing a wheel or brake pad. Depending on the kit, you may be installing adjustable sleeves and springs on your original struts, or replacing more of the factory strut assembly. That difference affects the tools, measurements, and setup procedure.
The safest approach is to follow the instructions for your exact vehicle and kit, support the car securely, preserve the original suspension measurements, and treat every fastener as a potential safety item. A properly installed system should have no spring movement at full droop, no interference with tires or brake lines, and no loose or visibly misaligned hardware.
This guide explains how to install ground control coilovers on a typical MacPherson-strut vehicle, while identifying the points that vary by application. You will learn how to prepare the car, remove the factory struts, assemble the adjustable suspension, set an initial ride height, inspect your work, and arrange the alignment and road test that finish the job.
At a glance
- Verify whether your kit uses factory struts, replacement dampers, or a complete coilover assembly before disassembly.
- Use the vehicle service manual and Ground Control instructions for torque values, spring orientation, and minimum-height limits.
- Do not consider the installation complete until the suspension is settled, the alignment is checked, and every tire and brake-line clearance is confirmed.
How to Install Ground Control Coilovers Safely and Correctly
Ground Control systems are not all assembled the same way. Some are coilover sleeves that fit over shortened or unmodified OEM struts; others use a threaded body, a separate height-adjustment sleeve, or application-specific upper mounts. Read the kit paperwork before lifting the car and identify every supplied part.
The procedure below describes the common strut-based installation. It does not replace the instructions for your exact chassis. If the kit requires cutting, welding, strut-body modification, or a different damper cartridge, stop and use the manufacturer’s application instructions or have a qualified suspension technician perform that portion.
Tools you will need
- Vehicle service manual or Ground Control application instructions for torque values and assembly order
- Floor jack and four properly rated jack stands for supporting the vehicle
- Wheel chocks to prevent movement while one end of the car is raised
- Complete socket and wrench set, including the sizes used for the strut and sway-bar hardware
- Calibrated torque wrench for final fastener tightening
- Paint marker, ruler, or caliper for recording ride-height and thread measurements
- Spring compressor only if the kit instructions require transferring a factory spring or compressing a spring; use a suitable professional-grade type
- Penetrating oil, wire brush, and a small pry bar for corroded hardware
- Optional: digital angle gauge or alignment tools for checking approximate camber, not for replacing a professional alignment
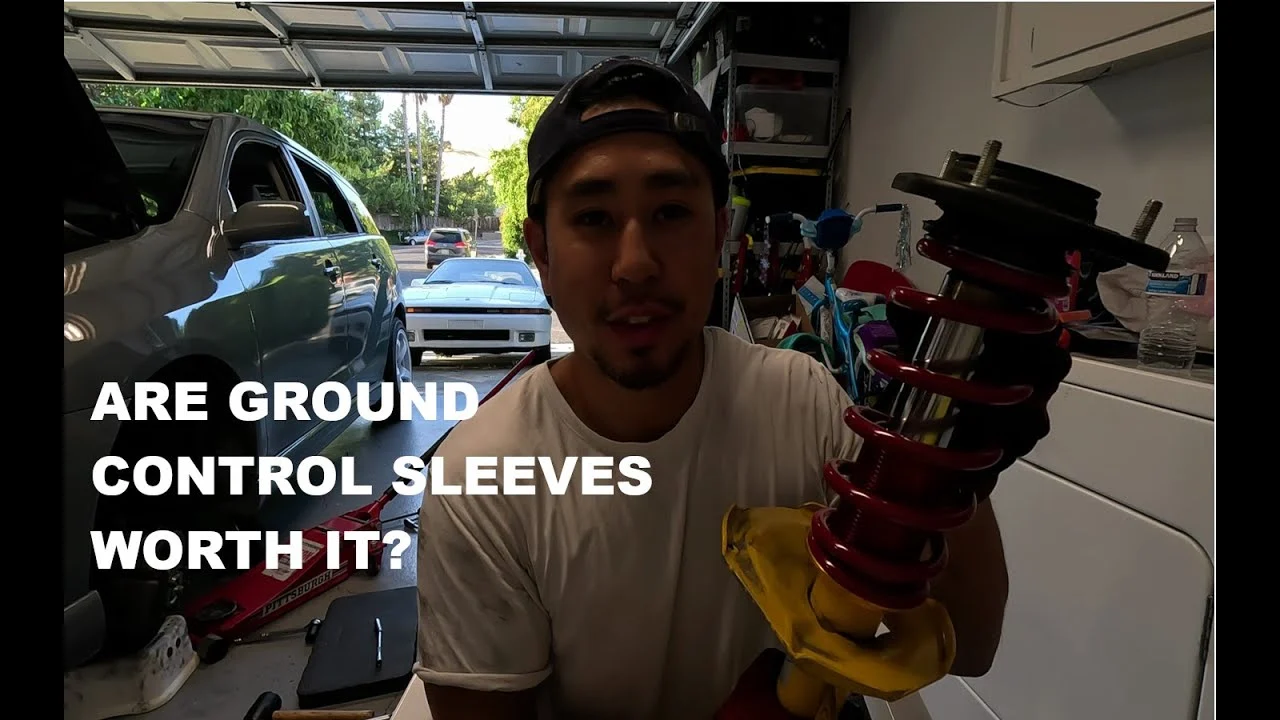
Step 1 Confirm the kit, suspension layout, and baseline measurements
Park on a level surface, set the parking brake, and place wheel chocks at the wheels that remain on the ground. Before lifting the car, compare the part numbers and labels with the application instructions. Separate front and rear components, and confirm which parts are left- and right-side specific.
Measure from the center of each wheel hub vertically to a repeatable point on the fender lip. Hub-to-fender measurements are more useful than measurements from the ground because tire pressure and tire size can affect ground clearance. Also measure the visible threads, spring perch position, and overall strut height where practical, then photograph the original assembly.
Record the direction of the original springs, the location of brake-line brackets, and the position of any camber plates. These records give you a reference if the kit instructions do not specify an initial setting. Do not assume the same number of exposed threads on both ends produces the same ride height; chassis tolerances and spring seating can differ.
Important
Never rely on a floor jack alone. Raise the car on solid, level ground and support it at the manufacturer’s specified lift points or sturdy subframe locations. If a spring is still compressed in a factory strut, do not loosen the top nut until the spring is safely restrained with the correct compressor or the entire assembly is handled by a qualified technician.
Step 2 Raise the vehicle and remove the wheels
Loosen the wheel lug nuts slightly while the tires are still on the ground. Lift the vehicle according to the service manual, place jack stands securely, and gently test each supported corner before removing the wheels. Keep the removed wheels nearby so you can use them later as a clearance reference, but do not place them under the car as a substitute for jack stands.
With the wheels removed, inspect the suspension before touching the struts. Look for leaking dampers, torn ball-joint boots, cracked sway-bar links, damaged control-arm bushings, bent brake shields, and rusty mounting points. Installing adjustable suspension on worn or damaged components can create noises and handling problems that are not caused by the coilovers.
Support any suspension arm that may drop when the strut or shock is disconnected. On many cars, the sway-bar link is attached to the strut, so the suspension can move unexpectedly when that link is removed. Keep brake hoses and wheel-speed sensor wires supported; never let the caliper hang by its hose.
Step 3 Disconnect the strut and related brackets
Remove or loosen the brake-line bracket, wheel-speed sensor bracket, and sway-bar link hardware attached to the strut. Mark the original camber-bolt position if the vehicle uses an eccentric bolt, but understand that the mark is only a reference and cannot replace an alignment.
Support the steering knuckle or hub with a jack before removing the lower strut bolts. Remove the lower hardware, then loosen the upper mounting nuts from the engine bay or trunk area while keeping one nut engaged by a few threads. This prevents the assembly from dropping suddenly.
Check that the steering knuckle is not pulling on the brake hose, axle, or sensor wire. Remove the final upper fastener and guide the strut out of the wheel well. Set left and right assemblies separately if their brackets or mounts differ.
Some cars use a pinch bolt rather than two lower bolts, and some rear suspensions use a separate shock and spring instead of a complete strut. Follow the vehicle-specific removal sequence rather than forcing a part that appears stuck. A spreading tool or penetrating oil may help with a seized knuckle, but avoid damaging the aluminum housing or prying against a thin casting.
Step 4 Disassemble the factory strut only when the kit requires it
Place the removed assembly on a stable work surface and compare it with the Ground Control parts. If the kit is a complete replacement coilover, you may not need to disassemble the original spring and upper mount. If it is a sleeve kit, you may need to remove the factory spring, bump stop, dust boot, and upper mount before installing the new components.
Relieve spring force before removing the factory top nut. A compressed spring stores enough energy to cause severe injury if a compressor slips or the wrong part is loosened. Use the procedure and tool type specified by the service manual; if the spring compressor cannot grip the coils securely or the strut is heavily corroded, stop rather than improvising.
Inspect reusable parts while they are accessible. Replace a damaged upper bearing, cracked rubber mount, bent isolator, leaking damper, or deteriorated bump stop before assembly. A new adjustable spring cannot correct a worn mount, and reusing a failed damper may make the new setup unsafe or unpleasant to drive.
A useful way to approach how to install ground control coilovers is to check your progress after each stage.
Step 5 Assemble the Ground Control hardware in the specified order
Clean the strut body and remove rust, dirt, and burrs from the area where the adjustable sleeve will sit. Do not grind away structural material or modify the strut body unless the kit instructions explicitly require a qualified modification. Slide the sleeve or threaded housing into position, then install the lower locking hardware or retaining arrangement supplied with the kit.
Install the spring perch, thrust rings, spring, upper seat, bump stop, dust boot, and upper mount in the order shown by the instructions. A spring that appears symmetrical may still have a narrow end or a specified seating direction. Make sure the lower and upper ends are fully seated against their pockets before applying preload.
Thread the adjustable perch by hand first. It should turn smoothly without cross-threading, and the lock ring should engage enough clean thread to hold the setting. Do not use an impact gun on the adjustment threads or lock rings unless the manufacturer specifically permits it.
If the kit uses camber plates, note the marked left and right orientation and the permitted adjustment range. Route the damper adjustment knob, if supplied, so it remains accessible without contacting the hood, trunk trim, tire, or suspension during movement.
Step 6 Set a conservative initial height and spring preload
Use the manufacturer’s initial spring-preload and minimum-height instructions, not a guessed measurement. Spring preload is the amount of compression applied when the suspension is at full droop; ride height is the vehicle’s installed height on the ground. On many adjustable systems, height should be changed with the designated lower mount or sleeve rather than by arbitrarily tightening the spring perch.
Start near the supplied or recommended baseline. Ensure the spring remains captured when the suspension is fully extended. If the spring becomes loose, the perch is too low, the damper is too short for the setup, or the assembly is being used outside its intended range.
Do not “fix” a loose spring by adding random spacers or excessive preload.
Make the left and right sides visually and dimensionally similar, but do not force identical thread counts if the kit or chassis requires a small correction for driver weight or corner balance. Write down the initial sleeve, perch, and ride-height measurements so later changes are traceable.
Step 7 Reinstall each assembly and tighten the mounting hardware
Guide the coilover into the wheel well and loosely install the upper nuts or mount hardware. Align the lower mounting holes with the steering knuckle, then install the lower bolts and nuts in the original orientation. Reattach the sway-bar link, brake-line bracket, and wheel-speed sensor bracket without twisting or stretching their wires and hoses.
Snug the fasteners enough to hold the assembly while keeping the suspension aligned. Final torque should follow the vehicle service manual or kit instructions, and the suspension may need to be at normal ride height for some bushing-mounted bolts. Tightening rubber-bushed pivot bolts with the suspension hanging can preload the bushings and shorten their life.
Check that the spring, sleeve, lock rings, and upper mount are centered and that no part touches the body. Turn the steering from lock to lock by hand while watching the brake hose, tire, spring, and damper. On the rear suspension, confirm that the spring and shock move freely through the available travel.
Step 8 Install the wheels, settle the suspension, and set the starting ride height
Install the wheels and hand-tighten the lug nuts. Lower the vehicle carefully until the tires touch the ground, tighten the lug nuts in a star pattern to the vehicle’s specified torque, and then remove the remaining stands. Roll the car forward and backward several feet, or drive it slowly on private level ground, so the suspension settles naturally.
Do not judge the final height immediately after lowering the car. Bounce each corner gently, then repeat the hub-to-fender measurements from the baseline. If one side is substantially different, inspect spring seating, perch measurements, and installation orientation before adjusting anything.
Make height changes in small, equal increments on an axle unless the kit instructions say otherwise. Raise the car again, support it safely, clean and lubricate adjustment threads only with a product approved by the manufacturer, loosen the lock ring, make the adjustment, retighten the lock ring, and repeat the settling process.
Step 9 Perform the complete clearance and fastener inspection
With the vehicle on the ground, turn the steering fully left and right and inspect the inner tire sidewall, spring, sleeve, damper body, brake hose, and sensor wiring. Then raise each corner carefully to simulate suspension droop and look for a loose spring or stretched line. If possible, inspect clearance with the wheels straight and at both steering extremes.
Verify that the tires do not contact the fenders, inner liners, sway bars, or strut bodies. Check that the brake lines are clipped in their original locations and that the ABS wires have enough slack for steering and suspension travel. Look for an uneven spring seat, a lock ring that has backed off, or a mount installed backward.
Understanding how to install ground control coilovers also means recognizing the limits of the method.
Recheck every disturbed fastener with a torque wrench. Marking a torqued nut with a paint pen can make later visual inspections easier, but the mark is not a substitute for the specified torque. Confirm that the wheel lug torque is correct before moving the car.
Step 10 Drive cautiously to the alignment shop and document the final setup
The first drive should be short and slow on a smooth, low-traffic route. Listen for clunks, scraping, spring bind, or repeated tapping, and pay attention to pulling, steering-wheel misalignment, vibration, or unusual braking behavior. Stop immediately if a tire rubs, a line is stretched, or the car feels unstable.
After the suspension settles, have a four-wheel alignment performed. Changing ride height changes camber and toe, and excessive toe can damage tires quickly or make the car unpredictable. Ask for a printed alignment report and keep it with your installation notes.
After the first short drive and again after additional normal use, inspect the lock rings, mounts, brake-line routing, and tire edges. If the height changes, repeat the alignment check. This is how you complete the installation rather than merely bolting the parts onto the car.
What the Main Adjustments Actually Change
A coilover adjustment can affect more than appearance. Understanding the separate functions of the components helps prevent a common beginner mistake: using spring preload to chase ride height or lowering the car until suspension travel is nearly gone.

Spring preload is not the same as ride height
Preload compresses the spring when the suspension is unloaded. Ride height is the position of the chassis with the car’s weight on the tires. On a true height-adjustable design, the lower mount or threaded body changes the installed height while preserving the intended spring preload.
Some sleeve systems do not offer independent height adjustment in the same way. Their instructions may use the threaded perch to establish both spring tension and ride height. Follow that design’s limits precisely, because excessive adjustment can reduce bump travel, create a loose spring, or place the damper outside its usable range.
Damper adjustment controls response, not vehicle height
If your dampers have rebound or compression adjustment, those settings change how quickly the suspension responds to movement. They do not safely replace the height-adjustment procedure. Begin at the manufacturer’s baseline and change only one setting at a time after the hardware and alignment are correct.
Ride height affects alignment and available travel
Lowering a vehicle generally changes camber and toe, although the exact direction depends on the suspension geometry. It can also reduce bump travel, increase the chance of bump-stop contact, and alter the angle of sway-bar links and control arms. A lower measurement is not automatically a better setup.
Helpful tip
Keep a setup record with hub-to-fender heights, spring-perch measurements, damper settings, alignment results, tire pressures, and the date of each change. It makes diagnosing a new noise or uneven tire wear much easier.
How to Check the Finished Installation
The vehicle should pass several simple checks before normal driving. These checks do not replace a professional inspection, but they can reveal an incorrectly seated spring, a missing bracket, or a clearance problem while the car is still in your driveway.

- Spring capture: With each suspension corner at full droop, the spring remains guided and does not rattle or lift out of its seats.
- Thread engagement: The adjustable sleeve, perch, and lock ring have the minimum engagement specified by Ground Control, with no cross-threading or damaged threads.
- Steering clearance: At both steering locks, the tire and wheel clear the spring, damper, brake hose, sensor wire, and inner bodywork.
- Suspension clearance: The suspension can move without the tire contacting the fender or liner and without the damper adjustment hardware hitting nearby parts.
- Fastener security: Strut, mount, sway-bar, brake-line, sensor-bracket, and wheel fasteners are torqued to their specified values.
- Ride-height consistency: Left and right measurements are reasonable for the chosen setup after the suspension has settled.
- Alignment readiness: The steering wheel and tire direction are not being used as evidence of correct alignment; a four-wheel alignment is still required.
Inspect the tire sidewalls and tread after the first drive. Fresh rubbing marks, shiny areas on the spring or tire, or a new cut in a brake hose are reasons to stop driving and find the cause before continuing.
Common Problems After Installation
Most post-installation issues come from an incorrect assembly order, insufficient clearance, a worn part exposed during the job, or a setting outside the kit’s intended range. The symptom usually points toward the area that needs inspection.
| Symptom | First checks |
|---|---|
| Clunk over bumps | Check loose upper or lower hardware, sway-bar links, spring seating, and upper-mount orientation. Also inspect worn bushings that were not replaced. |
| Spring rattles with the wheel off the ground | Verify the specified preload and minimum height. A captured spring should not be held in place by guesswork or excessive lock-ring pressure. |
| Car pulls or steering wheel is crooked | Check tire pressure and wheel installation, then schedule an alignment. Do not correct a pull by changing one perch without measuring the cause. |
| Tire rubs during turns | Inspect steering-lock clearance, wheel offset, tire size, ride height, and brake-line routing. Do not simply add more negative camber without addressing the contact point. |
| Harsh ride or frequent bottoming | Check available bump travel, bump stops, damper settings, spring rates, and ride height. A very low setting may leave too little usable travel. |
| Uneven left-to-right height | Allow the suspension to settle, confirm spring seating, compare perch measurements, and inspect for worn or bent components before making adjustments. |
A new noise that appears immediately after installation deserves a physical inspection, not a period of “breaking in.” Some settling is normal, but metal-to-metal contact, a loose spring, or a stretched brake line is not.
Beginner Questions About Ground Control Coilovers
Can I install Ground Control coilovers without replacing my factory struts?
Some Ground Control kits are designed to use compatible OEM struts, while others require specific replacement dampers or modified strut bodies. Confirm the exact kit and damper application before ordering or installing parts. A sleeve that fits physically is not necessarily compatible with the damper’s travel or spring requirements.
Do I need a spring compressor?
You need one if the procedure requires removing a compressed factory spring or transferring a factory upper mount while the spring is loaded. You may not need one for a complete assembly that arrives already assembled. Never remove a factory top nut from a loaded strut without safely controlling the spring.
How low should I set the car?
Use the manufacturer’s permitted range and preserve adequate bump travel, spring capture, tire clearance, and brake-line slack. Start near the recommended baseline, measure after settling, and lower in small increments only if the suspension still operates safely.
Should I get an alignment after installing coilovers?
Yes. Any meaningful ride-height change can alter toe and camber, and toe changes can cause rapid tire wear or unstable handling. Get a four-wheel alignment after the final height is selected, not before.
Can I adjust the coilovers while the car is on the ground?
Only if the adjustment method and access are explicitly designed for it. Many adjustments require the vehicle to be safely lifted so the lock ring can be loosened and the spring is not carrying load. Use the manufacturer’s procedure and never reach beneath an unsupported vehicle.
Finish the Installation With Measurement, Alignment, and Inspection
Knowing how to install ground control coilovers means more than fitting threaded sleeves and tightening nuts. The finished suspension must use compatible dampers, retain a captured spring, preserve brake and tire clearance, and operate within the manufacturer’s height and preload limits.
Take baseline measurements, follow the vehicle-specific instructions, torque every disturbed fastener, settle the suspension, and record the final settings. Then arrange a professional four-wheel alignment and perform a cautious inspection after the first drive. If the assembly requires unfamiliar strut modifications or you cannot safely control a compressed spring, stop and have that part handled by a qualified suspension professional.


