
How to Install Coilovers: A Complete Step-by-Step Guide
Learning how to install coilovers can seem hard at first. The job is easier when you treat it as a careful suspension replacement, not just a way to lower a car. A good install starts with measurements, clean parts, and the correct torque values.
The exact steps vary by car. A MacPherson strut front end may need the whole strut removed, while some rear systems use a separate spring and shock. The coilover maker may also use different brackets, spacers, top mounts, and height adjustments.
A common lesson in suspension work is simple: do not rush the last 10 percent. Most problems come from skipped checks, loose hardware, poor clearance, or an incorrect ride-height setup. Take your time and follow the instructions for your specific vehicle and kit.

What Are Coilovers?
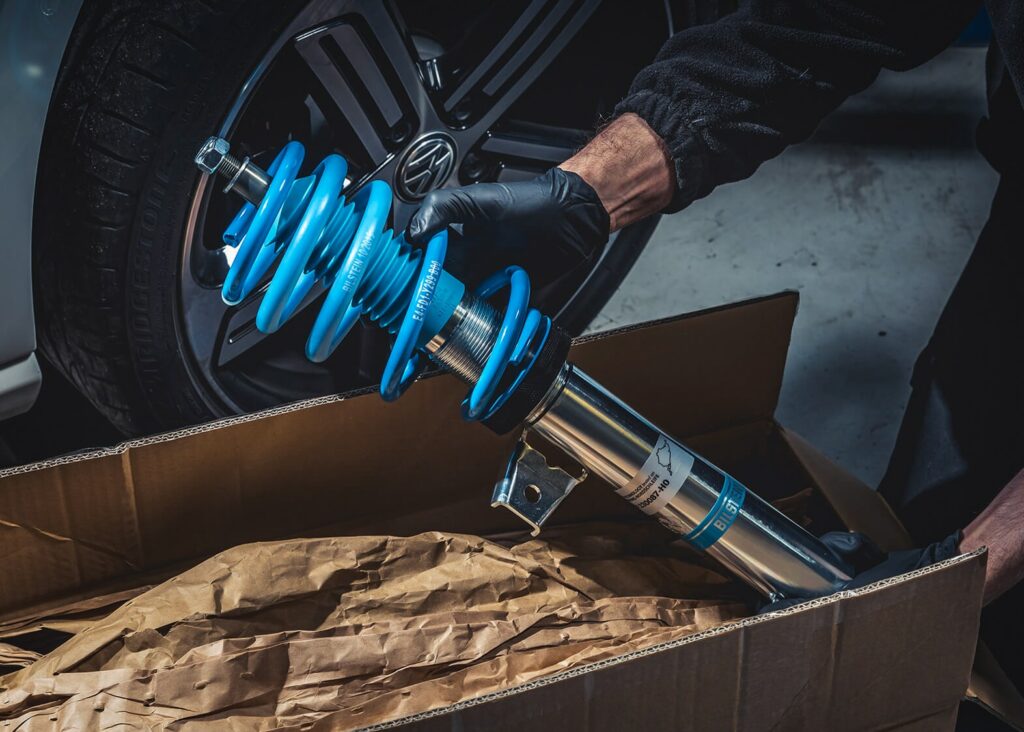
A coilover combines a coil spring and shock absorber in one suspension unit. Many kits also let you change ride height. Some allow damper adjustment, camber adjustment, or other changes.
The main goal depends on the kit and the car. Some owners want a lower stance. Others want better control on a track or more control over suspension settings. A coilover should match the car, tire setup, and way you plan to drive.
Before learning how to install coilovers, check that the kit fits your exact year, model, trim, and drivetrain. A kit for one version of a car may not fit another version.
- ✦ Ride height
This is the distance from the car body to the ground or another chosen reference point. Lower is not always better.
- ✦ Spring
The spring supports the car and controls much of its basic suspension rate.
- ✦ Damper
The damper controls how fast the suspension moves after a bump, dip, or body movement.
- ✦ Top mount
The top mount connects the coilover to the vehicle. Some kits use fixed mounts, while others offer adjustable camber plates.
Coilovers vs. Lowering Springs
Lowering springs replace the factory springs but keep the original shocks in many setups. Coilovers replace more of the suspension assembly and often provide ride-height adjustment.
That extra adjustment also adds setup work. A coilover install needs more care because ride height, spring preload, damping, and alignment can affect how the car drives.
Tools and Parts You Need Before You Start
Good preparation makes coilover installation much safer. Park on a flat, hard surface and give yourself enough room to work around the car. Keep the coilover instructions and your vehicle service information close by.
A torque wrench is one of the most important tools for this job. Suspension bolts need the correct torque, and the right value can differ by vehicle. Never guess when the factory manual or coilover instructions provide a specification.
You may need special tools for some cars. These can include a pass-through socket, sway-bar link tool, ball-joint separator, spring compressor, or alignment tools. Many complete coilover kits do not require you to compress the new springs, but the original suspension may still require special handling.

- ✦ Safety gear
Use sturdy jack stands, wheel chocks, eye protection, and gloves. Never rely on a floor jack alone to support a vehicle.
- ✦ Basic hand tools
Have sockets, ratchets, wrenches, extensions, and breaker bars that fit the fasteners on your car.
- ✦ Torque wrench
Use a suitable torque wrench to tighten suspension fasteners to the specified values.
- ✦ Measuring tools
Use a tape measure to record ride height before and after the install. A marker and notebook can help track settings.
- ✦ Vehicle information
Keep the factory service manual and coilover installation guide available. They provide the exact order, torque values, and special notes for your setup.
Do You Need a Spring Compressor?
It depends on the kit and the suspension design. Many complete coilover assemblies arrive with the spring and damper already assembled, so you can install the unit as supplied.
Do not remove a loaded factory spring without the correct procedure and equipment. A compressed spring stores a lot of energy. If the original assembly must be disassembled, use the proper compressor and follow the vehicle service procedure, or have a qualified shop handle that part.
Prepare the Car and Measure Stock Ride Height
Before you lift the car, park it on a level surface. Remove heavy items from the trunk and cabin if they are not normally carried there. Set the parking brake and use wheel chocks as needed.
Measure the car before removing anything. You can measure from the center of each wheel hub to the fender edge, or use another repeatable point. Write down all four measurements.
These numbers give you a useful starting reference. They also help you spot a large height difference after installation. Record tire size, wheel size, and any unusual load that could affect the measurement.

- ✦ Check the kit
Compare every coilover, bracket, mount, spacer, nut, and accessory with the kit instructions before taking the old suspension apart.
- ✦ Inspect the suspension
Look for damaged bushings, worn ball joints, leaking shocks, rusty fasteners, and other issues that could affect the job.
- ✦ Mark the setup
If useful, mark the original adjustment position or record thread measurements on the new coilovers before making changes.
- ✦ Plan the work
Decide whether you will install one axle at a time or follow the sequence in the kit and vehicle instructions.
Why Stock Measurements Matter
A measurement gives you a clear baseline. It is much more useful than saying the car looks about one inch lower. Repeatable measurements also make later adjustments easier.
Remember that a new spring may settle slightly after the first few drives. Recheck the ride height on level ground after the suspension has had time to settle.
How to Install Coilovers Step by Step
The basic process for how to install coilovers is similar on many cars, but the fasteners and suspension layout are not universal. Follow the vehicle and coilover instructions whenever they differ from this general guide.
Lift the car at the approved lift points and support it securely with jack stands. Remove the wheels. Keep the wheels under the car only as an extra backup where safe and practical; they are not a replacement for proper support.
Start by removing the parts that hold the factory suspension in place. Depending on the car, this may include the sway-bar link, brake line bracket, ABS wire bracket, lower mounting bolts, and upper mount nuts.
Support the suspension component before removing its final fasteners. Do not let a heavy assembly drop or hang from a brake hose, ABS wire, or other line.
Compare the new coilover with the old assembly before installation. Check the mounting holes, bracket shape, overall length, spring position, and top mount. If something does not match the instructions, stop and verify the application before forcing any part into place.
Install the new coilover in the reverse order used for removal. Start all fasteners by hand when possible. This helps prevent cross-threading and makes it easier to correct small alignment issues.
Leave fasteners at the specified preliminary tightness if the instructions require final torque at normal ride height. Some suspension bushings can be damaged if their inner sleeves are clamped in the wrong position. The vehicle service manual will tell you which joints need this treatment.
Repeat the process on the other side of the axle. Then move to the rear suspension if the kit includes rear coilovers. Rear systems can look very different, so follow the supplied diagram rather than assuming the front procedure applies.

- ✦ Step 1: Lift and support
Use approved lift points and solid jack stands. Make sure the car is stable before working underneath it.
- ✦ Step 2: Remove the wheel
Remove the wheel and place it aside where it cannot roll into your work area.
- ✦ Step 3: Free attached lines and links
Remove or release brackets and links that prevent the factory suspension from coming out.
- ✦ Step 4: Remove the factory unit
Support the assembly and remove its upper and lower mounting hardware in the order specified for your car.
- ✦ Step 5: Compare parts
Check the new coilover against the old unit and confirm the correct side and orientation.
- ✦ Step 6: Install the coilover
Place the coilover into position and start the mounting hardware by hand.
- ✦ Step 7: Reconnect components
Reconnect sway-bar links, brake line brackets, ABS wire brackets, and other parts that were removed.
- ✦ Step 8: Torque the hardware
Use the exact torque values from the vehicle service manual and coilover instructions.
- ✦ Step 9: Repeat the process
Install the remaining units and check that all four corners use the correct parts and orientation.
Front Coilover Installation
Front coilovers often replace the factory strut assembly. You may need to disconnect a sway-bar link and move a brake hose or ABS wire bracket out of the way before the strut can come free.
Keep an eye on the steering knuckle and brake assembly while the strut is loose. Do not allow the hub or knuckle to pull hard on a brake hose or sensor wire.
Rear Coilover Installation
Rear suspension layouts vary more than many people expect. Some cars use a true rear coilover. Others use a separate rear spring and shock with a special adjustable perch.
Follow the kit instructions for the rear spring perch and damper. Make sure the spring seats correctly and that any supplied isolator or spacer sits in the proper position.
How to Set Coilover Ride Height
Ride height is one of the most important parts of coilover setup. Do not set it by eye alone. Measure each corner from the same reference point and make small changes.
Many height-adjustable coilovers use a threaded body and locking collars. On these designs, the height adjustment should normally come from the intended threaded adjustment system, not by simply crushing the spring with extra preload.
The correct setup depends on the coilover design. Some kits use a lower mount that threads onto the damper body. Others use a different collar system. Read the manufacturer’s instructions before turning any collar.
Keep enough suspension travel for the car’s intended use. A very low car can hit bump stops, scrape parts, reduce available travel, and change suspension geometry. A lower stance can also create tire-to-fender or tire-to-suspension clearance problems.

- ✦ Start near the recommended setting
Use the manufacturer’s starting height rather than immediately choosing the lowest possible setting.
- ✦ Measure all four corners
Use the same measurement method at every corner. Small left-to-right differences can matter.
- ✦ Check the spring
The spring should sit correctly in its seats and maintain the setup specified by the manufacturer.
- ✦ Lock the collars
After setting the height, secure the adjustment collars as directed by the coilover maker.
- ✦ Check travel
Make sure the suspension still has useful compression and rebound movement.
How Much Should You Lower a Car?
There is no single safe lowering amount for every car. The limit depends on suspension design, wheel and tire size, alignment range, road conditions, and the coilover itself.
For a street car in the United States, leave enough clearance for driveways, speed bumps, rough roads, and full steering lock. A height that works on a smooth track may be difficult on normal roads.
Torque, Clearance, and Final Safety Checks
Do not skip the final inspection. Suspension parts carry high loads, and a small mistake can lead to serious damage or loss of control. Check every fastener and bracket before the car goes back on the road.
Use the torque values listed for your exact vehicle and coilover kit. Do not substitute a generic torque value from another car. If a manufacturer calls for a new locking nut or bolt, replace it as directed.
Turn the steering from lock to lock while checking the front suspension. Look for contact between the tire, spring, coilover body, brake hose, ABS wire, sway-bar link, and other nearby parts.
Also check clearance with the suspension loaded. A tire that clears while the car is hanging can touch the body or suspension when the car returns to the ground. If you are unsure about a clearance issue, stop and correct it before driving.

- ✦ Torque check
Verify each critical suspension fastener against the correct service specification.
- ✦ Tire clearance
Check the tire at steering lock and through expected suspension movement.
- ✦ Brake hose and ABS wire
Make sure both have a safe path and cannot rub against the spring, tire, or damper.
- ✦ Spring seating
Confirm that every spring sits fully and correctly in its upper and lower seat.
- ✦ Collar position
Confirm that all adjustment collars are locked as required by the manufacturer.
- ✦ Wheel hardware
Install the wheels and torque the lug nuts to the vehicle manufacturer’s specification.
Why a Test Drive Should Be Slow
The first drive is a check, not a performance run. Start at low speed in a safe area and listen for knocks, rubbing, clunks, or other new sounds.
After the short check, inspect the suspension again. If you find loose hardware, unusual tire contact, fluid leakage, or a major change in handling, do not continue driving until the issue is fixed.
Get a Wheel Alignment After Installing Coilovers
A wheel alignment is a key part of learning how to install coilovers correctly. Changing ride height changes suspension geometry on many cars. That can change toe, camber, and other alignment angles.
Toe is especially important for tire wear and straight-line behavior. Even a small change can affect how the car tracks and how quickly the tires wear.
Drive the car only as needed to reach the alignment shop if the car is safe to drive. Avoid hard cornering until the alignment is checked. Tell the technician that the suspension was changed and provide your desired street or track alignment targets.
After the alignment, record the final ride height and alignment values. This creates a useful baseline for future adjustments. If you later change the ride height, check the alignment again.

- ✦ Four-wheel alignment
Use a shop with equipment suited to your vehicle and ask for a printout of the final measurements.
- ✦ Street setup
For a daily driver, alignment settings should suit normal road use, tire wear goals, and the vehicle manufacturer’s limits.
- ✦ Track setup
Track settings can differ from street settings and should reflect the tires, track, suspension parts, and driving conditions.
- ✦ Recheck after height changes
A meaningful ride-height change can alter alignment again, so measure and inspect after major adjustments.
What to Watch for After Alignment
The steering wheel should sit in its normal position when the car travels straight. The car should not pull strongly to one side on a suitable road.
Watch for uneven tire wear over time. If one tire develops unusual wear, have the alignment and suspension inspected instead of assuming the coilovers are fine.
Common Coilover Installation Mistakes to Avoid
The most common coilover problems are often simple setup errors. They include skipping measurements, using the wrong torque values, setting the car too low, and forgetting to check brake and tire clearance.
Another common mistake is changing several settings at once. If you change ride height, damping, wheel size, and alignment at the same time, it becomes hard to tell what caused a change in handling.
Make one change at a time and record it. This simple habit makes suspension tuning much easier and helps you return to a known setup.
- ✦ Using the lowest setting
The lowest possible height may reduce suspension travel and create clearance problems. Start with a sensible setting.
- ✦ Ignoring torque specs
Guessing torque values can lead to loose or damaged hardware. Always use the correct specification.
- ✦ Changing spring preload to chase height
Use the intended height adjustment system. Extra spring preload is not a universal substitute for proper ride-height adjustment.
- ✦ Skipping the alignment
A new suspension setup can change alignment. Have the car checked after installation.
- ✦ Forgetting brake and ABS clearance
A hose or wire that rubs on a moving suspension part can fail or become damaged.
- ✦ Not checking both sides
Measure left and right ride height and confirm that the settings match the intended setup.
- ✦ Relying on appearance
A car can look level while having different measurements at each corner. Use a repeatable measurement method.
When You Should Use a Professional Shop
DIY coilover installation is not a good fit for every owner. If you do not have safe lifting equipment, the required tools, or a clear service procedure, a suspension shop can handle the job.
Professional help also makes sense when a fastener is seized, a spring must be safely compressed, a suspension part is damaged, or you cannot confirm that the installed parts are correct. Paying for safe work is better than taking a risk under a car.
- ✦ Use a shop for damaged parts
Replace or repair worn suspension components before treating the coilover installation as complete.
- ✦ Use a shop for special tools
Some suspension designs need tools that are not safe to replace with improvised methods.
- ✦ Use a shop for alignment
A professional alignment is often needed to finish the installation correctly.


