
How to install universal coilovers safely and set ride height
Universal coilovers can give a project car more control over ride height and suspension tuning, but “universal” does not mean “bolt-on.” The shocks, springs, brackets, and mounting dimensions must suit the vehicle, and many installations require fabricated mounts or changes to the original suspension. A mistake in this area can affect steering, braking, tire clearance, and the vehicle’s ability to stay on the road.
The attainable goal is a properly supported coilover installation with full suspension travel, secure fasteners, and an alignment that matches the intended use. This guide explains how to install universal coilovers in a general front or rear suspension while recognizing where vehicle-specific service information, fabrication, or professional help becomes necessary.
You will learn how to confirm compatibility, remove the original components, mount and adjust the coilovers, check clearance at full suspension movement, and arrange a final alignment. Because suspension designs vary widely, use the coilover manufacturer’s instructions and the vehicle service manual whenever their specifications differ from the general method here.
At a glance
- A universal coilover needs correct compressed and extended lengths, mounting dimensions, and spring capacity for the vehicle.
- Support the vehicle with stands and never rely on a jack while working on suspension components.
- Ride height is only acceptable after checking suspension travel, tire clearance, fastener security, and wheel alignment.
How to install universal coilovers safely and correctly
A coilover combines a coil spring with a shock absorber in one adjustable assembly. Before removing anything, determine whether your vehicle has separate spring and shock mounts, a strut-type assembly, a solid axle, or an independent suspension. The installation may involve replacement brackets, adapter sleeves, reinforcement, or welding rather than simple hardware replacement.
Tools you will need
- Vehicle service manual or suspension diagram for torque specifications and removal details
- Floor jack and appropriately rated jack stands for safely supporting the vehicle
- Wheel chocks to prevent movement
- Socket and wrench set, including the sizes needed for the original and coilover hardware
- Torque wrench for tightening structural fasteners to specification
- Spring-preload or adjustment spanner supplied for the coilovers
- Tape measure for recording ride height and checking shock length
- Paint marker or scribe for marking original positions
- Optional: angle finder, measuring calipers, and a suspension travel worksheet
- Optional: professional fabrication and welding equipment when the kit requires new mounts or reinforcement
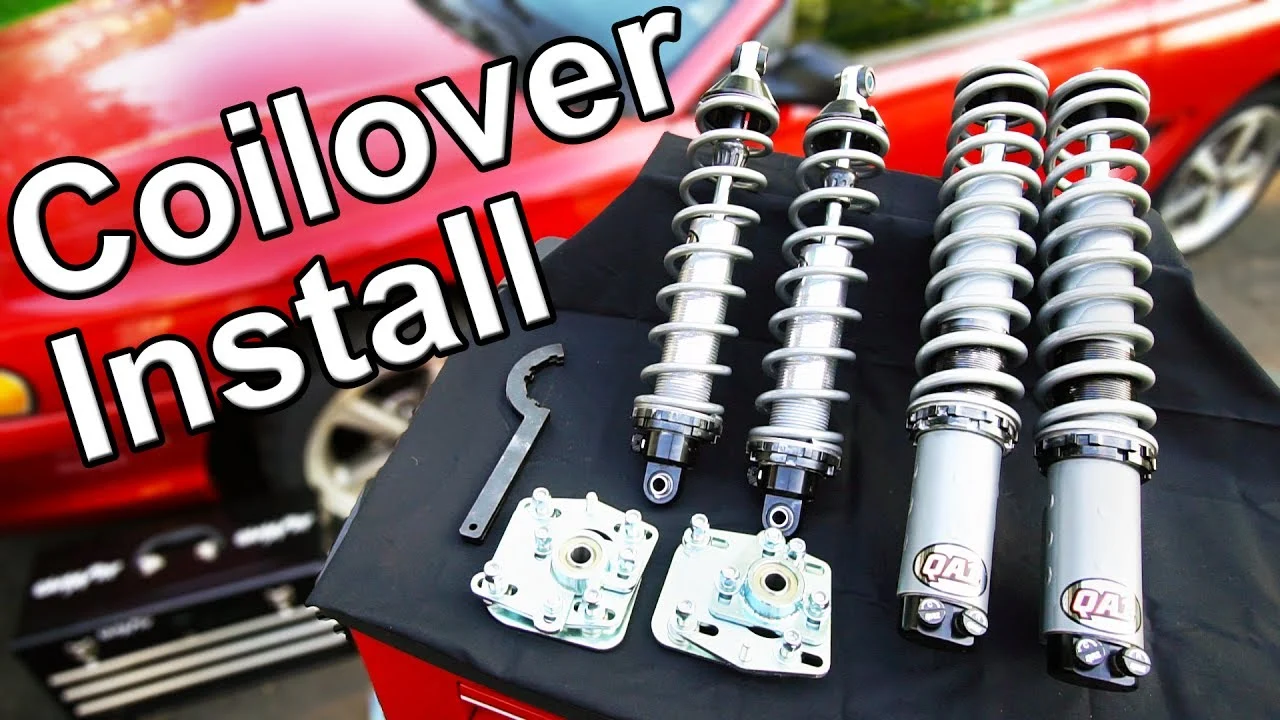
Step 1 Confirm that the coilovers and vehicle are compatible
Read the coilover manufacturer’s specifications before lifting the vehicle. Record the shock’s compressed length, extended length, stroke, upper and lower mounting style, mounting bolt diameter, eye width, stud dimensions, and recommended spring rates. Compare those measurements with the available space and the original suspension layout.
Measure the vehicle’s current ride height from a repeatable point, such as the center of the wheel hub to the fender lip. Also measure the distance between the intended upper and lower mounting points with the suspension at normal ride height, with the suspension fully compressed if safely possible, and with the suspension hanging. These measurements reveal whether the coilover will run out of travel before the suspension does.
Check the manufacturer’s limits for shock angle and side loading. A coilover is not automatically suitable simply because its mounting bolts fit. The spring must carry the vehicle’s corner weight, the shock must have enough travel, and the mounts must transfer load without bending or tearing.
If the vehicle uses a separate spring perch, confirm that the coilover can replace both the spring and shock without allowing the axle or control arm to move beyond its intended range. If a new bracket must be welded to a control arm, axle housing, chassis, or strut tower, stop and have the design reviewed by a qualified suspension fabricator before proceeding.
Important
Do not remove the original suspension until you have a verified mounting plan. Never weld a coilover bracket to thin sheet metal, a corroded area, or a component that was not designed to carry the spring load.
Step 2 Prepare the vehicle and record the original setup
Park on a solid, level surface, select a gear or park position, apply the parking brake, and chock the wheels that will remain on the ground. Break the wheel lug nuts loose slightly before lifting the vehicle, then raise it at the manufacturer’s approved jacking points and place it securely on jack stands under strong structural locations.
Keep the jack positioned under a suitable suspension member when working on a spring or control arm. This lets you control stored spring force and prevents a component from dropping suddenly when a fastener is removed. Do not place a jack under a thin arm, brake line, exhaust component, or other part that can deform.
Remove the wheels and photograph the existing suspension from several angles. Mark the original positions of adjustable links, eccentric bolts, and brackets. Measure ride height at all four corners if the installation affects the complete vehicle, and note tire size, wheel offset, and any existing clearance problems.
Inspect the surrounding parts while they are accessible. Replace damaged ball joints, worn bushings, cracked mounts, leaking shocks, bent arms, and deteriorated brake hoses before installing adjustable suspension. Coilovers cannot correct a worn or structurally unsound foundation.
Step 3 Remove the original spring and shock assembly safely
Follow the vehicle service manual for the removal sequence because spring force may be stored in the original component. Some strut assemblies require a spring compressor; others can be unloaded with a jack under the control arm. Do not loosen a spring-retaining nut or disassemble a loaded strut unless you have the correct compressor and know how to use it.
Support the suspension member before disconnecting the shock, spring seat, control arm, sway-bar link, or axle-related hardware. Remove only the components necessary for the conversion, and retain original bolts until you confirm whether the coilover kit supplies replacement hardware.
As each part comes free, check for seized bolts, elongated mounting holes, cracks, and rust around the proposed attachment points. A mounting hole that has become oval-shaped cannot safely clamp a new coilover until the damage is repaired.
Once the original assembly is removed, compare its length and mounting orientation with the coilover. Do not assume that the new shock should be installed with the adjustment knob, reservoir, or body facing the same direction as the old part. Follow the manufacturer’s orientation requirements and keep adjusters accessible without placing them near heat or moving components.
Step 4 Prepare the coilover without changing its basic geometry
Inspect every coilover for bent threaded bodies, damaged threads, leaking fluid, loose collars, incorrect bushings, and missing spacers. Clean dirt from the threads with a soft brush rather than forcing an adjustment collar across contamination that could damage the threads.
Set the coilover near the manufacturer’s recommended starting length. If the assembly has separate spring-preload collars and a lower mounting adjustment, learn which adjustment changes what. Preload is the amount the spring is compressed when the suspension is unloaded; ride height may instead be changed by altering the overall shock-body length or a dedicated lower mount.
On a height-adjustable coilover, avoid lowering the vehicle by shortening the available shock stroke. Excessive preload or an incorrect adjustment can cause coil bind, a loose spring at full droop, or insufficient bump travel. The spring should remain properly captured through the full safe range of suspension movement.
Install the correct upper and lower bushings, sleeves, spacers, and washers in the order shown by the instructions. The sleeve should fit the mounting bolt without excessive side play, while the bushing should not be crushed until it becomes distorted when the fastener is tightened.
Step 5 Install the upper and lower mounts
Position the coilover between the intended mounts and install the hardware by hand. Do not force a bolt through misaligned holes with the fastener threads, and do not use an impact wrench to draw a suspension mount into position. If the holes do not line up at the coilover’s approved length, support or reposition the suspension rather than bending a bracket.
Keep the coilover body, spring, adjuster, and reservoir away from the tire, wheel, brake hose, axle, driveshaft, sway bar, steering link, and exhaust. Check clearance with the steering turned from lock to lock where applicable. A part that clears while parked straight ahead may contact the tire during a turn.
Install supplied locking nuts or new specified fasteners where required. Tighten the hardware only enough to hold the assembly while you verify orientation and movement. Final torque often must be applied with the suspension at normal ride height, especially when rubber bushings are clamped through an inner sleeve.
If the design needs fabricated mounts, remove the coilover and complete the fabrication according to an engineered layout before driving. Welds must fully support the spring load, brackets must be reinforced against bending, and the finished mount must preserve the intended suspension axis. This is the point to stop and use a qualified fabricator if you do not have the equipment or structural knowledge.
Step 6 Set an initial ride height and confirm suspension travel
Reinstall the wheels temporarily if needed for clearance checks, then lower the vehicle onto level ground or onto suitable suspension-loading equipment. Set the coilovers to a conservative height close to the measured original ride height. Do not begin with the lowest possible setting; a low car can lose bump travel, scrape structural parts, or place the control arms at an unsuitable angle.
A useful way to approach how to install universal coilovers is to check your progress after each stage.
Measure from the same hub-center reference used earlier. Adjust both sides of an axle in small, equal changes, then settle the suspension by rolling the vehicle a short distance or gently bouncing it. Record the measurement after the suspension has settled rather than adjusting against a jack-supported vehicle.
With the vehicle safely supported, move each suspension corner through its usable range. You are checking that the shock does not bottom out before the bump stop performs its job and does not top out before the suspension reaches its safe droop limit. Confirm that the spring remains seated and that coil turns do not touch one another before the suspension reaches full compression.
Inspect brake hose slack at full droop and full steering lock. Verify that anti-roll-bar links, control arms, and driveshaft joints are not binding. If the coilover reaches the end of its stroke, a tire contacts a body panel, or a mount flexes, do not compensate by simply changing the ride height; correct the underlying geometry or component selection.
Step 7 Torque the assembly and repeat the clearance inspection
Use the vehicle manual and coilover instructions for every torque value. Torque the upper and lower mounts, control-arm hardware, sway-bar links, wheel lugs, and any replacement fasteners with a calibrated torque wrench. If a specification is given for a prevailing-torque nut, use a new nut when required rather than reusing a damaged or loosened one.
Torque rubber-bushed pivots at their normal ride-height position unless the manufacturer specifies another method. Tightening those bushings while the suspension hangs can preload the rubber and shorten its service life. Spherical bearings and metal spacers have different requirements, so do not apply rubber-bushing rules to every mount.
After torqueing, mark the fastener and adjacent mount with a paint marker. The mark is not a substitute for torque, but it provides a quick visual indication if a fastener later rotates. Recheck that adjustment collars are locked and that the spring seats are fully engaged with the threaded body.
Check your result
Before moving the vehicle, confirm that every structural fastener is torqued, every spring is captured, both front wheels steer freely, and no hose, wire, tire, or suspension part touches through the full checked range.
Step 8 Lower the vehicle, perform a cautious road check, and arrange alignment
Install the wheels, torque the lug nuts in the manufacturer’s pattern and specification, and lower the vehicle completely. Check ride height on level ground and compare the left and right sides. A small difference can come from settling, fuel load, or an uneven surface, but a large difference suggests an adjustment, spring, mount, or suspension problem.
Before driving on a public road, move the vehicle a short distance by hand or at walking speed on private property if possible. Listen for knocking, spring movement, rubbing, or clicking. Recheck the lug nuts and accessible coilover hardware after this first movement.
The first road check should be slow and short, away from heavy traffic. Test braking, steering, and low-speed turns separately. Stop immediately if the vehicle pulls sharply, the steering does not self-center normally, a tire rubs, the suspension bottoms out, or a warning sound appears.
Schedule a four-wheel alignment after the ride height has settled. Lowering or raising a vehicle changes camber, caster, toe, and sometimes bump-steer behavior. The alignment technician should know the intended ride height and whether the vehicle is for street, track, drag, or off-road use.
For how to install universal coilovers safely, the alignment is not an optional cosmetic finish; it is part of confirming that the suspension works as intended.
What universal coilover measurements really tell you
Universal coilovers are usually selected by dimensions and load requirements rather than by a vehicle-specific part number. That makes them useful for custom projects, but it also transfers the responsibility for fitment to the installer. A correct installation must match the entire suspension system, not just the distance between two mounting holes.

Compressed and extended length
Compressed length is the coilover’s shortest safe length, while extended length is its longest safe length. The difference is the available shock stroke. The suspension should use that stroke without bottoming the shock before the bump stop or topping out the shock before the suspension reaches its safe droop position.
Measure at the actual mounting points, not from a convenient nearby bracket. Account for bushing compression, spacers, mounting angle, and the fact that an angled shock has less effective vertical travel than its measured shaft movement. A suspension professional can help evaluate motion ratio when the coilover is not mounted near the wheel.
Spring rate and motion ratio
Spring rate describes how much force is required to compress the spring a given amount. The correct rate depends on corner weight, motion ratio, desired handling, available travel, and whether the vehicle carries passengers or cargo. A spring that is too soft can bottom out; one that is too stiff can reduce grip and overload mounts or chassis components.
Motion ratio is the relationship between wheel movement and coilover movement. If the wheel moves farther than the coilover, the spring and damper experience a different load and travel requirement than they would at a one-to-one mounting position. This is one reason a spring rate that looks suitable on paper may not behave correctly after installation.
Ride height, preload, and usable travel
Changing spring preload can alter how much force is required before the suspension begins to move, but it does not always provide a useful ride-height adjustment. On many designs, the lower mount or threaded body changes overall length while preserving more of the shock’s usable stroke. Use the adjustment method specified for the particular coilover.
Keep enough ground clearance for the intended road and enough bump travel for normal driving. The lowest static height is not automatically the best setting. A suspension that repeatedly hits its bump stops can be less controlled and less safe than one set slightly higher.
How to verify the finished installation
Verification should be more than a quick visual glance. Suspension parts move through arcs, and clearance that looks adequate at rest can disappear during steering, braking, acceleration, or one-wheel compression. Perform checks with the vehicle loaded as it will normally be used, while keeping all test conditions controlled.
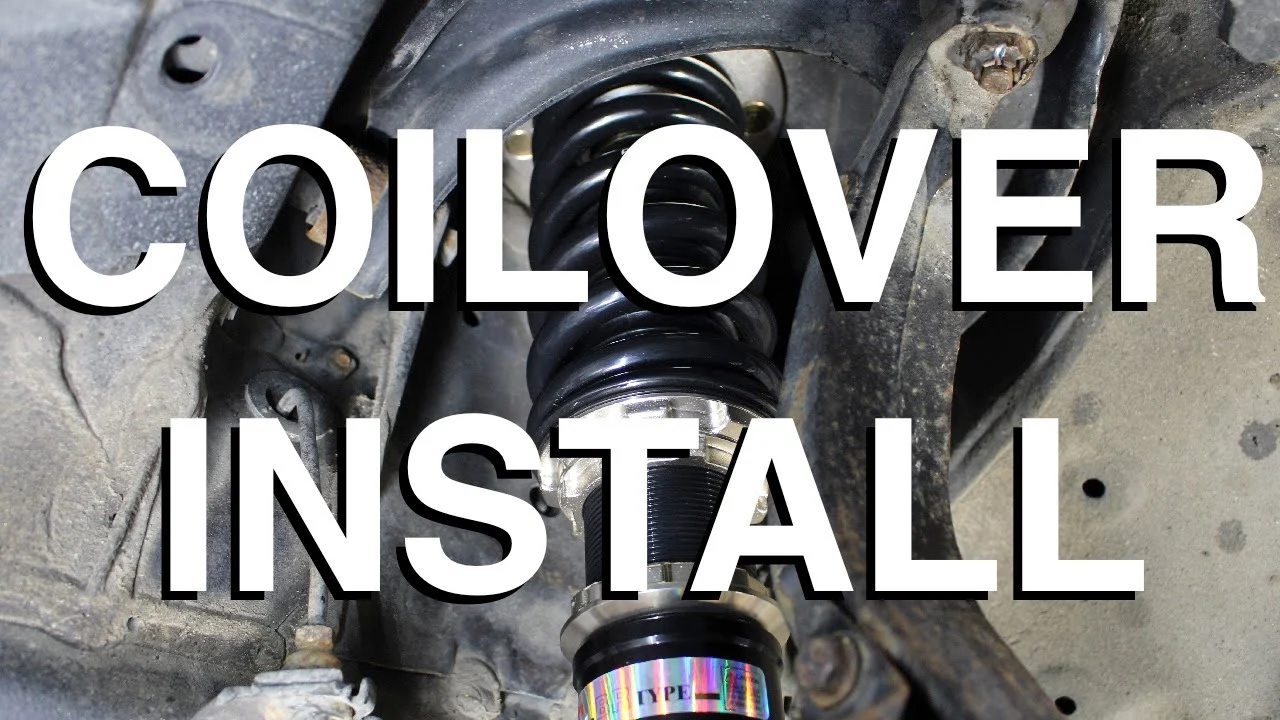
- Confirm the coilover is centered in its mounts and the spring remains seated at full droop.
- Check tire and wheel clearance at both steering locks and throughout the suspension range.
- Inspect brake hoses, ABS wires, and parking-brake cables for stretching, twisting, or contact.
- Look for shock-body, shaft, or threaded-body contact with brackets and control arms.
- Check bump-stop engagement and confirm the shock is not being used as the bump stop unless designed for that purpose.
- Verify that sway-bar links and control arms do not bind near full compression or droop.
- Confirm left-to-right ride height and record the final measurements.
- Have the alignment checked after the vehicle settles and after any significant height adjustment.
Ask the alignment shop to provide the final readings rather than relying only on the steering wheel position. Excessive toe error can quickly damage tires and make the car unstable, while changes in camber or caster can affect braking and steering feel. The correct targets depend on the vehicle and its intended use.
Common problems after installation
Many problems blamed on coilover quality are actually caused by incorrect length, loose hardware, unsuitable spring rates, or an adjustment that removed suspension travel. The symptoms below can help narrow the issue, but any structural doubt is a reason to stop driving and obtain an inspection.
| Symptom | Likely area to inspect |
|---|---|
| Clunk over bumps | Loose mount, incorrect spacer order, worn adjacent bushing, or a spring that is not captured |
| Harsh ride or frequent bottoming | Insufficient bump travel, excessive damping, unsuitable spring rate, or ride height set too low |
| Vehicle pulls or wanders | Alignment change, unequal ride height, tire issue, bent part, or binding suspension joint |
| Tire or wheel rubbing | Insufficient clearance at steering lock or compression; inspect wheel offset, spring position, and body clearance |
| One corner sits low | Unequal adjustment, incorrect spring seating, damaged mount, mismatched spring, or uneven surface |
| Shock leaks or adjustment feels abnormal | Damaged damper, incorrect installation orientation, or a defective component requiring manufacturer review |
Do not cure a rubbing tire by removing material from a structural mount or by adding random spacers. Do not cure a loose spring by adding preload without checking whether the spring length and coilover travel are correct. Each symptom should be traced to a mechanical cause.
Universal coilover installation FAQs
Can universal coilovers fit any vehicle?
No. They must match the vehicle’s mounting dimensions, shock length, stroke, spring capacity, suspension motion, and available clearance. Some applications also require engineered brackets or reinforcement, so universal coilovers are not automatically compatible with every chassis.
Do I need a spring compressor?
You may need one to remove or disassemble the original spring-and-shock assembly, depending on the suspension design. Never compress a loaded spring with improvised tools. If the original spring is captured under significant force and you do not have the correct equipment, have that portion of the work done professionally.
Should I adjust preload to lower the vehicle?
Usually, no. Use the manufacturer’s designated ride-height adjustment, often a threaded lower mount or shock-body adjustment, and preserve adequate shock travel. Changing preload can alter how the spring is captured and can create coil bind or a loose spring at full droop.
Can I drive without an alignment after installing coilovers?
Only for a slow, cautious movement to an alignment facility, provided the vehicle has no rubbing, steering, braking, or structural problem. Ride-height changes commonly alter toe, camber, and caster, so normal driving should wait until the alignment has been checked.
How low should I set the vehicle?
Set it only as low as the suspension can operate with adequate bump and droop travel, safe ground clearance, and no tire or component contact. The correct height depends on the vehicle, wheel and tire combination, road conditions, and intended use—not on a universal visual measurement.
When should I stop and call a professional?
Stop when mounts need structural welding, the chassis is rusty or cracked, the coilover length is uncertain, spring force cannot be safely controlled, or the vehicle behaves unpredictably after installation. A qualified suspension fabricator or alignment technician can inspect geometry and load paths before the car is driven regularly.
Finish with measured checks, not just a lower stance
Learning how to install universal coilovers is mainly an exercise in matching dimensions, controlling spring energy, preserving suspension travel, and verifying the result under movement. The finished assembly should have secure mounts, captured springs, correct fastener torque, adequate clearance, and a professional alignment at the settled ride height.
Keep a written record of the final ride height, coilover adjustments, torque values, and alignment readings. Reinspect the mounts, collars, bushings, and nearby hoses after the initial road check and again after the suspension has had time to settle. If any part flexes, rubs, leaks, or behaves unpredictably, park the vehicle until the cause is corrected.


