
How to Install Rev9 Coilovers: A Safe Setup and Alignment Guide
Installing coilovers changes more than the appearance of a car. You are removing parts that locate the wheel, support the vehicle’s weight, and control suspension movement, so the job deserves the same care as any other safety-critical repair. Rev9 kits are designed for specific vehicle applications, but the exact brackets, top mounts, fasteners, and adjustment ranges vary by chassis.
The safest realistic approach is to use the installation instructions supplied with your exact Rev9 kit, support the vehicle on properly rated jack stands, and record the original ride height before disassembly. A home mechanic with normal hand tools can often complete the mechanical installation, but a professional alignment is still required afterward. Do not rely on a visual check to confirm that the suspension is correct.
This guide explains how to install Rev9 coilovers from preparation through final inspection. You will learn how to confirm compatibility, remove the original struts or shocks, set spring preload and ride height without damaging the threaded bodies, torque the hardware, check for interference, and arrange the alignment and follow-up inspection that make the installation safe to use.
At a glance
- Confirm the kit matches the exact year, body style, drivetrain, and suspension layout before removing anything.
- Use the manufacturer’s torque values and preserve enough suspension travel; a low ride height is not automatically a good setup.
- Plan on a professional four-wheel alignment and recheck the installation after the first drive.
How to install rev9 coilovers safely and correctly
The procedure below describes the common installation pattern for Rev9 adjustable coilovers on vehicles that use separate or integrated spring-and-damper assemblies. Your vehicle’s service manual and the Rev9 instructions take priority whenever they differ. Some applications require transferring top hats, bushings, or other hardware; others use supplied upper mounts, so do not assume every kit installs the same way.
Tools you will need
- Vehicle-specific Rev9 installation instructions and service-manual torque specifications
- Floor jack and four properly rated jack stands for supporting the vehicle
- Wheel chocks, lug-nut socket, and a torque wrench
- Metric or SAE socket and wrench set appropriate for the vehicle
- Paint marker, tape measure, and notepad for recording original settings
- Penetrating oil and a wire brush for corroded fasteners
- Optional: spring-compressor equipment only if the instructions require transferring a spring or mount; use professional help if you are not trained to use it
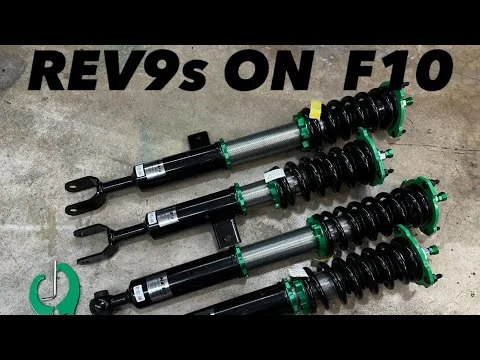
Step 1 Confirm the kit and inspect every component
Before lifting the vehicle, compare the part numbers on the boxes and coilovers with the application listed for your car. Check the model year, body style, engine or drivetrain differences, front and rear configuration, and whether the kit is intended for a vehicle with electronic dampers or other factory suspension controls.
Lay out the coilovers, adjustment spanners, lock collars, mounting hardware, and any replacement brackets or bushings. Look for bent threaded bodies, damaged threads, leaking dampers, torn boots, missing washers, or hardware that does not match the instructions. Do not install a visibly damaged component or substitute a random fastener because it appears to fit.
Read the adjustment instructions before touching the collars. On most adjustable coilovers, the spring collars establish spring preload while the lower mount or shock body adjusts overall length and ride height. The correct method is application-specific, and forcing a locked collar against dirty threads can damage the coating or make later adjustment impossible.
Step 2 Measure the original ride height and prepare the work area
Park on a level, hard surface with the steering wheel straight. Measure from the center of each wheel hub vertically to the lower edge of the fender or another repeatable body reference, and write down all four measurements. Hub-to-fender measurements are more useful than measurements from the ground because tire pressure and tire size can distort ground-based readings.
Photograph the original front and rear suspension, brake-hose routing, sway-bar connections, and the position of upper mounts. These references help when several similar brackets are removed. Loosen the wheel lug nuts slightly while the tires are on the ground, but do not remove them yet.
Read the vehicle service information for lifting points and for any special procedure involving ride-height sensors, electronic dampers, air suspension, or brake lines. If the vehicle has an electronically controlled suspension system, the coilover kit may require a compatible cancellation module or a warning-light procedure; do not disconnect or bypass a system without following the kit and vehicle instructions.
Important
Never work under a vehicle supported only by a floor jack. Use jack stands on the manufacturer’s approved support points, chock wheels that remain on the ground, and keep your hands clear whenever a loaded spring or suspension joint is being separated.
Step 3 Lift the vehicle and remove the wheels
Chock the wheels that will remain on the ground, then lift the vehicle at the approved central lifting points. Place jack stands at the specified structural support points and lower the vehicle onto them gently. Shake the vehicle lightly at a solid body or suspension point to confirm that it is stable before removing the wheels.
Remove the wheels and place them out of the work area. Keep lug nuts and vehicle-specific hardware in labeled containers. Do not let a brake caliper hang by its hose; if it must be moved, support it with suitable wire or a strap attached to a strong suspension point.
With the wheels removed, compare both sides before disassembly. Uneven factory components, bent brackets, damaged bushings, or a leaking original damper can indicate a separate repair that should be addressed rather than hidden by the new coilovers.
Step 4 Disconnect the suspension items that prevent removal
Start at one corner and take photographs as you go. Depending on the vehicle, you may need to disconnect the sway-bar end link, brake-hose retaining bracket, ABS-wire clips, upper control-arm connection, or other link attached to the strut or shock assembly. Remove only the connections required by the instructions, and support heavy components so they do not pull on hoses or wiring.
Apply penetrating oil to rusty fasteners and clean exposed threads with a wire brush. Use a wrench on the matching nut or bolt head rather than relying on an impact tool to spin a fastener against a rubber bushing. If a ball-joint stud spins, use the vehicle-specific service method instead of applying uncontrolled heat near brake components, wiring, or fuel lines.
Leave the main assembly supported while loosening its upper and lower fasteners. On a front strut, remove the lower knuckle bolts only after the assembly is supported, then remove the upper mounting nuts while holding the strut. On a separate rear spring and damper layout, the spring and damper may come out by different routes.
Step 5 Remove the original strut or shock assembly
Support the hub or knuckle with a jack before separating it from the damper. This prevents the brake hose and axle from being stretched and keeps the suspension from dropping suddenly. Remove the original assembly according to the service manual, keeping track of bolt orientation, spacers, washers, and left-versus-right components.
Do not disassemble a factory strut with a compressed spring unless the Rev9 instructions explicitly require transferring a component and you have suitable spring-compressor equipment and the training to use it. A compressed coil spring stores substantial energy. If the job requires moving a factory spring or mount and the procedure is unclear, stop and have that portion completed by a qualified suspension shop.
Once removed, compare the original assembly with the replacement. Check approximate length, mounting-hole pattern, bracket position, and the location of brake-line or ABS-wire tabs. A difference that is shown in the instructions may be intentional; a difference that leaves a bracket unusable or changes the mounting orientation is a reason to stop and verify the application.
Step 6 Set the Rev9 coilovers to a sensible starting position
Before installation, set the coilovers to the manufacturer’s recommended starting adjustment. If the instructions provide a baseline ride height, spring-preload setting, or damper-click position, record it and use it. If they do not, avoid making a dramatic height change during installation; preserving a moderate amount of suspension travel is more important than achieving the lowest possible stance.
Use the supplied spanner wrenches to loosen and tighten the lock collars. Keep the threaded bodies clean, and never use a hammer and punch on the adjustment collars unless the manufacturer specifically approves that method. On a height-adjustable design, adjust the lower mount or shock body as directed rather than reducing spring preload until the spring is loose.
A properly installed spring should remain seated in its upper and lower perches through the expected range of suspension movement. A loose spring at full droop, insufficient thread engagement, or a coilover adjusted beyond its marked safe range indicates an incorrect setup, not a finishing detail.
Step 7 Install each coilover without loading the hardware incorrectly
Position the new coilover in the same general orientation as the original assembly, with its brackets and adjustment controls accessible as shown in the instructions. Start every fastener by hand so the threads are not crossed. Do not fully tighten suspension pivot hardware while the suspension hangs unless the service instructions specifically call for that position.
For a front strut, loosely secure the upper mount, align the lower mount with the knuckle, and reconnect the brake-line and ABS-wire brackets. For a separate rear spring and damper, install the spring with its ends seated correctly in the perches and install the damper without twisting its bushings. Follow the supplied diagram for upper-mount orientation; reversing a camber plate or offset mount can create handling and clearance problems.
Reconnect sway-bar links and any sensor brackets. Make sure the brake hose has a natural curve with the steering turned in both directions, and confirm that the ABS wire is clipped away from the spring, tire, and moving joints. The assembly should fit without prying, hammering, or forcing a misaligned bolt through its hole.
Step 8 Set the initial ride height and secure the adjustment collars
Measure the new hub-to-fender height with the vehicle still supported if the instructions provide a useful baseline, but remember that the final measurement must be taken with the vehicle on the ground. Adjust both sides of an axle equally as a starting point. Keep enough clearance for the tire, wheel, brake line, and suspension movement rather than choosing height by appearance alone.
After the height is set, tighten the lock collars against the correct surfaces using the supplied spanners and the manufacturer’s method. Do not assume that a collar is secure because it feels tight by hand. Confirm that the spring perch and lower mount are not moving relative to the threaded body, and record the number of exposed threads or the measured height so the opposite side can be matched.
A useful way to approach how to install rev9 coilovers is to check your progress after each stage.
Do not use the ride-height adjustment to compensate for a sagging or incorrectly seated spring. If the two sides differ substantially after matching the settings, inspect the spring seats, mounts, bushings, and installation orientation before making further adjustments.
Step 9 Tighten the suspension hardware at the correct position
Snug the fasteners first, then use the vehicle service manual or Rev9 instructions for final torque values. Torque values are not interchangeable between vehicles, and the largest-looking bolt is not automatically the one that receives the highest torque. Replace one-time-use nuts or bolts when the service information requires it.
Rubber-bushed suspension pivots generally need to be tightened at normal ride height so the bushing is not twisted through its operating range. If the vehicle uses spherical bearings or a different mounting design, follow its specific instructions instead. Use a calibrated torque wrench for final tightening and mark completed fasteners with a paint marker if that helps prevent omissions.
Recheck every connection at the corner before moving on: upper mount, lower mount, sway-bar link, brake-hose bracket, ABS-wire clips, spring collars, and any sensor linkage. Repeat the installation on the other side, using the completed side as a reference but not as a substitute for reading the instructions.
Step 10 Reinstall the wheels and lower the vehicle carefully
Clean the wheel mounting surfaces and install the wheels by hand-starting the lug nuts. Lower the vehicle until the tires just touch the ground, then torque the lug nuts in the vehicle’s specified pattern and to its specified value. Lower it fully and remove the jack stands only after confirming that the vehicle is stable.
Roll the car forward and backward a short distance or bounce each corner gently to let the suspension settle. Do not use aggressive bouncing or stand beside a vehicle with a loose component. Measure hub-to-fender height again on level ground and compare left to right and front to rear.
A small difference can come from the surface, steering position, or the suspension settling. A persistent or large difference, a spring that is not seated, or a wheel that sits visibly out of position requires inspection before driving.
Step 11 Check steering, clearance, and damper adjustments before the first drive
Turn the steering fully from lock to lock while watching the tire, spring, damper body, brake hose, ABS wire, and inner fender. Check the same areas with the suspension loaded and, where safely possible, with the wheel hanging. Inspect the rear suspension for tire-to-spring or tire-to-body clearance as well.
Confirm that every damper adjuster can be reached and that its setting is the same side to side. Start at the recommended baseline rather than immediately choosing the stiffest setting. A damper setting changes how quickly the suspension moves; it does not replace correct spring preload, ride height, alignment, or safe clearance.
Before driving, compare the steering wheel position, brake-pedal feel, and visual wheel alignment with their original condition. The steering may be off-center because toe changed during the installation, which is why the car should go directly to an alignment appointment rather than being used for extended driving.
Step 12 Perform a cautious initial drive and arrange alignment
Drive only far enough to evaluate basic operation on a quiet road. Use gentle steering, braking, and acceleration, and listen for clunks, scraping, spring movement, or repeated knocking. Stop immediately if the vehicle pulls sharply, the steering binds, a wheel rubs, a brake hose stretches, or any fastener appears loose.
After this short check, return to a level surface and inspect all four corners again. Look for fresh contact marks, shifted collars, leaking damper fluid, loose wiring clips, or hardware that has backed out. Do not treat the absence of noise as proof that the installation is correct.
Have a qualified shop perform a four-wheel alignment as soon as practical. Coilover installation commonly changes toe and camber, and some vehicles need adjustable arms or camber plates to bring the angles into an appropriate range. Ask for a printout and keep it with your installation notes.
What the coilover adjustments actually change
Understanding the adjustment points prevents one of the most common beginner errors: using one collar for every purpose. Rev9 designs vary, but the terms below describe the functions you will usually encounter. Always identify the actual adjustment surfaces on your kit before turning anything.
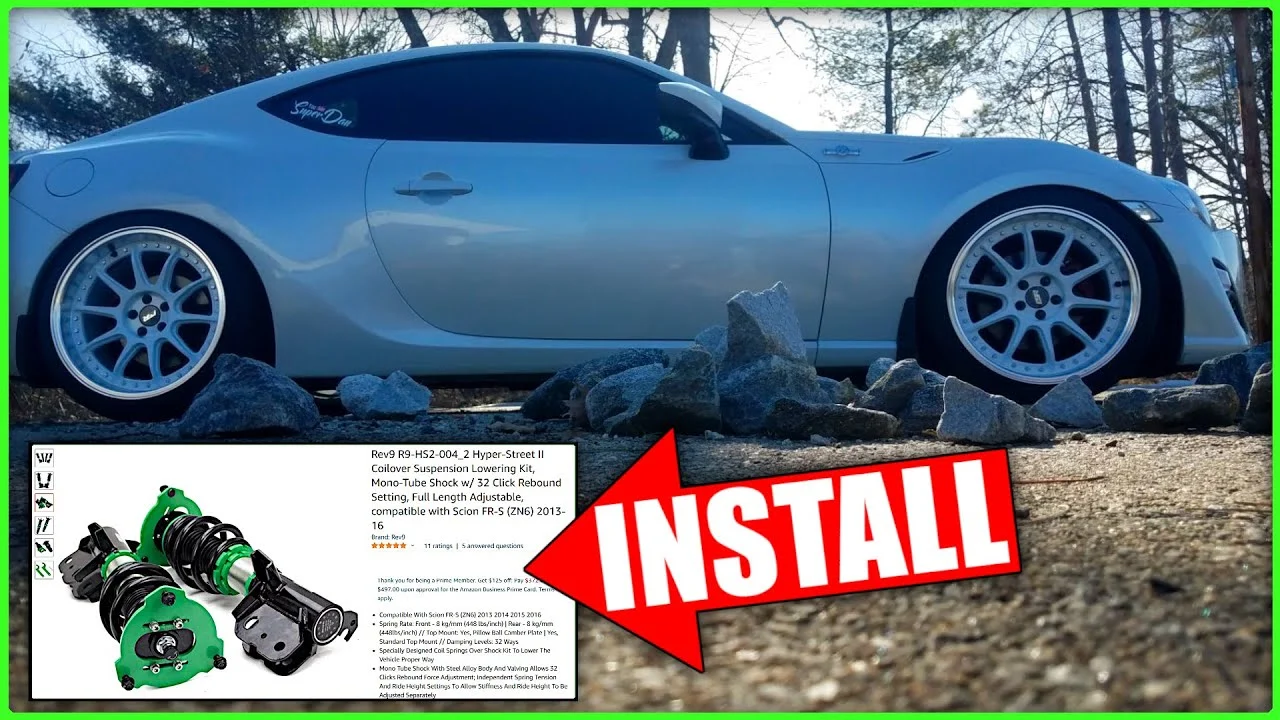
Spring preload is not the same as ride height
Spring preload is the amount a spring is compressed when the suspension is at full droop or before the vehicle’s weight is applied. Changing preload can alter how firmly the spring remains seated and may affect available travel, but it is not a universal ride-height control.
Many height-adjustable coilovers change ride height by changing the distance between the lower mount and the shock body. This allows the spring relationship to remain closer to the intended setting. If you lower the car by simply backing off the spring perch, you may create a loose spring or reduce bump travel.
Ride height affects alignment and suspension travel
Lowering a vehicle changes control-arm angles, toe, camber, roll-center position, and the amount of bump and droop travel available. A car that looks level in the driveway can still hit its bump stops, rub a tire during steering, or behave unpredictably over a dip.
Set the height conservatively at first. After alignment and normal driving, you can make small, equal adjustments and repeat the clearance, torque, and alignment checks. Each height change can alter alignment enough to justify another measurement.
Damper adjustment controls motion, not load capacity
If your Rev9 coilovers have adjustable dampers, the clicks or positions change damping force. They do not increase the vehicle’s payload rating, correct a worn bushing, or make an excessively low setting safe. A very stiff setting can reduce grip on rough roads because the tire may not follow the surface effectively.
Keep left and right settings equal unless a documented tuning reason calls for a difference. Record the baseline so you can return to it after testing. Make one change at a time and evaluate it on the same type of road.
How to verify the installation before regular driving
Verification is part of how to install Rev9 coilovers, not an optional finishing step. The suspension can appear complete while a brake-line bracket is rubbing, a collar is moving, or a bushing is tightened in the wrong position. Use an observable checklist before treating the car as finished.

- All upper and lower mounting fasteners are tightened to vehicle-specific specifications.
- Spring ends are seated in their perches, and the springs remain properly retained at full droop.
- Brake hoses and ABS wires do not touch the tire, spring, damper, or sharp brackets at either steering lock.
- Sway-bar links and sensor brackets are connected and not preloaded by an incorrect orientation.
- There is no tire, wheel, brake, or body contact through steering and suspension movement.
- Left and right ride-height settings are recorded and reasonably matched.
- Lug nuts are torqued correctly after the wheels are installed.
- The vehicle has a professional alignment report showing the final toe and camber values.
Check your result
After the first short drive, recheck the wheel torque and inspect the lock collars, mounting bolts, brake-line routing, and tire sidewalls. Repeat the inspection after several normal drives, especially if the suspension settles or you change the ride height.
Common problems after coilover installation
Most post-installation issues have a mechanical cause that can be found by returning to the corner where the symptom occurs. Avoid turning adjustment collars randomly before checking seating, torque, clearance, and alignment.
| What you notice | Likely areas to inspect |
|---|---|
| Clunk over bumps | Loose upper or lower mount, sway-bar link, collar, or incorrectly seated spring |
| Pulling or crooked steering wheel | Changed toe or camber; schedule an alignment and inspect for a bent or loose component |
| Scraping or rubbing | Tire clearance, brake hose, ABS wire, spring position, wheel offset, and ride height |
| One corner sits higher | Unequal adjustment, unseated spring, different preload, worn bushing, or uneven surface |
| Harsh or bouncy ride | Incorrect damper setting, insufficient travel, excessive lowering, or an installation problem |
Stop when a fastener or mount will not seat normally
A bolt that requires heavy prying, a mount that does not align, or a coilover that seems to fit only after bending a bracket is not a normal adjustment issue. Stop and verify the part number, installation orientation, and vehicle application. Continuing can place side loads on the suspension or damage threads.
Do not diagnose every noise as a damper setting
Damper clicks do not fix loose hardware or a spring that is moving in its perch. If a noise changes with steering angle, inspect brake hoses, sway-bar links, top mounts, and tire clearance. If it changes with braking, also inspect the brake assembly and wheel mounting surfaces.
Beginner questions about Rev9 coilovers
Can I install Rev9 coilovers without a spring compressor?
Often, the new coilover assembly installs without compressing a factory spring, but some vehicles require transferring a top mount or other component. If that transfer involves a compressed spring, use the exact approved equipment or have a qualified shop perform it. Never improvise with straps, jacks, or clamps.
How low should I set the car after installation?
Start near the manufacturer’s recommended baseline or at a moderate height that preserves suspension travel and tire clearance. The correct height depends on the vehicle, wheel and tire package, road conditions, and intended use. Set appearance second to safe movement and alignment range.
Do I need an alignment after installing coilovers?
Yes. Removing or changing struts and ride height commonly changes toe and camber, even if the wheel appears straight. Drive only as needed for a cautious check, then obtain a professional four-wheel alignment.
Should the spring be loose when the car is lifted?
That depends on the coilover design and the manufacturer’s instructions, but a spring that can fall out or is clearly not retained is unsafe. Check the recommended preload and droop-retention procedure for your exact kit. Do not solve uncertainty by tightening collars until the spring is excessively compressed.
Why is one side higher after the installation?
First confirm that the vehicle is on a level surface and that both sides have matching adjustment measurements. Then inspect spring seating, upper mounts, bushings, and tire pressure. If the difference remains, do not keep driving or chase the measurement with random collar adjustments; find the installation or vehicle problem first.
Finish with measured checks, not just a lower stance
Learning how to install Rev9 coilovers is mainly an exercise in controlled disassembly, correct adjustment, and careful verification. Match the kit to the vehicle, support the car securely, follow the supplied torque and adjustment information, protect brake and ABS components, and preserve useful suspension travel.
Once the car passes the clearance and hardware checks, complete a cautious test drive and schedule a professional alignment. Keep your ride-height measurements, damper settings, torque information, and alignment printout. If a component does not fit naturally, a spring is not properly retained, or the vehicle develops a serious handling or clearance problem, stop and have the installation inspected before driving farther.


