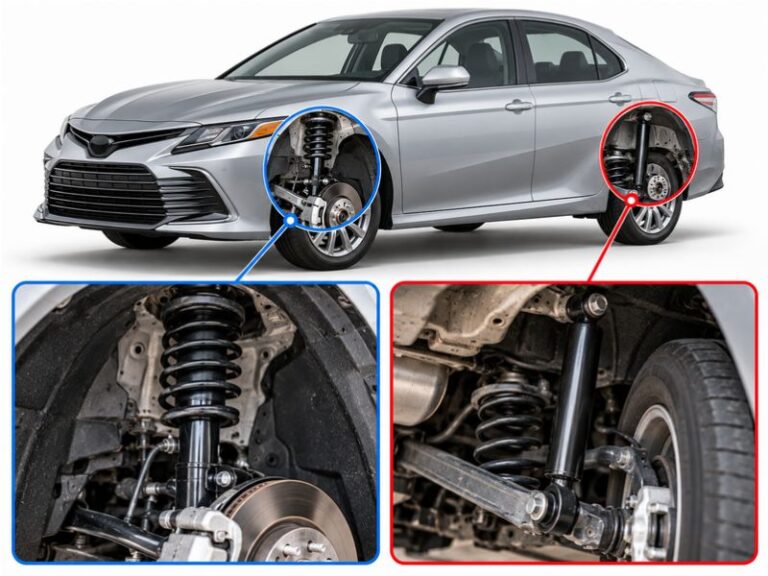
To stop a shock absorber from spinning, hold the shock shaft with the correct counter-hold tool while turning the retaining nut with a suitable wrench. Use the shaft’s built-in hex, Torx, or other specified holding feature when available. Never grip a polished shaft with locking pliers, and never open a pressurized shock absorber.
When replacing shocks on a car, truck, or SUV in the United States, a spinning shaft can turn a simple suspension repair into a frustrating job. You may turn the top nut, only to find that the entire shaft turns with it. This often happens because the nut and shaft are not separating as intended, or because the shaft lacks a secure counter-hold.
The correct fix depends on the suspension design. Some shocks have a small hex socket or Torx feature at the end of the shaft. Others require a pass-through socket, a special holding tool, or a method specified by the vehicle manufacturer. Before applying more force, identify the exact shock design and check the service instructions for your vehicle.
This guide explains how to stop a shock absorber from spinning during removal or installation, which tools can help, and what to do when the nut remains stuck. It also explains the difference between a conventional shock absorber and a strut assembly, because that distinction can affect both the repair method and the risk involved.
A shock absorber shaft may spin because the retaining nut is tight, the shaft has little resistance, or the available tool cannot hold the shaft securely. The nut is threaded onto the shaft, so turning the nut can make the shaft rotate instead of allowing the nut to move along the threads.
This problem is common when removing upper shock mounts, replacing worn shocks, or tightening new hardware. It can also occur when the original shock has corrosion, damaged threads, or a worn internal mechanism. The right approach is to identify the cause rather than simply apply more force.
Some shocks are designed with a holding feature at the end of the shaft. This feature lets a mechanic counter-hold the shaft while turning the nut. Other designs use special sockets or tools that fit around the shaft and engage the nut at the same time.
Source: i.ytimg.com
The shaft turns with the nut
The shaft is not being held firmly enough, or the nut is binding on the threads. Use the specified counter-hold method before trying again.
The nut will not loosen
Corrosion, thread damage, excessive tightening, or a damaged nut may be preventing movement. Confirm the correct tool size and thread direction before applying more force.
The shock turns inside its mount
The mount or bushing may not be secured correctly, or the wrong mounting point may be moving. Inspect the assembly and follow the vehicle’s service procedure.
The shaft spins freely without normal resistance
Internal damage may be present, although shaft movement alone does not prove a shock has failed. Check for leaks, unusual noise, damaged mounts, and other signs before deciding what to replace.
Identify the Part Before Applying Force
A conventional shock absorber often has a separate mounting arrangement, while a MacPherson strut forms part of the suspension structure and may support the coil spring. Both can have threaded shafts, but their removal and safety requirements are not interchangeable.
If the shock is attached to a coil spring or integrated into a strut assembly, determine whether the spring remains under tension. Do not remove a central retaining nut that holds a compressed spring assembly together unless the manufacturer specifically directs that procedure and you have the required equipment.
Conventional shock
Follow the vehicle-specific instructions for its upper and lower mounting hardware.
Complete strut assembly
Check whether the spring is part of the assembly and whether a complete replacement unit can avoid disassembling the compressed spring.
Tools You Need to Stop a Shock Absorber From Spinning
The most useful tool is one that matches the shock shaft’s holding feature while leaving enough access to the retaining nut. Check the service manual or shock manufacturer’s instructions before choosing a tool. A tool that fits a different shock design may slip, round off the holding feature, or damage the shaft.
You may need a combination wrench, a correctly sized socket, a pass-through socket set, a hex key, a Torx bit, or a dedicated shock absorber nut tool. Some assemblies need a special holding socket that fits around the shaft. Use tools that fully engage their intended surfaces rather than forcing an undersized tool into place.
A torque wrench is useful during installation because the correct final torque depends on the vehicle and hardware. Do not guess the torque value or assume that every shock uses the same nut specification.
Source: mail.freeasestudyguides.com
Correct counter-hold tool
Engages the shaft’s built-in hex, Torx, or other specified holding feature to prevent rotation.
Pass-through socket or shock nut tool
Allows the nut to turn while the holding tool remains engaged with the shaft on compatible designs.
Penetrating oil
May help loosen corrosion on an exposed threaded joint when compatible with nearby rubber, plastic, and other components. Follow the product label and keep it away from brakes.
Vehicle support equipment
A floor jack and correctly rated jack stands can support the vehicle at approved lift points. Wheel chocks help prevent unintended movement.
Safety equipment
Wear eye protection and suitable work gloves. Keep hands clear of pinch points and never work beneath a vehicle supported only by a jack.
Why a Pass-Through Socket Can Help
A pass-through socket has an opening through its center. On compatible shock designs, this opening gives the shaft-holding tool room to reach the shaft while the socket turns the nut. This allows two tools to work together without one blocking the other.
The socket must fit the retaining nut, and the holding tool must match the shaft feature. If either tool does not seat fully, stop and obtain the correct size. Do not improvise with loose adapters or tools that can slip under load.
Before turning
Confirm that the socket is seated on the nut and the holding tool is fully engaged with the shaft.
During turning
Hold the shaft steady while applying controlled force to the nut in the direction specified for removal.
Step-by-Step: How to Stop a Shock Absorber From Spinning
The basic method is to secure the vehicle, expose the correct mounting hardware, identify the shaft-holding feature, and use a counter-hold tool while turning the nut. The exact order may differ by vehicle, so use the factory service procedure whenever it is available.
Do not begin by removing the central nut on a loaded strut assembly. First determine whether that nut retains a compressed coil spring. If it does, the assembly must be handled according to the manufacturer’s spring and strut procedure.
Source: merityre.co.uk
Step 1: Park and secure the vehicle
Park on a firm, level surface, select Park or a suitable gear, apply the parking brake, and chock the wheels that remain on the ground. Let hot components cool before working.
Step 2: Raise and support the vehicle if needed
Use approved lift points and correctly rated jack stands. Never rely on a hydraulic jack alone. Follow the vehicle manual for lifting and wheel removal.
Step 3: Identify the retaining nut
Locate the shock’s mounting hardware and determine whether the nut is a separate mount fastener or part of a spring-loaded strut assembly. Do not proceed if you cannot confirm its function.
Step 4: Inspect the shaft end
Look for a hex socket, Torx recess, flats, or another designed holding feature. Clean dirt from the feature so the tool can seat fully.
Step 5: Fit the counter-hold tool
Insert the correct hex key, Torx bit, or specified holding tool. Keep it aligned with the shaft so it does not slip or damage the feature.
Step 6: Turn the nut with a matching tool
Use the specified socket, wrench, or pass-through tool to turn the nut while holding the shaft stationary. Apply smooth, controlled force rather than sudden jerks.
Step 7: Reassess if the shaft still turns
Stop and check the tool fit, shaft-holding feature, nut condition, and mounting arrangement. If the holding feature is rounded or the threads are damaged, do not keep forcing it.
Step 8: Reinstall using the specified procedure
If replacing the shock, use the correct replacement hardware and tighten fasteners to the vehicle manufacturer’s specifications. Follow any specified suspension loading or ride-height procedure.
How to Know the Method Is Working
The shaft should remain stationary relative to the nut while the nut turns along the threads. You should be able to see a change in the nut’s position rather than the entire shaft rotating with it.
During installation, the shaft should remain controlled while the nut tightens. A smooth change in nut position is a better sign of progress than the amount of force you can apply. If the nut binds, the threads appear damaged, or the shaft-holding tool slips, stop and inspect the assembly.
Successful removal
The nut moves along the threads while the shaft remains controlled, with no visible damage to the holding feature.
Successful installation
The nut reaches the specified seating position and final torque without damaging the shaft, mount, or threads.
What to Do if the Shock Absorber Shaft Still Spins
If the shaft continues to spin, do not keep increasing force without checking why. A worn holding feature, incorrect tool, seized nut, or internal shaft problem may prevent normal removal. Each cause needs a different response.
Start with the least invasive checks. Confirm the tool size, inspect the shaft end, and verify that the nut is not being held by a locking feature or unusual design. If corrosion is visible, a compatible penetrating product may help, but it will not repair damaged threads or a rounded shaft feature.
Source: afx2462ae66.networkreach.com
Check for a slipping tool
Remove the tool and inspect its fit. A loose or shallow fit can slip and round the shaft feature. Use the exact size and type specified for the shock.
Check for corrosion
Look for rust around the nut and exposed threads. Apply a suitable penetrating product only where appropriate, allow the label-specified time, and protect rubber parts and brake components.
Check the mounting arrangement
Make sure the shock body or mount is not moving because another fastener is loose. Do not grip the polished shaft to compensate for a loose mount.
Check for damaged threads
If the nut binds, the threads look flattened, or metal fragments appear, stop. Damaged hardware may need replacement, and forcing the nut can make removal harder.
Seek professional removal when needed
A rounded shaft feature, severely seized nut, damaged mount, or uncertain spring-loaded assembly is a good reason to use a qualified suspension technician.
Can You Use an Impact Wrench?
An impact wrench can loosen some fasteners, but it is not a universal solution for a spinning shock shaft. The impacts may rotate the shaft, damage the holding feature, or place unwanted stress on the mount. Some manufacturers prohibit impact tools on particular shock nuts or shaft designs.
Use an impact tool only if the service instructions permit it and the assembly is properly supported. If the shaft requires a counter-hold, use the specified holding method. Do not use an impact wrench to compensate for a missing or poorly fitting tool.
When it may be suitable
The manufacturer permits impact use, the fastener and tool are compatible, and the assembly is secured according to the service procedure.
When to avoid it
The shaft is unrestrained, the holding feature is damaged, the fastener is part of a spring-loaded strut, or the service instructions prohibit impact use.
Should You Use Locking Pliers on the Shaft?
No. Locking pliers can leave deep marks on the polished shaft surface. That surface moves through a seal, and scratches or dents can damage the seal and allow hydraulic fluid to leak. Damage may also shorten the shock’s service life.
If the shaft has no visible holding feature, check the shock manufacturer’s instructions for the correct tool. If the shock is being discarded, a manufacturer-approved removal method may differ from the method used when the shock must remain serviceable. Do not assume that cutting, crushing, or clamping the shaft is safe.
Avoid shaft damage
Use only designated holding features or approved tools that do not mark the working surface.
Replace damaged parts
If the polished shaft is scratched, bent, or deeply scored, have the shock assessed and replace it if required by the manufacturer.
How to Stop a Shock Absorber From Spinning During Installation
During installation, the shaft may spin as you tighten the upper retaining nut. Use the same basic principle as removal: hold the shaft at its designated feature and turn the nut with the correct tool. Follow the specified tightening sequence and torque value for your vehicle and shock model.
Do not use a universal torque value. Shock mounting hardware varies by vehicle, shaft diameter, thread type, mount design, and manufacturer. The correct value may also depend on whether the fastener is new or reusable and whether the suspension must be at normal ride height during tightening.
If the nut reaches resistance early, do not assume it is fully tight. Misaligned threads, an incorrect nut, a damaged mount, or an unsuitable replacement part may cause binding. Remove the load if the service procedure permits, inspect the components, and correct the problem before proceeding.
Source: i.ytimg.com
Use the correct replacement hardware
Check the supplied nut, washer, spacer, and mount against the parts and instructions for the exact vehicle and shock.
Start the nut by hand when accessible
Hand-starting the nut helps reduce the risk of cross-threading. If it will not turn smoothly, stop and inspect the threads.
Keep the shaft controlled
Engage the correct shaft-holding tool and use a matching wrench or pass-through socket on the nut.
Apply the specified torque
Use a calibrated torque wrench and the manufacturer’s procedure. Replace single-use fasteners when required.
Check the final assembly
Verify that the mount, washers, bushings, and fasteners are installed in the correct order and that no component is pinched or misaligned.
Why the Shaft May Spin Even With a New Shock
A new shock can spin during installation because its internal design allows the shaft to rotate freely when it is not restrained. This behavior does not automatically mean the new part is defective. The shaft may simply need to be held with the designated tool while the nut is tightened.
If the correct counter-hold method does not work, confirm that the part matches the vehicle and that the nut and threads are correct. Never assume a new part can tolerate a damaged tool, excessive torque, or an improvised clamping method.
Normal shaft rotation
Some designs allow rotation when the shaft is not held. Use the prescribed counter-hold method.
Possible fitment problem
Incorrect threads, incompatible hardware, or a mismatched shock can prevent proper tightening.
Common Mistakes That Can Damage a Shock Absorber
Most avoidable damage happens when a spinning shaft is treated as a problem that requires more force. The safer approach is to identify the shaft design, select the right tools, and stop when the hardware no longer behaves as expected.
Shock absorbers contain moving internal parts and may contain pressurized gas. A strut assembly may also hold a coil spring under substantial stored energy. Neither should be opened or disassembled casually to gain access to a spinning shaft.
Source: vasionmart.com
Gripping the polished shaft
Pliers, pipe wrenches, and similar tools can score the shaft and damage its seal. Use a designated holding feature instead.
Applying excessive force
Long extensions and sudden jerks can damage threads, mounts, or tools. Use controlled force and the specified tool.
Heating the retaining nut without guidance
Heat can damage seals, bushings, coatings, and nearby parts. Do not heat a shock or strut assembly unless the manufacturer explicitly provides a safe, applicable procedure.
Using an unapproved impact tool
Impacts may damage the shaft or violate the manufacturer’s procedure. Check the service instructions first.
Removing the wrong nut
The central nut on some strut assemblies retains the spring-loaded assembly. Removing it without the correct equipment can release stored spring energy.
Reusing damaged hardware
A rounded nut, damaged thread, bent washer, or cracked mount may not secure the suspension correctly. Replace parts as required by the manufacturer.
When Professional Help Is the Safer Choice
Stop the repair if the spring remains compressed, the retaining nut’s function is uncertain, the shaft-holding feature has rounded off, or the mount begins to deform. These conditions can turn a routine fastener job into a high-risk suspension repair.
A qualified technician can identify the assembly, use the proper counter-hold or extraction tools, and check whether the shock, mount, and fasteners need replacement. This is especially useful when corrosion or prior repairs have damaged the original hardware.
Compressed coil spring
Use the correct service equipment and procedure, or have a suspension professional handle the assembly.
Severely seized fastener
Avoid repeated force that may break the shaft or damage surrounding parts.
Damaged suspension mount
Inspect and repair the mount before putting the vehicle back into service.
Troubleshooting Guide: Match the Symptom to the Fix
Use the following table to narrow down the likely cause before selecting a repair method. These are troubleshooting possibilities, not proof of a specific fault. The vehicle’s service manual and the shock manufacturer’s instructions take priority.
Source: i.ytimg.com
Shaft and nut spin together
Likely issue: no effective counter-hold. Next action: identify the shaft feature and use the correct holding tool with a matching nut wrench.
Counter-hold tool slips
Likely issue: wrong size, poor alignment, or a damaged holding feature. Next action: stop, inspect, and use the specified tool.
Nut will not turn despite a secure shaft
Likely issue: corrosion, damaged threads, or an incorrect removal method. Next action: confirm the thread direction and fastener design, then use an approved method.
Shock body moves in its mount
Likely issue: the mount or another fastener is loose. Next action: support the assembly and inspect the mounting points using the service procedure.
Nut tightens but the assembly remains loose
Likely issue: missing or misplaced hardware, incorrect fitment, damaged threads, or a failed mount. Next action: disassemble only as permitted and check the component order.
Oil leaks after the shaft was clamped
Likely issue: shaft or seal damage. Next action: have the shock inspected and replace it if necessary; do not continue driving with a potentially damaged suspension component.
How to Decide Whether the Shock Needs Replacement
A spinning shaft by itself is not enough to determine that a shock absorber has failed. Some shafts rotate normally when they are not held, while others may spin because of a tool or fastener problem. Consider the shock’s overall condition and the manufacturer’s diagnostic guidance.
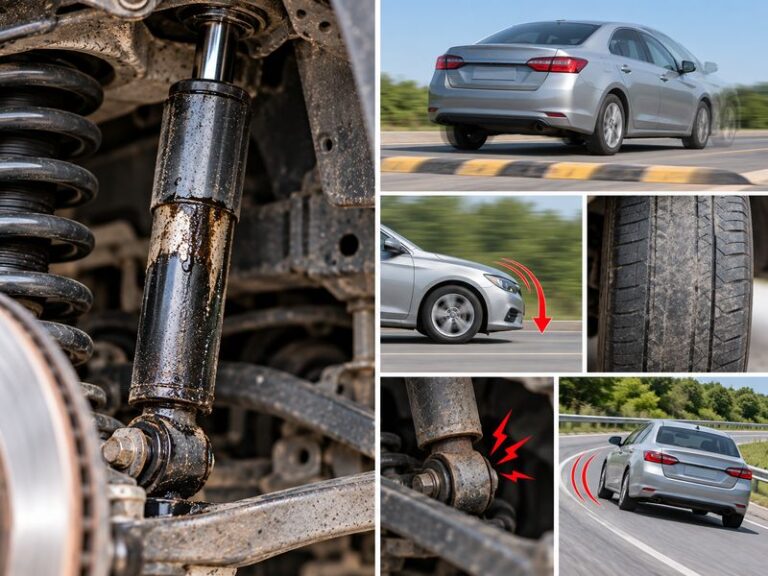
Visible hydraulic fluid leakage, a bent shaft, damaged threads, a broken mount, or a shock that no longer controls suspension movement may indicate that replacement is needed. A light film of residue may have a different meaning from active fluid leakage, so use the manufacturer’s inspection criteria rather than judging by appearance alone.
Inspect for fluid leakage
Look for clear evidence of a leak and compare it with the manufacturer’s inspection guidance.
Inspect the shaft and threads
Check for bends, deep scratches, rounded holding features, and damaged threads.
Check mounts and bushings
Look for cracks, separation, excessive movement, and missing hardware.
Assess vehicle behavior
Excessive bouncing, unstable handling, unusual suspension noise, or uneven tire wear warrants further inspection.
Research Notes and Next-Question Gap Map
The central reader need is to prevent the shaft from rotating while a shock absorber retaining nut is loosened or tightened. The most useful supporting questions concern tool selection, seized hardware, installation torque, shaft damage, and the danger of spring-loaded assemblies.
The supplied image list identifies a directly relevant video thumbnail about a spinning shock absorber lock nut, along with general shock replacement images. The other images are illustrative references rather than verified repair instructions. No hands-on repair test is claimed in this article.
A live review of three to five competing pages and their current search results was not completed for this draft. Therefore, no current search positions, verified People Also Ask questions, measured search demand, or claims of competitor-wide omissions are presented as established facts. The gap map below separates inferred next needs from questions supported by the supplied topic and image descriptions.
How do I hold a shock shaft while loosening the nut?
Reader stage: active repair. Basis: directly inferred from the primary task and the supplied image description about a spinning lock nut. Competitor coverage: not checked. Priority: high. Placement: tool selection and step-by-step instructions.
Can I use locking pliers on a shock absorber shaft?
Reader stage: troubleshooting. Basis: inferred from the need to stop shaft rotation. Competitor coverage: not checked. Priority: high because shaft damage can lead to leakage. Placement: common mistakes and safety.
What if the shock nut is seized?
Reader stage: failed removal. Basis: inferred from the primary task. Competitor coverage: not checked. Priority: high. Placement: troubleshooting and professional-help guidance.
How tight should the shock absorber nut be?
Reader stage: installation. Basis: inferred from the need to reinstall the fastener correctly. Competitor coverage: not checked. Priority: high. Placement: installation steps and torque guidance.
Does a spinning shaft mean the shock is bad?
Reader stage: repair decision. Basis: inferred from the uncertainty between normal shaft rotation and component failure. Competitor coverage: not checked. Priority: medium. Placement: replacement decision.
Frequently Asked Questions
Q
Why does my shock absorber spin when I try to remove the nut?
The shaft may be turning because it is not being held, the nut is binding, or the shock design allows the shaft to rotate freely. Find the shaft’s specified holding feature and use the correct counter-hold tool while turning the nut. If the tool slips or the shaft feature is damaged, stop and reassess.
Q
Can I stop a spinning shock absorber with locking pliers?
Do not clamp locking pliers onto the polished working surface of the shaft. The jaws can scratch or dent it, which may damage the seal and cause a leak. Use the designated shaft-holding feature or an approved tool that fits the shock design.
Q
Will an impact wrench stop a shock absorber shaft from spinning?
Not reliably. An impact wrench may rotate the shaft or damage the nut, threads, or holding feature. Use one only when the vehicle or shock manufacturer’s procedure permits it and the assembly is secured correctly. If a counter-hold is required, use the specified tool.
Q
Can I remove a spinning shock absorber nut without a special tool?
Sometimes a standard wrench and the correct hex key or Torx bit are enough. Other shock designs require a pass-through socket or a dedicated holding tool. If the correct feature cannot be reached safely, obtain the specified tool rather than improvising with pliers or an unsuitable socket.
Q
Does a shock absorber shaft spinning mean the shock is damaged?
No. Some shafts can rotate when they are not restrained, so rotation alone does not prove failure. Look for fluid leaks, bent or scored shafts, damaged threads, loose mounts, and poor suspension control. Follow the manufacturer’s inspection procedure or have the shock checked by a qualified technician.
Q
Can I open a shock absorber to stop the shaft from spinning?
No. Opening a sealed or pressurized shock absorber is not a safe way to solve a spinning-shaft problem. The unit may contain pressurized gas and hydraulic fluid, and its internal parts are not intended for casual disassembly. Use the approved external holding method or replace the shock as directed by the manufacturer.
✦ Wrapping Up
Conclusion
The reliable way to stop a shock absorber from spinning is to hold the shaft with the correct counter-hold tool while turning the retaining nut. Identify the shock design first, use a properly fitting wrench or pass-through socket, and apply controlled force. The right tool matters more than the amount of force you apply.
If the shaft keeps turning, inspect the holding feature, nut, threads, and mount before trying again. Avoid clamping the polished shaft, applying unapproved heat, or using an impact tool against the manufacturer’s instructions. If the job involves a compressed spring, damaged threads, or a severely seized nut, stop and seek qualified suspension service.
💡 Key Takeaway
Before turning the nut again, identify the shaft’s holding feature, obtain the correct counter-hold tool, and verify that the nut is safe to remove. Follow the exact service instructions and torque specifications for your vehicle.
Eric
Hi, I’m Eric Bennett, the person behind OffRoadTruckAccessories.com.
I created this blog to share my interest in trucks, off-road driving, automotive accessories, and DIY modifications. I enjoy learning how different truck accessories work, testing their usefulness, and understanding whether they are truly worth buying.
Shock absorbers are located near the wheels as part of the suspension system, usually between the vehicle’s body, frame, or subframe and a suspension component such as a control arm, axle, or wheel assembly. However, the exact answer to where are shock absorbers located on a car depends on the suspension design. Some vehicles have…
You should change shock absorbers when they are worn, leaking, damaged, or no longer controlling suspension movement properly. There is no single replacement interval that applies to every vehicle because shock absorber life depends on road conditions, vehicle weight, driving habits, suspension design, and component quality. If you are wondering when to change shock absorbers,…