How to Remove Track Bar Bushings: A Practical Step-by-Step Guide
A worn track bar bushing can make a vehicle feel loose, wander on uneven pavement, or clunk when you brake and accelerate. The track bar, also called a panhard bar on many solid-axle vehicles, locates the axle from side to side. When its bushing deteriorates, the axle can shift slightly instead of staying centered under the vehicle.
Learning how to remove track bar bushings is realistic for a careful beginner, but it is not simply a matter of undoing a bolt and pulling out a rubber insert. The bar may be under load, the bushing can be tightly bonded to its sleeve, and the correct replacement depends on the vehicle and the specific end of the bar.
This guide explains how to support the vehicle, unload the suspension, remove the track bar, separate the old bushing without damaging the bar, and inspect the result before installing a replacement. Because designs vary, use the service information for your vehicle’s torque values and removal method, and stop if the bar, mount, or fasteners are damaged.
At a glance
- Support the vehicle by the frame and keep the axle supported separately before loosening the track bar.
- Identify whether the bushing is pressed into the bar, captured by a sleeve, or part of a non-serviceable assembly.
- Verify that the replacement is fully seated and that every fastener is torqued with the suspension at the specified ride height.
How to Remove Track Bar Bushings Safely: The Complete Method
The safest general method is to remove the track bar from the vehicle, place it securely on a workbench, and press or carefully drive the old bushing out. Do not try to force the bushing out while the bar is still attached to a supported vehicle unless the manufacturer specifically describes that procedure.
Tools you will need
- Vehicle jack and properly rated jack stands for lifting and supporting the vehicle
- Wheel chocks to prevent movement
- Socket set, breaker bar, and combination wrenches sized for the track-bar fasteners
- Torque wrench for reinstalling the fasteners to the vehicle specification
- Penetrating oil and a wire brush for corroded threads and exposed hardware
- Ball-joint press, hydraulic press, or suitable bushing-removal adapters for pressing the old bushing out
- Safety glasses, mechanic’s gloves, and hearing protection when using impact or striking tools
- Service information for the vehicle’s torque values and bushing orientation
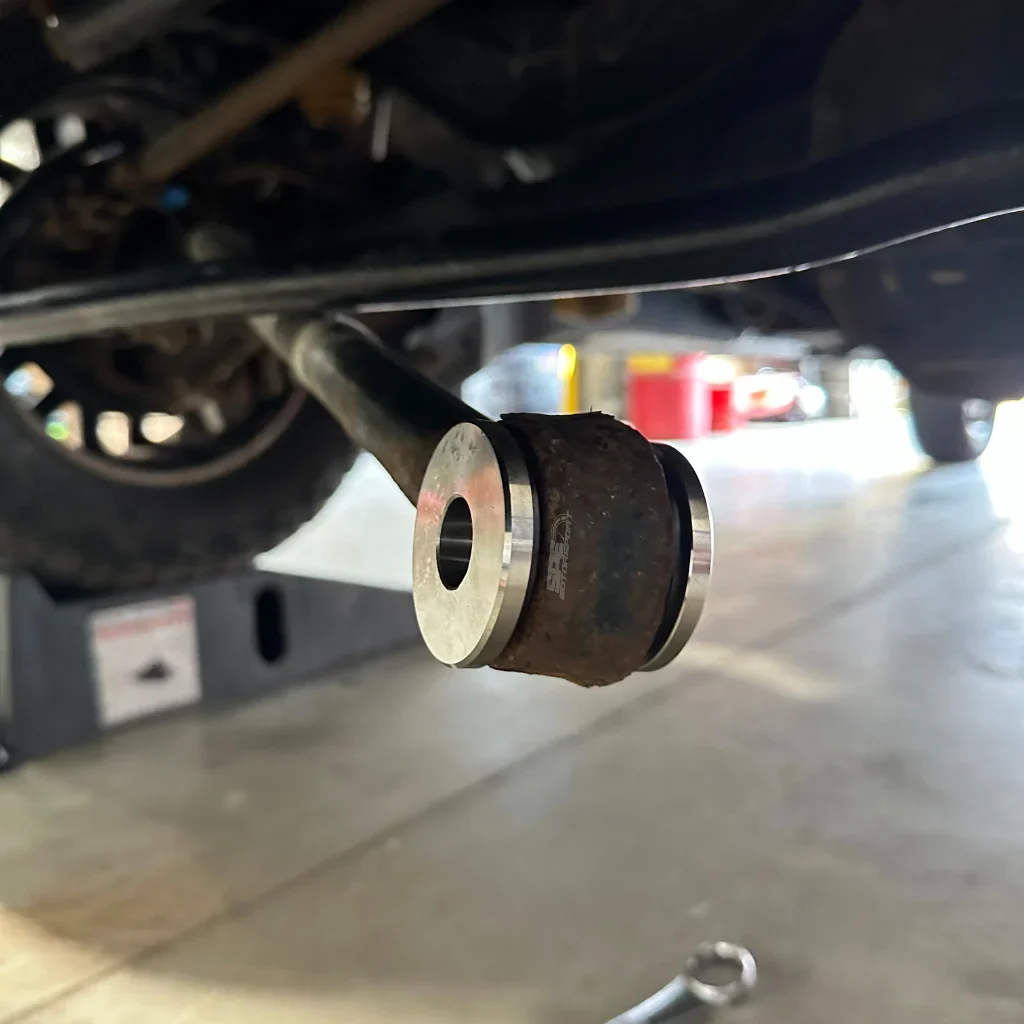
Step 1 Confirm the bushing and replacement are serviceable
Start by identifying which end of the track bar has the worn bushing. Some bars have one rubber bushing and one adjustable joint, while others use bushings at both ends. A few assemblies are designed to be replaced as a complete track bar rather than rebuilt with an individual bushing.
Compare the replacement part with the old assembly before taking anything apart. Check the outside diameter, inner sleeve diameter, width, and overall shape. The rubber or polyurethane compound, sleeve length, and locating lips must match the original design; a bushing that looks similar can still allow unwanted axle movement.
Look for cracks, separation, crushed rubber, or shiny movement marks around the bushing and its mounting sleeve. Also inspect the track-bar bracket for elongated holes or cracks. If the bracket is bent or the bolt hole has become oval, replacing the bushing alone will not correct the problem.
Step 2 Park, secure, and support the vehicle
Park on a firm, level surface, select Park or first gear, set the parking brake, and place wheel chocks at wheels that remain on the ground. Read the vehicle owner’s or service manual for its designated lifting points before raising anything.
Lift the vehicle high enough to work comfortably, then place jack stands under the frame or other approved support points. Lower the vehicle onto the stands and gently test their stability. Keep a separate floor jack under the axle so you can control its position without using the jack as the sole support for your body or the vehicle.
Important
Never work beneath a vehicle supported only by a hydraulic jack. The track bar helps locate the axle, so loosening it can allow the axle to move sideways or change height unexpectedly.
Step 3 Relieve track-bar tension before removing the fasteners
The track bar may be carrying side load even when the vehicle appears stationary. The axle and frame mounting holes can be slightly out of alignment, which is why a bolt may refuse to slide out after the nut is removed.
Use the axle-supporting jack to raise or lower the axle in small increments while watching the track-bar bolt. Your goal is to remove the load from the fastener, not to lift the vehicle off the stands. When the bolt can be pushed or lightly tapped out without force, the axle is in a better position.
Do not strike a highly loaded bolt repeatedly or use the fastener threads as a pry point. If the axle wants to shift substantially, stop and reassess the support arrangement. A helper can watch the alignment while you make small jack adjustments.
Step 4 Remove the track-bar mounting hardware
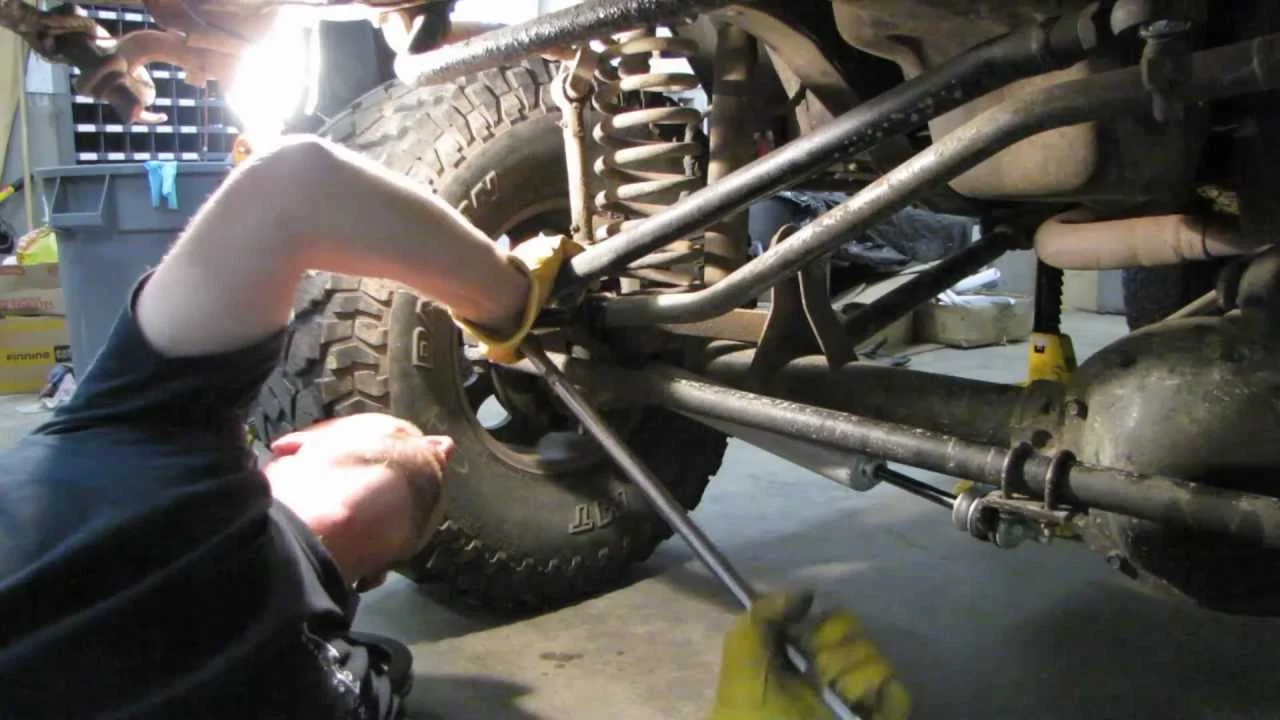
Brush dirt and rust from the exposed threads, then apply penetrating oil if the hardware is corroded. Remove the nut while holding the bolt head or opposite fastener as needed. Keep track of washers, spacers, eccentric plates, and any alignment hardware in their original positions.
With the axle still supported, remove the second mounting fastener and take the bar out of the vehicle. If the bar is adjustable, do not change its length or loosen its jam nuts unless the repair procedure requires it. Marking the existing adjustment can help, but the final axle position should still be checked rather than assumed.
If the bolt will not come out, do not hammer directly on a threaded end until the threads are mushroomed. Thread the nut back on flush with the end for protection, or use a suitable drift after confirming that no wiring, brake line, or bracket is in the striking path.
Step 5 Clean and examine the removed track bar
Place the bar on a stable workbench and clean the bushing area. Remove loose rust and dirt with a wire brush, but avoid removing sound metal from the bar or mounting eye.
Examine the bushing eye for cracks, distortion, and corrosion that has reduced the wall thickness. Check the bar for bends and inspect the mounting sleeve for looseness. A sleeve that has spun inside the rubber, a torn bar eye, or severe corrosion is a reason to replace the bar or seek a qualified suspension repair rather than continue with a bushing-only job.
A useful way to approach how to remove track bar bushings is to check your progress after each stage.
Measure or compare the replacement bushing before pressing. Note its orientation: some bushings have a wider flange on one side, an offset center sleeve, or a specific void pattern that must face a particular direction.
Step 6 Support the bar and press out the old bushing
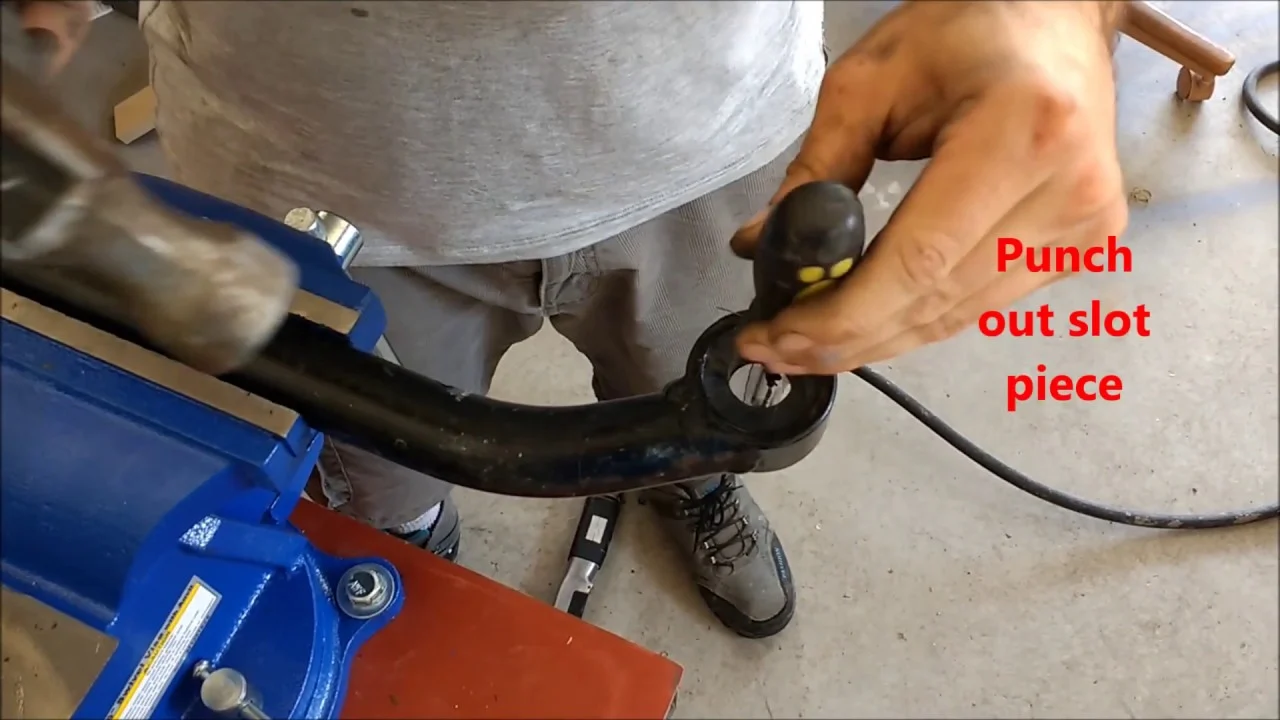
Set the track bar in a press with adapters that support the solid outer portion of the bar around the bushing eye. The receiving adapter must be large enough for the old bushing to pass through, while the pushing adapter should contact the bushing’s outer sleeve rather than the soft rubber alone.
Apply pressure slowly and keep the bar square to the press ram. Watch the bushing, the adapters, and the bar eye continuously. A bushing that begins moving smoothly is a good sign; a bar that tilts, bows, or starts to deform means the setup is wrong and the pressure should be released.
If you do not have a press, a heavy-duty ball-joint or C-frame press may work if its adapters fit the bar. Some rubber bushings can be removed by carefully drilling through the rubber and then cutting the outer shell, but this requires controlling the drill and cutting tool so the bar eye is not scored. Do not heat a rubber bushing until it smokes, and do not burn it out beneath a vehicle.
Helpful tip
Support the component close to the bushing eye. Supporting the far ends of a long track bar can let it flex and can send press force into the bar instead of the stuck bushing.
Step 7 Remove corrosion and prepare the bore
After the old bushing is out, remove rust, rubber residue, and burrs from the bore with a wire brush, scraper, or fine abrasive material. Clean the bore until the replacement can enter evenly. Do not enlarge the opening or grind away the original seating surface.
Inspect the bore in good light. It should be round, continuous, and free of deep grooves. Check that the bar’s outer eye has not spread or cracked during removal.
If the new bushing fits loosely by hand where the original was a press fit, the bar may be damaged or the part may be incorrect.
Step 8 Press in the replacement bushing
Confirm the direction and orientation of the new bushing one more time. If the manufacturer specifies a lubricant, use only that product. Rubber bushings often install dry, while some polyurethane bushings require a supplied grease; petroleum-based grease can damage certain rubber compounds.
Align the bushing squarely with the bore and press on the correct outer edge or installation sleeve. Keep pressure centered and gradual. Do not press against the inner sleeve, because that can displace it or tear the new bushing before the track bar is installed.
Stop when the bushing’s flange or outer sleeve reaches the same position as the original, or when the service information gives a specific depth. The inner sleeve should remain centered and should not be crushed, cocked, or pushed through one side of the rubber.
Step 9 Reinstall the track bar without forcing alignment
Return the track bar to its original position and install the bolts and washers by hand. If the holes do not line up, use the axle-supporting jack to move the axle slightly until the fasteners pass through. Do not pull the bar into alignment by tightening the bolt, because that can preload the bushing and damage the mount.
Leave the fasteners loose enough for the bar to settle until the final tightening stage specified by the manufacturer. Keep the axle supported while you check that the bar is seated fully against both brackets and that no brake hose, ABS wire, or steering component is trapped.
Step 10 Torque the fasteners at the specified suspension position
Use the vehicle service information for the exact torque values and tightening sequence. The correct final position may be normal ride height, with the vehicle on its wheels, or a specified loaded suspension position. Follow that requirement rather than relying on a generic torque chart.
If the vehicle cannot be torqued safely on the ground, use an approved method to place the suspension at ride height while keeping the vehicle securely supported. Tighten with a calibrated torque wrench, and hold the bolt head if the design requires it. Reinstall any locking nuts, cotter pins, or one-time-use hardware called for by the manufacturer.
Understanding how to remove track bar bushings also means recognizing the limits of the method.
After tightening, check that the bushing flange is seated evenly and that the track bar is not contacting the bracket. Remove the axle-supporting jack only after the track bar and all other supports are secure.
Step 11 Lower the vehicle and perform the initial check
Reinstall the wheels if they were removed and tighten the wheel fasteners to the vehicle specification. Carefully remove the stands and lower the vehicle onto level ground. Inspect the track-bar mounts again with the suspension at rest.
Compare the axle’s position to the body and check for an obvious change in centering. Start the engine and turn the steering wheel slightly in both directions while listening for clunks, but do not substitute this for a road test. A properly seated bushing should not visibly walk out of the bar eye or allow the sleeve to shift independently.
What the Track Bar Bushing Does and When It Needs Replacement
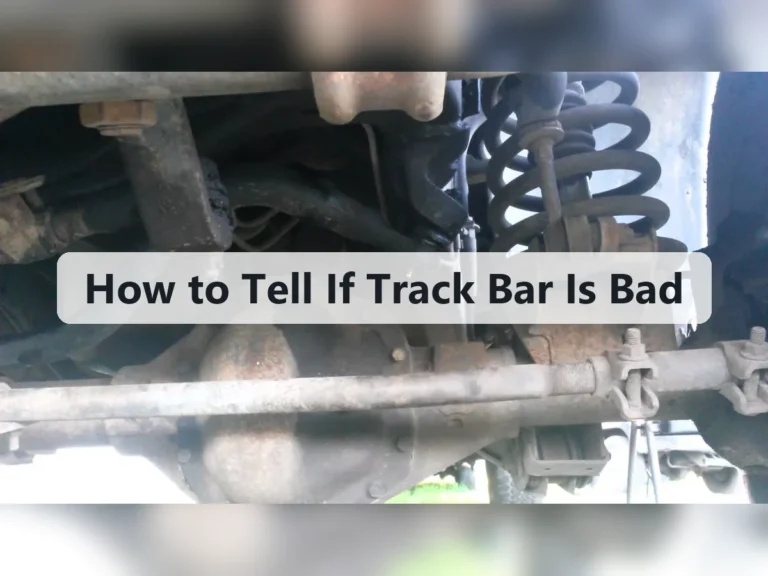
A track bar connects the vehicle body or frame to a solid axle and controls lateral axle movement. Its bushing isolates vibration while allowing the bar to pivot as the suspension moves. It is different from a control-arm bushing in location and function, although both use a flexible material around a sleeve.
Common symptoms include a clunk over bumps, a delayed response when steering, wandering, or a feeling that the vehicle shifts when braking. These symptoms can also come from worn ball joints, tie-rod ends, wheel bearings, loose track-bar bolts, damaged brackets, or an alignment problem. Inspecting the whole suspension is more reliable than diagnosing the bushing from one symptom.
Rubber, polyurethane, and complete replacement bars
Factory rubber bushings generally provide quiet operation and controlled flexibility. Polyurethane replacements can be firmer and may resist some types of wear, but they can transmit more vibration and require the lubricant or maintenance specified by their manufacturer.
A complete replacement track bar may be the better choice when the bar is bent, the bushing eye is damaged, the joint is non-serviceable, or the vehicle has an adjustable bar that needs a fresh joint. Match the part to the axle, suspension configuration, and mounting hardware rather than choosing only by external appearance.
Why the axle must be supported separately
When the frame is supported and the axle hangs, the track bar can sit at an angle that creates tension at its bolts. The axle can also shift as soon as the bar is disconnected. Supporting the axle lets you control that movement and keeps the bar from becoming an unexpected load-bearing component during removal.
How to Check the Repair Before Driving
Verification should cover the part, the hardware, the suspension movement, and the vehicle’s behavior. A new bushing does not prove that the original cause of the noise has been corrected, especially if a mounting bracket or bolt was worn.
- Confirm the replacement bushing is fully seated, centered, and facing the correct direction.
- Check that both mounting bolts, washers, spacers, and locking devices are present.
- Confirm the fasteners were tightened to the vehicle-specific specification at the required suspension height.
- Look for contact between the track bar, bracket, axle, steering linkage, brake lines, and ABS wiring.
- Inspect the bracket holes for movement marks or an oval shape.
- Make sure the wheels are secure and the vehicle sits normally before moving it.
Begin with a slow drive in a safe area. Listen for a single clunk, repeated knocking, or a metal-on-metal sound while turning, braking, and passing over a small uneven surface. Stop and reinspect if the steering feels less stable, the axle appears off-center, or any fastener has moved.
Check your result
After the short test drive, recheck the track-bar mounts visually and verify that the bushing sleeve is still centered. Any fresh witness marks, looseness, or shifting means the repair needs further diagnosis before normal driving.
Troubleshooting Difficult Removal and Installation
Most problems come from suspension load, corrosion, an unsuitable press setup, or an incorrect replacement part. The table below separates the symptom from the safest response.
| What you observe | Likely cause and response |
|---|---|
| The bolt will not slide out | The axle is loading the bolt. Support and reposition the axle in small increments; do not force the fastener with the bar under tension. |
| The bushing will not press out | The adapters may be contacting the wrong surface, or corrosion may be locking the shell in place. Release pressure, realign the setup, and inspect the bar rather than increasing force blindly. |
| The new bushing enters crooked | The bore may have burrs, the bushing may be wrong, or the press is not square. Remove pressure, correct the cause, and do not drive it farther while misaligned. |
| Clunk remains after replacement | Check bolt torque, the track-bar bracket, ball joints, tie-rod ends, shocks, and wheel bearings. The original noise may not have come from the bushing. |
Severely rusted hardware may require heat or specialized extraction, but heat near rubber, wiring, fuel components, and brake parts creates additional hazards. If a fastener is seized in a structural bracket or the bracket begins to deform, a professional repair facility is the safer next choice.
Frequently Asked Questions
Can I replace a track bar bushing without removing the track bar?
Usually, removal is the better method because it provides access and lets you support the bar correctly during pressing. Some vehicle-specific designs allow an on-vehicle replacement, but follow the service procedure rather than assuming every bushing can be changed in place.
Do I need an alignment after replacing a track bar bushing?
A bushing replacement does not always change alignment, but the axle’s position and steering feel can change if the old bushing allowed movement. Have the vehicle inspected or aligned if the steering wheel is no longer centered, the vehicle pulls, or the axle is visibly off-center.
Can I hammer the old bushing out?
You may be able to drive out some bushings with properly sized drifts and a stable setup, but pressing is usually more controlled. Never strike the bar eye directly, and stop if the bushing shell does not move or the bar begins to bend.
Should I replace both track bar bushings at the same time?
Replace both only if both are worn, the manufacturer specifies a matched set, or the other bushing is difficult to access and clearly near the end of its service life. Inspect each end independently because one side may use a serviceable joint rather than a bushing.
What if the new bushing is too tight to install?
First confirm the part number, orientation, bore condition, and required lubricant. A press-fit bushing should require controlled force, but excessive force, crooked entry, or a loose bore indicates a problem that should be corrected before installation continues.
Finish the Repair With a Careful Inspection
Knowing how to remove track bar bushings is only part of a safe suspension repair. The essential work is controlling axle movement, pressing the bushing with the correct support, protecting the bar eye, and using the vehicle’s specified torque and ride-height procedure.
Once the replacement is installed, check the entire track-bar mounting area and take a cautious test drive before returning to normal use. If the bracket is damaged, the fasteners are seized, the bar is bent, or the symptoms remain, stop and have the suspension evaluated rather than repeatedly replacing bushings without finding the underlying fault.