
How to Install Coilover Sleeves Safely: Complete Beginner Guide
Learning how to install coilover sleeves can seem straightforward: remove the original spring perch, slide on a threaded sleeve, and fit an adjustable spring perch. In practice, the sleeve must match the strut or shock body, the spring must remain properly captured, and the finished suspension must have enough travel for safe driving. A mismatch can cause noise, poor handling, or a spring that is not securely retained.
This job is realistic for a careful beginner who can safely support a vehicle and follow a kit manufacturer’s instructions. It is not a universal bolt-on procedure, though. Some kits use a slip-on threaded tube, while others require removing a factory perch, shortening a strut housing, welding a new mount, or using different top hats and dampers.
This guide explains how to confirm compatibility, remove the factory components, install and adjust the sleeves, reassemble the suspension, and verify the result. You will also learn when a professional should take over, how to identify common installation mistakes, and why an alignment is part of the job rather than an optional finishing touch.
At a glance
- Confirm that the sleeves fit your exact strut, shock, spring, and top-hat combination before disassembly.
- Keep the spring captured at full droop and follow the vehicle-specific torque specifications during reassembly.
- Settle the suspension, inspect every corner, and obtain a professional wheel alignment before normal driving.
How to install coilover sleeves safely from inspection to alignment
A coilover sleeve kit changes the way the spring is supported on the damper or strut. The sleeve normally provides a threaded body and an adjustable spring perch, allowing ride height to be changed without cutting the spring. The exact installation depends on the kit, so treat the included instructions and your vehicle service information as controlling documents.
Tools you will need
- Vehicle service manual or reliable torque specification source for fastener values and removal procedures
- Floor jack and properly rated jack stands for supporting the vehicle
- Wheel chocks to prevent movement while the vehicle is raised
- Socket set, ratchet, breaker bar, and combination wrenches matched to the vehicle
- Torque wrench for suspension and wheel fasteners
- Penetrating oil and a wire brush for corroded fasteners and mounting surfaces
- Spring compressor, only if the original strut assembly requires spring removal and the kit instructions permit that method
- Digital caliper or tape measure for comparing damper and sleeve dimensions
- Paint marker or scribe for recording original positions before disassembly
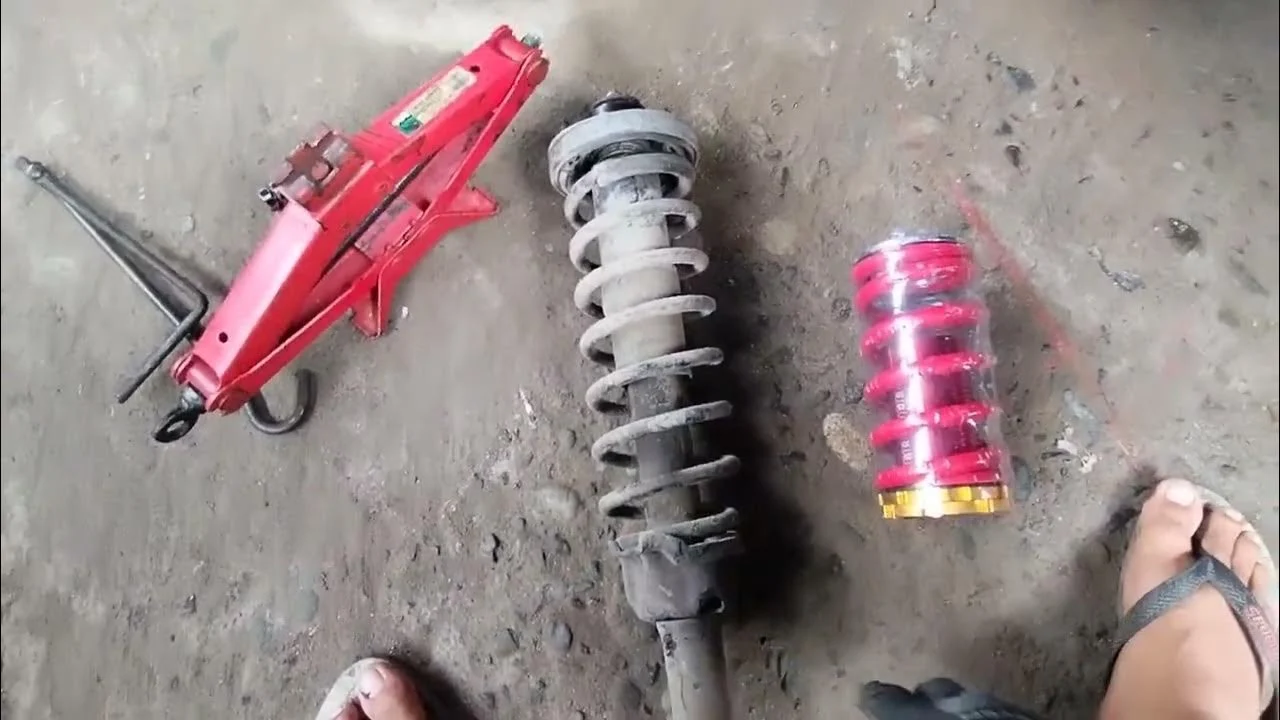
Step 1 Read the kit instructions and verify every component
Before lifting the vehicle, identify which parts the kit replaces and which parts it reuses. Lay out the threaded sleeves, locking collars, spring perches, springs, thrust bearings if supplied, helper springs if supplied, bump stops, spacers, and any replacement hardware. Compare the parts with the kit’s application chart, not merely with the vehicle’s make and model.
Measure or visually confirm the outside diameter and usable length of the strut or shock body where the sleeve will sit. Check whether the kit is designed for the front struts, rear shocks, or both. A sleeve that is close in size but not designed for the application is not an acceptable substitute.
Also check the spring’s inner diameter, free length, and rated load against the kit documentation. The spring must sit squarely on the perch and must not contact the sleeve, tire, brake hose, or nearby suspension arm through its range of motion.
Important
Stop before disassembly if the kit requires welding, cutting, machining, or opening a pressurized damper and you do not have the equipment and experience for that work. A qualified suspension shop is the safer choice for those conversions.
Step 2 Record the original ride height and suspension layout
Park on a level surface with the tires inflated to the vehicle manufacturer’s recommended pressure. Measure from the center of each wheel hub straight upward to a repeatable point on the fender, or use another consistent measurement method specified by the kit manufacturer. Write down all four measurements.
Photograph each suspension assembly before removal. Capture the position of the brake hose bracket, ABS wire, sway-bar link, camber bolt, eccentric washer, and any spacers or washers. Mark adjustable parts only as a reference; the marks will not replace a final alignment.
These records give you a baseline and help prevent reversed parts during reassembly. They also make it easier to detect a corner that sits unusually high or low after the sleeve installation.
Step 3 Raise and support the vehicle securely
Chock the wheels that will remain on the ground, loosen the wheel lug nuts slightly, and use the specified lifting points. Raise the vehicle with a floor jack, then place jack stands under strong, approved support points. Lower the vehicle gently onto the stands and confirm that it is stable before removing the wheels.
Support the suspension or hub as needed with a second jack so that a control arm or knuckle cannot drop suddenly when a strut or shock bolt is removed. Do not rely on the floor jack alone, and do not place any part of your body under a vehicle supported only by a jack.
Remove the wheels and inspect the existing assembly. Look for leaking dampers, bent rods, cracked spring seats, damaged mounts, torn boots, loose sway-bar links, and severe corrosion. Coilover sleeves are not a repair for a failed damper or structurally weakened strut housing.
Step 4 Remove the original strut or shock assembly
Disconnect brackets and links that are attached to the assembly, such as the brake hose bracket or ABS wire guide. Support the knuckle or control arm, then remove the lower mounting bolts and the upper mounting nuts according to the service manual. Leave one upper fastener loosely engaged until the assembly is controlled and ready to come out.
Keep track of the orientation of the upper mount and any eccentric hardware. On some vehicles, the upper mount controls camber or caster, so changing its position can significantly alter alignment. Do not let the assembly hang from a brake hose, ABS wire, or other flexible line.
Rear shock conversions may not involve a complete spring-and-shock unit. If the spring is separate from the damper, support the control arm appropriately and follow the kit’s separate instructions for the spring seat and shock. The general principle remains the same: identify what carries the spring load before removing it.
Step 5 Remove the factory spring perch only as the kit specifies
Clean dirt and rust from the area where the sleeve will sit. Some sleeves slide over an existing cylindrical damper body after a factory spring perch is removed. Others use the existing perch, a supplied adapter, or a clamp arrangement.
Follow the kit instructions exactly rather than assuming every threaded sleeve is installed the same way. A useful way to approach how to install coilover sleeves is to check your progress after each stage.
If the original assembly contains a compressed coil spring, use a properly rated spring compressor designed for that spring and follow its instructions. Position the compressor evenly, tighten it gradually, and confirm that the spring is no longer loading the upper mount before loosening the center nut.
Never remove the upper mount nut from a compressed factory spring without controlling the spring. If the perch is welded and the kit calls for cutting or grinding, protect the damper rod and nearby surfaces, remove only the specified material, and have a professional perform the work if the instructions are unclear or the metal is badly corroded.
Step 6 Fit the sleeve, perch, spring, and upper mount in the correct order
Clean the damper body and test-fit the sleeve without forcing it. The sleeve should sit fully against its intended stop or adapter, remain square to the damper, and not rock excessively. Do not fill a loose fit with random shims, set screws, or welds that the manufacturer did not specify.
Install the locking collar and adjustable spring perch in the order shown by the kit. Thread them by hand first. The threads should turn smoothly without binding or cross-threading.
Set the perch to the manufacturer’s starting position, or use the original ride-height measurement as a cautious baseline when the kit provides no other starting point.
Place the spring on the perch with its end seated against the spring stop. If the kit includes a helper spring or tender spring, install it in the specified position and direction. Refit the upper spring seat, isolator, bearing, top hat, bump stop, dust boot, and retaining hardware in their original or documented order.
At full suspension droop, the spring should remain captured between the upper and lower seats. A small amount of initial looseness can be normal on some kits with helper springs, but a main spring that can fall out is not acceptable. Do not use ride-height adjustment to compensate for an incorrectly assembled or uncaptured spring.
Step 7 Tighten the assembly and reinstall it on the vehicle
Tighten the damper shaft nut and mounting fasteners using the kit and vehicle specifications. The shaft nut often requires a method that prevents the damper rod from spinning, but do not clamp or damage the polished rod. If the kit specifies a new locknut, use it rather than reusing the old one.
Guide the completed assembly into the vehicle without twisting brake hoses or ABS wires. Start every fastener by hand, then tighten the hardware only enough to hold the assembly in place. Reconnect brackets, sway-bar links, and any other components exactly as photographed or shown in the manual.
Many rubber-bushed suspension fasteners should be tightened at normal ride height rather than with the suspension hanging. Check the service manual for this requirement. Tightening a bonded rubber bushing at full droop can preload it and reduce its service life.
Helpful tip
Use a paint marker to place a small witness mark across a tightened fastener and its adjacent surface. The mark is not a substitute for a torque wrench, but it makes a later visual inspection easier.
Step 8 Set an initial ride height and check clearance
Adjust the spring perch evenly so the threaded collars remain engaged by the minimum amount specified by the kit. Keep the adjustment similar from side to side while you establish a conservative starting height. Avoid lowering the vehicle until the tire, wheel, spring, damper, and suspension have been checked through their usable travel.
Reinstall the wheels and tighten the lug nuts in a star pattern to the vehicle specification. Lower the vehicle carefully, roll it forward and backward a short distance, and allow the suspension to settle. Measure the hub-to-fender height again on both sides of each axle.
Turn the steering from lock to lock on the front axle and inspect for contact. Look behind the wheels for interference with the tire, spring, sleeve, brake line, ABS wire, sway-bar link, and inner fender. On the rear, inspect clearance with the suspension at normal height and, where safely possible, with the suspension compressed according to the vehicle or kit procedure.
Step 9 Torque the final hardware and perform a controlled road check
With the vehicle at the required ride position, torque suspension fasteners, wheel lugs, and any adjustable collar hardware to their specified values. Confirm that the locking collars are tight against the perch and that no collar is resting on damaged or contaminated threads.
Before driving normally, push the vehicle down at each corner and listen for spring movement, metal-to-metal contact, or a loose mount. A faint change in suspension noise after assembly deserves inspection; a sharp clunk, binding sensation, steering pull, or visible spring movement means the vehicle should not be driven farther until the cause is found. Understanding how to install coilover sleeves also means recognizing the limits of the method.
Make the first road check at low speed in a safe area. Test gentle braking, steering, and turns, then stop and inspect the assembly again. If the vehicle tracks unevenly, the steering wheel is no longer centered, or the ride height changes noticeably, arrange an inspection rather than continuing to adjust by guesswork.
What coilover sleeves change, and what they do not
Coilover sleeves provide an adjustable spring perch around a compatible damper or strut. Turning the perch changes the spring’s installed position and therefore the vehicle’s ride height. That adjustment is different from changing damping, which controls how quickly the suspension compresses and rebounds.
A sleeve kit does not automatically create a complete motorsport coilover. The original damper may still have fixed damping, limited stroke, or a valving range that is unsuitable for a very short spring. If the car is lowered beyond the damper’s intended operating range, it may ride harshly, bottom out, or lose suspension travel.
Spring rate also matters. A higher-rate spring can support a lower ride height but may make the car less forgiving and can overwhelm an original shock absorber. Use the spring dimensions and rate recommended by the kit maker unless a suspension specialist has calculated a different combination.

Compatibility checks that should happen before buying
Confirm the vehicle year, chassis, trim, drive layout, axle position, and damper type. Then compare the kit’s sleeve diameter, sleeve length, spring inner diameter, spring length, perch style, and upper-mount requirements with the parts on the vehicle.
- Damper body: The sleeve must fit the intended cylindrical section and stop at the correct location.
- Spring dimensions: The spring must seat fully without rubbing the sleeve or nearby components.
- Top mount: The original top hat may be retained, or the kit may require a different mount, bearing, or spacer.
- Suspension travel: The installed height must leave adequate compression and rebound travel.
- Clearance: Wheel and tire width, brake components, and steering movement must all be considered.
If the listing uses vague terms such as “universal sleeve,” ask the manufacturer for the actual dimensions and installation method. A generic part may fit physically while still being unsafe because it lacks a positive stop, adequate thread engagement, or a suitable spring seat.
How to verify the finished installation
Verification is more than checking whether the car sits lower. A correct installation keeps the spring captured, preserves safe clearance, and leaves the suspension and steering geometry within a range that can be aligned.

Use a complete post-installation checklist
- All upper and lower mounting fasteners are installed and torqued.
- Wheel lugs are torqued to the vehicle specification.
- Brake hoses and ABS wires have their original supports and cannot stretch or rub.
- Springs are seated against their stops and remain captured at full droop.
- Locking collars are engaged on clean, undamaged threads.
- Both sides of the same axle have sensible starting adjustments.
- No tire, wheel, spring, sleeve, brake line, or sway-bar component touches during steering movement.
- The steering wheel, ride height, and suspension behavior are checked after a short low-speed drive.
Get the alignment checked before regular driving
Changing ride height changes suspension geometry. Depending on the vehicle, it can alter toe, camber, caster, and thrust angle. Even if the car appears to drive straight, those changes can wear tires quickly or make handling unpredictable.
Have a shop measure alignment after the suspension settles. Tell the technician that the ride height is adjustable and provide the target height or intended use. If the alignment cannot be brought into an acceptable range, the vehicle may need different adjustment hardware, a different height, or a suspension design review.
Check your result
A successful final check shows a captured spring, clear moving parts, equal and intentional ride-height measurements, no leaks or loose hardware, and an alignment report that matches the vehicle’s intended setup.
Troubleshooting common coilover sleeve problems
Most problems come from an incorrect sleeve fit, poor spring seating, insufficient travel, or skipped alignment work. The symptom can point toward the likely cause, but suspension parts should be inspected rather than diagnosed only by sound.
| Symptom | Likely area to inspect |
|---|---|
| Clunk over bumps | Loose top mount, sway-bar link, collar, spring seat, or uncaptured spring |
| One corner sits high or low | Unequal perch adjustment, spring not seated, damaged mount, or different spring position |
| Vehicle pulls or steering wheel is crooked | Alignment change, incorrect mount orientation, tire issue, or bent component |
| Harsh ride or frequent bottoming | Insufficient travel, excessive lowering, incorrect spring rate, or unsuitable damper |
| Visible sleeve movement | Incorrect diameter, missing stop or adapter, damaged threads, or improper kit installation |
When adjustment is not the solution
Do not keep turning the perch to cure a noise, uneven height, or poor handling until the assembly has been inspected. Height adjustment cannot repair a bent strut, leaking shock, broken spring, loose top nut, worn bearing, or incorrect hardware.
Return to the kit instructions if the sleeve does not sit squarely or the spring is loose at full droop. If the instructions conflict with the parts supplied, pause the project and contact the manufacturer or a qualified suspension shop.
Beginner questions about coilover sleeve installation
Can I install coilover sleeves over the factory spring perch?
Only if the kit specifically uses the factory perch or provides an approved adapter. Many sleeves require the original perch to be removed, while others depend on it for support. Never assume the sleeve is safe simply because it slides over the part.
Do I need a spring compressor?
You need a safe spring-removal method whenever the original spring remains compressed by the upper mount. Some assemblies can be handled with a kit-specific procedure, while others require a proper compressor. Follow the service manual and kit instructions; never loosen a loaded upper mount nut casually.
How low should I set the car after installation?
Start at a conservative height that preserves suspension travel, spring capture, and tire clearance. The lowest possible setting is not automatically the best setting. Final height should also leave enough alignment adjustment for the intended use.
Can I use the original shocks with sleeve kits?
Sometimes, but only when the kit is designed for those dampers and the resulting spring rate and travel are appropriate. A factory shock may not control a short or stiff aftermarket spring, especially after substantial lowering.
Why is a wheel alignment necessary?
Changing ride height changes the angles of suspension links and steering components. An alignment measures and corrects toe and other adjustable angles, helping prevent rapid tire wear and restoring predictable handling.
Finish the job with measured checks, not just a lower stance
The safe way to learn how to install coilover sleeves is to treat the work as a complete suspension conversion: verify compatibility, control the spring, fit the sleeve squarely, preserve clearance and travel, torque the hardware, and arrange an alignment. The sleeve itself is only one part of the system.
Before normal driving, confirm that every spring is captured, every moving component clears, and the vehicle behaves consistently on a cautious road check. If the kit calls for fabrication, the sleeve does not fit positively, or any part of the assembly remains uncertain, stop and have a qualified suspension professional inspect it.


