
How to Adjust Coilovers While on Car: Safe Step-by-Step Guide
Learning how to adjust coilovers while on car can save time because you normally do not need to remove the whole suspension assembly. In most setups, you can reach the locking collars, lower mount, or damping adjuster with the coilover still installed. The key is knowing which part of the coilover actually controls the setting you want to change.
The safest method is not to turn adjustment collars while the full weight of the vehicle is sitting on them. Instead, park on level ground, record your starting measurements, loosen the wheel nuts if needed, raise the vehicle, and support it with quality jack stands. This removes most of the load from the suspension and makes the collars much easier to move.
I have found that the biggest setup mistakes often come from chasing a target stance too quickly. A driver may lower one corner several turns, lower another by a different amount, and then wonder why the car sits unevenly. Small changes, careful measurements, and a short settling drive produce far better results.
This guide explains how to adjust coilovers while on car for ride height, preload, and damping. It also covers measuring techniques, common mistakes, safety concerns, alignment, and how to fine-tune the suspension for daily driving.

Can You Adjust Coilovers While They Are on the Car?
Yes. In many vehicles, coilovers are designed so common adjustments can be made without removing them. That includes ride height, damping, and sometimes spring preload.
However, how to adjust coilovers while on car depends on the coilover design. Some units change height through the lower threaded body. Others use the spring perch. A few designs require more disassembly than others.
You should always check the instructions supplied with your coilovers before turning any collar. Two coilovers can look similar yet use different adjustment methods.
The phrase “while on the car” also does not mean the suspension should remain fully loaded. In most cases, the car should be lifted and safely supported before you loosen or rotate adjustment collars.

- ✦ Ride height
Most threaded-body coilovers allow ride-height changes while installed.
- ✦ Damping
Many coilovers use an adjuster knob that can be turned with the vehicle on the ground.
- ✦ Spring preload
Preload may be adjustable while installed, but you should unload the suspension first.
- ✦ Camber
Some front coilovers use adjustable top mounts, but access depends on the vehicle.
Why You Should Unload the Suspension First
A loaded spring puts strong pressure on the adjustment collars. Trying to turn a collar under heavy load can damage the collar, slip the spanner wrench, or injure your hand.
Lifting the car lets the suspension droop. This usually reduces spring pressure and gives you more room to work.
- ✦ Less collar tension
An unloaded suspension makes threaded collars easier to turn.
- ✦ Better access
Removing the wheel gives much more room around the coilover.
- ✦ Safer work
Proper support keeps the car stable while you make the adjustment.
Tools You Need to Adjust Coilovers on the Car
You do not need a large tool collection for most coilover adjustments. The correct spanner wrench and safe lifting equipment are the most important items.
Before starting, clean dirt from the threaded section of each coilover. Sand, road salt, and debris can make the collars hard to move and may damage the threads.
A penetrating lubricant may help with dirty or lightly seized collars, but use products that are safe for your suspension finish. Avoid forcing a collar that will not move.
- ✦ Floor jack
Use a jack rated for the weight of your vehicle.
- ✦ Jack stands
Support the car securely before working near or under it.
- ✦ Wheel chocks
Block the wheels that remain on the ground.
- ✦ Spanner wrench
Use the wrench supplied for your coilover collars whenever possible.
- ✦ Tape measure
Use consistent measurements to compare ride height at each corner.
- ✦ Torque wrench
Retighten wheels and other fasteners to the correct specification.
- ✦ Brush and cleaner
Clean exposed threads before moving the collars.
- ✦ Marker or notebook
Record your starting point and each change you make.
How to Adjust Coilovers While on Car Step by Step
The best way to learn **how to adjust coilovers while on car** is to use a repeatable process. Do not start by turning collars at random.
First decide what you want to change. If the car is too low, you need a ride-height adjustment. If the suspension feels too firm or too soft, you may need a damping change instead.
Work on level ground and make small adjustments. Matching both sides of the same axle helps keep the vehicle balanced.

- ✦ Step 1: Park on a flat surface
Choose solid, level pavement. Set the parking brake and place the transmission in Park or in gear.
- ✦ Step 2: Measure the current height
Measure from the wheel center to the fender edge at all four corners and write down the numbers.
- ✦ Step 3: Chock the wheels
Secure the wheels that will stay on the ground.
- ✦ Step 4: Lift the vehicle
Raise the correct end or corner using approved factory lifting points.
- ✦ Step 5: Install jack stands
Lower the car onto secure stands. Never rely on the hydraulic jack alone.
- ✦ Step 6: Remove the wheel if needed
Wheel removal is not always required, but it usually gives better access.
- ✦ Step 7: Clean the threads
Brush dirt and road debris away from the threaded body.
- ✦ Step 8: Loosen the locking collar
Use the correct spanner wrench and turn only the collar specified by the manufacturer.
- ✦ Step 9: Make a small adjustment
Change the height in small steps and count turns or measure exposed threads.
- ✦ Step 10: Lock the collar
Tighten the locking collar firmly using the method specified by the coilover maker.
- ✦ Step 11: Match the opposite side
Repeat the adjustment on the other side of the same axle.
- ✦ Step 12: Reinstall the wheels
Fit the wheels and hand-tighten the lug nuts.
- ✦ Step 13: Lower the car
Remove the stands and lower the car carefully.
- ✦ Step 14: Torque the wheels
Torque the lug nuts to the vehicle manufacturer’s specification.
- ✦ Step 15: Settle and remeasure
Roll or drive the car a short distance, then measure all four corners again.
How Much Should You Adjust at One Time?
Small changes are easier to control. If you are learning **how to adjust coilovers while on car**, avoid making a large height change on the first attempt.
A few millimeters can change wheel gap, suspension travel, alignment, and clearance. Make one change, settle the car, measure it, and then decide whether you need more.
- ✦ Use small steps
Small adjustments make it easier to correct an uneven stance.
- ✦ Count turns
Counting collar or body rotations helps repeat the same change on both sides.
- ✦ Measure again
Never assume equal turns will always produce exactly equal fender height.
How to Adjust Coilover Ride Height While Installed
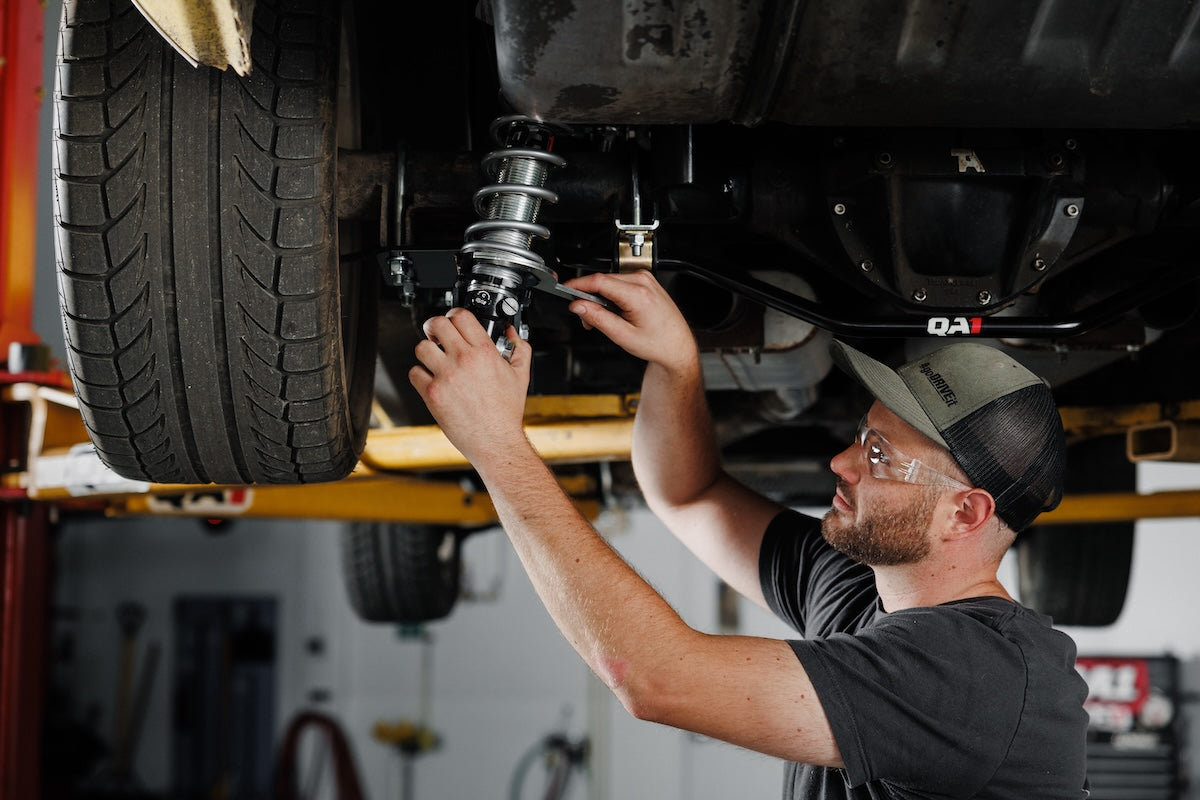
Ride-height adjustment is the main reason drivers search for **how to adjust coilovers while on car**. The exact procedure depends on whether the coilover uses independent height adjustment or a spring-perch design.
With many modern full-bodied coilovers, the lower mount threads up or down the shock body. This changes overall coilover length without greatly changing spring preload.
Other coilovers change ride height by moving the spring perch. That can also change spring preload and available suspension travel. Never assume your system works one way simply because another brand does.
- ✦ To raise the car
Adjust the coilover in the direction that increases its installed length according to the manufacturer’s instructions.
- ✦ To lower the car
Adjust the system in the direction that shortens the effective coilover length.
- ✦ Keep thread engagement safe
Do not extend a threaded mount beyond the manufacturer’s minimum thread engagement.
- ✦ Check clearance
Make sure tires, control arms, axles, brake hoses, and other parts still have enough room.
Independent Height Adjustment
An independently adjustable coilover often has a threaded lower mount. After loosening the lower locking collar, you rotate the shock body or lower mount to change total length.
This design can help preserve spring preload while changing vehicle height. Even so, available bump and droop travel must still stay within the safe range.
- ✦ Main benefit
Ride height can often be changed without using the spring perch.
- ✦ Main caution
Never reduce thread engagement below the coilover manufacturer’s limit.
Spring-Perch Height Adjustment
Some coilovers raise or lower the car by moving the spring seat. Turning the perch changes where the spring sits on the threaded body.
Because the spring perch can also affect spring compression, you need to understand preload before making a large adjustment.
- ✦ Check spring tension
The spring should remain properly seated when the suspension reaches full droop.
- ✦ Watch travel
Too much perch adjustment may reduce usable suspension travel.
How to Measure Coilover Ride Height Correctly
Good measurements matter more than counting exposed threads. Body tolerances, corner weight, spring seating, and surface level can all affect the final fender height.
The most repeatable home method is measuring from the center of the wheel hub straight up to the fender edge. This removes tire pressure and tire diameter from the measurement.
Measure all four corners before you begin. Write the numbers down instead of trying to remember them.
- ✦ Use level ground
A sloped driveway can make one side appear higher than the other.
- ✦ Use the same reference points
Measure from the wheel center to the same fender location each time.
- ✦ Set tire pressures first
Uneven tire pressure can change how the vehicle sits.
- ✦ Settle the suspension
Move the car after lowering it so the tires and bushings can relax.
- ✦ Measure twice
Confirm each number before making another adjustment.
Why Counting Threads Alone Can Be Misleading
Equal exposed threads are useful as a starting reference, but they do not prove that the car sits equally from side to side. Vehicle weight is not always distributed evenly.
A fuel tank, driver position, battery, or other heavy component can affect static height. Use thread counts to track changes, then confirm the result with real measurements.
How to Adjust Coilover Preload While on the Car
Spring preload is the amount the spring is compressed before normal suspension load is applied. It is not simply another name for ride height.
When learning **how to adjust coilovers while on car**, this difference is important. Changing preload when you only wanted to change height can alter droop travel and the way the suspension reacts.
For many street coilovers, the spring should first sit snug between its seats with no free play at full droop. Any extra preload should follow the coilover manufacturer’s recommendation.
Do not copy a random number of turns from another vehicle. Spring length, spring rate, shock stroke, and suspension geometry may be different.

- ✦ Unload the suspension
Lift and support the vehicle before adjusting spring collars.
- ✦ Find the spring perch
Identify which collar supports the spring and which collar locks it.
- ✦ Remove spring looseness
Bring the perch up until the spring sits securely if that is the maker’s specified baseline.
- ✦ Apply specified preload
Add only the amount recommended for your coilover model.
- ✦ Lock the collars
Secure the adjustment before returning the car to the ground.
Does More Preload Make Coilovers Stiffer?
With a normal linear-rate spring, preload does not change the spring’s actual rate. A spring rated at a given rate keeps that rate within its normal working range.
Preload can still change how much droop travel is available and when the suspension starts moving through its stroke. That can affect how the car feels even when the spring rate itself stays the same.
How to Adjust Coilover Damping
Damping controls how the shock absorber manages suspension movement. Depending on your coilovers, one knob may adjust rebound, compression, or a combined setting.
Damping is often the easiest setting to change while the car stays fully assembled. The adjuster may sit at the top of the strut, near the lower body, or on a remote reservoir.
Start from a known setting. A good method is to gently turn the adjuster to the manufacturer’s reference position, then count clicks toward the desired setting.
Never force an adjuster after it reaches its stop. Small internal parts can be damaged by excessive force.

- ✦ Softer setting
Often gives a more compliant ride over rough streets, depending on the shock design.
- ✦ Firmer setting
Can reduce unwanted body movement but may make sharp bumps feel harsher.
- ✦ Change a few clicks
Small changes are easier to evaluate than large jumps.
- ✦ Keep an adjustment log
Record front and rear settings so you can return to your baseline.
Start in the Middle for Street Testing
If your coilover maker does not specify a street baseline, the middle of the adjustment range can be a practical starting point. Drive the same familiar road after each change.
Adjust one variable at a time. If you change ride height, tire pressure, and damping together, it becomes hard to know which change improved or hurt the ride.
How to Raise Coilovers While They Are on the Car
Raising a lowered car may improve ground clearance, suspension travel, and daily usability. This can be useful if the exhaust scrapes, the tires rub, or the car bottoms out on rough U.S. roads.
To raise adjustable coilovers, first measure your current ride height. Lift the vehicle, unload the suspension, and loosen the correct locking collar.
Then increase the coilover’s effective length or move the spring perch in the correct direction for your design. Make equal starting changes on the left and right sides.
After lowering the car, settle the suspension and measure again. The final height may not match the amount of movement you made at the coilover because suspension geometry can change the ratio.
- ✦ Check brake hose length
Make sure hoses are not stretched when the suspension droops.
- ✦ Check axle angles
Large height changes can affect CV axle and suspension geometry.
- ✦ Check top-out behavior
Do not raise the vehicle beyond the coilover’s approved adjustment range.
- ✦ Recheck alignment
Toe and camber can change when ride height changes.
How to Lower Coilovers While They Are on the Car
Lowering is usually straightforward, but going too low can create several problems. These include tire rubbing, reduced ground clearance, poor suspension travel, bump-stop contact, and alignment changes.
If you are learning **how to adjust coilovers while on car** because you want a lower stance, focus on function as well as appearance. A car that looks lower is not automatically better to drive.
Make small changes and inspect clearance after each one. Turn the steering from lock to lock and check the tire near the fender liner, brake hose, spring, and suspension arms.
Also inspect underbody clearance. Exhaust components, subframes, oil pans, aerodynamic panels, and front splitters can become vulnerable after lowering.

- ✦ Preserve bump travel
Leave enough compression travel so the suspension can absorb normal road impacts.
- ✦ Avoid tire contact
Check clearance during steering and suspension movement.
- ✦ Keep safe ground clearance
Consider driveways, speed bumps, potholes, and road debris.
- ✦ Stay within the rated range
Do not lower beyond the minimum height approved by the coilover manufacturer.
Why Extremely Low Coilovers Can Ride Poorly
A very low setup can leave little room for the wheel to move upward over a bump. The suspension may reach the bump stop often, which can create a harsh impact.
Good suspension setup needs usable travel in both directions. The lowest possible setting is rarely the best street setting.
Should Both Coilovers Be Adjusted the Same Amount?
For a basic street setup, matching left and right adjustments is a sensible starting point. If you rotate a lower mount three turns on the left, begin with the same change on the right.
However, equal turns do not guarantee equal final height. Cars can have small differences in weight distribution, body shape, and suspension geometry.
This is why you should always remeasure after lowering the vehicle. Use the actual ride-height measurements to make the final correction.
A serious performance setup may use corner balancing rather than simply matching fender gaps. Corner balancing requires scales and is different from normal driveway height adjustment.
- ✦ Start equally
Use equal turns or equal measured changes on both sides of an axle.
- ✦ Finish by measuring
Use hub-to-fender measurements to confirm the final stance.
- ✦ Do not chase tiny differences
Small body and measurement variations are normal.
- ✦ Use corner balancing for performance
A scale-based setup is better when weight distribution matters more than visual symmetry.
Common Mistakes When Adjusting Coilovers on the Car
Knowing **how to adjust coilovers while on car** also means knowing what not to do. Many coilover problems come from setup errors rather than defective parts.
One of the most common mistakes is changing ride height by moving the wrong collar. Another is making a large adjustment and expecting the vehicle to sit perfectly on the first attempt.
Corroded threads are another common problem on cars driven through winter weather. Road salt and moisture can seize collars if the threads are never cleaned or protected.

- ✦ Adjusting under full vehicle weight
This can put excessive load on the collars and make the wrench slip.
- ✦ Using the wrong collar
You may change preload when you meant to change ride height.
- ✦ Making large changes
Big adjustments make it harder to keep both sides even.
- ✦ Forcing seized collars
Excessive force can damage the collar or threaded body.
- ✦ Leaving collars loose
Unlocked collars can move and create noise or alter your settings.
- ✦ Ignoring tire clearance
Lowering can cause rubbing during turns or suspension compression.
- ✦ Skipping alignment
Ride-height changes can alter toe, camber, and steering behavior.
- ✦ Ignoring minimum thread engagement
Too little engagement can weaken the connection between the shock body and mount.
What to Do If the Coilover Collar Will Not Turn
Stop before using extreme force. First confirm that you loosened the correct locking collar and that the suspension is unloaded.
Clean the threads with a suitable brush and apply an appropriate penetrant if the manufacturer allows it. Give the product time to work, then try the proper spanner wrench again.
If the collar is badly seized or damaged, removing the coilover may be safer than fighting it on the car.
Do You Need an Alignment After Adjusting Coilovers?
You should strongly consider an alignment after changing coilover ride height. Even a modest change can alter suspension geometry.
Toe is especially important because incorrect toe can wear tires quickly and make the car feel unstable. Camber and caster may also change depending on the suspension design.
You may not need a new alignment after a simple damping adjustment because damping does not change static suspension geometry. Ride-height changes are different.
Set the final ride height first, drive enough for the suspension to settle, confirm the measurements, and then schedule the alignment. That avoids paying for an alignment before your setup is finished.
- ✦ Alignment is recommended
Get the geometry checked after a meaningful ride-height change.
- ✦ Finish adjusting first
Do not align the car while you are still changing its height.
- ✦ Watch tire wear
Uneven wear may indicate poor toe or camber settings.
- ✦ Notice steering changes
A crooked wheel or pulling can point to alignment problems.
How to Fine-Tune Coilovers for Daily Driving
For a daily-driven street car, usable suspension travel matters more than an extreme stance. You want the car to clear normal roads while keeping enough travel to absorb bumps.
When I fine-tune a street setup, I prefer changing one thing at a time. I first set a safe ride height, then confirm clearance, then work on damping.
This method makes each change easier to judge. It also helps you return to a known setup if a new setting makes the car worse.
A comfortable street setup does not need to feel soft and loose. Good coilovers can feel controlled without making every small crack in the road harsh.
- ✦ Set practical ride height
Leave enough clearance for normal streets, parking ramps, and speed bumps.
- ✦ Keep usable travel
Avoid a setup that sits on or near the bump stops.
- ✦ Start damping near the middle
Use the coilover maker’s baseline when one is provided.
- ✦ Test familiar roads
Drive the same route so you can compare settings more fairly.
- ✦ Write down your setup
Record height and damping settings for future reference.
Signs Your Coilovers May Be Set Too Low
Frequent scraping is an obvious warning, but it is not the only one. Repeated harsh impacts over small bumps can mean the suspension lacks compression travel.
Tire rubbing, damaged inner fender liners, poor axle angles, and unusual alignment readings may also point to excessive lowering.
- ✦ Frequent bottoming
The suspension reaches the bump stop during ordinary driving.
- ✦ Tire rubbing
The tire contacts body or suspension parts during turns or bumps.
- ✦ Constant scraping
The underbody touches common driveways or road transitions.
- ✦ Poor handling
The car may feel nervous if suspension geometry or travel has moved outside a useful range.
Safety Tips Before and After Coilover Adjustment
Suspension work puts you close to a heavy vehicle and highly loaded components. Safe support is more important than saving a few minutes.
Never work beneath a vehicle that is supported only by a hydraulic jack. Use jack stands on solid lifting points and keep the work area level.
After learning **how to adjust coilovers while on car**, build a habit of inspecting every part you touched. Check collar position, wheel torque, hose routing, tire clearance, and any fasteners that were loosened.
Take the first test drive at low speed. Listen for clunks, rubbing, or other new sounds before driving normally.
- ✦ Use approved lift points
Follow the vehicle manufacturer’s lifting guidance.
- ✦ Never trust the jack alone
Always use properly rated jack stands.
- ✦ Keep hands clear
Do not place fingers near loaded springs or moving suspension parts.
- ✦ Torque wheel nuts
Use the correct torque after reinstalling wheels.
- ✦ Inspect after driving
Recheck collars and visible components after the suspension has settled.
- ✦ Stop if something feels wrong
Do not continue driving if the car develops severe rubbing, looseness, or unusual handling.


