To adjust a track bar, safely support the vehicle, measure the axle’s position, change the adjustable bar’s effective length according to the manufacturer’s instructions, and verify axle centering and fastener torque before driving.
On American-market vehicles such as Jeep Wrangler models, Jeep Cherokee models, and solid-axle pickup trucks, a track bar helps keep a live axle centered under the body. After a suspension lift or leveling kit, the axle may shift sideways because the bar moves through an arc as the suspension changes height. An adjustable track bar can correct that shift when the suspension design calls for a different bar length.
The correct adjustment depends on the vehicle, axle, lift height, track bar design, and mounting hardware. Some track bars use threaded ends, while others use a turnbuckle-style adjuster or a fixed mounting position. The steps below explain the general method for a compatible adjustable track bar, but the vehicle service manual and the part manufacturer’s instructions take priority for support points, adjustment limits, torque values, and final installation.
A track bar adjustment is not the same as a steering alignment. If the steering wheel is off-center after a lift, the track bar may need adjustment, but the drag link, steering linkage, and alignment settings may also require inspection. Do not change parts or lengths at random to correct a symptom that has not been diagnosed.
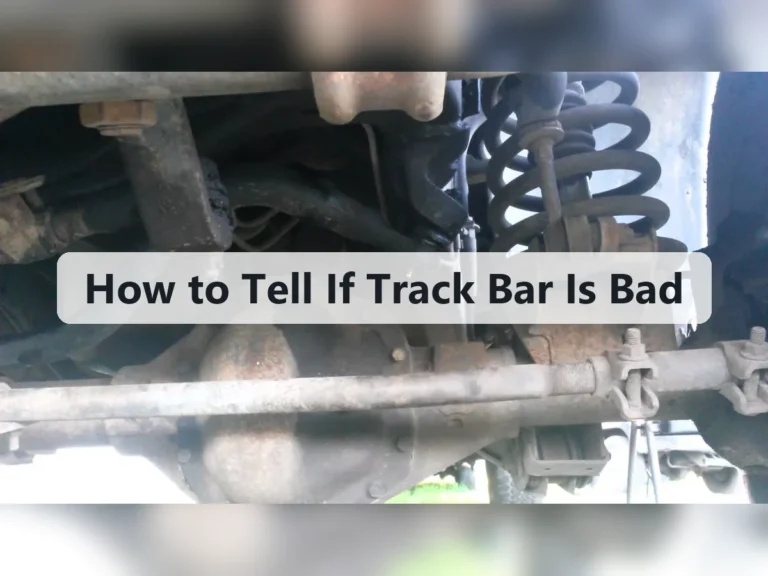
A track bar, also called a panhard bar, is a suspension link that limits side-to-side movement of a solid axle relative to the vehicle body. It commonly connects the axle housing to the frame on vehicles with a live axle. The bar works with the suspension links and springs to keep the axle located laterally as the suspension moves.
Because a track bar pivots at its mounting points, it travels along an arc rather than moving straight up and down. Raising or lowering the vehicle can change the axle’s lateral position, especially when the bar is short or the lift changes the relationship between the frame and axle mounts.
The track bar is not designed to set wheel toe, camber, or caster. Those settings belong to the relevant alignment and suspension components. A track bar adjustment can affect steering geometry on some vehicles, so inspect the complete system rather than assuming every handling issue comes from bar length.
Source: i.ytimg.com
Axle location
The bar resists lateral axle movement and helps maintain the intended position of the axle beneath the vehicle.
Suspension lift correction
A compatible adjustable bar can compensate for axle offset introduced by a change in suspension height.
Steering stability
A sound, correctly installed track bar supports predictable handling. Worn bushings, loose bolts, or damaged mounts can cause movement and clunks.
Front and Rear Track Bars Are Not Always Interchangeable
Some solid-axle vehicles use a track bar at the front, the rear, or both. Front and rear designs can differ in length, bends, mounting angles, joint type, and clearance requirements. A part that fits one axle may not fit the other, even when the vehicle model is the same.
Before making an adjustment, confirm the bar’s exact application, the axle it serves, and whether the manufacturer permits adjustment while installed. Use the instructions for that specific part instead of applying a universal number of turns or a generic length.
Confirm fitment
Check the vehicle year, model, trim, axle configuration, lift height, and track bar part number.
Inspect mounting geometry
Make sure the bar clears the differential, steering linkage, exhaust, wheels, brake hoses, and other nearby components through the usable suspension travel.
When Should You Adjust a Track Bar?
Adjust a track bar when measurements or the vehicle’s service instructions show that the axle needs to be repositioned and the installed bar is designed to allow that change. A suspension lift is a common reason to check axle centering, but lift height alone does not establish the correct final length.
On many solid-axle vehicles, the axle shifts sideways as the suspension is raised or lowered because the track bar follows an arc. The amount and direction of the shift depend on the original geometry, bar angle, mounting points, and lift design. Some suspension kits include a corrected fixed-length bar or a relocated bracket instead of an adjustable bar.
Do not adjust a track bar solely because the steering wheel is crooked. Steering wheel position can be affected by the drag link or other steering components. If the axle is already centered, changing track bar length may create a new problem instead of fixing the original one.
Source: i.ytimg.com
After installing a suspension lift
Measure axle centering after the suspension has been installed and settled according to the kit instructions.
After replacing the track bar
Confirm that the new bar has the correct application and that its effective length matches the required setup.
When the body appears offset over the axle
Measure both sides at consistent body and axle reference points before deciding whether adjustment is needed.
When movement or clunking occurs
Inspect fasteners, bushings, rod ends, brackets, and mounting holes first. A loose or worn component is not corrected by changing bar length.
Signs That Do Not Prove the Track Bar Is Misadjusted
Uneven tire wear, steering wander, a crooked steering wheel, vibration, or a clunk can have several causes. Tire pressure, wheel balance, worn ball joints, steering linkage, control-arm geometry, wheel bearings, and damaged suspension mounts may produce similar symptoms.
A visibly off-center axle is useful evidence, but it should still be checked against the vehicle’s specified measurement method. If the axle is centered and the handling problem remains, investigate other suspension and steering components rather than continuing to alter the bar.
Look for physical movement
With the vehicle secured and inspected under the correct procedure, check for loose joints, worn bushings, damaged bolts, and elongated mounting holes.
Separate alignment concerns
Use a proper alignment inspection when the vehicle pulls, the steering wheel remains off-center, or the tires show abnormal wear.
Tools and Preparation Before Adjustment
Gather the correct tools before loosening any track bar hardware. Depending on the vehicle and adjuster design, you may need a floor jack, properly rated jack stands, wheel chocks, sockets, wrenches, a calibrated torque wrench, a tape measure, paint marker, and the manufacturer’s installation instructions.
Park on a firm, level surface and secure the vehicle against movement. Follow the service manual for lifting points and whether the adjustment must be made with the suspension at normal ride height, hanging freely, or supported in a specified position. These conditions differ by vehicle and part design.
Do not rely on a jack as the sole support for a vehicle you will work under. Keep hands and tools away from pinch points, springs, steering links, and other components that can shift when a fastener is loosened. If the axle or bar is under tension and will not move freely, stop and identify the source of the load before proceeding.
Source: i.ytimg.com
Vehicle service information
Obtain the correct torque specifications, adjustment range, approved support points, and any model-specific installation sequence.
Measuring tools
Use the same reference points on the left and right sides. A tape measure and a helper can improve repeatability.
Torque wrench
Use a suitable torque wrench for final tightening wherever the manufacturer specifies a torque value.
Personal safety equipment
Wear eye protection and suitable work gloves, and keep the work area clear of people who could move the vehicle or disturb the setup.
Identify the Adjuster Type
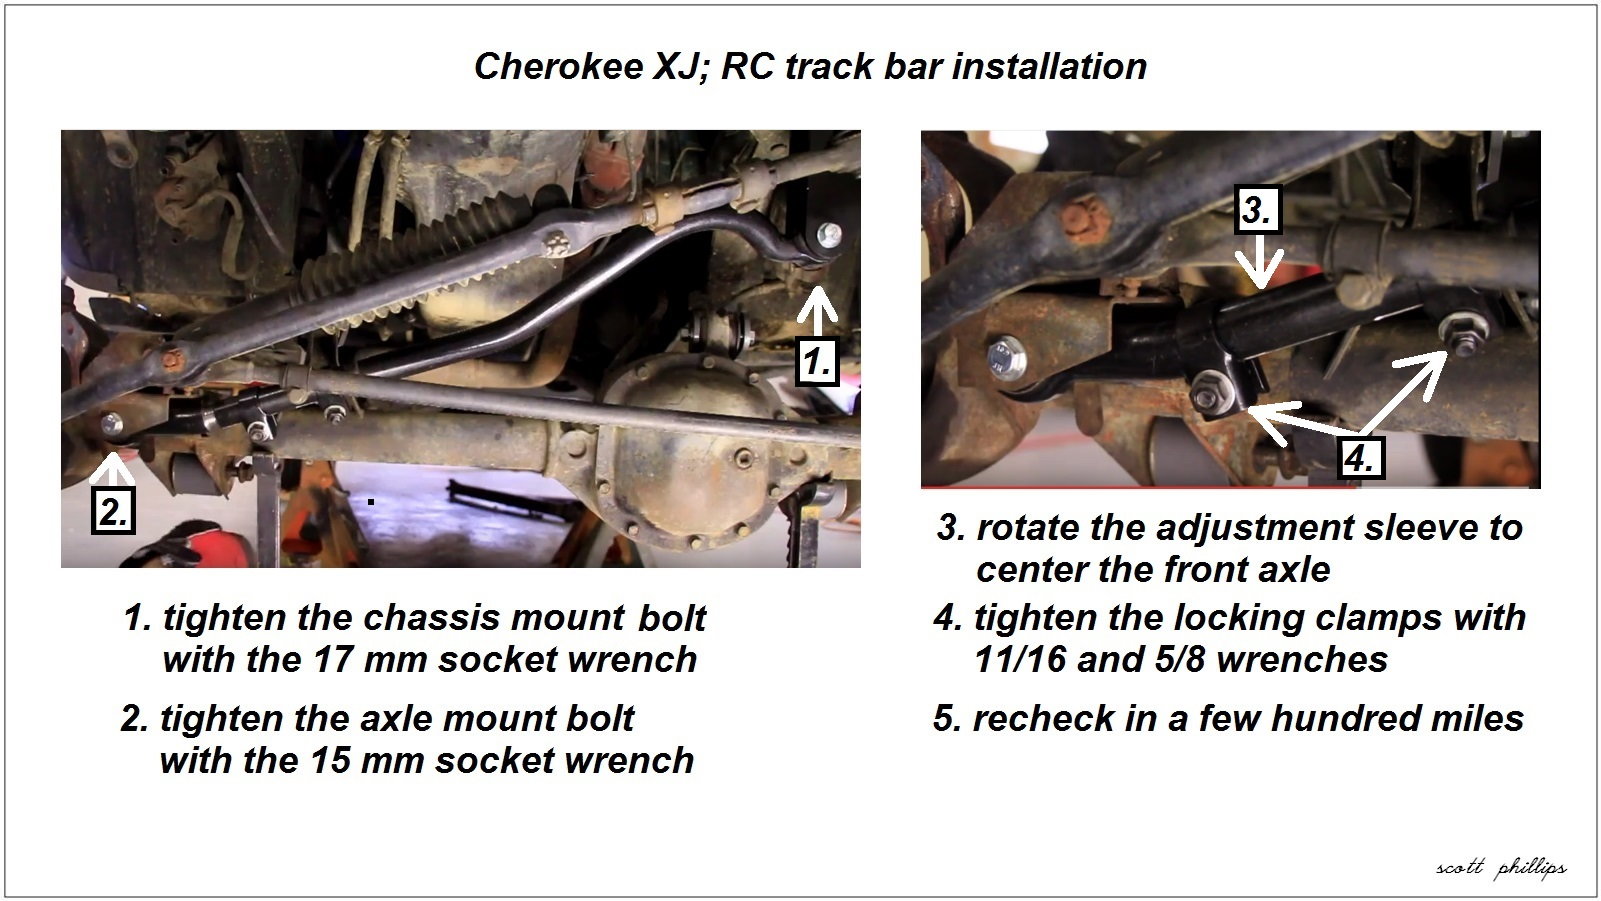
An adjustable track bar may use a threaded end, a central turnbuckle, or another approved length-setting design. Some use a jam nut to lock the setting, while others have a different locking arrangement. Read the instructions to determine which parts loosen, which parts rotate, and how much thread engagement must remain.
Never assume that clockwise rotation always lengthens the bar. Thread direction and adjuster layout vary. Mark the starting position and measure the initial length so you can track changes and return to a known setting if necessary.
Record the baseline
Measure the current bar length using the manufacturer’s stated reference points and record the axle position before changing anything.
Check adjustment limits
Confirm minimum and maximum lengths, minimum thread engagement, joint articulation limits, and the specified locking method.
How to Adjust a Track Bar Step by Step
The safest general approach is to measure first, make small controlled changes, and verify the result before tightening the assembly for service. The steps below apply to a compatible adjustable track bar on a vehicle whose service procedure permits this method. They are not a substitute for model-specific instructions.
Some vehicles require a different procedure because the bar is difficult to access, the axle is loaded sideways, the adjuster cannot be turned in place, or the suspension uses a special bracket or joint. If the required adjustment cannot be made without forcing the components, use the service procedure or have a qualified technician complete the work.
Source: cdn.speednik.com
Step 1: Confirm the correct component
Verify the part number, front or rear application, compatible lift height, and adjustment range. Inspect the bar, joints, bushings, bolts, brackets, and mounting holes for damage or excessive wear.
Step 2: Secure the vehicle
Park on level ground, set the parking brake as appropriate, chock the wheels, and support the vehicle at the service-manual-approved points. Follow the specified suspension position for adjustment.
Step 3: Measure axle centering
Use matching reference points on both sides of the vehicle to measure the lateral position of the axle beneath the body. Record the measurements and calculate the difference. Use the manufacturer’s method if it specifies particular body or axle references.
Step 4: Record the original bar setting
Measure the current effective bar length, mark the adjuster position, and note the amount of exposed thread or other relevant reference. This provides a baseline and helps prevent excessive adjustment.
Step 5: Relieve unwanted load safely
Follow the vehicle and part instructions for supporting the axle and releasing the fastener. The mounting bolt may be under load. Do not hammer, pry, or force a joint to move while the assembly is binding.
Step 6: Loosen the specified locking hardware
Loosen the jam nut or approved locking mechanism as instructed. Do not remove more hardware than the procedure requires, and do not allow a bracket or axle to shift unexpectedly.
Step 7: Change the effective length
Rotate the adjuster or threaded end in the direction specified by the manufacturer. Make a small change, remain within the allowed adjustment range, and preserve the required thread engagement and joint orientation.
Step 8: Recheck the axle position
Repeat the measurements using the same reference points and suspension condition. Continue in small increments only when the measurements show that more correction is required.
Step 9: Secure the bar
Install and tighten the mounting hardware using the exact specified torque, sequence, and suspension position. Tighten the adjuster locking hardware to its specified value and confirm that joints are properly seated.
Step 10: Inspect the completed installation
Check clearances, fastener seating, thread engagement, hose routing, steering linkage movement, and any specified ride-height or articulation checks. Lower the vehicle according to the service procedure and recheck axle centering.
How to Tell Which Way the Bar Needs to Change
The correct direction depends on the track bar’s mounting layout and which side connects to the frame. There is no universal rule that a longer bar always moves the axle toward the driver’s side or that a shorter bar always moves it toward the passenger side.
Use the manufacturer’s geometry guidance or the vehicle’s service procedure to determine the required direction. If that information is not available, a qualified suspension technician can establish the correct setting without relying on guesswork.
Use measurements, not appearance alone
Body panels and fender openings may not be perfectly symmetrical. Verify the reference points before interpreting a visual offset.
Avoid large single adjustments
Small changes make it easier to identify the effect of the adjuster and reduce the chance of exceeding the permitted range.
How to Measure Track Bar Length and Axle Offset
Measure the axle’s position relative to the body using consistent reference points. On a vehicle with a suitable solid axle and accessible, repeatable body references, you may be able to compare the distance from a matching frame or body reference to a corresponding point on each side of the axle. The vehicle manufacturer may specify a more precise method.
A visual check of tire-to-fender gaps can help identify a possible offset, but it is not always accurate. Fender shapes, body alignment, tire sizes, wheel offsets, and aftermarket flares can create differences that do not reflect the axle’s true position. Use these visual gaps as a preliminary check, not the sole measurement.
Track bar length should be measured between the reference points specified by the bar manufacturer. Measuring from the centers of the mounting holes may be appropriate for some designs, while other designs specify different reference points. Do not compare measurements taken from different locations or use a universal target length for all vehicles.
Source: images-na.ssl-images-amazon.com
Keep the measurement conditions consistent
Use the same ground surface, suspension position, reference points, and measurement technique before and after adjustment.
Account for body asymmetry
Confirm that the chosen frame or body points are intended to be symmetrical before using them to calculate axle offset.
Follow the correct length specification
Use the specified center-to-center or other manufacturer-defined dimension rather than a guessed overall measurement.
A Hypothetical Axle-Centering Example
Suppose a vehicle’s approved measurement method shows that the axle is offset 0.5 inch to one side of the intended centerline. That measurement identifies the size of the observed offset, but it does not automatically mean the track bar should be shortened or lengthened by 0.5 inch.
The relationship between bar length and axle movement depends on the bar angle and mounting geometry. Use the suspension manufacturer’s correction guidance, adjust in controlled increments, and measure again. Do not treat the example as a specification for a real vehicle.
Initial measurement
Record the measured offset and the direction in which the axle sits relative to the approved reference.
Adjustment decision
Determine the correct bar-length change from the applicable suspension instructions rather than copying the axle-offset number.
Final verification
Repeat the original measurement after adjustment and confirm that the result falls within the manufacturer’s acceptable range.
Track Bar Adjustment After a Suspension Lift
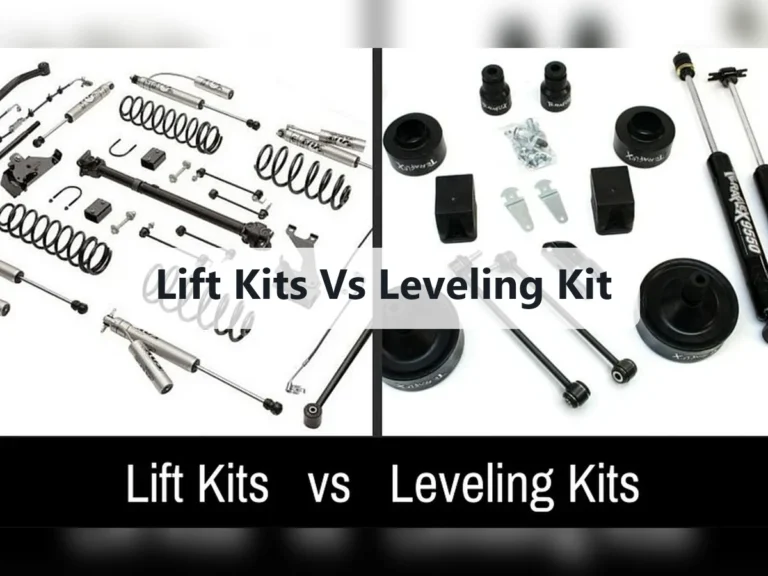
After a lift, check axle centering and track bar geometry before assuming that the original bar can simply be adjusted. The lift changes the frame-to-axle relationship, and the correct solution depends on the vehicle’s suspension design and the height and type of the lift.
An adjustable track bar is one possible solution. A fixed-length bar designed for the modified ride height, a corrected bracket, or another manufacturer-approved suspension component may be more appropriate in some applications. The right choice must preserve adequate joint movement, clearance, and mounting strength.
A lift can also change caster, steering linkage angles, driveline angles, and suspension travel. Correcting lateral axle position does not correct those separate geometry changes. Check the complete installation against the lift manufacturer’s instructions and arrange an alignment when required.
Source: i.ytimg.com
Verify the lift kit requirements
Check whether the kit calls for an adjustable bar, a fixed replacement, a relocated bracket, or a combination of parts.
Check full suspension travel
Verify clearances and joint articulation through the approved travel range. A static check at ride height cannot prove that nothing will bind at compression or droop.
Inspect the mounting brackets
Look for loose hardware, cracks, distortion, corrosion, and elongated holes. Do not use bar adjustment to compensate for a damaged bracket.
Recheck steering geometry
Follow the vehicle and lift manufacturer’s procedure for steering wheel centering and alignment after suspension changes.
Does Every Lifted Jeep Need an Adjustable Track Bar?
No. The requirement depends on the Jeep model, suspension design, lift height, mounting arrangement, and the specifications of the installed kit. Some setups use a suitable fixed-length bar or a corrected bracket, while others call for an adjustable bar to achieve the intended axle position.
Do not select a bar based on lift height alone. Confirm the exact vehicle generation, axle, part compatibility, and required adjustment range before purchasing or installing a replacement.
Use application-specific guidance
Check the lift kit instructions and the track bar manufacturer’s fitment information for the exact model and axle.
Avoid mixing incompatible components
A bracket, bar, or joint that fits physically may still have unsuitable geometry or strength for the intended suspension setup.
Common Track Bar Adjustment Problems and Fixes
If the axle remains off-center, the adjuster will not turn, or the vehicle still handles poorly after adjustment, stop repeating the same change and diagnose the specific problem. Binding, incorrect parts, damaged mounts, and unrelated steering faults can all prevent a successful result.
The most useful first checks are component compatibility, visible damage, adjustment limits, measurement consistency, and fastener condition. If these checks do not explain the problem, use the service manual or seek a technician familiar with the vehicle’s suspension.
Source: bdsliftkits.ca
The adjuster will not turn
Confirm that the correct locking hardware has been released and that the design permits adjustment in its installed position. Corrosion, damaged threads, or load on the bar may prevent movement. Do not apply excessive force.
The axle is still off-center
Repeat the measurements with consistent reference points and the specified suspension condition. Verify that the bar and brackets match the application and that the available adjustment range is sufficient.
The steering wheel remains crooked
Check steering linkage adjustment and alignment requirements. Do not keep changing the track bar if axle centering is already correct.
A clunk or knock remains
Inspect mounting bolts, bushings, rod ends, brackets, ball joints, and other nearby suspension components for movement or wear.
The vehicle wanders or feels unstable
Stop driving if control is seriously affected. Check for loose or damaged suspension and steering parts, tire problems, and incorrect alignment before returning the vehicle to service.
The adjuster reaches its limit
Do not exceed the specified thread engagement or length range. Confirm the part selection and mounting geometry; the setup may require a different approved component.
What If the Track Bar Has No Adjuster?
A fixed-length track bar cannot be adjusted through a threaded mechanism if it has no adjustment feature. Do not heat, bend, cut, weld, or drill the bar or its mounts to force a fit. Such changes can weaken a component that helps control axle movement.
If measurements show that the fixed bar is unsuitable for the modified suspension, identify a compatible replacement or manufacturer-approved bracket. Verify that the replacement provides the correct geometry, clearance, and strength for the vehicle.
Confirm the original specification
Check whether the installed bar is the correct stock part or a replacement intended for another suspension configuration.
Choose an approved correction
Use a compatible adjustable bar, a specified fixed-length bar, or an approved mounting solution based on the vehicle and lift instructions.
Torque, Safety, and Final Checks
Correct adjustment is only part of a safe installation. The mounting bolts, bushings, rod ends, brackets, and adjuster locks must be assembled according to the instructions for the exact vehicle and component. A bar set to the right length can still be unsafe if its hardware is loose or its joints are incorrectly installed.
Torque values vary by vehicle, bolt size, joint design, bracket, and fastener specification. There is no single safe torque value for every track bar. Obtain the correct values from the service manual or the part manufacturer’s installation sheet rather than estimating from bolt size alone.
Some suspension joints require final tightening at normal ride height to avoid unwanted bushing preload, while other designs have different instructions. Follow the specified procedure, including any requirements for new locking hardware, replacement nuts, thread treatment, or post-installation checks.
Source: cimg3.ibsrv.net
Confirm all specified torque values
Use the correct specifications for the axle-side bolt, frame-side bolt, adjuster lock, and any modified bracket hardware.
Inspect thread engagement
Make sure the adjuster remains within its permitted range and has the minimum engagement required by the manufacturer.
Check joint orientation
Verify that joints and bushings are seated correctly and are not forced beyond their intended articulation.
Recheck nearby systems
Confirm that brake hoses, ABS wiring, steering links, tires, and other components have adequate clearance through the approved range of motion.
Arrange an alignment when needed
Follow the vehicle manufacturer’s guidance after suspension work, particularly if steering components or alignment-related geometry have changed.
When to Stop and Get Professional Help
Get professional assistance if a mounting bolt is seized, a bracket is cracked, a mounting hole is elongated, the bar cannot be adjusted within its approved range, or the axle shifts unexpectedly when hardware is loosened. These conditions can involve structural damage or stored loads that make improvised repair unsafe.
A qualified suspension shop is also the better choice when the vehicle has modified brackets, an unfamiliar multi-link system, severe steering symptoms, or uncertain lift compatibility. If the vehicle feels unstable or has loose steering components, do not road-test it to see whether the problem goes away.
Stop work for structural damage
Do not reuse a cracked, bent, or badly worn mounting point without a proper repair assessment.
Stop if the vehicle cannot be supported safely
Use suitable rated equipment and approved support points, or have a professional complete the job.
Do not skip final verification
If you cannot verify the specified torque, adjustment range, and clearance, the vehicle is not ready for normal driving.
Track Bar Adjustment Research and Reader Question Gaps
The main reader need is a safe way to center a solid axle with a compatible adjustable track bar. The most useful supporting topics are how to measure axle offset, how suspension lifts change bar geometry, which symptoms require a broader diagnosis, and how to confirm a safe installation.
The following editorial gap map distinguishes inferred next needs from questions verified in a live search. No live competitor-page audit, Search Console dataset, customer support record, or verified People Also Ask result is claimed here. The priorities below are based on the practical consequences of the adjustment task, not measured search volume.
Source: i.ytimg.com
Question: How do I know which direction to turn the adjuster?
Reader stage: During adjustment. Basis: Inferred next need. Competitor coverage: Not checked in a live page audit. Reader benefit: Prevents a wrong-direction change. Evidence needed: Exact bar design and vehicle-specific manufacturer instructions. Priority: High. Placement: Step-by-step adjustment section.
Question: How much should the track bar length change?
Reader stage: Measurement and correction. Basis: Inferred next need. Competitor coverage: Not checked in a live page audit. Reader benefit: Avoids treating axle offset as a one-to-one bar-length change. Evidence needed: Manufacturer geometry guidance and measured vehicle dimensions. Priority: High. Placement: Measurement section.
Question: What if the steering wheel is still off-center?
Reader stage: After adjustment. Basis: Inferred next need. Competitor coverage: Not checked in a live page audit. Reader benefit: Separates axle centering from steering linkage adjustment. Evidence needed: Vehicle service procedure and alignment inspection. Priority: High. Placement: Troubleshooting section.
Question: Can I adjust a fixed-length track bar?
Reader stage: Choosing a repair. Basis: Inferred next need. Competitor coverage: Not checked in a live page audit. Reader benefit: Prevents unsafe modification of a structural suspension part. Evidence needed: Part design and manufacturer-approved replacement options. Priority: High. Placement: Common problems section.
Question: Which torque value should I use?
Reader stage: Final installation. Basis: Inferred next need. Competitor coverage: Not checked in a live page audit. Reader benefit: Prevents reliance on generic torque values. Evidence needed: Exact vehicle service manual and component instructions. Priority: High. Placement: Safety and final checks section.
Frequently Asked Questions
Q
How do I know if my track bar needs adjustment?
Measure axle centering using the vehicle manufacturer’s method, especially after a suspension lift or track bar replacement. An axle that sits off-center may need a different bar length or mounting arrangement, but first rule out worn joints, loose hardware, damaged brackets, and incorrect parts.
A crooked steering wheel by itself does not prove that the track bar is misadjusted. Check the steering linkage and alignment if the axle is already centered.
Q
Can I adjust a track bar without removing it?
Some adjustable track bars are designed to be adjusted while installed, provided the required locking hardware can be accessed and the bar is not binding. Other designs or vehicle procedures require removal or a different support position.
Follow the exact installation instructions. Never force the adjuster against a loaded or seized joint, and keep the vehicle securely supported whenever working underneath it.
Q
How much should I lengthen or shorten a track bar?
There is no universal adjustment amount. The required change depends on the axle offset, track bar angle, mounting geometry, suspension height, and the component’s adjustment range.
Use the manufacturer’s specified dimensions and make controlled changes while repeating the same axle-centering measurement. Do not assume that a measured half-inch axle offset requires a half-inch bar-length change.
Q
Will adjusting the track bar center my steering wheel?
It may affect steering wheel position on some solid-axle vehicles, but track bar adjustment and steering linkage adjustment perform different jobs. The track bar locates the axle laterally, while the drag link and related steering parts influence steering wheel centering.
First verify axle centering. If the steering wheel remains off-center, follow the vehicle-specific steering adjustment and alignment procedure instead of repeatedly changing bar length.
Q
Do I need an alignment after adjusting a track bar?
The need depends on the vehicle and the work performed. Follow the service manual and suspension kit instructions, particularly after a lift, bracket change, steering linkage work, or any modification that can affect alignment geometry.
If the vehicle pulls, wanders, has an off-center steering wheel, or shows abnormal tire wear, have the steering and alignment checked. Correct axle centering alone does not establish that every alignment angle is within specification.
Q
Can I adjust a track bar if it is bent or has worn bushings?
No adjustment should be used to compensate for a bent bar, worn joint, damaged bushing, cracked bracket, or elongated mounting hole. These faults can allow unwanted axle movement and may make the vehicle unsafe to drive.
Replace or properly repair the defective component using an approved procedure before setting the final bar length. If there is severe looseness or unstable steering, do not drive the vehicle until it has been inspected.
✦ Wrapping Up
Conclusion
Adjusting a track bar starts with confirming that the component is suitable for the vehicle and that the axle actually needs repositioning. Measure the axle against consistent reference points, record the original setting, make small changes within the manufacturer’s limits, and repeat the measurements before securing the hardware.
A correct result also depends on sound mounting points, proper thread engagement, specified torque values, adequate suspension clearance, and any required alignment work. If the bar binds, reaches its adjustment limit, or cannot center the axle without forcing the parts, investigate fitment and suspension geometry rather than modifying the component.
💡 Key Takeaway
Before loosening any track bar bolt, identify the exact vehicle and bar, obtain the manufacturer’s adjustment and torque instructions, and record the axle’s current position. Do not return the vehicle to normal driving until the installation and all required safety checks are complete.
Eric
Hi, I’m Eric Bennett, the person behind OffRoadTruckAccessories.com.
I created this blog to share my interest in trucks, off-road driving, automotive accessories, and DIY modifications. I enjoy learning how different truck accessories work, testing their usefulness, and understanding whether they are truly worth buying.