How to Remove Track Bar Bushings: Complete Garage Repair Guide
Worn track bar bushings can make a solid-axle vehicle feel loose, especially when braking, changing lanes, or crossing uneven pavement. You may notice a clunk from the front or rear axle, steering that needs constant correction, or visible movement where the track bar connects to its bracket. The bushing is meant to isolate that joint while keeping the axle located, so deterioration can affect both ride quality and handling.
Learning how to remove track bar bushings is realistic for a careful home mechanic, but the job is not simply a matter of unbolting a part and knocking rubber out with a hammer. Some bushings are bonded to an outer sleeve, while others are pressed directly into the track bar or its bracket. The correct removal method depends on that design.
This guide explains how to identify the bushing style, support the vehicle safely, remove the track bar without loading the fasteners, extract a stubborn bushing, and inspect the joint before installation. It also shows how to check the finished repair without assuming that a quiet test drive alone proves the suspension is correct.
At a glance
- Support the vehicle by the frame and let the axle hang only as far as the brake and steering hardware allow.
- Confirm whether the bushing uses a removable sleeve before cutting or pressing anything.
- Use the manufacturer’s torque specifications at the specified ride height, then check for axle movement and new noises.
How to Remove Track Bar Bushings Safely and Correctly
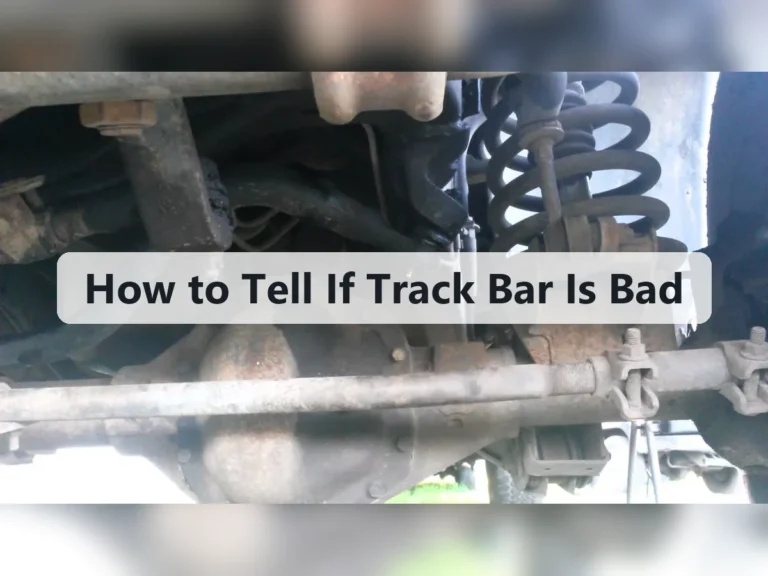
A track bar, also called a panhard rod, is a lateral suspension link that controls side-to-side axle movement. It usually runs from the vehicle frame on one side to the solid axle housing on the other. The bushing may be at one end or both ends, and the removal process changes with the design.
Before beginning, read the service information for the exact year, model, axle, and track bar. Factory and aftermarket parts can use different sleeves, washers, bolt sizes, and torque procedures. If the track bar is adjustable, record its installed length and count exposed threads so the replacement returns close to its original setting.
Tools you will need
- Heavy-duty jack stands and a floor jack for supporting the frame and controlling the axle
- Socket set, breaker bar, combination wrenches, and a torque wrench
- Penetrating oil and a wire brush for corroded fasteners
- Ball-joint or bushing press with correctly sized cups and adapters
- Optional: reciprocating saw or hacksaw for cutting a seized inner sleeve, if the service procedure permits it
- Replacement bushing or complete track bar, plus any required sleeves, washers, and hardware

Step 1 Identify the Track Bar Bushing Design
Inspect both ends of the track bar before removing anything. Look for a rubber or polyurethane element captured between an inner sleeve and an outer shell. A removable bushing generally has a visible outer shell that can be pressed out; some replacement kits instead require reusing the original outer shell after the old rubber is removed.
Compare the replacement part with the installed joint. Check the sleeve diameter, overall width, bolt-hole diameter, and the shape of the rubber. If the replacement does not match, stop and resolve the mismatch before disassembly.
Pressing the wrong part into a track bar can damage the eye or leave the axle poorly located.
Step 2 Secure the Vehicle and Relieve Track Bar Load
Park on a firm, level surface, select Park or first gear, set the parking brake, and chock the wheels that remain on the ground. Loosen the relevant wheel lug nuts only if wheel removal is needed. Lift the vehicle according to its service instructions and place jack stands under strong frame points, not under thin sheet metal or the track bar itself.
Support the axle with a floor jack so it cannot drop suddenly when the track bar bolt is removed. The jack should control the axle, not carry the vehicle’s weight in place of the frame stands. Keep the axle at a position that does not pull on brake hoses, wiring, or steering components.
Important
Do not work under a vehicle supported only by a floor jack. If the axle shifts violently when you loosen the track bar, or if you cannot identify safe support points, stop and use a qualified repair facility.
Step 3 Mark the Track Bar Position and Treat the Fasteners
Use a paint marker to mark the track bar’s orientation and, if adjustable, mark the jam-nut position and exposed thread length. Photograph the washers and spacers before removal. Brush dirt from the exposed threads and apply penetrating oil to the nuts and bolt shanks, avoiding overspray on brake friction surfaces.
Allow the oil to work while you inspect the fasteners for damaged threads, oval bolt holes, or cracks in the brackets. A bolt that turns but does not release may be spinning inside a captive nut or may be under side load from the axle. Do not force it indefinitely with an impact tool.
Step 4 Remove the Track Bar from Its Mounts
Use the floor jack to raise or lower the axle by a small amount while checking the bolt. You are looking for the position where the bolt slides out without binding. If the hole is misaligned, do not pry hard against the bracket; adjust the axle gradually until the load is relieved.
Remove the nut and bolt from one end, then support the track bar as you remove the other end. Some vehicles use a tapered stud or a special washer arrangement rather than a straight bolt. Follow the vehicle-specific removal method if a tapered connection is present, and do not strike a threaded stud directly with a hammer.
Once free, place the track bar on a clean workbench. Keep all sleeves and washers with the part until their order is recorded. Inspect the mounting brackets on the vehicle before moving to the bushing itself.
Step 5 Inspect the Track Bar and Brackets Before Pressing
Clean the bushing eye and examine it for cracks, distortion, heavy corrosion, or an elongated bolt hole. A worn bushing can allow the bolt to hammer the bracket, but replacing the rubber will not repair a bracket that has been stretched or cracked.
Check the track bar for bends and inspect the welds around each mounting bracket. The original bushing may be centered, offset, or installed with a particular side facing outward. Mark that orientation now.
If the bar is bent or the eye is damaged, replacing the complete track bar is usually safer than trying to rebuild it.
Step 6 Press or Cut Out the Old Track Bar Bushing
Position the track bar in a press with a receiving cup large enough for the bushing to pass into. The cup must support the solid outer eye of the track bar, not the rubber or a thin lip. Choose a press adapter that contacts the outer sleeve evenly and lines up with the bore.
Apply pressure slowly and watch the track bar, press, and cups from the side. The old bushing should move in a controlled direction. If the press begins to tilt, the adapter slips, or the track bar eye starts to deform, release pressure and correct the setup.
If the bushing is rusted in place, penetrating oil may help, but it will not replace a properly aligned press. On designs that permit it, a reciprocating saw or hacksaw can cut through the inner sleeve or outer shell to release tension. Make shallow cuts and protect the track bar eye; cutting into the eye can ruin the part.
Some rubber bushings can be burned out, but that method creates smoke and potentially harmful fumes and can damage nearby finishes or heat-treated parts. Avoid it unless the manufacturer specifically allows it and you have suitable ventilation and fire controls. A press or complete track bar replacement is the better choice for most beginners.
Check your result
After removal, the bore should be round and free of loose metal, torn rubber, and sharp burrs. A replacement bushing should be able to start straight rather than entering at an angle.
Step 7 Clean the Bore and Prepare the Replacement Bushing
Remove rust and rubber residue with a wire brush, plastic scraper, or fine abrasive suitable for the part. Do not enlarge the bore or grind away the track bar eye. Wipe the surface clean and compare the bore with the replacement sleeve once more.
Follow the bushing manufacturer’s instructions for lubricant. Rubber bushings may require a specific grease or may need to be installed dry, while polyurethane bushings often use supplied grease on their contact surfaces. Do not substitute petroleum grease when the instructions call for a compatible synthetic or silicone product.
A useful way to approach how to remove track bar bushings is to check your progress after each stage.
Step 8 Press the New Track Bar Bushing Into Place
Set the new bushing squarely against the bore and use a press adapter that contacts the sleeve or reinforced installation surface identified by the manufacturer. Press in the same direction as the old part came out unless the instructions specify another direction.
Keep the bushing centered as it enters. Pause to verify that the rubber is not folding, the sleeve remains concentric, and the bushing reaches the correct depth. Some designs have a shoulder that must sit flush against the track bar; others require a specific amount of offset.
Do not assume that flush means correct.
Repeat the process at the other end only if that end is designed for service. If one end is a sealed joint or a spherical rod end, do not press it apart as though it were a rubber bushing. Replace that assembly according to its service instructions.
Step 9 Reinstall the Track Bar Without Forcing the Axle
Return the track bar to its marked orientation and loosely install the washers, sleeves, bolts, and nuts. If the holes do not line up, use the floor jack to move the axle slightly. Do not use the bolt as a pin to drag the axle into position, because that can damage the threads or bend the bracket.
Leave the fasteners loose enough for the bushing to settle until the correct final-torque condition is reached. Many rubber bushings are designed to be tightened at normal ride height, but the exact procedure varies. Follow the service information for your vehicle and replacement part.
Step 10 Torque the Track Bar Hardware and Lower the Vehicle
Set the axle and vehicle at the ride-height position specified by the manufacturer, then torque the track bar fasteners with a calibrated torque wrench. If the instructions call for the wheels on the ground, use ramps or another approved method that keeps the vehicle stable; never place yourself beneath an unsupported vehicle to reach a fastener.
Reinstall any removed wheel and tighten the lug nuts in the specified pattern and sequence. Remove the stands only after the vehicle is fully supported by the jack and the ground, then lower it carefully. Recheck that the track bar is not contacting the differential housing, sway bar, brake lines, or other suspension parts.
How Track Bar Bushings Affect Axle Location
The track bar does not carry the vehicle in the same way a spring or control arm does. Its main job is to limit lateral axle movement while the suspension travels up and down. A compliant bushing allows small movement and reduces noise, but a torn or excessively soft bushing can let the axle shift more than intended.
On a coil-spring solid axle, a worn track bar bushing may contribute to wandering or a steering shake, but it is not the only possible cause. Loose wheel bearings, worn tie-rod ends, a damaged drag-link joint, incorrect alignment, bent brackets, and tire problems can produce similar symptoms.
The phrase how to remove track bar bushings can describe two different repairs: removing a bushing from the track bar on a workbench, or removing a complete track bar from the vehicle and replacing its ends. Confirm which repair the parts catalog and service manual describe before ordering tools.

Rubber and Polyurethane Track Bar Bushings
Rubber bushings usually provide quieter operation and controlled flex, but they can crack, split, or separate from their sleeve with age. Polyurethane replacements may resist some types of deterioration, but they can transmit more noise and require the correct lubricant and maintenance procedure.
Do not mix an inner sleeve from one bushing design with rubber from another unless the kit specifically supports that combination. The sleeve controls bolt fit and clamping width, so a small mismatch can leave the joint loose or bind the suspension.
How to Check the Finished Track Bar Repair
Verification starts before the road test. With the vehicle safely on the ground, look at both track bar ends and confirm that the fasteners are fully seated, the washers are in the recorded order, and no part of the bushing is pinched or visibly displaced.
Have an assistant move the steering wheel slightly left and right with the engine off while you observe the track bar ends from a safe position. There should not be a visible delay or sharp clunk between steering movement and track bar movement. Keep hands, clothing, and tools away from pinch points.

- Check that the axle sits at the expected lateral position relative to the frame.
- Look for fresh contact marks on the track bar, differential, sway bar, and brake hardware.
- Confirm that brake hoses and wheel-speed sensor wiring have normal slack through suspension movement.
- Listen for a clunk while rolling slowly over a small, familiar uneven surface.
- Recheck the hardware after the initial short drive according to the service instructions.
A changed steering-wheel position or persistent pull can indicate that the axle is not centered or that another steering or suspension problem remains. An alignment check may be appropriate, especially if the track bar length or mounting position changed.
Track Bar Bushing Removal Problems and Safe Solutions
Most difficulty comes from corrosion, axle load, or an incorrect press setup rather than from the rubber itself. The table below helps separate problems that can be corrected at home from signs that the assembly needs professional attention.
| What you observe | Likely cause and response |
|---|---|
| The bolt will not slide out | The axle is loading the joint. Support and adjust the axle a small amount rather than forcing the bolt. |
| The bushing starts crooked in the press | The adapter or receiving cup is misaligned. Release pressure and reset the setup before continuing. |
| The bracket hole is oval or cracked | The bracket may need repair or replacement; a new bushing alone will not restore the joint. |
| The replacement bushing is a different width | Stop and verify the part number, sleeve, and axle application before installation. |
| A clunk remains after repair | Inspect the track bar hardware, steering linkage, wheel bearings, shocks, and other suspension joints. |
When a Complete Track Bar Is the Better Repair
Replace the complete track bar when the tube is bent, the eye is distorted, the mounting hardware is permanently seized, or the bar uses a non-serviceable joint. A complete assembly can also be the more sensible choice when pressing equipment is unavailable and the manufacturer does not provide a reliable hand-tool procedure.
Do not weld, heat, or reshape a suspension link without a repair procedure specifically intended for that part. The track bar controls axle location, so an improvised repair can affect handling even if it appears solid while the vehicle is parked.
Track Bar Bushing Removal FAQs
Can I remove track bar bushings without a press?
Sometimes, but it depends on the design. A threaded bushing tool may work when it has the correct cups and enough capacity. Cutting or drilling may release certain bonded bushings, but it risks damaging the track bar.
If the bushing will not move with a properly aligned tool, replacing the complete track bar or using a professional press is safer.
Should I replace one track bar bushing or both?
Replace both serviceable bushings when they are the same age and show similar wear, unless the parts manufacturer specifies a different procedure. If only one end uses a removable bushing, replace that part and inspect the other end for looseness, tearing, or a damaged seal.
Can a bad track bar bushing cause death wobble?
A worn bushing can contribute to severe front-end shake on some solid-axle vehicles, but it is rarely safe to blame one part without inspecting the entire steering and suspension system. Check the track bar mounts, steering joints, wheel bearings, tires, alignment, and fastener torque. Do not continue driving if the vehicle shakes violently or the steering becomes difficult to control.
Do track bar bolts need to be tightened at ride height?
Many rubber-bushing installations do, because tightening at full suspension droop can preload the rubber when the vehicle returns to the ground. The exact requirement varies by vehicle and bushing design, so use the specified torque position rather than relying on a general rule.
Will replacing the bushings recenter the axle?
It may restore the axle’s intended position if worn bushings were allowing movement, but it will not change the fixed geometry of a standard track bar. Adjustable track bars and altered ride heights may require a separate length and alignment check.
Confirm the Track Bar Repair Before Driving Normally
Knowing how to remove track bar bushings is only part of a sound repair. The bushing must match the track bar, the bore and brackets must remain undamaged, and the replacement must be pressed in straight with the correct orientation. Proper support and axle control matter just as much as the removal tool.
After installation, torque the hardware using the vehicle and bushing manufacturer’s instructions, inspect for interference, and perform a cautious low-speed check. If the axle shifts visibly, the bracket is damaged, the fasteners cannot be torqued, or the original handling problem remains, stop driving and have the suspension inspected before returning the vehicle to normal use.